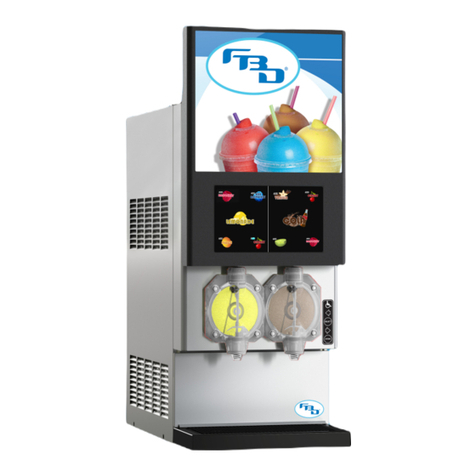
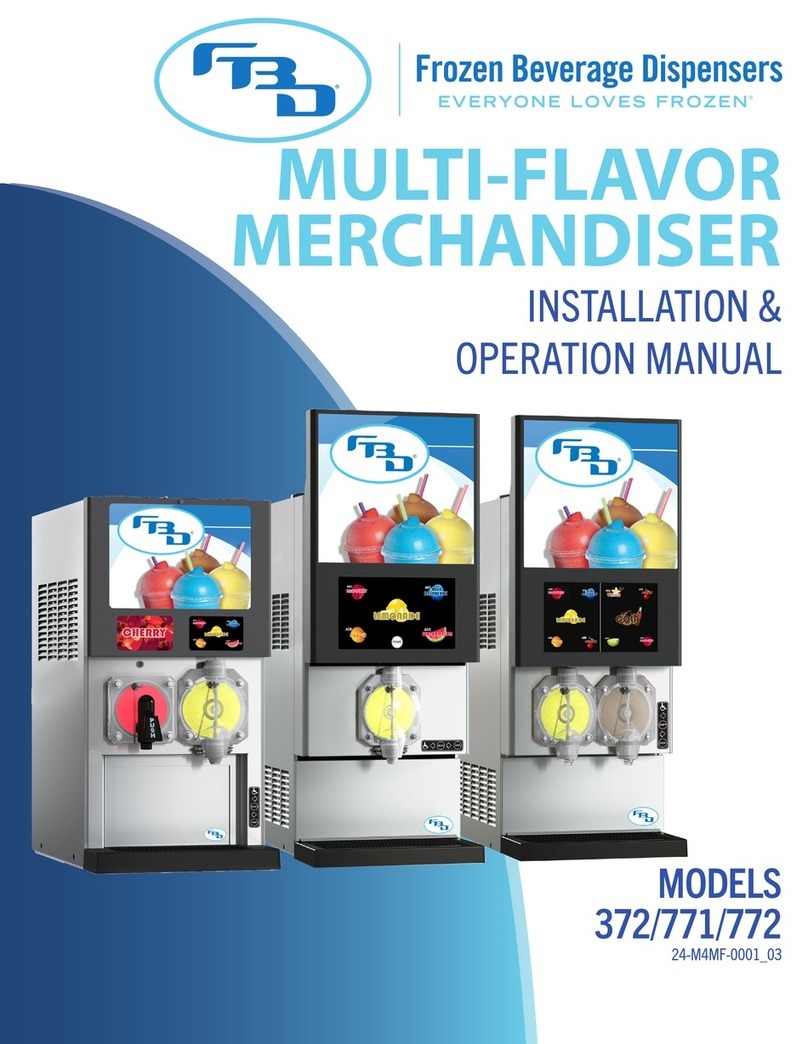
FBD 56X Series User manual

DIGITAL
MERCHANDISER
INSTALLATION &
OPERATION MANUAL
56X/77X MODELS
24-M4VD-0001_01

This manual is for general informational purposes only and is not intended to cover every potential installation or operational
possibility. The parts and equipment addressed herein are warranted only to the extent covered by FBD’s Parts and Equipment
Warranty. FBD makes no express warranties as to any matter whatsoever and hereby disclaims all implied warranties including,
without limitation, the implied warranties of merchantability and fitness for any particular purpose. In no event shall FBD be liable
or obligated to any customer or to any third party for incidental, consequential, or special damages, regardless of the theory of
liability, arising out of, or in any manner related to FBD parts, equipment or any delay with respect to its delivery.
The information contained in this document is subject to change without notice.
© 2020 FBD Partnership, L.P. All Rights Reserved.
FBD TECHNICAL SUPPORT: 866-323-2777 or www.fbdfrozen.com

DIGITAL MERCHANDISER
56X/77X MODELS
1
TABLE OF CONTENTS
1. SAFETY.................................................................................................................................... 2
1.1 ELECTRICAL........................................................................................................................2
1.2 GENERAL PRECAUTIONS....................................................................................................2
2. SPECIFICATIONS..................................................................................................................... 3
2.1 GENERAL REQUIREMENTS.................................................................................................3
2.2 DIMENSION, WEIGHT, AND RESOLUTION SPECIFICATIONS...............................................3
3. RECEIVING............................................................................................................................... 4
4. INSTALLATION ........................................................................................................................ 4
4.1 INSTALLATION OF A 561 DIGITAL MERCHANDISER ...........................................................4
4.2 INSTALLATION OF 56X MULTIPLE-BARREL MERCHANDISERS (2-, 3-, OR 4-BARREL) .......5
4.3 INSTALLATION OF 77X MULTIPLE-BARREL MERCHANDISERS (2-, 3-, OR 4-BARREL) .......6
4.4 INSTALLATION OF A DIGITAL MERCHANDISER WITH CONVERSION KIT ............................6
5. START-UP................................................................................................................................ 7
6. MENU LAYOUT AND OPERATION FOR 561 MERCHANDISER ................................................ 7
6.1 SCREEN LAYOUT FOR 561 MERCHANDISER ......................................................................7
6.2 SINGLE-FLAVOR OPERATION..............................................................................................8
6.3 MULTI-FLAVOR OPERATION ...............................................................................................8
6.4 UNLOCKING A 561 MERCHANDISER..................................................................................9
6.5 MENU LAYOUT FOR 561 MERCHANDISER .......................................................................10
6.6 CHANGING VIDEO ON 561 MERCHANDISER ....................................................................10
6.7 CHANGING FLAVOR IMAGES ON 561 MERCHANDISER....................................................11
6.8 UPDATING CONTENT ON AN SD CARD ............................................................................11
6.9 SAVING CHANGES AND EXITING SERVICE MODE .............................................................12
7. MULTI-BARREL (TWO-, THREE-, OR FOUR-BARREL)............................................................ 12
7.1 UNLOCKING A TWO-, THREE-, OR FOUR-BARREL MERCHANDISER ................................12
7.2 MENU LAYOUT FOR TWO- OR THREE-BARREL MERCHANDISERS ...................................14
7.3 MENU LAYOUT FOR FOUR-BARREL MERCHANDISER......................................................15
7.4 BARREL STATUS MESSAGES FOR MULTIPLE-BARREL MERCHANDISERS .......................16
7.5 CHANGING OF A VIDEO OR FLAVOR IMAGE ON A MULTIPLE-BARREL MERCHANDISER...1616
7.6 DIAGNOSTIC TOOLS FOR MULTIPLE-BARREL MECHANDISERS .......................................17
7.7 UPDATING IMAGES AND VIDEOS ON MULTIPLE-BARREL MERCHANDISERS ...................18
7.8 ADDING CONTENT TO A USB DRIVE.................................................................................18
8. CLEANING ............................................................................................................................. 19
8.1 CLEANING THE SCREEN(S)...............................................................................................19
8.2 CLEANING THE MERCHANDISER BODY ...........................................................................19
9. TROUBLESHOOTING FOR SINGLE BARREL MERCHANDISER.............................................. 20
9.1 ERROR WARNINGS...........................................................................................................20
10. TROUBLESHOOTING FOR TWO-, THREE-, OR FOUR-BARREL MERCHANDISERS.............. 23
10.1 BRIGHTSIGN ERROR LIGHTS..........................................................................................23
10.2 ON-SCREEN ERRORS......................................................................................................23
DIGITAL MERCHANDISER
56X/77X MODELS
2
1. SAFETY
1.1 Electrical
This accessory must be properly installed according to the instructions in this manual. This will ensure that the accessory
is properly grounded to avoid possible fatal electric shock or serious injury to the operator. Before attempting any internal
maintenance, disconnect electrical power to the dispenser to prevent personal injury. Only qualified personnel should
service internal components or electrical wiring.
1.2 General Precautions
This equipment, depending on the accessory, can weigh up to 50 pounds (23 kilograms) and is top-heavy. To avoid
personal injury or equipment damage, do not attempt to lift the digital merchandiser without help. Working with a partner
is highly recommended. Take care when lifting and positioning the merchandiser to avoid damage and injury.

DIGITAL MERCHANDISER
56X/77X MODELS
3
2. SPECIFICATIONS
2.1 General Requirements
The digital merchandiser is compatible with only dispensers from either the 56x or 77x series. The merchandiser will not
function properly if installed onto a dispenser outside of the 56x or 77x series. The barrel count on the dispenser and the
merchandiser must match. For example, a three-barrel merchandiser should only be installed on a three-barrel dispenser.
2.2 Dimension, Weight, and Resolution Specifications
561 Merchandiser
Width 17 in. (432 mm)
Depth 2.9 in. (74 mm)
Height 26 in. (660 mm)
Weight 32.1 lb (14.6 kg)
Shipping Weight 39.1 lb (17.7 kg)
Video Viewing Area 1080 x 1280
.mp4
Flavor Background 1080 x 640
.png
Flavor Images
(1X Base Flavor,
4X Flavor Add-ins)
600 x 500
.png
Two-Barrel Merchandiser
Width 17 in. (432 mm)
Depth 2.9 in. (74 mm)
Height 26 in. (660 mm)
Weight 30.4 lb (13.8 kg)
Shipping Weight 37.4 lb (17 kg)
Video Viewing Area 1080 x 1280
.mp4
Flavor Card (x2) 516 x 600
.png
Three-Barrel Merchandiser
Width 20.3 in. (516 mm)
Depth 2.9 in. (74 mm)
Height 26 in. (660 mm)
Weight 33.2 lb (15.1 kg)
Shipping Weight 40.7 lb (18.5 kg)
Video Viewing Area 1080 x 1540
.mp4
Flavor Card (x3) 340 x 340
.png
Four-Barrel Merchandiser
Width 27.1 in. (688 mm)
Depth 2.9 in. (74 mm)
Height 26 in. (660 mm)
Weight 42.5 lb (19.3 kg)
Shipping Weight 50.7 lb (23 kg)
27” Screen for Video 1920 x 1080
.mp4
8” Screen for Flavor
Card (x4)
600 x 800
.png

DIGITAL MERCHANDISER
56X/77X MODELS
4
3. RECEIVING
Each merchandiser is tested and thoroughly inspected before shipment. At the time of shipment, the carrier accepts
the merchandiser and any claim for damages must be made with the carrier. Upon receiving the merchandiser from the
delivering carrier, carefully inspect the carton for visible indication of damage. If damage is present, have carrier note this
on bill of lading and file a claim with the carrier.
4. INSTALLATION
Installation instructions vary based on the dispenser model and the circumstances of installation. The digital merchandiser
may be installed on a new dispenser or will replace an older merchandiser as part of a door conversion kit. Please refer to
the appropriate section based on merchandiser type and required installation.
4.1 Installation of a 561 Digital Merchandiser
1. Remove the collar from each of the hinge pins on the back of the new
door using a 3/32” hex wrench. Place the collars and hex wrench
nearby so they are accessible for the next step.
2. Slide the hinge pin from the new door into the pivot hole on the upper
brackets on the dispenser (Aon Figure 4.1). Place the collar back on
each hinge pin and tighten the set screw on the shaft collars with the
hex wrench (Bon Figure 4.1).
Before installing a merchandiser, disconnect electrical power to the dispenser.
Figure 4.1
Figure 4.2 Figure 4.3 Figure 4.4
3. While holding up the door, push the gas shock socket from the door into the ball stud on the front facing bracket.
Repeat on opposite side (Figure 4.2).
4. Connect the power harness coming out of the right side of the new door to the power extension harness coming out
of the right top side of the dispenser (Figure 4.3).
5. Connect the harness coming out of the left side of the door with the harness coming out of the top left side of the
dispenser (Figure 4.4).
6. Reconnect the power to the dispenser and follow start-up instructions in Section 6 of this manual.

DIGITAL MERCHANDISER
56X/77X MODELS
5
4.2 Installation of 56x Multiple Barrel Merchandisers (2-, 3-, or 4-Barrel)
Figure 4.7
Figure 4.9
Figure 4.8
Figure 4.5
Figure 4.6
Door
56X:
Top View
564HR:
Front View
Figure 4.10
3. While holding up the door, push the gas shock socket from the door into the ball
stud on the front facing bracket. Repeat on the opposite side (Figure 4.6).
4. Remove the top panel and acrylic keypad cover from the dispenser to access the
harness connections.
5. Run the serial and LED harnesses coming out of the left side of the dispenser so
that the connections end up on the left side of the upper board. Make sure to pull
the harnesses all the way in to meet the connectors inside dispenser (Figure 4.7).
6. Connect the white LED harness from the door to the J5 harness. Connect the serial
harness from the door to the Molex connector on the serial harness (Figure 4.8).
7. Connect the power harness coming out of the right side of the new door to the
power extension harness coming out of the right top side of the dispenser (Figure
4.9).
8. Make sure the door harnesses on the top are running through the holes on the top
panel. Ensure the harnesses are not pinched or too near the hinges (Figure 4.10)
Note: For 564HR dispensers, the harnesses will connect through the front panel
instead of the top panel.
9. Reconnect the power to the dispenser and follow start-up instructions in Section
6 of this manual.
1. Remove the collar from each of the hinge pins on the back of the new
door using a 3/32” hex wrench. Place the collars and hex wrench
nearby so they are accessible for the next step.
2. Slide the hinge pin from the new door into the pivot hole on the upper
brackets on the dispenser (Aon Figure 4.5). Place the collar back
on each hinge pin and tighten the set screw on the shaft collars with
the hex wrench (Bon Figure 4.5).

DIGITAL MERCHANDISER
56X/77X MODELS
6
4.3 Installation of 77x Multiple Barrel Merchandisers (2-, 3-, or 4-Barrel)
4.4 Installation of a Digital Merchandiser with Conversion Kit
Installing a new digital merchandiser on a dispenser that was sold with a non-digital merchandiser requires various internal
changes to the dispenser. The conversion kit sold with the digital merchandiser will have all required components for the
change. Please refer to the install instructions included with the conversion kit for detailed instructions. If instructions are
missing from the conversion kit, please contact Customer Service and ask for these using the part numbers below.
Door
3. While holding up the door, push the gas shock socket from the door into the ball
stud on the front facing bracket. Repeat on the opposite side (Figure 4.12).
4. Connect the power harness coming out of the right side of the new door to the
power extension harness coming out of the right top side of the dispenser (Figure
4.13).
5. Connect the serial and LED harnesses from the door to the left side connections
on the dispenser (Figure 4.14).
6. Make sure the door harnesses on the top are running through the holes on the top
panel. Ensure the harnesses are not pinched or too near the hinges (Figure 4.15).
7. Reconnect the power to the dispenser and follow the start-up instructions in
Section 6 of this manual.
1. Remove the collar from each of the hinge pins on the back of the new
door using a 3/32” hex wrench. Place the collars and hex wrench
nearby so they are accessible for the next step.
2. Slide the hinge pin from the new door into the pivot hole on the upper
brackets on the dispenser (Aon Figure 4.11). Place the collar back
on each hinge pin and tighten the set screw on the shaft collars with
the hex wrench (Bon Figure 4.11).
Figure 4.11
Figure 4.12
Figure 4.13 Figure 4.14 Figure 4.15
561 Conversion Kit Instructions 24-4001-0004
56x Conversion Kit Instructions 24-4001-0005
77x Conversion Kit Instructions 24-4001-0007

DIGITAL MERCHANDISER
56X/77X MODELS
7
5. START-UP
Once power has been restored to the dispenser, the merchandiser should begin booting up. As part of the start-up
sequence, the backlight on the main display will activate followed by a no-signal bubble. The door may take 60 seconds
to fully power up.
Ifthere are no indications of power,verify if the doorhas arocker switch onthe rearside andtoggle it. For 561 merchandisers
without a toggle switch, disconnect the 20-pin harness, wait 30 seconds, then reconnect it. For all other merchandisers
without a rocker switch, or if the door still does not power up after toggling switch, consult the troubleshooting guide in
Section 10 of this manual.
6. MENU LAYOUT AND OPERATION FOR 561 MERCHANDISER
The digital merchandiser allows the user to change the visual content of the screen from the user menu. To keep casual
users from changing the merchandiser content, the menu is “locked.” The unlock procedure, menu layout, and content
change procedure diers based on the barrel configuration of the merchandiser.
6.1 Screen Layout for 561 Merchandiser
The 561 merchandiser allows for control of the flavor and dispensing operations (the 2-4 barrel merchandisers do not
have these controls and only act as displays). The merchandiser can operate either a single-flavor layout (Figure 6.1) or
a multi-flavor setup (Figure 6.2) and, based on the option ordered, will change the way the bottom portion of the screen
looks and functions.
Item Description Item Description
1 Flavor Buttons: Select flavors or flavor add-ins. 3 Pour Button: Press and hold to dispense a drink.
2 Base Flavor Button: Flavor of the base syrup. 4 Barrel Status: Show status of barrel.
Figure 6.1 Single-Flavor Layout Figure 6.2 Multi-Flavor Layout

DIGITAL MERCHANDISER
56X/77X MODELS
8
6.2 Single-Flavor Operation
To pour a drink in the single-flavor setup, tap a flavor and then press and hold the POUR button. When a flavor is selected,
the name of that flavor will appear across the top of the menu region, the flavor button will enlarge, and the POUR button
will appear (Figure 6.3). The dispenser will continue pouring as long as the POUR button is pressed. The single-flavor
setup, as the name suggests, only allows for one flavor to be selected at a time. If another flavor is selected, the previous
flavor will automatically be deselected.
6.3 Multi-Flavor Operation
The multi-flavor setup allows the user to select more than one flavor add-in for the drink. When one or more flavors are
selected, those flavors will gray-out and the POUR button will blink to indicate the dispenser can start pouring. Once
all wanted flavor add-ins are selected and the POUR button blinks, press and hold the POUR button (Figure 6.4). The
dispenser will continue pouring as long as the POUR button is pressed. If the POUR button is pushed without any flavors
selected, only the base flavor will dispense.
Figure 6.3
Figure 6.4

DIGITAL MERCHANDISER
56X/77X MODELS
9
6.4 Unlocking a 561 Merchandiser
To unlock the 561 merchandiser screen tap and hold a flavor button (Figure 6.5) for ten seconds. An “Enter Password”
window will appear (Figure 6.6). Enter the code “561” to enter the Service Mode.
Figure 6.5 Figure 6.6

DIGITAL MERCHANDISER
56X/77X MODELS
10
6.5 Menu Layout for 561 Merchandiser
Figure 6.7 illustrates the menu displayed after a successful unlock as well as the menu options.
6.6 Changing Video on 561 Merchandiser
Tap the “Change Video” button to open the video menu (Figure 6.8). Tap the desired video to select it, then press the blue
arrow to return to the previous screen.
3 4
2
1
5
Figure 6.7
Item Description
1Change Video: Opens video selection menu.
2Flipped/Not Flipped: Rotates screen orientation.
3Flavor Button: Displays syrup or add-in flavors.
4Flavor Background: Background behind the flavor
bubbles.
5Exit Service Mode: Closes service mode and saves
any changes.
Content can be changed.
Figure 6.8

DIGITAL MERCHANDISER
56X/77X MODELS
11
6.7 Changing Flavor Images on 561 Merchandiser
To change the image on a flavor button, tap a flavor image to open the images menu. Select the desired image.
To change the background behind the flavor button, tap any part of the screen where the background is visible to open the
background menu. Select the desired image (Figure 6.9). To exit the image or background menus, press the blue arrow.
6.8 Updating Content on an SD Card
All merchandisers come preloaded with video, flavor, and background content. However, content can be updated, added,
or removed as needed. The process below describes the procedure for doing this. However, before adding content to
an existing or new large-sized SD card, ensure all folders are named as shown in Figure 6.10. If any folder names are
different than illustrated in the figure, content will not load or be updated on the screen properly. Also, all images should
be formatted as PNG files and all video files as MP4 files unless otherwise noted.
Figure 6.9
1. Locate the 4 main folders on the SD card. These 4 folders should
be named Backgrounds, Buttons, Flavors, and Videos. Ensure each
folder name begins with an uppercase letter.
2. The Backgrounds folder holds the background images for the lower
selection flavor portion of the video door. The background images
should be formatted to the standard resolution of 1080 x 640 px.
3. The Buttons folder holds the button images for the base flavor image
that is the center/middle button on the screen and that corresponds
to the base flavor connected to the dispenser. These button images
should be formatted to the standard resolution of 600 x 500 px.
4. The Flavors folder holds the flavor shot images for the four different
flavor shots that can be dispensed. These flavor images should also
be formatted to 516 x 600 px.
5. The Videos folder holds the video files to display on the upper portion
of the video door. These videos should be formatted to 1080 x 1280
px, in portrait orientation.
Figure 6.10

DIGITAL MERCHANDISER
56X/77X MODELS
12
6.9 Saving Changes and Exiting Service Mode
As changes are completed throughout the screens in the Service Mode, using the blue arrow found in some of the screens
will allow you to return to the previous screens and save the information that was updated. Once all required changes
are completed, you can exit the Service Mode by pressing the “Exit Service Mode” button at the bottom of the screen, as
shown in Figure 6.7 found in Section 6.5 of this manual.
7. MULTI-BARREL (TWO-, THREE-, OR FOUR-BARREL)
7.1 Unlocking a Two-, Three-, or Four-Barrel Merchandiser
To unlock the merchandiser display, touch each of the four corners of the video portion of the screen in clockwise order
starting with the top left corner. These touches must be made within 1 second of each other or the “unlocking” will not
activate. Content management controls will appear upon a successful “unlock” of the screen. Figure 7.1 illustrates the
unlocking procedure on a three-barrel merchandiser (the procedure is the same for a two-barrel merchandiser). Figure
7.2 illustrates the process on a four- barrel merchandiser.
Figure 7.1

DIGITAL MERCHANDISER
56X/77X MODELS
13
Figure 7.2

DIGITAL MERCHANDISER
56X/77X MODELS
14
7.2 Menu Layout for Two- or Three-Barrel Merchandisers
Figure 7.3 illustrates the menu displayed after a successful “unlock” as well as the menu options.
4
5
6
123
7 8
10
9
Item Description
1Locks screen, removes controls, saves settings, and
starts the video.
2 Reboots the screen.
3Provides access to additional information through a
quick reference guide.
4Tests connection between the merchandiser and the
dispenser.
5 Tests for content available to the merchandiser.
6 Tests for flavor card functionality and content.
7 Changes to previous video.
8 Changes to next video.
9Left half of each flavor card changes to the previous
flavor.
10 Right half of each flavor card changes to the next
flavor
Figure 7.3

DIGITAL MERCHANDISER
56X/77X MODELS
15
7.3 Menu Layout for Four-Barrel Merchandiser
Figure 7.4 illustrates the menu displayed after a successful “unlock” as well as the menu items.
4
123
5
6
7
8
910
11 12
Item Description
1Locks the screen, exits the controls screen, saves settings, and starts the
video.
2 Reboots the screen.
3 Provides access to additional information through a quick reference guide.
4 Changes to the previous video.
5 Changes to the next video.
6 Tests the connection between the merchandiser and the dispenser.
7 Tests for video content loaded on the USB drive.
8Tests the digital annunciator overlays for flavor cards (verifies if harness and
communication is valid and stable).
9 Deletes all flavor card images from each digital flavor card screen.
10 Loads new flavor cards onto the merchandiser from the USB drive.
11 Changes to the previous flavor.
12 Changes to the next flavor.
Figure 7.4

DIGITAL MERCHANDISER
56X/77X MODELS
16
7.4 Barrel Status Messages for Multiple-Barrel Merchandisers
In addition to displaying the barrel flavor image, the flavor card screens will also show barrel status messages. These
messages are specific to the barrel that the flavor card is for. Because these have been set up as image overlays, when the
status message appears, the flavor image will be obscured so that the message can be seen. Below is a list of the common
messages shown and their meaning.
7.5 Changing of a Video or Flavor Image on a Multiple-Barrel Merchandiser
The Service Mode screen provides easy access to change video and flavor images on the multiple-barrel merchandisers.
The process simply requires selecting the backward or forward option for each to move through the existing content.
Please refer to Sections 7.2 and 7.3 for the location of the buttons to make these changes. Please keep in mind that this
is to change videos and images from existing content. If additional content not on the existing USB(s) is needed, please
refer to Sections 7.7 and 7.8 of this manual.
Barrel Status Description
The barrel is in a defrost cycle.
If on defrost during peak draw, adjust dispenser defrost schedule as needed
(see dispenser operations manual on how to adjust defrost schedules).
The barrel is freezing down the product.
Wait until the dispenser completes freeze down cycle.
Product out can refer to the barrel being out of syrup, or the dispenser being out
of CO2or water.
Check the supply for each of these and replenish the needed product(s).
The barrel is turned off.
Restart the barrel/dispenser.

DIGITAL MERCHANDISER
56X/77X MODELS
17
7.6 Diagnostic Tools for Multiple-Barrel Merchandisers
The merchandisers come with three diagnostic tools which can be used to ensure the screen will function properly. These
can be run by simply selecting the options from the main Service Mode screen. Please refer to Sections 7.2 and 7.3 for
the location of each of these. To run the tool, simply press the button for each. Once the diagnostic is completed, select
the BACK button to go back to the previous screen.
Diagnostic Tool Description
This tool will test the harness connection to verify the dispenser is communicating
with the door. Once selected, if there are no issues, the screen will show the
barrel status messages for each barrel.
This tool tests for content loaded onto the installed USB. Once selected, the
screen will show a list of folders and file count for each of those folders. If the
USB is updated, the “Retest” button can be pressed to run the diagnostic again.
This tool will cycle through the flavor images for each barrel and the overlays for
each. It can be run on two-, three-, or four-barrel merchandisers. For the four-
barrel merchandisers, this tool tests the connection between the large screen
and the four smaller flavor image screens.

DIGITAL MERCHANDISER
56X/77X MODELS
18
7.7 Updating Images and Videos on Multiple-Barrel Merchandisers
All multiple-barrel merchandisers have a USB port to allow new content to be added. The process below describes the
procedure for accessing the USB ports.
1. Tilt the merchandiser up so that the back panel is accessible.
2. Remove the two screws securing the L-shaped panel (Figure 7.5). The panel should hinge open.
3. Remove the USB and replace it with a USB containing updated content or add the desired content to the existing
USB and reinsert it (Figure 7.6).
4. Close the access panel and tighten the screws.
5. Tilt the merchandiser down so the screen is visible. Unlock the screen and reboot the door.
6. For the four-barrel merchandiser, make sure you select the “Update Cards” button to upload any new flavor images
to the door.
Figure 7.5 Figure 7.6
7.8 Adding Content to a USB Drive
The process below describes the procedure to add content to a new USB drive. Ensure all folders are named as described.
If any folder names are different than illustrated below, the content will not load into the merchandiser properly.
1. Create two new folders on the USB drive. Rename the two folders flavors and
videos using lowercase letters only (Figure 7.7).
2. Add videos to the video folder. Though the merchandiser supports videos in
.mp4, .mov, and .mpeg format, .mp4 is the best format to use.
3. Add flavor images to the flavors folder. Though the merchandiser supports
images in .png, .jpg, and .bmp format, .png is the best format to use.
Figure 7.7
This manual suits for next models
1
Table of contents
Other FBD Merchandiser manuals
Popular Merchandiser manuals by other brands

Hussmann
Hussmann ESGMS datasheet

HL Display
HL Display 3eBin Assembly instructions

EPTA
EPTA iarp DRAGHETTO Use and maintenance

Hussmann
Hussmann Impact F6 Installation and operation manual

Hussmann
Hussmann GSVM Installation & operation manual

Henny Penny
Henny Penny Express Profit Center Merchandiser EPC-200 Specification sheet