FDS TBox-41 User manual

TBox-Radio User manual
February 2023 - Version EN 2.5
www.fdstiming.com
TBOX-RADIO
1. Appearance
The TBox-Radio is a compact and well equipped timing console. It accepts wired and wireless
peripherals like photocells, start gates or other starting devices. It has been mainly designed to
generate and deliver Time Of Day data to external timing applications.
TBox-41 (SN >= 00600):
TBox-41 (SN < 00600):
Power Status LED
Power Switch
GPS LED
USB
-
C
RS232 Jack
Auxilliary connector
Radio
Config
button
4 Group / ID
LEDs
Radio antenna
2 x Jack Inputs
2 inputs LEDs
Ext GPS antenna
2 manual input
switches
Power Status
Power Switch
GPS LED
Mini USB
RS232
Jack
Auxiliary connector
Radio
Config button
4 Group / ID LEDs
Radio antenna
2 x Jack Inputs
2 inputs LEDs
Ext GPS antenna
2 manual input
switches

TBox-Radio User manual
February 2023 - Version EN 2.5
www.fdstiming.com
TBox-40:
Power Status
Power Switch
GPS
LED
Mini USB
RS232
Jack
Sync Jack
Radio
Config button
4 Group / ID
LEDs
Radio antenna
2 x Jack Inputs
2 inputs LEDs
Ext GPS antenna
2 manual
input switches

TBox-Radio User manual
February 2023 - Version EN 2.5
www.fdstiming.com
2. Power ON/OFF
The ON/OFF switch has 3 functions:
1) Switch ON / OFF the TBox
a) Press briefly the ON/OFF button (0.5s – 1.5s) until the battery status is indicated on the
Input’s LEDs 1-4.
b) Release the ON/OFF button and repress it within 1 second, and hold down until the 4
inputs LEDs are ON, and the audible beep signal is emitted (provided that the buzzer is
not deactivated).
2) Battery status
Press and hold the ON/OFF button
The Inputs LEDs (1 – 4) will illuminate to indicate the battery charge status
4 LEDs ON green: 75-100 %
3 LEDs ON green: 50-75%
2 LEDs ON green: 25-50%
1 LED ON green: 10-25%
1 LED ON red: < 10% (Will work only with external power plugged)
Power Status LED
TBox On/Off USB Battery
Yellow ON OFF connected Battery Charging
Green ON OFF connected 100% charged
Yellow blinking ON connected Battery Charging
Green blinking ON connected 100% Charged
Green blinking ON disconnected > 25%
Red blinking ON disconnected Low battery
3) Other functions combined with IN_1 IN_2 and Radio switches
- IN_1 : Start GPS or External synchro at power up
- IN_2 : Start External synchro at power up
- IN_1 : Download all TOD on RS232 or Printer
- RADIO: Lock Radio group change
TBox-Radio User manual
February 2023 - Version EN 2.5
www.fdstiming.com
3. Timing Inputs
The TBox-Radio comprises of 2 hardware inputs and 6 wireless Radio-Inputs
Manual Push Buttons (inputs 1 & 2)
Jack inputs (inputs 1 & 2)
Working contact without potential (short-circuit)
Wireless inputs for WIRC / WINP (inputs A - D)
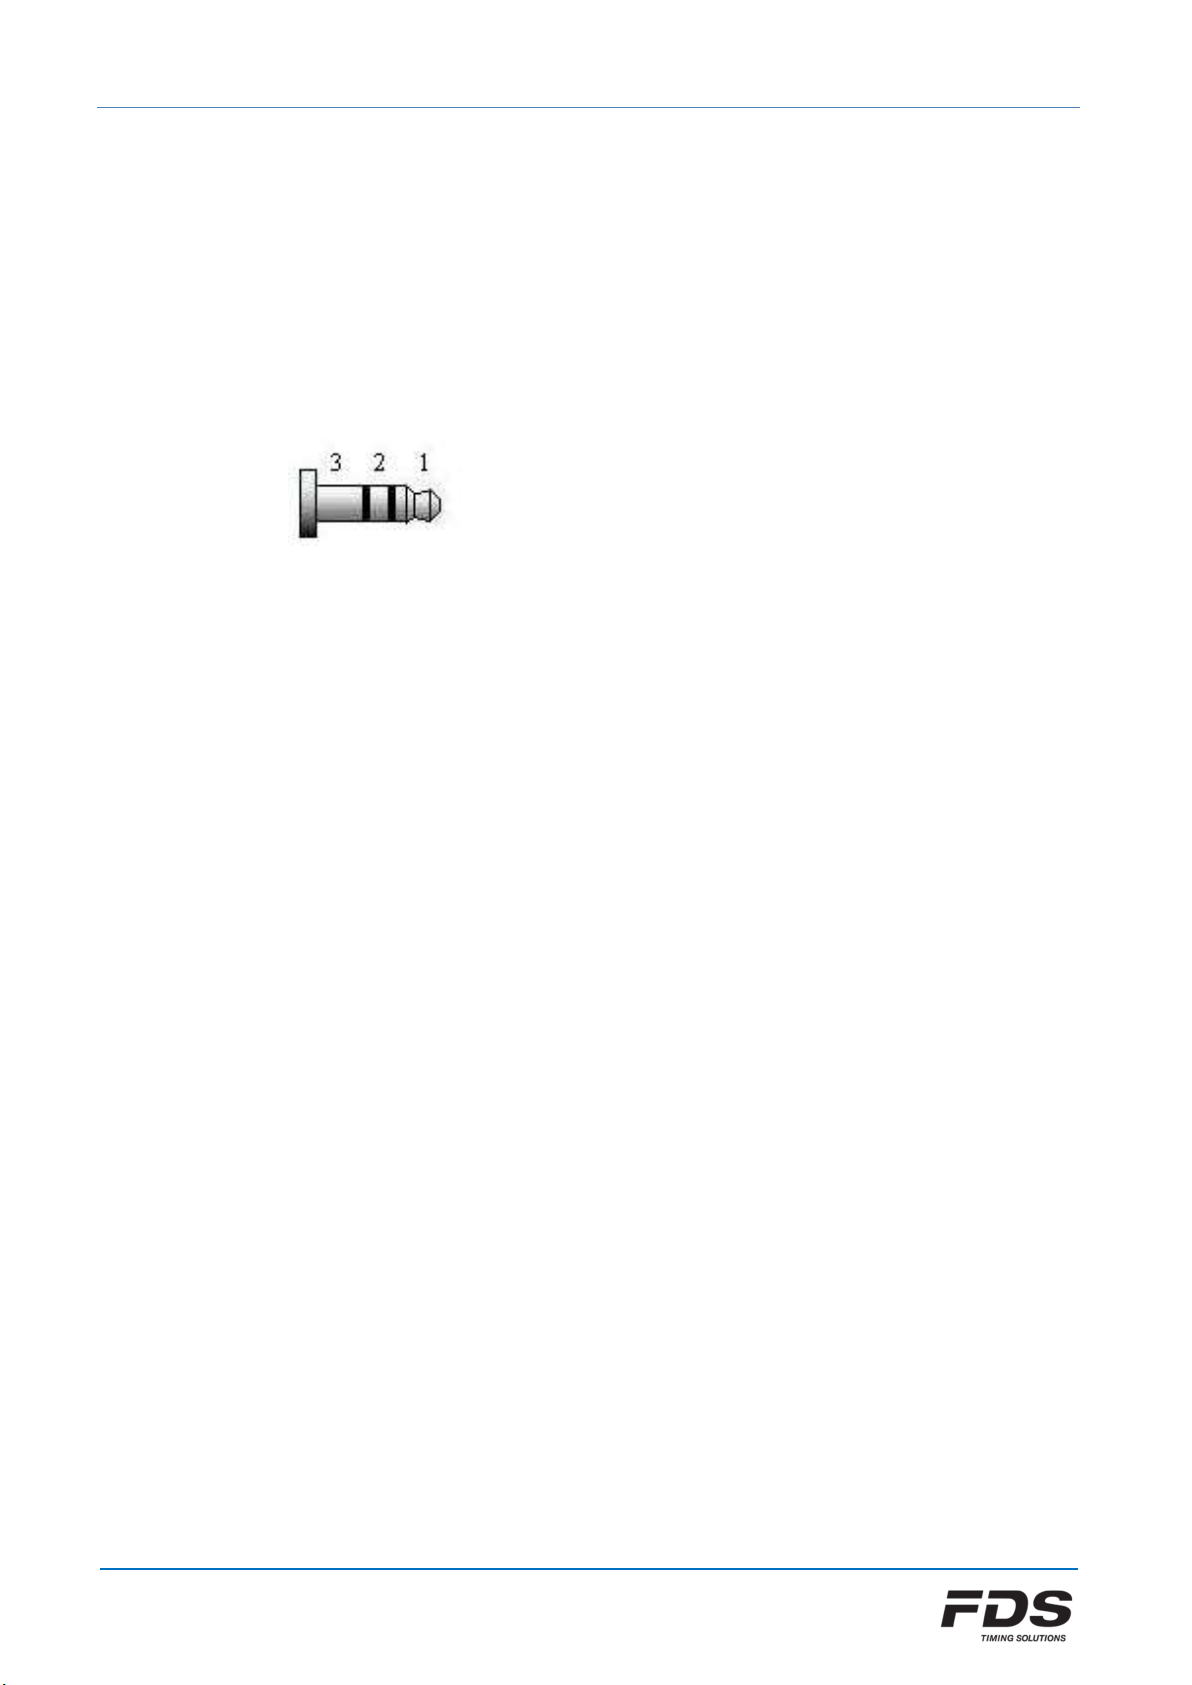
Jack inputs:
1: Input
2: Reserve
3: GND
Each press of a manual push button, short-circuits on the Inputs or radio impulse are stored in
the TBox-Radio memory, with associated date and time of impulse.
The user has the ability to configure a locking time using the “TBox-Setup” App. This facility
allows the blocking of undesired impulses corresponding to the channel configured.
E.g. – To ignore multiple impulses from dirt or snow dust.
4. Radio configuration
The TBox-Radio is configured and linked to WIRC photocells using two Parameters:
Group (radio frequency)
Input/ID (TBox Input / WIRC-WINP serial number)
NOTE: TBox-Radio and WIRC photocells must be configured with an identical Group setting

TBox-Radio User manual
February 2023 - Version EN 2.5
www.fdstiming.com
4.1. Groups (Radio Frequencies) - Europe / India / Russia
6 Groups are available.
Group A, B, C, D:
Wireless Transmission Distance: up to 2000m (clear line of sight)
Each group uses ¼ of the full frequency band
Min locking time of 200ms
Group E, F:
Wireless Transmission Distance: up to 5000m (clear line of sight)
Each group uses the full frequency band
Min locking time is longer: 500ms
OFF:
The radio transmission function is disabled. This mode is selected to save power when
you prefer to connect TBox-Radio to photocells using a hard-wired solution rather than
wireless.
4.2. Groups (Radio Frequencies) - North America / Japan
8 Groups are available
Group A, B, C, D:
Tested wireless Transmission Distance (clear line of sight)
US : up to 4000m
Japan : up to 1000m
Min locking time of 200ms
Group E, F, G, H:
Tested wireless Transmission Distance (clear line of sight)
US : up to 6000m
Japan : up to 1500m
Min locking time of 500ms
OFF:
The radio transmission function is disabled. This mode is selected to save power when
you prefer to connect TBox-Radio to photocells using a hard-wired solution rather than
wireless.
TBox-Radio User manual
February 2023 - Version EN 2.5
www.fdstiming.com
To select your desired Group, press the Setup button
The current Group selected is indicated by the LED array A, B, C & D.
Release and press the number of times you want to change the setting.
Group LED A LED B LED C LED D
A GREEN
B GREEN GREEN
C GREEN GREEN GREEN
D GREEN GREEN GREEN GREEN
E YELLOW
F YELLOW YELLOW
G (*) YELLOW YELLOW YELLOW
H (*) YELLOW YELLOW YELLOW YELLOW
OFF RED RED RED RED
(*) only available for North America and Japan
To prevent unwanted radio group changes, the radio Setup button can be locked / unlocked
by a simultaneous long press on both radio button and Power button.
LEDs A and Led D will flash red (locked) or green (unlocked).

TBox-Radio User manual
February 2023 - Version EN 2.5
www.fdstiming.com
4.3 TBox-Radio Input (WINP/WIRC Pairing)
Each WINP/WIRC has a unique ID (serial number) that can be paired with a TBox-Radio input
(A-F).
Pairing can be performed on a TBox using the “TBox-Setup” application (no need to power
ON WIRC/WINP). Pairing can also be performed manually without any application. In this
case, both TBox-Radio and WINP/WIRC have to be powered and the following procedure
executed.
1) Make sure the TBox and the WINP/WIRC are both powered On.
2) On the TBox-Radio, enter the pairing mode by pressing the Setup button for 3 sec
until a long beep sounds and LED A flash yellow.
3) Now select the desired input (A, B, C or D) by performing a short press on the same
button.
4) Finally enter the pairing mode on the WINP/WIRC by pressing the Setup button for
3 second.
When pairing is completed, LEDs A to D of the TBox flash yellow and both TBox and
WINP/WIRC resume normal operation.
To exit the pairing mode on either TBox or WINP/WIRC, just press the Setup button for 3
second until a long beep sound.
NOTE: In case an IOS or PC application is used to configure the radio inputs, do not use the
same WIRC/WINP serial number for more than one input.

TBox-Radio User manual
February 2023 - Version EN 2.5
www.fdstiming.com
5. Radio communication
Every time an impulse is received from a WINP/WIRC, the corresponding input LED flash on the
TBox-Radio and an acknowledgement is sent back to the WIRC/WINP.
WIRC/WINP radio protocol will resend any message several times if no ACK is received form the
TBox-Radio.
Radio transmissions cannot be 100% guaranteed. An unfavorable environment, lack of line of
sight, interference or an improper installation might lead to the loss of data.
FDS cannot be held responsible for any of the above.
5.1. Time delay and precision
In case of a good radio communication with no interference, the time delay from the IR
beam detection to the generation of a time event by the TBox-Radio will vary from 10ms to
150ms depending of the selected Group. In case of interferences this delay might reach a few
seconds. However, whatever the delay value, the TBox-Radio takes this delay into account
and generates a corrected time event with a precision of 1/10’000 sec.
6. Mini-USB / USB-C
The USB connector has various functions including:
External power supply and battery charging
COM port emulation for RS232 communication and data transfer
- Time of day (protocol FDS, TAG Heuer, Alge, Seiko)
- Configure the TBox-Radio options and parameters (with the app “TBox-Setup”)
4GB USB Flash Drive (2GB for model TBox-40)
- All impulse data is stored in a .csv file on the TBox internal SD drive
A new file is created every time the TBox-Radio is swiched ON
- A log file is updated in an event of a firmware crash.
- User needs to maintain sufficient memory availability to ensure storage of data
- The space required for a competition of 1000 times is approximately 40 Kbytes
- Flash Drive access is only possible when the TBox-Radio is turned OFF
TBox-Radio User manual
February 2023 - Version EN 2.5
www.fdstiming.com
7. RS232
Jack-Stereo connection 3.5mm.
In conjunction with the TBox-Setup, the protocol output can be configured by the user.
FDS / TAG Heuer / Alge / Seiko Time of day protocol
Serial printer
LEDs Display Output (FDS-MLED & TAG Heuer)
1: TBox TXD
2: TBox RXD
3: GND
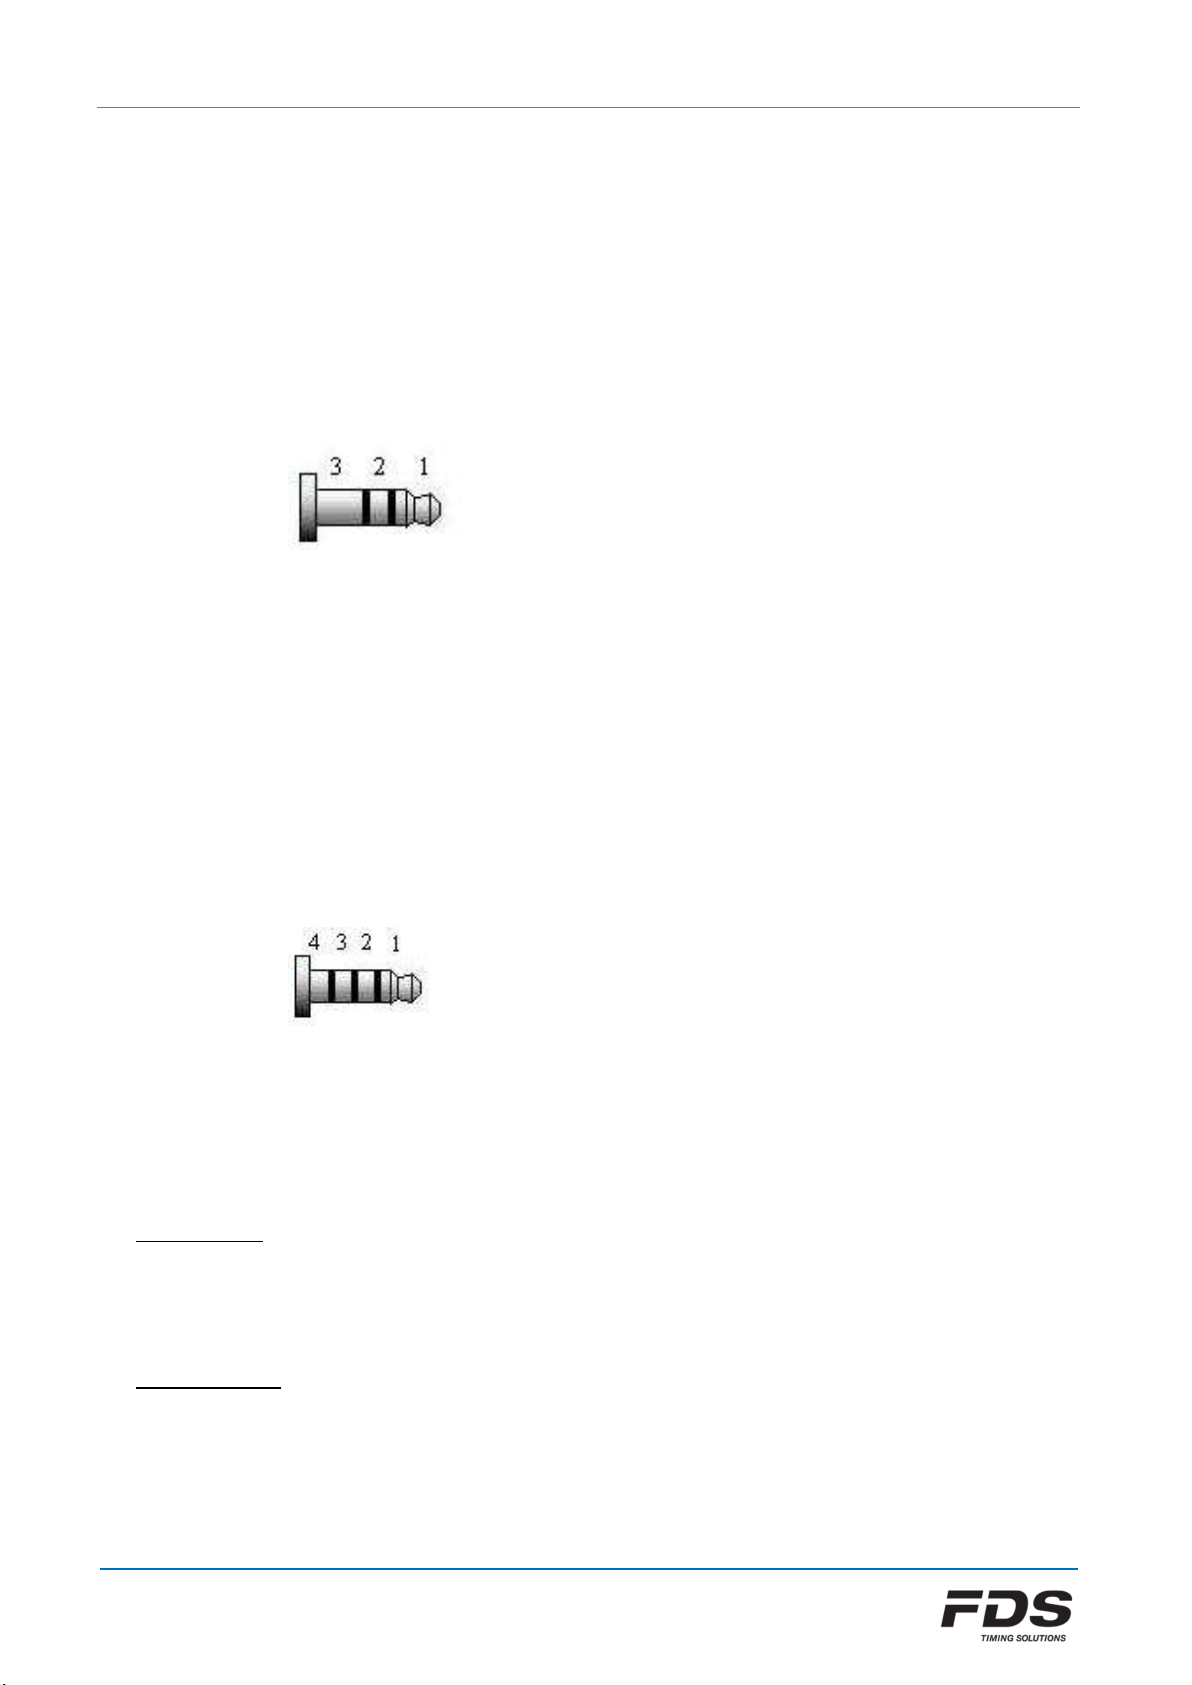
8. In/Out Synchro (TBox-40)
Jack-4pin connection 2.5mm.
Allows to synchronize the TBox with other timing systems
1: TBox +3.3V
2: TBox Sync In
3: TBox Sync Out
4: GND
TBox Sync In:
Internal resistor to Vcc: 10 kOhm
Active state: Tie to Gnd, Sink current 0.3mA
Inactive state: Leave unconnected
TBox Sync Out:
Min ext resistor to Vcc: 1 kOhm
Max Vcc: 5V
Active state: Tied to Gnd (1ms)
Inactive state: Open circuit
TBox-Radio User manual
February 2023 - Version EN 2.5
www.fdstiming.com
9. In/Out Synchro + 2nd RS232 (TBox-41)
7 pin 2.54 header
Allows to synchronize the TBox with other timing systems
Has a secondary RS232 port for auxiliary units
1: Supply +3.3V
2: Aux units detection
3: TBox Sync In
4: TBox Sync Out
5: Aux RS232 RXD
6: Aux RS232 TXD
7: GND
TBox Sync In:
Internal resistor to Vcc: 10 kOhm
Active state: Tie to Gnd, Sink current 0.3mA
Inactive state: Leave unconnected
TBox Sync Out: (Optocoupler)
Internal resistor: 33 Ohm
Max Vcc: 16V
Active state: Tied to Gnd (1ms)
Inactive state: Open circuit
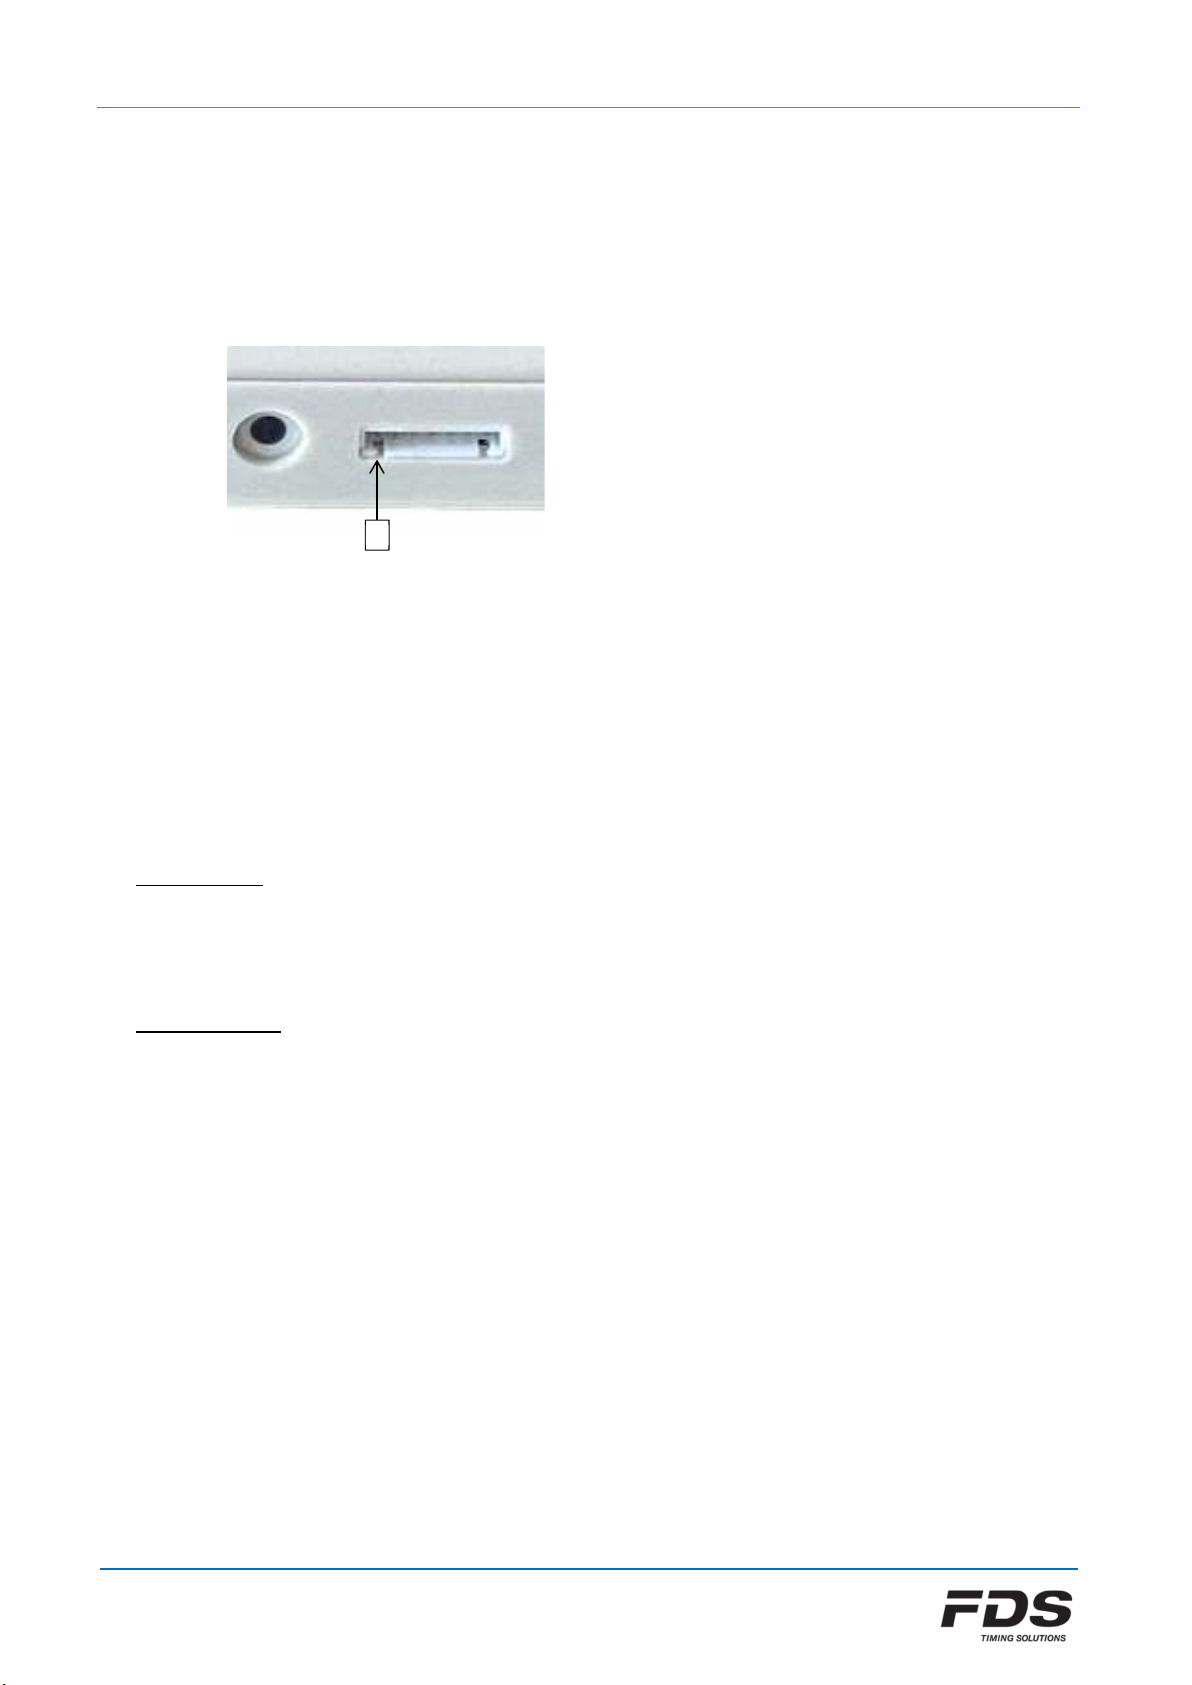
10. Printer
FDS offer a dedicated thermal printer which can be connected either to the TBox via its RS232
port or via Bluetooth using one of our iOS timing applications. In case of a TBox direct
connection, all the TBox generated time stamps will be printed, as well as the synchro time and
the GPS status if used in synchro.
The user can also reprint all times stamps of the run. Whilst pressing and holding down the
ON/OFF button, press the manual input 1 switch.
1

TBox-Radio User manual
February 2023 - Version EN 2.5
www.fdstiming.com
11. Synchronization
There are 5 different methods to synchronize the TBox-Radio.
All manual input LEDs will flash yellow until a synchro is completed.
a) Sync at Zero
This is the default synchro method for TBox-40. Once the TBox-Radio is switched ON, the
first impulse will sync the internal time at Zero
b) Internal Sync (TBox-41 only)
This is the default synchro method for TBox-41. Once the TBox-Radio is switched ON, it is
synchronized with the internal RTC. RTC value is updated during a GPS or App Sync
c) GPS Sync
To start the GPS Sync, ensure TBox-Radio is powered off, hold down the switch “Input 1”
while powering ON the TBox-Radio. Our PC or IOS setup application can also be used to
start the Synchro.
The sync will commence once the TBox-Radio receives sufficient GPS data
Once synchronized, the internal clock drift is constantly compensated by GPS signals (as
long as GPS coverage is maintained)
d) Manual
A user defined time of day is sent via Bluetooth or via a com port. The synchro is started
using one of the 2 inputs or a radio impulse.
e) External
External synchro uses the auxiliary 7 pins connector as the source of synchro. First a time
stamp has to be received on the aux RS232 port followed by the top synchro signal.
This can be used to keep a perfect synchronization between two TBox (using a dedicated
cable). The Master TBox can be first synchronized using any other mode, then external
synchro is selected on the slave TBox.
External synchro can be selected manually by pressing the switch “Input 2” while
powering the TBox.
f) Sync via app
All synchro methods presented above can be controlled manually or automatically by
our Timing Applications

TBox-Radio User manual
February 2023 - Version EN 2.5
www.fdstiming.com
12. Bluetooth
A Bluetooth connection can be established with compatible FDS timing or setup Apps.
After power up, the TBox broadcasts its presence for 2 minutes. During this period the TBox can
be detected and connected by the user App. To re-establish detection after the 2 minute period
simply press and release the power button to reactivate the Bluetooth broadcasting process.
13. Auto Timing (Training mode)
The TBox has been mainly designed to generate TOD for external timing applications. However
for training and auto timing purpose an internal timing mode has been implemented on the TBox
41 model.
- This mode has to be activated and all parameters set using one of our TBox Setting applications
- Beside the Start and Finish inputs, 2 intermediates are accepted
- For each inter and finish, a min and max detection time has to be defined
- The start pulse can be identified either using our RCID (RFID identification box) or with an auto
incrementing counter (max 250 then back to 1)
- This mode handles data output on an MLED display via RS232 or Radio as well as a on a printer
(Main RS232 jack or RS232 on the auxiliary connector)
14. Switches settings & shortcuts
During power On:
Switch <1> : Set GPS synchro
Switch <2> : set External synchro
While power is On:
Switch <1> short press : Manual pulse 1
Switch <2> short press : Manual pulse 2
Switch <Radio> short press : Radio Group change
Switch <Radio> long press : Enter/Leave pairing mode
Change pairing input with short press
Switch <1> & Switch <Power> short press : Print or download all TOD of the Run on RS232 port
Switch <Radio> & Switch <Power> long press : Lock/Unlock radio switch

TBox-Radio User manual
February 2023 - Version EN 2.5
www.fdstiming.com
15. How to update the TBox-Radio Firmware
No software is required.
a) Copy and paste the “.bin” file to the USB Flash Drive root directory of the TBox.
Note that you should have only ONE “.bin” file on the drive. If you want to save the
previous “.bin” files, create a sub-directory
b) Delete the file “UPDATLOG.txt” if it exists on the TBox drive
c) Disconnect the USB connector from your TBox
d) Wait 1-2 seconds and reconnect the USB cable between the TBox and your PC.
All LED’s will switch yellow for a few seconds and update is complete when extinguished
e) A file “UPDATLOG.txt” is created on the Drive. Open it and check that the update
completes with success. Do not delete this file
16. Technical specifications
Frequencies & Power :
Europe
India
Russia
North America
Japan (TBox-41 only)
869.4 - 869.65 MHz 100mW
865 - 867 MHz 100mW
868.7 - 869.2 MHz 100mW
920 - 924 MHz 100mW
922 - 927 MHz 20mW
Inputs precision 1/10’000 sec
Operating temperature -20°C to 60°C
Battery charge possible only between 0°C and 45°C
Timer Precision
Temperature drift
1ppm @ 20°C, Recalibration possible at 0.2ppm
2.5ppm from -20°C to 60°C
External power input USB compatible (5V +/- 10%) up to 1.5A
Battery:
TBox-40
TBox-41
LiPo 2200mAh
LiPo 2500mAh (SN < 00600)
LiPo 2900mAh (SN >= 00600)
Autonomy:
GPS and Radio inactive
Radio On and GPS Off
Radio and GPS On
140 hours
70 hours
45 hours
Bluetooth module:
TBox-40
TBox-41
BLE 4.1
BLE 5
Dimensions 124x86x31mm
Weight 180gr
Homologation (TBox-41) FIS : FDS.001T.20
FEI : 2019001-1B/C

TBox-Radio User manual
February 2023 - Version EN 2.5
www.fdstiming.com
17. Copyright and Declaration
This manual has been compiled with great care and the information it contains has been
thoroughly verified. The text was correct at the time of printing; however the content can
change without notice. FDS accepts no liability for damage resulting directly or indirectly from
faults, incompleteness or discrepancies between this manual and the product described.
The sale of products, services of goods governed under this publication are covered by FDS
standard Terms and Conditions of Sales and this product publication is provided solely for
informational purposes. This publication is to be used for the standard model of the product of
the type given above.
Trademarks: All hardware and software product names used in this document are likely to be
registered trademarks and must be treated accordingly.
FDS-TIMING Sàrl
Rue du Nord 123
2300 La Chaux-De-Fonds
Switzerland
www.fdstiming.com
Table of contents


