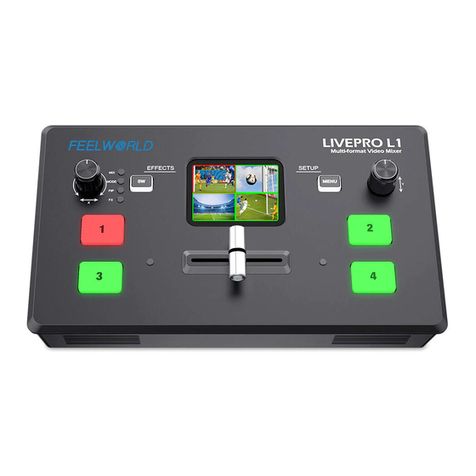
Feelworld L4 User manual

L4
5-CH Multi Format Video Switcher
User Manual

1
Thank you for choosing our product!
This User Manual is designed to show you how to use this video switcher quickly and make
use of all the features. Please read all directions and instructions carefully before using this
product.
Safety Instruction
The general safety information in this summary is for operating personnel.
1. There are no user-serviceable parts within the unit. Removal of the top cover will expose
dangerous voltages. To avoid personal injury, do not remove the top cover. Do not operate
the unit without the cover installed.
2. Please do not use chemical solutions to clean this product. Please wipe the switcher with
a clean soft cloth to maintain the brightness of the surface.
3. This product comes with standard 12V/3A power adapter, please use the power supply
correctly.
4. To avoid explosion, do not operate this product in an explosive atmosphere.
Installation Safety Summary
Safety Precautions
For all product installation procedures, please observe the following important safety and
handling rules to avoid damage to yourself and the equipment. To protect users from electric
shock, ensure that the chassis connects to earth via the ground wire provided in the AC
power Cord. The AC Socket-outlet should be installed near the equipment and be easily
accessible.
Unpacking and Inspection
Before opening product shipping box, inspect it for damage. If you find any damage, notify
the shipping carrier immediately for all claims adjustments. As you open the box, compare
its contents against the packing slip. If you find any shortages, contact your sales
representative. Once you have removed all the components from their packaging and
checked that all the listed components are present, visually inspect the system to ensure
there was no damage during shipping. If there is damage, notify the shipping carrier
immediately for all claims adjustments.
Site Preparation
The environment in which you install your product should be clean, properly lit, free from
static, and have adequate power, ventilation, and space for all components.

2
Contents
Chapter 1 Your Product ......................................................................................................................................3
1.1 Product Overview ...................................................................................................................................... 3
1.2 Key Features ...............................................................................................................................................3
1.3 Front Panel Instruction............................................................................................................................. 4
1.4 Interface Panel Instruction.........................................................................................................................5
Chapter 2 Install Your Product ........................................................................................................................... 6
2.1 Plug in Power............................................................................................................................................. 6
2.2 Connect Signal Source Input...................................................................................................................... 6
2.3 Connect HDMI and SDI Output..................................................................................................................7
2.4 Connecting Microphone and External Monitoring Devices...................................................................... 7
2.5 Connect USB3.0 as a Network Signal Source.............................................................................................8
2.6 Connect Computer and L4 ......................................................................................................................... 8
2.7 Connect USB2.0 for Firmware Update...................................................................................................9
Chapter 3 Use Your Product ............................................................................................................................. 10
3.1 Touch Screen ............................................................................................................................................10
3.2 Button Instruction .................................................................................................................................... 10
3.3 Menu Operation Instruction.................................................................................................................... 10
3.4 Switch Source...........................................................................................................................................15
Chapter 4 Streaming ........................................................................................................................................ 16
4.1 OBS Streaming......................................................................................................................................... 16
4.2 vMix Streaming........................................................................................................................................20
Chapter 5 Feelworld Live Plus Software Operation ..........................................................................................23
5.1 Connect L4 and computer ....................................................................................................................... 23
5.2 Using Feelworld Live Plus (MAC version) ................................................................................................ 25
Chapter 6 Product Parameters .........................................................................................................................34

3
Chapter 1 Your Product
1.1 Product Overview
FEELOWRLD L4 is a multi-camera video switcher with 4 HDMI and 1 SDI inputs, meet more
professional needs. The audio supports MIC and LINE IN, you can choose any 2 for mixing
from the 5 input audio sources and external audio.
L4 has a 10.1-inch full color touch screen control, displaying all signal sources and operating
interfaces, making the operation of chroma key, PIP, audio smoother and convenient,
provide easier live streaming solution. L4 also supports desktop operating systems for
Windows and MAC, as well as mobile control for iOS and Android.
1.2 Key Features
10.1-inch touchscreen, real-time preview 5 input sources +PST + PGM and operation
interface
Iconized touch operation, fast to learn; or buttons + knob operation
Compatible with HDMI and SDI signal source, meet professional needs
T-bar simply switch signal source or transition effects
USB 3.0 fast to live streaming
Embedded & Insert Audio with Sync
Mix audio from multiple inputs
Chrome key, creating an exciting studio
Configurable PIP video overlay
PC/Phone remote control via APP (Feelworld Live Plus)

4
1.3 Front Panel Instruction
①
10.1-inch touch screen
Display input sources + PST+PGM, MENU operation interface
②
Signal buttons 1~5
The lights on the signal source buttons will appear in three states
Static Green: is on air (PGM),
Flashing green: ready to be switched,
No light: no input source or the source not supported by L4
Main picture,click the input source can be switch signal
Picture in Picture
Press to call out PIP operation interface
Chroma Key
Press to call out Chroma Key operation interface
Press to call out Audio operation interface
Press to call out Effect Switching, Signal cut method, Cut
Duration,etc.menu interface
Press to call out HDMI Output, PGM Format, Logo overlay menu interface.
③
T-bar
Manual switching, push to top end or bottom end to switch signal to PGM
(Note: when t-bar not on top or bottom end, the signal cannot be
switched)

5
Menu back key
Press it to switch the signal from PST to PGM directly
④
Knob
Rotate left or right to select menu items or adjust parameters. Press to
confirm menu selection (icon turns red after confirmed)
1.4 Interface Panel Instruction
No.
Interface
Instruction
①
AUDIO IN
Analog audio input port, connect to microphone
②
3.5mm Headphone jack
③
LAN
Communication port to link dedicated software for control
④
USB CONTROL
USB3.0 output, capture signal via third party streaming software
and push to live broadcasting websites
⑤
HDMI 1~4 INPUT
4 HDMI inputs, connect to input source from HD camera or PC
⑥
PGM OUT
1 HDMI Output, it can connect to external display. You can select
to show program picture (PGM) or multiple view (PST)
⑦
3G-SDI OUTPUT
3G-SDI signal output
⑧
INPUT 5
3G-SDI signal input
⑨
DC IN
1 DC Jack for power input, connect to 12V/3A power adapter.
⑩
Power Switch
⑪
USB
Firmware update/logo overlay import

6
Chapter 2 Install Your Product
2.1 Plug in Power
L4 is packaged with a 12V/3A power adapter, please check the power supply standard used
in your country/region.
Turn on after linking to the power
2.2 Connect Signal Source Input
You can use any camera, computer or other HDMI device as the input source of the L4. It
supports up to 4Kp30 standard and 4 sources of different formats and resolutions at the
same time. L4 also comes with SDI input , you can connect with SDI device.

7
2.3 Connect HDMI and SDI Output
You can use a HDMI cable to connect the HDMI output to a monitor with an HDMI input
interface, so that you can monitor the input, output and audio display in real time.
You can select PST or PGM mode for HDMI output
For PST mode, you can see the audio and video conditions of all input signal sources, you can
see the current status of each function of L4, and you can also see the PST (Preset) and
current PGM (program)output.
For PGM mode, HDMI output also supports single screen display of any one of the five
inputs. You can switch between PST and PGM In menu.
HDMI output supports resolution setting . Click --PGM out, tap to select the output
resolution format. HDMI output supports resolution up to 1080p60.
In addition, L4 also with a SDI output, you can connect to SDI monitor.
2.4 Connecting Microphone and External Monitoring Devices
L4 provides a 3.5mm audio input, you can connect microphone, also can use an external
sound console to mix multiple external sound inputs.
L4 also provides a standard 3.5mm audio output, so you can use external speakers or
headphones to monitor the L4’s main output audio signal in real time.

8
Note: If your computer only has a Type-C port, you can use a USB-A to Type-C cable to transmit the webcam
signal. Please note that the Type-C cable you choose needs to support data transmission. The signal is
recognized in Windows and MAC system as「FEELWORLD USB 3.0 Capture」.
「FEELWORLD USB 3.0 Capture」。
2.5 Connect USB3.0 as a Network Signal Source
You can use the L4’s USB CONTROL port to use the L4 as a webcam source, and you can
recognize the webcam signal from the L4 on live streaming platforms like Zoom, YouTube,
Facebook, Twitch, OBS, etc.
2.6 Connect Computer and L4
Software control: connect computer and L4 with CAT6 cable
Stream: connect L4’s USB CONTROL and L4’s USB 3.0 port with USB3.0 cable
(Note: the color of USB3.0 port is blue)
Minimum System Requirements for macOS (Note: the following system is an example, it
doesn’t mean only this system supported)
●macOS 11.0 Big Sur or later

9
Note:The IP address of the L4 must be in the same WLAN segment as the computer.
●macOS 10.15 Catalina
Minimum System Requirements for Windows
●Microsoft Windows 10 64-bit
2.7 Connect USB2.0 for Firmware Update
When L4 need to upgrade, you can update via the USB2.0 port.
Steps for firmware update:
1. Format USB flash driver as FAT32
2. Copy the firmware update file to USB flash driver, insert to USB2.0 port of L4 (the color of
USB2.0 port is white). Then turn on power of L4 (if L4 turned on already, please turn off first
and turn on again), the buttons on the panel will be flashing after turned on power.
3. The buttons stop flashing after finish update, please reboot the L4.

10
Chapter 3 Use Your Product
3.1 Touch Screen
On the front panel of L4, you can see a 10.1-inch touch screen as shown in the picture
below:
The LCD screen presents 5 input sources, PST preset picture, PGM output picture and the
menu operation interface.
You can easily tap the picture of signal source directly to switch input source. All of control
can be finished by touching.
You can click on any position of PGM window, and the current set information ( Mode,
Input, Main Audio, Mix Audio, Brightness, Contrast, R.G.B value) can be displayed in the
upper right corner of PGM and PST. Click again to exit.
3.2 Button Instruction
Except touch control, L4 also with physical buttons. You can press directly to call out the
corresponding menu quickly, such as press button PIP can be call out PIP menu immediately.
Then rotate the knob to select the needed function or value, press the knob after selected to
confirm.
3.3 Menu Operation Instruction

11
Click to adjust parameter values to adjust the brightness, contrast, and R.G.B color values of
the image
is increase value, is decrease value
Brightness: 0~100
Contrast: 0~100
R.G.B: 0~255
RESET: After click RESET, the value reset to default value R.G.B 128, Brightness/Contrast 50
Including MAIN, PIP, KEY
MAIN
Click MAIN of menu interface or press button MAIN to enter main picture menu, you can
click any one input sources switch to PST (Preset)
PIP

12
Click PIP of menu interface or press button PIP to enter Picture in Picture menu.
Select the signal source of main and sub picture, then you can see the selected signal in the
PST (preset) interface. You can choose the position of the PIP , and also can click Exchange to
quickly exchange the main picture and sub picture.
KEY
Click KEY of menu interface or press button KEY to enter chroma key menu
Steps of chroma key:
1. Click to select the signal source for Background and Body
2. Click on the icon to pick the color, the color selection can be pick by clicking on any
position of Body signal source or by clicking up, down, left, and right to adjust the color
selection position
3. After selecting the color, click on the chroma key switch
4. Click the tolerance value to adjust the chroma key effect
Click icon or press button AUDIO enter audio menu

13
Mixing: You can choose one channel from Main Audio and one channel from Mix Audio for
mixing
Volume: Adjust the volume of main audio and mix audio 0~100
Earphone: you can select any channel you want to monitoring
When AUDIO IN is connected to a microphone, click to select so that you can
better hear the sound; When L4 is connected to electronic devices such as computer,
smart phone, etc, you can plug headphone into the AUDIO IN port of L4 and click
select to listen to audio from electronic device.
Click icon or press button SW to enter transition effect menu
Cut Effect: Click to select the transition effect, there are 13
Cut Method: A=PST, B=PGM
:Indicates PST is directly switched to PGM, and after switching, the PST and PGM
screen are the same.
:Indicates that the PST picture switches to PGM, and the PGM picture returns to
PST.
Cut Duration: 0.5S~5S
CUT: AUTO, CUT
When select AUTO, you can set the switching time 0.5~5S. eg. You set the time 4S, the
screen will finish switching within 4 seconds.
When select CUT, the screen switch directly.

14
The device supports set IP address Manually and Automatically
SET IP Address Manually
Turn OFF DHCP and select each segment with the knob, then press to enter and set the
value of each segment by pressing the knob again.
Set IP Address Automatically
Use this setting if your network/router has a DHCP serve
Turn ON DHCP
manual setting is disabled, and the IP Address for L4 is set from the network.
Audio Bar: On/Off
Histogram: On/Off after turning on , the histogram will be shown on the lower right corner
of PST and PGM
Version Info.: including hardware version, software version and SN
T-bar Calibration: Click START and follow the prompts to calibrate T-bar
Language: EN, 中文
HDMI OUT: PST, PGM
PST: It is for multi-view
PGM: It is for main picture output
PGM Format: click to select resolution of program out
LOGO: ON/OFF
Export the LOGO file from the software FEELWORLD Live Plus (details see 5.2.2 SW - LOGO
Overlay - Export Bin ) to the USB flash drive, then insert it into the USB2.0 interface of L4.
Click to Choose File to import the LOGO , and then click "ON" to open LOGO overlay
function.
Position: adjust the logo position using the up, down, left, and right arrow keys

15
Note: only support import one LOGO a time
3.4 Switch Source
When you access the five source buttons, the lights on the source buttons will appear in
three states:
green constant: the signal is currently on the main output;
green flashing: the currently selected, signal is being edited;
unlit: the source is not accessed or the resolution of the accessed source is not supported by
the L4
After transition effect and transition mode is selected
In AUTO+Time Mode:
1. Press a source button (1, 2, 3, 4 or 5) ,the selected button is green flashing.
2. Selected source will be switched to the output with the set TIME and using the
transition selected, the pressed source button becoming green constant .
Slide the T-BAR to switch
1. Press a source button (1, 2, 3, 4 or 5) the selected button is green flashing.
2. Slide T-Bar from top end to bottom end or reversely, then the pressed source button
becoming green constant.

16
Chapter 4 Streaming
4.1 OBS Streaming
Video Capture
L4 is compatible with many third party steaming software, we recommend OBS, which is available to
download on https://obsproject.com/download.Download the software and update to the latest
version.
1. Click”+”icon
2. choose video capture device
3. Choose : FEELWORLD USB 3.0 Capture and Choose Video Format YUY2

17
Note:If there is no video format YUY 2 after setting above, check the USB 3.0 port connection. Make sure it is
linked to USB 3.0 port on PC by USB 3.0 cable. (USB 3.0 cable or port is standard in blue while USB 2.0 is in
black). If the captured , change the video format to YUY2.
Audio Setting
When there is no audio playing first check the video source see if the it is set in default value and then
check the
audio setting on OBS.
1. Set Default for the audio source.
2. Audio setting on OBS.
Choose Audio, click Setting and choose audio device (Mic/Auxiliary Audio Device)
Synchronize Video with External Audio
When the video itself doesn’t have embedded audio and need insert external audio.Here are the steps.

18
1. Set the audio source: Setting→Audio→Mic/Auxiliary Audio Devices
2.Right click the Video Capture Device in Source and choose Filter
3. Click “+”under Audio/Video Filters and choose Video Delay (Async)

19
4.You can custom the filter name in the pop-up window. Click OK to confirm the filter name.
5.Input delay value in ms, the value need to adjusted until the video and audio is synchronous.
Streaming Setting
1. Find the RTMP URL and Stream Key provided by streaming broadcast website.
2. Coy URL and Stream Key
3. Back to OBS, click Setting in the lower right corner and click “Stream”. Choose Stream Type as
“Streaming Service” or “Custom Streaming Server” . If choose “Streaming Service”, there is a list of
streaming service name available in the drop down list of Service. If the streaming service is in the list,
choose it from the list.
If choose Custom Service, just fill in URL and Stream Key.
4. Paste the RMTP URL to Server or URL and Stream Key to Stream Key.
5. Click “Start Streaming”.
6. Go back to live broadcast website and check the broadcasting.
Table of contents
Other Feelworld Switch manuals
Popular Switch manuals by other brands

3Com
3Com LANPLEX 2500 EXTENDEDPLEX 2500 EXTENDED user guide

Link electronics
Link electronics 862-XL804HD/2A Specification sheet

Cleveland Controls
Cleveland Controls AFS-961 Description & operation

TRENDnet
TRENDnet TU2-400 Quick installation guide

Juniper
Juniper EX Series quick start

THOMSON
THOMSON Grass Valley TRITON TTN-BTS-0808/34 installation manual