Feider FBA20U2 User manual

1
ORIGINAL INSTRUCTIONS
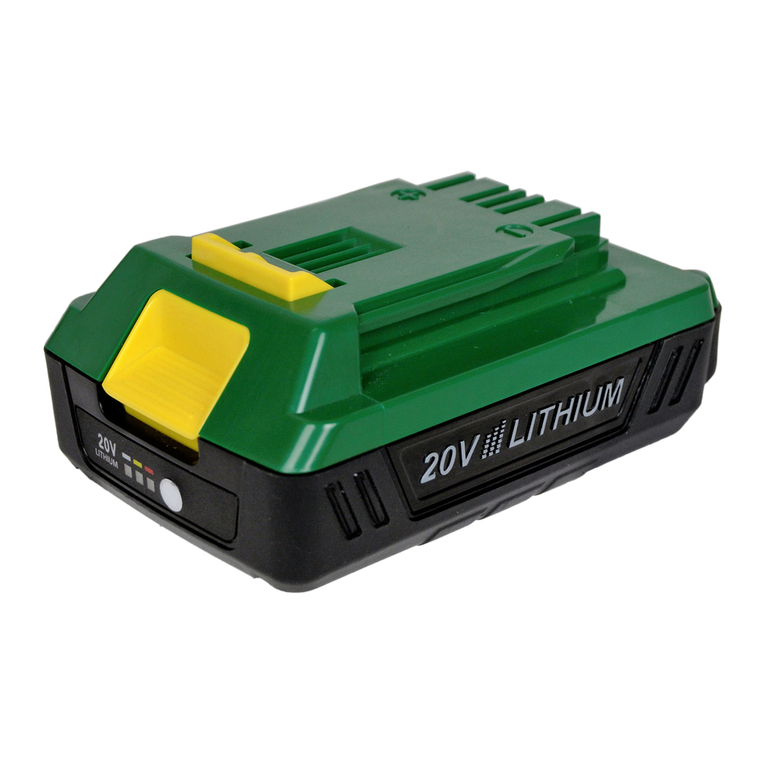
20V 2Ah(4Ah) LITHIUM-ION BATTERY
MODEL: FBA20U2/FBA20U4
WARNING: READ THE INSTRUCTIONS BEFORE USING THIS MACHINE.
BUILDER SAS
32, rue Aristide Bergès-ZI 31270 Cugnaux, France
Made in PRC

2
Warning: Please read the manual carefully before using the battery!
1.
SAFETY INFORMATION
WARNING! Read all safety warnings and all instructions. Failure to follow the warnings and
instructions may result in electric shock, fire and/or serious injury.Save all warnings and instructions for
future reference.
a)
Recharge only with the charger specified by the manufacturer. A charger that is suitable for one
type of battery pack may create a risk of fire when used with another battery pack.
b)
Use power tools only with specifically designated battery packs. Use of any other battery packs
may create a risk of injury and fire.
c)
When battery pack is not in use, keep it away from other metal objects, like paper clips, coins,
keys, nails, screws or other small metal objects that can make a connection from one terminal to
another. Shorting the battery terminals together may cause burns or a fire.
d)
Under abusive conditions, liquid may be ejected from the battery; avoid contact.If contact
accidentally occurs, flush with water. If liquid contacts eyes, additionally seek medical help.
Liquid ejected from the battery may cause irritation or burns.
SPECIFIC SAFETY INSTRUCTIONS
The product is not intended for use by persons (including children) with reduced physical, sensory or mental
capabilities, or lack of experience and knowledge, unless
they have been given supervision or instruction
concerning
use of the product by a person responsible for their safety. Children should be supervised to
ensure that they do not play with theproduct.
Please read and observe these instructions before using the
product.
The battery pack for this tool has been shipped in a low charge condition. You should charge the battery pack
fully before use.
Do not incinerate the battery pack even if it is seriously damaged or can no longer hold a charge.
The battery pack can explode in a fire.
Batteries can explode in the presence of a source of ignition, such as a pilot light. To reduce the risk of serious
personal injury, never use any cordless product in the presence of open flame. An exploded battery can propel
debris and chemicals. If exposed, flush with water immediately.
Do not crush, drop or damage battery pack. Do not use a
battery pack or charger that has been dropped or
received a
sharp blow. A damaged battery is subject to explosion. Properly dispose of a dropped or damaged
battery immediately.
Do not crush, drop or damage battery pack. Do not use a
battery pack or charger that has been dropped or
received a
sharp blow. A damaged battery is subject to explosion. Properly dispose of a dropped or damaged
battery immediately.
A small leakage of liquid from the battery pack may occur
under extreme usage or temperature conditions. This
does
not necessarily indicate a failure of the battery pack. However, if the outer seal is broken and this
leakage comes into contact with your skin wash the affected area quickly with soap and water. If the leakage
gets in your eyes flush your eyes with clean water for a minimum of 10 minutes and seek immediate medical
attention.
Inform the medical staff that the liquid is a 25-35% solution of potassium hydroxide.

3
Never attempt to open the battery pack for any reason. If the plastic housing of the battery pack breaks open
or
cracks, immediately discontinue its use and do not recharge
it.
Do not store or carry a spare battery pack in a pocket or toolbox or any other place where it may come into
contact
with metal objects. The battery pack may be short- circuited
causing damage to the battery pack, burns or
a fire.
Do not charge battery tool in a damp or wet location. Following this rule will reduce the risk of electric shock.
For best results, change the battery tool in a location where the temperature is more than 10°C but less than
40°C, to reduce the risk of serious personal injury, do not store outside or in vehicles.
Never service damaged battery packs. Service of battery packs should only be performed by the
manufacturer or authorized service providers.
2.
RE-CHARGEABLE BATTERIES
Batteries may leak or explode if not charged or handled correctly. Always observe the following
precautions when handing batteries.
Ensure that the machine is switched off before removing or fitting batteries.
Do not use this battery with any other product.
Do not attempt to fit the battery the wrong way round.
Do not short out, or attempt to dismantle the battery.
Do not expose the battery to flames or excessive heat.
Do not immerse in or expose the battery to water.
Do not store or transport the battery with loose metal objects such as drill and drive bits.
Batteries are points to leakage when discharged. To avoid damage to the product, remove or re-charge
the battery when no charge remains. Store the battery in a cool place when not in use.
After prolonged use the battery may become hot. Before removing the battery,switch the machine off and
allow the battery to cool down. Do not use the battery if you notice any discoloration or distortion of the
battery casing.
3.
Intended Use
The Li-Ion battery specially design to work with Hyundai range of cordless power tools as below.
FSC20V165
20 V LITHIUM CIRCULAR SAW
FPV20V2B2B
20V LITHIUM CORDLESS DRILL
FMP20V
20 V LITHIUM HAMMER DRILL
FM20V115
20VLITHIUM ANGLE GRINDER
FSS20V
20 V LITHIUM CIRCULAR SAW
FMT20V
20 V LITHIUM MULTI TOOL

4
4.
COMPONENTS ( FIG.1)
1
Battery release catch
2
Charge level indictor
3
Charge level indictor button
5.
OPERATION
Battery pack
Charger (Not included)
FBA20U2
FFC20U
FBA20U4
5.1 Charging the batterypack
Warning ! Only charge in compatible 20V chargers. Use of other chargers may result in fire, damage or serious
personal
injury. The battery pack has been shipped in a low
charge condition to prevent possible problems.
Therefore,
youshould charge it until the green LED on the charger comes on.
1) Check that your mains voltage is the same as that marked on the rating plate of the battery charger. Insert
the power plug of the charger into the socket outlet. The RED LED will then begin to light.
2) Insert the battery pack into the battery charger, then the red LED on charger will begin to Green flash light.
3) You will find a label with “Charger indicator” of the LED indicator on the charger.
The battery pack can become a little warm during the charging. This is normal.
If the battery pack fails to charge, check:
Voltage at the power socket
Whether there is good contact at the charging contacts.
Whether the battery pack is warm or not, The battery protection system will not allow the battery to be
charged if the battery temperature is over 40°C after use, allow the battery pack to cool to room
temperature before commencing with the charging.
If the battery pack still fails to charge, send the charging unit and the battery pack to our customer service
center.

5
To ensure that the battery pack provides long service, you should take care to recharge it promptly. You must
recharge the battery pack when you notice that the power of the cordless vacuum drops. Never allow the battery
pack to become fully discharged. This will cause it to develop a defect.
5.2 Battery capacity indicator
Press the switch for the battery capacity indicator . The battery capacity indicator shows the charge status of the
battery using 4 LEDs as following:
All 4 LEDs are lit:
The battery is fully charged.
3 LED(s) are lit:
The battery has approx 75% remaining charge.
2 LED(s) are lit:
The battery has approx 50% remaining charge.
1 LED is lit:
The battery will be empty soon, please recharge the battery.
5.3 Charger indicator
Indicator status
Explanations and actions
Ready for use
The charger is connected to the mains and is ready for use; there is
no battery pack in the charger.
Charging
The charger is charging the battery pack in charge mode.
Battery pack is full of charge.
Charging is finished and battery pack in the charger.
The temperature of battery is too high or too low, the charger is
under protection status. The charging function can be recovered
after the temperature is normal.
Unrecoverable battery malfunction.
6.
MAINTENANCE AND STORAGE
MAINTENANCE
The batteries have been designed to provide maximum trouble-free life. However, like all batteries, they will
eventually
wear out. DO NOT disassemble battery pack and attempt to replace the batteries. Handling of these
batteries, especially
when wearing rings and jewellery, could result in serious burns.
To obtain the longest possible battery life, remove the battery pack from the charger once it is fully charged
and ready for use.

6
STORAGE
Store the battery pack where the temperature is below 27°C.
Store battery packs in a "charged" condition (minimum of 30%-50% charged).
To charge the battery pack after a six months storage period,it is recommended to discharge thebattery
about 0%-20% (by running it in a tool) and charge afterwards to maximize the battery lifetime.
7.
SPECIFICATIONS TECHNIQUES
Model
FBA20U2
FBA20U4
Voltage
20V d.c.
20V d.c.
Capacity
2.0Ah
4.0Ah
Charge time
60 minutes
120-130 minutes
Cell type
Lithium-ion
Lithium-ion
8.
Symbols explication
Do not dispose of old appliances with domestic rubbish .
Conforms to relevant safety standards
Do not expose batteries to temperatures exceeding 40 degrees.
Do not dispose of batteries in fire. They could explode and cause injury
Do not dispose of batteries in water.
Recycling

7
9. DISPOSAL
Electric power tools, as well as their accessories and packaging, must each be able to follow an
appropriate recycling pathway. Only for the countries of the European Union:
Do not throw away your electrical appliance with the household waste! In accordance with the
European Directive 2012/19/EU on waste electrical and electronic equipment and its implementation
in national laws, power tools that can no longer be used must be separated and follow an appropriate
recycling pathway.

10. WARRANTY
WARRANTY
The manufacturer guarantees the product against defects in material and workmanship for a period of 2
years from the date of the original purchase. The warranty only applies if the product is for household use.
The warranty does not cover breakdowns due to normal wear and tear.
The manufacturer agrees to replace parts identied as defective by the designated distributor. The
manufacturer does not accept responsibility for the replacement of the machine, in whole or in part , and/or
ensuing damage.
The warranty does not cover breakdowns due to:
• insucient maintenance.
• abnormal assembly, adjustment or operations of the product.
• parts subject to normal wear and tear.
The warranty does not extend to:
• shipping and packaging costs.
• using the tool for a purpose other than that for which it was designed.
• the use and maintenance of the machine done in a manner not described in the user manual.
Due to our policy of continuous product improvement, we reserve the right to alter or change specications
without notice. Consequently, the product may be dierent from the information contained therein, but a
modication will be undertaken without notice if it is recognized as an improvement of the preceding
characteristic.
READ THE MANUAL CAREFULLY BEFORE USING THE MACHINE.
When ordering spare parts, please indicate the part number or code, you can nd this in the spare parts list
in this manual. Keep the purchase receipt; without it, the warranty is invalid. To help you with your product,
we invite you to contact us by phone or via our website:
• +33 (0)9.70.75.30.30
• https://services.swap-europe.com/contact
You must create a "ticket" via the web platform.
• Register or create your account.
• Indicate the reference of the tool.
• Choose the subject of your request.
• Describe your problem.
• Attach these les: invoice or sales receipt, photo
of the identication plate (serial number), photo
of the part you need (for example: pins on the
transformer plug which are broken).
8

11. PRODUCT FAILURE
WHAT TO DO IF MY MACHINE BREAKS DOWN?
the repairer will refuse the machine.
Go to the store with the complete machine and with the receipt or invoice.
the repairer will refuse the machine.
c) Create a SWAP-Europe service ticket on the site: https://services.swap-europe.com When making the
request on SWAP-Europe, you must attach the invoice and the photo of the nameplate (serial number).
d) Contact the repair station to make sure it is available before dropping o the machine.
Go to the repair station with the complete machine packed, accompanied by the purchase invoice and the
station support sheet downloadable after the service request is completed on the SWAP-Europe site
For machines with engine failure from manufacturers BRIGGS & STRATTON, HONDA and RATO, please
refer to the following instructions.
Repairs will be done by approved engine manufacturers of these manufacturers, see their site:
• http://www.briggsandstratton.com/eu/fr
• http://www.honda-engines-eu.com/fr/service-network-page;jsessionid=5EE8456CF39CD572AA2AEEDFD
290CDAE
• https://www.rato-europe.com/it/service-network
Please keep your original packaging to allow for after-sales service returns or pack your machine
with a similar cardboard box of the same dimensions.
For any question concerning our after-sales service you can make a request on our website https://
services.swap-europe.com
Our hotline remains available at +33 (9) 70 75 30 30.
If you bought your product in a store:
a) Empty the fuel tank if your product has one.
b) Make sure that your machine is complete with all accessories supplied, and clean! If this is not the case,
If you bought your product on a website:
a) Empty the fuel tankif your product has one.
b) Make sure that your machine is complete with all accessories supplied, and clean! If this is not the case,
9

12. WARRANTY EXCLUSIONS
THE WARRANTY DOES NOT COVER:
• Start-up and setting up of the product.
• Damage resulting from normal wear and tear of the product.
• Damage resulting from improper use of the product.
• Damage resulting from assembly or start-up not in accordance with the user manual.
• Breakdowns related to carburetion beyond 90 days and fouling of carburetors.
• Periodic and standard maintenance events.
• Actions of modication and dismantling that directly void the warranty.
• Products whose original authentication marking (brand, serial number) has been degraded, altered or
withdrawn.
• Replacement of consumables.
• The use of non-original parts.
• Breakage of parts following impacts or projections.
• Accessories breakdowns.
• Defects and their consequences linked to any external cause.
• Loss of components and loss due to insucient screwing.
• Cutting components and any damage related to the loosening of parts.
• Overload or overheating.
• Poor power supply quality: faulty voltage, voltage error, etc.
• Damages resulting from the deprivation of enjoyment of the product during the time necessary for repairs
and more generally the costs related to the immobilization of the product.
• The costs of a second opinion established by a third party following an estimate by a SWAP-Europe repair
station
• The use of a product which would show a defect or a breakage which was not the subject of an immediate
report and/or repair with the services of SWAP-Europe.
• Deterioration linked to transport and storage*.
• Launchers beyond 90 days.
• Oil, petrol, grease.
• Damages related to the use of non-compliant fuels or lubricants.
* In accordance with transport legislation, damage related to transport must be declared to carriers within 48
hours maximum after observation by registered letter with acknowledgement of receipt.
This document is a supplement to your notice, a non-exhaustive list.
Attention: all orders must be checked in the presence of the delivery person. In case of refusal by the
delivery person, it you must simply refuse the delivery and notify your refusal.
Reminder: the reserves do not exclude the notication by registered letter with acknowledgement within 72
hours.
Information:
Thermal devices must be wintered each season (service available on the SWAP-Europe site). Batteries must
be charged before being stored.
10
This manual suits for next models
1
Table of contents
