Ferguson Ariva HDplayer 310 Guide

ENGLISH
1. What’s in the box?
Ariva HDplayer 310
EN User manual
PL Instrukcja obsługi
GIGABIT
User manual Remote Control
Unit
2x AAA baterries USB 3.0 A-B and
A/V cable
AC power
adaptor
2. Connect - basic audio/video connections
HDMI (Best quality)
Qucik Start Guide

ENGLISH
3. Setup
APress to turn on.
BPress SETUP to enter Setup menu.
CSelect System tab then“Menu Language”option and press OK.
DUse keys to select a language option in the menu and press OK to conrm.
EAdjust other settings if needed
FPress SETUP to exit.
4. Use
ACopy multimedia les to USB memory.
BConnect USB memory to USB port in Ariva player
CUse keys to navigate in the menu. Choose option“Files Manager” then select
USB from the devices list and select le that you want to play
DPress OK to start playback.
ETo stop playback, press STOP.
CAUTION!
Refer to the user manual for more information.
Qucik Start Guide

ENGLISH
Introduction
1 Product Overview
2 Safety Information
3 User manual
3 Software upgrade
4 Symbols used on the device
4 Setup
Connections
5 Connecting to a TV
6 Connecting the power cord
7 Optional: Connecting to an Stereo
System
7 Optional: Connecting Digital AV Receiver
8 Optional: Connecting a supported USB
devices
9 Optional: Connecting to computer
10 Optional: Connecting Ethernet network
10 Optional: Connecting WiFi network
Functional Overview
11 Front, Side and Rear panels
12 Remote Control Unit (RCU150)
Getting Started
13 Step 1: Inserting batteries into the
Remote Control
13 Step 2: Setting up the TV
14 Step 3: Setting language preference
Major functions
15 Upscaling
15 Playable Content
17 Basic playback controls
18 Operations for video playback
20 Playing pictures or audio les
21 File copy
21 Internet Media
22 Web Browser
22 SATA bay
23 NAS function (Samba server)
23 BitTorrent client
Setup Menu Options
25 Audio setup menu
25 Video setup menu
26 Network setup menu
27 System setup menu
28 Misc setup menu
Troubleshooting
Specication
Glossary
Contents

10
ENGLISH

1
ENGLISH
Introduction
Product Overview
Thank you for purchasing the Ariva
HDplayer 310. This user manual provides
step-by-step instructions for installing
and using your new HD media player. This
player has the following functionality.
Network Feature
A/V streaming/transmission via Ethernet
(10/100/1000Mb) & WiFi (802.11b/g/n)
A/V streaming via UPnP Media Server
File sharing via Samba server
FTP Server
UPnP Server
Internet Radio (SHOUTcast) client
Bittorrent download client
Video podcast
Web browser (Webkit)
Movie Playback
Fast forward/rewind
Subtitle support. Subtitle control: font
color / oset / font size
Supports major audio and video formats
(HD video decoding - up to 1080p)
Music Playback
Fast forward/rewind
Shue
Repeat
Supports major loss and lossless audio
formats
Photo Viewing
You can view photos in slide show mode
with background music.
Zoom in/out, Rotate
Supports major image formats
USB 3.0 &2.0 Support
USB 3.0 DEVICE port (for computer
connection, compatible to USB 2.0 )
Two USB 2.0 HOST ports (for USB storage
devices)
Card reader
SD/MMC
File Copy
Supports copying & moving les among
USB, HDD and other devices.

2
ENGLISH
Safety Information
Please observe all warnings and
instructions on the equipment and
contained in these operating instructions.
Please carefully read this user’s manual
before using the device.
To avoid electric-shock hazards, do not
open the cabinet, refer servicing to
qualied personnel only. If cabinet is
opened warranty will be invalid.
Please switch o completely the device
during thunder, during abnormal
phenomenon, before cleaning it and in
case it remains out of service for a long
period.
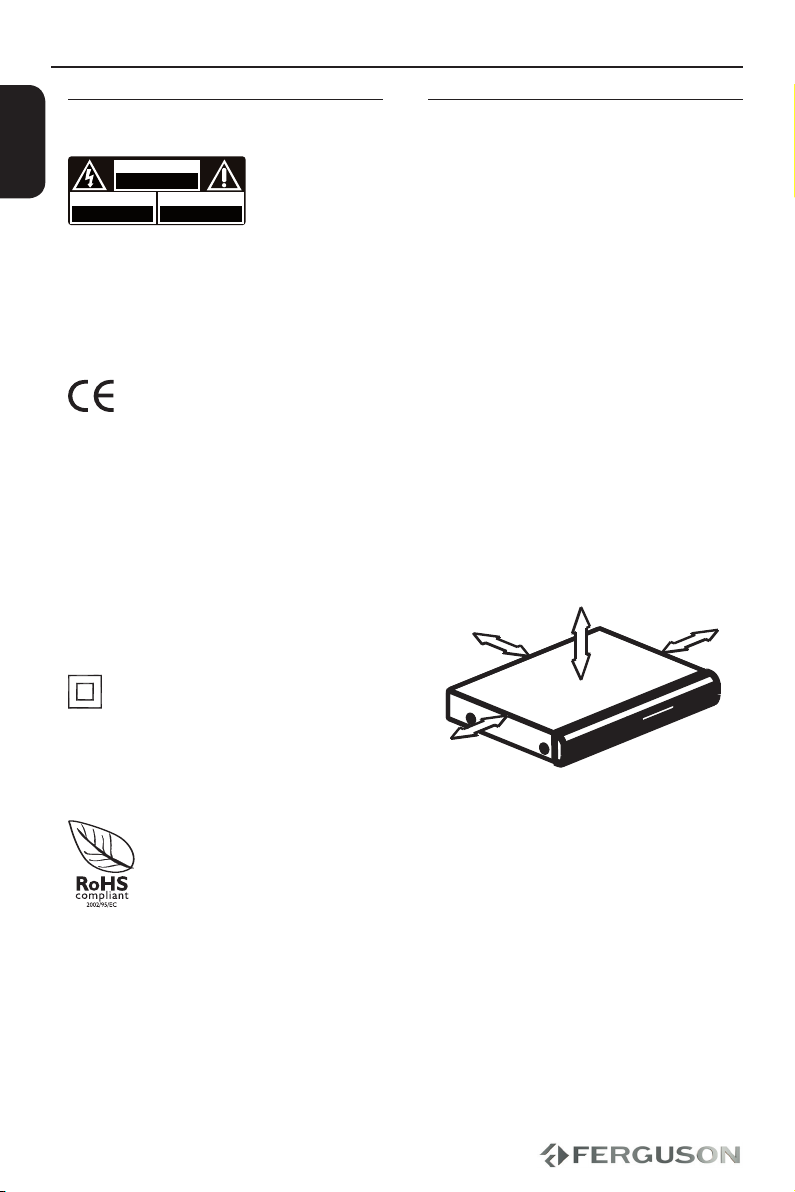
Do not expose the device under the
sunlight. And keep it away from the heat
source or humid environments. Do not
block ventilation holes of the device so
that air can circulate freely.
Please place the device in horizontal and
stable conditions, keeping it away from
vibrating.
If device is moved from warmer place to
a colder one some problem might occur.
Please switch o the device and turn it on
after 1 or 2 hours.
Keep the device away from ower
vases, tubs, sinks, etc., in order to avoid
damaging the equipment. Do not touch
power supply with wet hands.
Don’t put any objects on the device.
Be sure to turn the device o and
disconnect the AC power cord before
cleaning the receiver surface. If the
surface is dirty, wipe clean with a cloth
which has been dipped in a weak soap/
and/water solution and wrung out
thoroughly, and then wipe again with a
dry cloth.
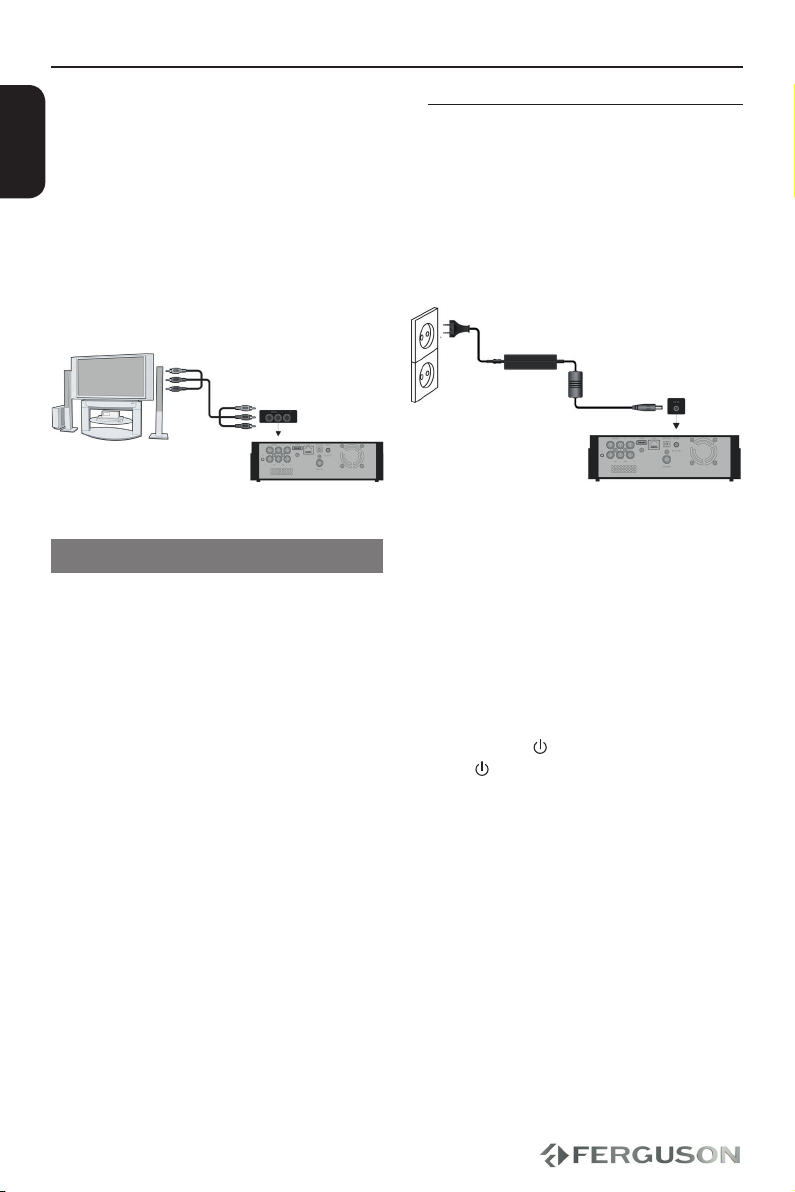
Do not connect cables while power is
plugged.
Do not use damaged cables for
connections: you could cause res.
Please switch o completely the device
while making all connections.
The product purchased is a sophisticated
electronic device which is not suitable for
children under 18 years.
We do not assume responsibility for
damages caused to people or object,
deriving from use of the device made by
people under 18 years.
Regularly backup the data in the hard
disk so that it can be recovered in the
event of data corruption or loss. Ferguson
company takes no responsibility for loss
of data stored on the hard disk.
Introduction

3
ENGLISH
Software upgrade
Periodically Ferguson will issue software
upgrade to enhance your user experience.
To download and install the latest
software to the player
Visit the Ferguson website
www.ferguson-digital.eu to check the
availability of the latest software upgrade.
User manual
Ferguson has used all the available
means to ensure the latest information
regarding its products. Ferguson does not
give a warranty regarding the contents
of this User Manual and waives any
implied warranties regarding market
value or tness for specic purposes. The
information contained herein provide
guidelines allowing the operation and
maintenance of the receiver.
Ferguson reserves the right to make
changes, corrections or to translate
the User Manual without giving prior
notice of such changes. Therefore, it is
recommended that users visit our website
regularly to receive the latest information.
IMPORTANT!
All the information contained in this
manual was correct at the time of
publication. However, as our engineers
are always updating and improving the
product, your device’s software may
have a slightly dierent appearance or
modied functionality than presented in
this manual.
To obtain the most current user manual
Visit the Ferguson website
www.ferguson-digital.eu to check the
availability of the latest version of user
manual. Please visit the FAQ section too.
Introduction

4
ENGLISH
Symbols used on the device
CAUTION!
DO NOT OPEN
RISK OF ELECTRIC SHOCK
ACHTUNG!
NICHT ÖFFNEN
LEBENSGEFAHR
UWAGA!
NIE OTWIERAĆ
RYZYKO PORAŻENIA
The caution risk of electrical shock - do
not open symbol
This symbol tells you that you are
not allowed to open the device. Only
authorized (service) technicians are
allowed to open the box.
The CE mark
This mark tells you that the device is
following the provisions of Council
Directive 2004/108/EC on the
approximation of the laws of the Member
States relating to the electromagnetic
compatibility and the provisions of
Council Directive 2006/95/EC and
93/68/EEC on the approximation of the
laws of the Member States relating to low
voltage and electrical safety.
The double insulation symbol
This symbol tells you that the device is
electrically safe within the normal use of
the device as stated in the safety chapter.
The RoHS mark
This mark tells you that the device is
following The Directive on the Restriction
of the Use of Certain Hazardous
Substances in Electrical and Electronic
Equipment 2002/95/EC (commonly
referred to as the Restriction of Hazardous
Substances Directive or RoHS)
Setup
Finding a suitable location
– Place the set on a at, hard and stable
surface.Do not place the set on a carpet.
– Do not position the set on top of other
equipment that might heat it up (e.g.
reciever or amplier).
– Do not put anything under the set (e.g.
CDs, magazines).
– Install this system near the AC outlet
and where the AC power plug can be
reached easily.
Space for ventilation
– Place the apparatus in a location
with adequate ventilation to prevent
internal heat buid up.Allow at least 10 cm
clearance from the rear and the top of the
set and 5 cm from the left and right to
prevent overheating.
10cm 10cm
5cm
5cm
Avoid high temperatures, moisture,
water and dust
– Apparatus shall not be exposed to
dripping or splashing.
– Do not place any sources of danger on
the apparatus (e.g., liquid lled objects,
lighted candles).
Introduction

5
HD Ready/Full HD TV
ENGLISH
IMPORTANT!
– You only need to make one video
connection from the following options,
depending on the capabilities of your
TV system.
– Connect the player directly to the TV.
– When there is no picture on screen
press repeatedly TV SYS. key.
Using HDMI (High Denition
Multimedia Interface) sockets
HDMI transfers an uncompressed digital
signal for the clearest sound/image
quality.
It has plug and play capability using only
one cable for both audio/video output.
AUse a HDMI cable to connect the player’s
HDMI to HDMI IN on the HDMI TV.
- It may take a while for the Ariva player
and input device to communicates and
initialise.
Connections
Using DVI (Digital Visual Interface)
sockets
If your TV has a DVI IN socket, you need a
HDMI-DVI adapter cable to connect the
HDMI socket on the Ariva player.
This HDMI-DVI cable has only video
output capability.
AUse a HDMI-DVI cable (not supplied) to
connect the Ariva player’s HDMI to DVI IN
on the DVI TV.
Helpful hint:
To hear sound from the Ariva player, use
one of the audio connections.
Connecting TV

6
ENGLISH
Using Composite Video Jacks (CVBS)
AUse the composite video cable (yellow) to
connect the Ariva player’s CVBS(VIDEO)
jack to the video input jack (or the
labled as A/V in , Video In, Composite or
Baseband ) on the TV.
BTo hear the sound of this Ariva Player
through your TV, use the audio cables
(white/red) to connect AUDIO OUT
(L/R) jacks of the Ariva player to the
corresponding AUDIO IN jacks on the TV.
Connections
After everything is connected properly,
connect the power cable to the media
player’s DC connector, and then plug
the opposite end into an AC power
outlet. The media player powers up
automatically.
Never make or change any connections
with the power switched on.
Press POWER on the RCU. Standby-On
diode will change color on the front
panel.
Connecting the power cord

7
AV Receiver
ENGLISH
Connections
Optional: Connecting to an Stereo
System
Stereo system has Right/Left Audio
In Jack
ASelect one of the video connections
(CVBS VIDEO or HDMI) depending on the
options available on your TV.
BUse the audio cables (white/red) to
connect AUDIO OUT (L/R) jacks of the
Ariva Player to the corresponding AUDIO
IN jackts on the stereo system.
Optional: Connecting Digital AV
Receiver
Receiver has a PCM, Dolby Digital, or
DTS decoder
ASelect one of the video connections
(CVBS VIDEO or HDMI) depending on the
options available on your TV.
BConnect the COAXIAL or OPTICAL jack
of the Ariva player to the corresponding
Digital Audio In jack on your Receiver
(cable not supplied).
CSet the Ariva Player’s Digital Output to
SPDIF LPCM or SPDIF RAW depending on
the capabilities of your Receiver.
Helpful hint:
If the audio format of the Digital Output
does not match the capabilities of your
receiver, the receiver will produce a
strong, distorted sound or no sound at all.

8
ENGLISH
Connections
Optional: Connecting a supported
USB devices
Using USB port for playback
AConnect the supported USB device
directly to the USB port on the side panel
(as shown on the above illustration).
BNavigate through menu in order to view
the les stored in the supported USB
device.
CYou have to stop playback before
removing the supported USB device from
the USB port.
Helpful hints:
The USB port supports playback of all
supported multimedia les.
Not all portable audio/video players and
digital cameras are supported.
External hard disk drives without separate
power supply are not supported and may
not work.
If the USB device does not t into the USB
port, a USB extension cable is required.
Connecting BD or DVD drive
AConnect the supported USB BD/DVD
drive directly to the USB port on the
side panel (as shown on the above
illustration).
BNavigate through menu in order to view
the les stored on the BD/DVD disc.
CYou have to stop playback before
removing the USB BD/DVD drive from the
USB port.
Helpful hints:
The USB port supports playback of all
supported multimedia les.
Not all USB BD/DVD drives are supported.
Only format ISO9660 disc are supported
Drives without separate power supply are
not supported and may not work.

9
ENGLISH
Connecting WiFi dongle
You can only connect dedicated dongle
with Realtek chip.
AConnect the supported WiFi dongle to
the USB port on the side panel (as shown
on the above illustration).
BCongure in menu WiFi connection.
CYou have to disconnect WiFi network
before removing the WiFi dongle from the
USB port.
Helpful hints:
WiFi networks are usually slower than
cable (Ethernet) networks. It may aect
playback performance.
Connect to computer
This is fast way to transfer large les on
internal hard disk.
AMake sure the player is powered on
BPlug in the connector of the USB3.0 cable
to this player’s USB DEVICE port;
CPlug in the rectangular connector of the
USB 3.0 cable to computer.
Helpful hints:
During this connection playback on Ariva
is disabled
Optional: Connecting to computer
Connections

10
router
ENGLISH
Connections
Optional: Connecting Ethernet
network
Ethernet 100Mb network
AConnect the Ethernet RJ-45 cable to LAN
port as shown on the above illustration.
BWait a moment until DHCP will congure
network connection.
Helpful hints:
If there is no DHCP server in your network
you can manually congure Ariva IP
address - “Fix IP (manual)”menu item.
Optional: Connecting WiFi network
WiFi 802.11g/n network
IMPORTANT!
You need dedicated WiFi USB dongle
for wireless connection. This dongle
is optional accessory and may be sold
separatly.
AConnect dedicated WiFi USB dongle
to USB port as shown on the above
illustration.
BEnter “Setup” > “Network” > “Wireless
Setup”
CSelect one of detected networks and
enter valid key.
Helpful hints:
If you don’t have WiFi router select “Peer
to Peer (Ad-Hoc)”, then congure settings
(SSID, WEP key, Ariva IP address)
WiFi networks are usually slower than
cable (Ethernet) networks. It may aect
playback performance.

11
ENGLISH
Functional Overview
Front, Side and Rear panels
AVFD display - Shows information
about the current status of the Player
BPower indicator- red (standby mode),
blue (power on mode)
EEthernet- Network Interface (LAN)
FOPTICAL (Digital Audio Out) - connect
to coaxial audio input of an amplier
GCOAXIAL (Digital Audio Out)- connect
to coaxial audio input of an amplier
HDC Power Supply Input - connect
AC power adaptor (use only supplied
adaptor)
ACard reader - Input the supported
ash card. SD, MMC or MS
BUSB 2.0 port - Input the supported
USB device
CUSB 3.0 port - connection to
computer for direct le transfer
AU- force rmware update
BCVBS (Composite Video Out) -
connect to CVBS video input of a TV
Stereo Audio Out - connect to audio
left and right input of a stereo system
CComponent Video Out - connect to
YPbPr input of a TV
DHDMI - Audio and video output socket
for the high denition television set

12
ENGLISH
Functional Overview
Remote Control Unit RCU310
POWER - Turns the player on or switches it to standby mode
EJECT - Safe remove the storage device
Numeric keypad 0-9 - Selects numbered items in a menu
SHUFFLE - Selects shue mode during music playback.
REPEAT - Selects various repeat modes
VOL − - Decrease the volume
MUTE - Turn on/o sound
VOL +− - Increase the volume
MENU - Press to enable the option menu, where you can change
the review mode of le manager and media library;
- Press to display or hide the option menu during playback.
HOME - Enter the home menu
BACK - Return to the previous screen while navigating menus.
- Cursor buttons for moving left, right, up, down.
OK - Conrms an entry or selection
- Stops playback
- Starts playback / Pauses playback
INFO - Display information on the screen during playback
- Reverse search
- Fast forward
- Skips to previous le / page up
- Skips to the next le / page down
RED - Function is available in virtual keyboard.
GREEN - Function is available in virtual keyboard.
- Display/hide address bar
YELLOW - Display virtual keyboard
BLUE - open/close USB DVD/BD-ROM tray.
SETUP - Enters or exits system setup menu
TV SYS. - Toggle Video Output Modes and resolution (NTSC, PAL,
480P, 576P, 720P, 1080I, and 1080P.)
AUDIO - Selects an audio track or language (DVD/avi/mkv)
SUBT. - Selects a subtitle le / subtitle moving / font change /time
adjustment
GOTO - Start playback from a designated point (Title, Chapter or
Time)
SLOW - Playback in slow motion. Press the button to resume
regular playback.
ANGLE - Switch the camera angle during DVD-Video playback
ZOOM - Enlarge a picture on the TV screen (photo or video)
BROWSER - Enter le manager.
EDIT - Rename or delete le in le browser
COPY - Enter le selecting menu.
A-B - Selects fragment for repeat mode

13
ENGLISH
Getting Started
Step 1: Inserting batteries into the
Remote Control
AOpen the battery compartment.
BInsert two batteries type R03 or AAA,
following the indications(+ -) inside the
compartment.
CClose the cover.
Using the Remote Control to operate
the Player
AAim the Remote Control directly at the
remote sensor (IR) on the front panel.
BDo not put any objects between the
Remote Control and Player while
operating the Player.
CAUTION!
Remove batteries if they are
exhausted or if the Remote Control is
not being used for a long time.
Do not use old and new or dierent
types of batteries in combination.
Batteries contain chemical
substances, so they should be disposed
properly.
Step 2: Setting up the TV
IMPORTANT!
Make sure you have completed all the
necessary connections.
APress POWER on the RCU to turn it on.
BTurn on the TV and set it to the correct
video source. You should see the Ariva
background screen.
The TV Remote Control may have a
button or switch that chooses dierent
video modes.
CIf you are using external equipment,
(eg. audio system or receiver), turn it on
and select the appropriate input source
for the Ariva player output. Refer to the
equipment owner’s manual for detail.
Selecting the TV system that
corresponds to your TV
This Player is compatible with NTSC, PAL
and HDMI.
APress SETUP.
BPress to select Video tab
CPress to highlight TV System, then
press .
DPress to highlight one of the avaible
options.
ESelect a setting and press OK.

14
ENGLISH
Getting Started
Step 3: Setting language
preference
The language options are dierent
depending on your country or region. It
may not correspond to the illustrations
shown on the user manual.
Setting the OSD language
APress SETUP.
BPress to select System tab.
CPress to highlight Menu Language,
then press .
DPress to select a language and press
OK.

15
ENGLISH
Major functions
IMPORTANT!
If the inhibit icon (ø) appears on the
TV screen when a button is pressed, it
means the function is not available on
the current multimedia content or at the
current time.
Upscaling
Supported Upscaling on Standard
Denition content:
A720p HDTV Progressive Scan -
24/25/30Hz, 720 Lines per Frame,
1280x720 pixel
B1080i HDTV Interlaced - 50/60Hz,
520+520 Lines per Frame, 1920x1080
pixel
C1080p HDTV Progressive Scan -
24/25/30Hz, 1080 Lines per Frame,
1920x1080 pixel
Playable Content
File Systems
FAT (FAT16 and FAT32)
NTFS
EXT2, EXT3
HFS+
ISO-9660 and partly UDF on external
optical drive (BD or DVD)
Video containers
MPEG-1/2 Program Stream (MPG, MPEG)
MPEG-2 Transport Stream (TS, TP, TRP,
M2TS)
MPEG-4 Part 14 (MP4)
VOB (also ISO images with DVD-Video)
AVI
ASF (ASF, WMV)
Matroska (MKV)
AVCHD (MTS, M2TS)
MOV (H.264)
FLV - Flash Video
Realmedia (RMVB, RM)
BD (folder structure or ISO image)
OGM
Video codecs:
Most video codecs are supported up to
1080p resolution.
XviD (except 3 warp-point GMC)
MPEG-1
MPEG-2
MPEG-4
MP@HL
MPEG-4.2
ASP@L5, 720p, 1 warp-point GMC
WMV9
MP@HL
H.264 (MPEG-4 AVC)
BP@L3

16
ENGLISH
Major functions
Audio containers:
M4A
MPEG audio (MP1, MP2, MP3, MPA)
WAV
ASF (ASF, WMA)
FLAC
OGG
Matroska (MKA)
AIFF
APE
RA
and others
Audio codecs:
Dolby Digital (AC3, EAC3, TrueHD)
DTS, DTS-HD (downmix)
WMA, WMA Pro
MP1, MP2, MP3
LPCM
FLAC
APE (MonkeyAudio)
Vorbis
COOK (RA-cooker)
LSD (RA-lossless)
ADPCM
APE
and others
Playlists:
M3U
PLS (internet radio)
CUE
Extensions recognized in Ariva le
browser.
List of recognized multimedia le
extensions are listed below. Not all les
with those extensions are playable -
some les may include not supported
codecs and/or settings. Files with other
extensions Ariva will not play.
ac3, acc, ai, ape, asf, avi, avs, bmp, cue,
and 12 and more reference frames)
VC-1
MP@HL
AP@L3
MJPEG
RealVideo 8/9/10, up to 720@30P
AVS
Subtitle formats:
SRT (SubRip)
SMI (Sami)
SUB (MicroDVD, SubViewer2)
SSA (SubStationAlpha)
ASS (Advanced Sub Station Alpha)
PSB (PowerDivx)
TXT (TMplayer, MPL2, SubRip, Sami,
MicroDVD, SubViewer2, SubStationAlpha,
Advanced Sub Station Alpha, PowerDivx)
Timed Text (TTXT, subtitles embeded in
.mp4 les)
IDX
PGS
Some user-created subtitles may not
work properly
Some special characters are not
supported
HTML tags are not supported
A movie le and external subtitle le must
be located in the same folder.
A movie le name and and it’s subtitle le
name must be identical to be displayed.
Photo formats :
JPEG, HD JPEG (baseline)
BMP
PNG (except Interlace)
GIF
partly TIFF (uncompressed, LZW, ZIP)
Table of contents