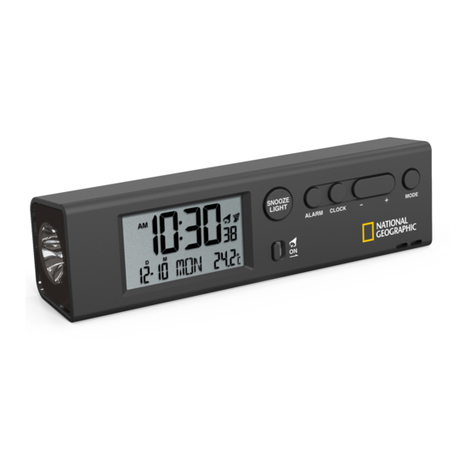
FettleLife DAB-A1 User manual

Digital Alarm Clock
DAB+ Radio
Quickstart Guide
Handleiding

EN –Instruction Manual
Model: DAB-A1
This alarm clock has a large LED display, easy to read, especially for the elderly.
With the built-in radio you can enjoy DAB + and FM radio. The radio can be set as
an alarm. You can set two alarms to go off at different times.
Functions
1. Alarm Sound Setting (DAB+/Buzzer/FM Radio)
2. Alarm Mode Setting (1 Day/Weekdays/7 Days)
3. Radio Setting (DAB/FM mode)
4. Up / Previous button
5. Down / Next button
6. Scan / OK button
7. Volume control
8. Radio station preset 5
9. Radio station preset 4
10. Radio station preset 3
11. Radio station preset 2, 12/24-hour format
12. Radio station preset 1, manual clock setting
13. Power ON/OFF
14. Sleep setting
15. Snooze / Dimmer
16. Alarm 2 view, setting or ON/OFF
17. Alarm 1 view, setting or ON/OFF
18. Battery compartment (3x AA)
19. Antenna
20. USB Power out 2
21. USB Power out 1
22. Power In (DC5V)
23. Speaker
Product information
•DAB tuning range:170-240MHz
•FM tuning range: 87.5-108MHz
•5 DAB preset stations & 5 FM preset stations
•Alarm timer: Dual alarm
•Alarm mode: DAB/Buzzer/FM
•Display: 3.5' LED display
•Speaker: 8Ω, 2W
•Backup battery: AA x 3PCS (not included)
•Power supply: DC-in 5V 2A
•Power out: 2 USB out power to other device
•operation power: 1W
•Antenna: Pigtail

Power Supply
To use the alarm clock you can either use batteries or connect the power supply. To
install batteries, open the battery compartment and inset 3x AA-size batteries. Close
the battery compartment after inserting the batteries.
To use the power supply please use a certified USB adapter to connect the DC5V (22)
–USB power cable.
Hour, Minute Setting
To set the time and date, press key (12), the hour digits start flashing, then press key
(4) or (5) to adjust the hour. Then, press key (12), so that the minute digits are
flashing, and press key (4) or (5) to adjust the minutes. Then press key (6) to save the
time.
Changing Between 12/24H Format
When the time is being displayed normally, press key (11) and then press key (4) or
(5) to change between 12/24H and press key (6) to save the time format.
Turning Alarm ON/OFF
When the time is being displayed normally, press key (17) to turn on/off alarm 1 and
press key (16) to turn on/off alarm 2. When alarm 1 is on, the symbol (…) appears,
and similarly for alarm 2. Press key (6) to save or wait until display stops flashing.
Set Alarm and Stop The Alarm
Press and hold key (17) for 3 seconds, and the hour digits of alarm 1 will flash on
screen. Then press key (4) or (5) to set alarm 1 to the desired hour. Pressing key (17)
again will cause the minute digits of alarm 1 to flash, and they can also be set using
key (4) or (5). Set alarm 2 in the same way, using key (16) instead of (17). When the
alarm is sounding, pressing key (15) will snooze the alarm, pressing key (16) or (17)
will stop the alarm.
Snooze Alarm ON/OFF
When the alarm is sounding, pressing key (15) will pause the alarm and active the
snooze function. The alarm symbol will flash. After 9 minutes, the alarm will sound
again. Pressing the alarm key will stop the alarm.
Setting Alarm Sound
By switching the alarm sound key (1) on “DR” will set the alarm sound on Digital Radio
with DAB+ tuning range. Set it on “Bz” to set the alarm sound on a normal Buzzer or
on “FM” to set it on FM Radio tuning range.
Sleep Timer
In radio mode, press (14) to activate the sleep timer. The display will show “SL.OF”,
this means the sleep timer is off. Press key (4) or (5) to choose between 90/60/30/15
minutes. Press key (6) to turn on the desired sleep timer. After the minutes of the
sleep timer chosen, the radio will automatically turn off accordingly.
Setting up DAB+ / FM Radio
Press key (13) to turn on the radio and press key (3) to switch to DAB+ or FM. Make
sure the alarm clock is placed to a window as close as possible, here you will get the
best connection. Fully extend the antenna and press and hold key (7) for 3 seconds.
The alarm clock will automatically scan and set DAB+ or FM channels. After scanning,
switch between channels by pressing key (4) or (5).
DAB+ RADIO NOTES:
Setting up the DAB+ radio channel can be a difficult process where you have to move
the antenna a lot to get the best connection. Bad signal is not due to the quality of the
alarm clock, but the location where you are situated. In some area’s DAB+
connections are better than others, and can even be improved by replacing the
antenna or alarm clock by just a few centimeters.
FM RADIO NOTES:
If you want to search FM stations manually, press and hold key (4) in FM radio mode.
The display shows ‘STEP’. Now press key (4) or (5) to select your desired radio
frequency.
Save Favorite Radio Stations
To save presets press and hold preset key (8), (9), (10), (11) or (12), while playing the
radio station, in DAB+ or FM mode, which you want to save. The radio station will be
saved on the preset key you hold. The next time, you can just press the preset key of
your desired radio station to set it immediately.
Adjusting Display Brightness
When the time is being displayed normally, press key (15) to adjust the brightness of
the display. There are 3 levels of display brightness.
Alarm Volume
Turn key (7) to set the volume of the alarm sound.
Charging Your Device
When the alarm clock is powered by the DC5V supply, it can charge a different device
with the two 5V USB ports on the back of the unit.
NOTE:
- When the device is powered by batteries, it can only charge for a few hours.
- When the DAB+ or FM Radio is on, it can’t power other devices.
Workday Mode Setting
Switch key (2) to set the alarm on days “1”, “5” or “7”accordingly:
“1” means the alarm will be set once.
“5” means the alarm will be set on Monday to Friday.
“7” means the alarm will be set on Monday to Sunday.

Maintenance and Storage
Keep the clock away from heat sources or humidity. Turn off the clock with the power
key and hold (13) for 5 seconds when the clock is not used for a long time.
Troubleshooting
No Power
•Ensure the power adapter is connected properly.
•Ensure the batteries are inserted correctly and are not empty.
•Press the power key (13) to turn on the alarm clock.
No Sound
•Ensure the volume is turned on by using the volume key (7).
•Ensure the alarm clock has a stable radio connection, read “Setting up DAB+
/ FM Radio” on the previous page to learn more.
Poor Radio Connection
•Setting up the DAB+ radio channel can be a difficult process where you have
to move the antenna a lot to find the best connection. Bad signal is not due to
the quality of the alarm clock, but the location where you are situated. Any
DAB+ radio receiver will have the same results. In some area’s DAB+
connections are better than others, and can even be improved by replacing
the antenna or alarm clock by just a few centimeters up, down or sideways.
•Ensure the DAB+ radio signal is strong enough
•Fully extend the antenna.
WARNING
There is presence of dangerous voltage within
the product’s enclosure, touching the inner parts
may result in a risk of electric shock to persons.
To reduce the risk of electric shock or fire, do not
open the cover. Refer servicing to qualified
service personnel.
NOTE:
We reserve the right to make technical changes without notice in the interest of improvement.
CAUTION
Danger of explosion if battery is incorrectly replaced. Replace only with the same or
equivalent type.
SAFETY PRECAUTIONS
1. Do not place any naked flame sources, such as lighted candles, on top of the appliance.
2. Do not place this apparatus in a closed bookcase or rack that obstructs ventilation.
3. The mains plug is intended as the primary means of disconnecting this apparatus from the
mains supply and shall remain readily operable at all times.
4. Ventilation should not be impeded by covering the ventilation openings of the unit with, for
example, newspapers, tablecloths, curtains, etc.
5. This apparatus shall not be exposed to dripping or splashing and objects filled with liquids, such
as vases, shall not be placed on the apparatus.
6. This apparatus shall not be exposed to direct sunlight, extreme high or low temperatures,
humidity, vibration, or dusty environments.
7. Do not use abrasive cleaners, benzene, thinner, or other chemical products to clean the cabinet
of this unit. Wipe the cabinet with mild soapy water and a soft, clean cloth.
8. Do not attempt to insert any cables, pins, or other objects into the openings or vents of this unit.
9. The batteries shall not be exposed to excessive heat such as sunshine or fire.
10. Do not attempt to open or repair this device.
ENERGY
1. Batteries inside speaker are only for back-up of clock and alarm settings. Not for portable use.
2. Never recharge the batteries provided and never throw them onto a fire.
3. Observe local regulations when disposing of batteries.
4. To power the device, use a certified USB wall adapter with an output voltage of less than 5V +/-
0.5V and an output current of between 1A - 2A.
This device meets the essential requirements and other
relevant conditions of the applicable European directive
2014/30/EU.
If possible, dispose of the device at a recycling centre. Do
not dispose of the device with the household waste.
WARRANTY
Freebird Products warrants that the product is at the time of original purchase free of defects. This
Limited Warranty for the product shall last for twelve (12) months from the date of original
purchase. This original warranty card and original invoice must be presented at the time you
require warranty service or such warranty will be voided. This limited warranty is valid only if the
product is used for the purpose for which it was designed. It does not apply to damages or loss
caused by negligence; physical abuse; misuse; accident; excessive exposure to water, exposure
to extreme temperatures; unauthorised modifications; unauthorised opening or repair; forces of
nature; or other actions beyond the reasonable control of Freebird Products. In case the warranty
does not apply, a repair or replacement charge will be incurred. The customer shall be responsi-
ble for sending the defective product to and collecting the repaired or replaced product from the
service centre.
Freebird Products reserves the right to interpret the terms and conditions contained herein; and
the right for any change without prior notice. Dutch law is applicable to all agreements to which
conditions apply whole or in past.
SUPPORT
Trouble shooting: fettleclub.com/support


NL - Handleiding
Model: DAB-A1
Deze wekker heeft een groot LED-display, gemakkelijk af te lezen, vooral voor
ouderen. Met de ingebouwde radio kunt u genieten van DAB + en FM-radio. De radio
kan worden ingesteld als alarm. U kunt twee wekkers instellen die op verschillende
tijdstippen afgaan.
Functies
1. Instelling van het alarmgeluid (DAB+/Buzzer/FM-radio)
2. Instelling van de alarmmodus (eenmalig/weekdagen/7 dagen)
3. Radio-instelling (DAB/FM-modus)
4. Omhoog / Vorige knop
5. Omlaag / Volgende knop
6. Scannen / OK-knop
7. Volumeregeling
8. Vooraf ingestelde radiozender 5
9. Vooraf ingestelde radiozender 4
10. Vooraf ingestelde radiozender 3
11. Vooraf ingestelde radiozender 2, 12/24-uursformaat
12. Vooraf ingestelde radiozender 1, handmatige instelling van de klok
13. Aan/uitschakelen
14. Slaapstand
15. Snooze / Dimmer
16. Alarm 2 weergave, instelling of AAN/UIT
17. Alarm 1-weergave, instelling of AAN/UIT
18. Batterijcompartiment (3x AA)
19. Antenne
20. USB-uitgang 2
21. USB-uitgang 1
22. Stroomvoorziening (DC5V)
23. Luidspreker
Product information
•DAB-bereik: 170-240MHz
•FM-bereik: 87,5-108MHz
•5 voorkeurzenders voor DAB en FM
•Wekker: Dubbel alarm
•Alarmmodus: DAB/Buzzer/FM
•Weergave: 3.5' LED-display
•Luidspreker: 8Ω, 2W
•Back-up batterij: AA x 3 st. (niet inbegrepen)
•Stroomvoorziening: DC-in 5V 2A
•Stroomuitval: 2 USB-uitgang naar ander apparaat.
•Vermogen: 1W
•Antenne: kabel

Stroomvoorziening
Om de wekker te gebruiken, kunt u batterijen gebruiken of de voeding aansluiten. Om
batterijen te plaatsen, opent u het batterij vak en plaatst u 3x AA-batterijen. Sluit het
batterij vak na het plaatsen van de batterijen.
Gebruik om de voeding te gebruiken een gecertificeerde USB-adapter om de DC5V
(22) - USB-voedingskabel aan te sluiten.
Om het apparaat uit te schakelen, houdt u de toets (13) 5 seconden ingedrukt.
Tijdinstelling
Om de tijd en datum in te stellen drukt u op toets (12), de uurcijfers beginnen te
knipperen, vervolgens drukt u op toets (4) of (5) om het uur in te stellen. Druk op toets
(12), zodat de minuutcijfers knipperen, en druk op toets (4) of (5) om de minuten aan
te passen. Druk vervolgens op toets (6) om de tijd op te slaan.
Wisselen tussen 12/24-uurs indeling
Wanneer de tijd normaal wordt weergegeven, drukt u op toets (11) en vervolgens op
toets (4) of (5) om te wisselen tussen 12 / 24H en op toets (6) om het tijdformaat op te
slaan.
Alarm AAN/UIT zetten
Wanneer de tijd normaal wordt weergegeven, druk op toets (17) om alarm 1 aan / uit
te zetten en druk op toets (16) om alarm 2 aan / uit te zetten. Wanneer alarm 1 aan is,
verschijnt het symbool (...) en dat zelfde voor alarm 2. Druk op toets (6) om op te
slaan of wacht tot het display stopt met knipperen.
Alarm Instellen
Houd toets (17) 3 seconden ingedrukt en de uurcijfers van alarm 1 knipperen op het
scherm. Druk vervolgens op toets (4) of (5) om alarm 1 op het gewenste uur in te
stellen. Door nogmaals op toets (17) te drukken, gaan de minutencijfers van alarm 1
knipperen, deze kunnen ook met toets (4) of (5) worden ingesteld. Stel alarm 2 op
dezelfde manier in met toets (16) in plaats van (17). Als het alarm afgaat, zal het
indrukken van toets (15) het alarm in sluimerstand zetten, door op toets (16) of (17) te
drukken zal het alarm stoppen.
Snooze Alarm AAN/UIT
Als het alarm klinkt, kunt u op de toets (15) drukken om het alarm te onderbreken en
de sluimerfunctie te activeren. Het alarmsymbool gaat knipperen. Na 9 minuten klinkt
het alarm opnieuw. Door op de alarmtoets te drukken, stopt het alarm.
Instellen Alarm Geluid
Door de alarmgeluidtoets (1) op “DR” te zetten, wordt het alarmgeluid op digitale radio
met DAB + bereik ingesteld. Zet het op "Bz" om het alarmgeluid in te stellen op een
normale zoemer of op "FM" om het in te stellen op het bereik van FM-radio.
Slaaptimer
Druk in de radiomodus op (14) om de slaaptimer te activeren. Op het scherm wordt
"SL.OF" weergegeven, dit betekent dat de slaaptimer is uitgeschakeld. Druk op toets
(4) of (5) om te kiezen tussen 90/60/30/15 minuten. Druk op toets (6) om de gewenste
slaaptimer in te schakelen. Na het gekozen aantal minuten van de slaaptimer zal de
radio automatisch uitschakelen.
Installeren DAB+ / FM Radio
Druk op toets (13) om de radio aan te zetten en druk op toets (3) om over te
schakelen naar DAB + of FM. Zorg ervoor dat de wekker zo dicht mogelijk bij een
raam staat, hier krijg je de beste verbinding. Strek de antenne volledig uit en houd de
toets (7) 3 seconden ingedrukt. De wekker scant automatisch en stelt DAB + of FM-
kanalen in. Schakel na het scannen tussen kanalen door op toets (4) of (5) te drukken.
DAB+ RADIO OPMERKING:
Het instellen van het DAB + signaal kan een moeilijk proces zijn, waarbij u de antenne
veel moet verplaatsen voor de beste verbinding. Slecht signaal is niet te wijten aan de
kwaliteit van de wekker, maar aan de locatie waar u zich bevindt. In sommige
gebieden zijn DAB+ verbindingen beter dan in andere en kunnen zelfs worden
verbeterd door de antenne of wekker slechts enkele centimeters te verplaatsen.
FM RADIO OPMERKING:
Als u handmatig naar FM-zenders wilt zoeken, houdt u de toets (4) ingedrukt in de
FM-radiomodus. Het display toont ‘STEP’. Druk nu op toets (4) of (5) om de gewenste
radiofrequentie te kiezen.
Favoriete Radiostations Opslaan
Om de voorkeurzenders op te slaan, houdt u de voorkeuzetoets (8), (9), (10), (11) of
(12) ingedrukt terwijl u de radiozender afspeelt in de DAB + of FM modus. De
radiozender wordt opgeslagen onder de voorkeurzendertoets die u ingedrukt houdt.
De volgende keer kunt u gewoon op de voorkeurtoets van uw gewenste radiostation
drukken om deze onmiddellijk in te stellen.
Display Helderheid
Als de tijd normaal wordt weergegeven, drukt u op de toets (15) om de helderheid van
het display aan te passen. Er zijn 3 helderheidsniveaus.
Alarmvolume
Draai aan de toets (7) om het volume van het alarmgeluid in te stellen.
Apparaten Opladen
Wanneer de wekker wordt gevoed door de DC5V-voeding, kan hij een ander apparaat
opladen door middel van de 5V USB-poorten aan de achterkant van het apparaat.
OPMERKING:
- Als het apparaat op batterijen werkt, kan het slechts enkele uren worden opgeladen.
- Als de radio is ingeschakeld, kan deze geen stroom leveren aan andere apparaten.

Dag Modusinstelling
Gebruik toets (2) om het alarm op dagen "1", "5" of "7" in te stellen:
"1" betekent dat het alarm één keer wordt ingesteld.
"5" betekent dat het alarm wordt ingesteld op maandag tot en met vrijdag.
"7" betekent dat het alarm wordt ingesteld op maandag tot en met zondag.
Maintenance and Storage
Keep the clock away from heat sources or humidity. Turn off the clock with the power
key and hold (13) for 5 seconds when the clock is not used for a long time.
Voorkomende Problemen
Geen Stroom
•Zorg ervoor dat de stroomadapter correct is aangesloten.
•Zorg ervoor dat de batterijen correct zijn geplaatst en niet leeg zijn.
•Druk op de aan / uit-toets (13) om de wekker in te schakelen.
Geen Geluid
•Zorg ervoor dat het volume is ingeschakeld met de volumetoets (7).
•Zorg ervoor dat de wekker een stabiele radioverbinding heeft, lees "DAB + /
FM-radio instellen" op de vorige pagina voor meer informatie.
Slechte radioverbinding
•Het instellen van het DAB + radiokanaal kan een moeilijk proces zijn, waarbij
u de antenne veel moet verplaatsen om de beste verbinding te vinden. Slecht
signaal is niet te wijten aan de kwaliteit van de wekker, maar aan de locatie
waar u zich bevindt. Elke DAB + radio-ontvanger zal dezelfde resultaten
hebben. In sommige gebieden zijn de DAB + -verbindingen beter dan in
andere en kunnen ze zelfs worden verbeterd door de antenne of wekker een
paar centimeter omhoog, omlaag of opzij te vervangen.
•Strek de antenne volledig uit.
Waarschuwing
Aanwezigheid van gevaarlijke spanning binnenin de
behuizing van dit product; het aanraken van de onderdelen
binnenin kan leiden tot elektrische schokken bij mensen.
Om een risico op elektrische schokken of brand te
voorkomen mag de behuizing niet worden geopend. Laat
alle onderhoud over aan een gekwalificeerde elektricien.
OPMERKING
In het belang van verbetering behouden wij ons het recht voor om zonder
voorafgaande kennisgeving technische aanpassingen te doen.
WEES VOORZICHTIG
Ontploffingsgevaar wanneer de batterij verkeerd of een ongeschikte batterij is ingezet.
Vervang uitsluitend door een batterij van hetzelfde of gelijkaardige type.
VEILIGHEIDSVOORZORGEN
1. Zet geen naakte vlam zoals van brandende kaarsen bovenop het apparaat neer.
2. Zet dit apparaat niet in een gesloten boekenkast of rek waardoor de ventilatie belemmerd wordt.
3. De stroomkabel doet dienst als hoofdmiddel om dit apparaat van de netvoeding los te koppelen en
dient te allen tijde bereikbaar te zijn.
4. De ventilatie mag niet belemmerd worden door de ventilatieopeningen van het apparaat af te dekken
met bijvoorbeeld kranten, tafelkleden, gordijnen enz.
5. Dit apparaat mag niet worden blootgesteld aan druppelende of spattende vloeistof en voorwerpen die
met water gevuld zijn, zoals vazen, mogen niet op dit apparaat worden neergezet.
6. Dit apparaat mag niet worden blootgesteld aan rechtstreeks zonlicht, extreem hoge of lage
temperaturen, vochtigheid, trilling of omgevingen met veel stof.
7. Gebruik geen schuurmiddelen, benzeen, thinner of andere chemische producten om de behuizing
van dit apparaat te reinigen. Veeg de behuizing schoon met een mild sopje en een zachte, schone doek.
8. Probeer in geen geval kabels, pinnen of andere voorwerpen in de openingen of ventilatiesleuven van
dit apparaat te stoppen.
9. De batterijen mogen niet worden blootgesteld aan overmatige hitte zoals van zonneschijn of vuur.
10. Probeer dit apparaat niet te openen of te repareren.
ENERGIE
1. Batterijen in de wekker dienen alleen als back-up voor de wekker en de alarminstellingen. Ze zijn niet
bedoeld om het apparaat als draagbaar apparaat te gebruiken.
2. Laad de meegeleverde batterijen nooit opnieuw op en werp deze nooit in open vuur.
3. Neem de plaatselijke richtlijnen in acht als u zich van de batterijen ontdoet.
4. Gebruik een gecertificeerde USB-wandadapter met een uitgangsspanning van minder dan 5V +/-
0,5V en een uitgangsstroom van tussen de 1A –2A.
Dit product is in overeenstemming met de
harmonisatiewetgeving en –normen van de Europese
richtlijn 2014/30/EU.
Lever het apparaat indien mogelijk na gebruik in bij een
inzamelplaats voor hergebruik. Gooi het apparaat niet weg
bij het huishoudafval.
GARANTIE
Freebird Products garandeert dat het product op het moment van de oorspronkelijke aankoop vrij
is van gebreken. Deze beperkte garantie voor het product duurt twaalf (12) maanden vanaf de
datum van de oorspronkelijke aankoop. Deze originele garantiekaart en de originele factuur
moeten worden getoond op het moment dat u de garantieservice nodig heeft, anders vervalt deze
garantie. Deze beperkte garantie is alleen geldig als het product wordt gebruikt voor het doel
waarvoor het is ontworpen. De garantie is niet van toepassing op schade of verlies veroorzaakt
door nalatigheid, fysiek misbruik, verkeerd gebruik, ongevallen, overmatige blootstelling aan
water, blootstelling aan extreme temperaturen, ongeoorloofde wijzigingen, ongeoorloofde opening
of reparatie, natuurkrachten of andere handelingen die buiten de redelijke controle van Freebird
Products vallen. De klant is verantwoordelijk voor het opsturen van het defecte product naar en
het ophalen van het gerepareerde of vervangende product bij het servicecentrum.
Freebird Products behoudt zich het recht voor om de hierin opgenomen voorwaarden te
interpreteren; en het recht voor elke wijziging zonder voorafgaande kennisgeving. Op alle
overeenkomsten waarop voorwaarden van toepassing zijn of waren, is Nederlands recht van
toepassing.
SERVICE
Trouble shooting: fettleclub.com/support

CONTACT
FettleLife® is a registered trademark owned by Freebird Products. Leiderdorp, The Netherlands, All
rights reserved. Warranty & legal terms: http://www.fettleclub.com/terms.
Freebird Products® reserves the right to interpret the terms and conditions contained herein; and the
right for any change without prior notice. Dutch law is applicable to all agreements to which conditions
apply whole or in past.
ADDRESS
Freebird Products
Van der Valk Boumanweg 180D
2352JD LEIDERDORP
Zuid-Holland, The Netherlands
For more detailed information or questions, please send us a message on info@freebirdproducts.com.

Table of contents
Languages:

