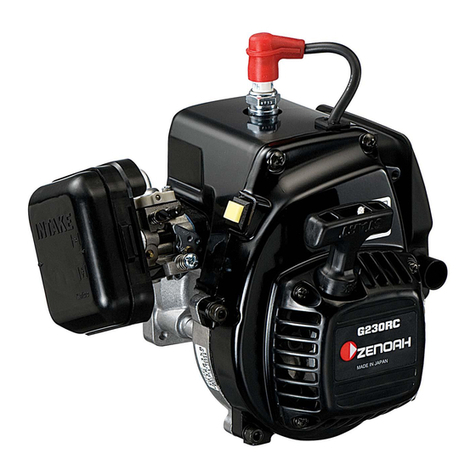
FG Modellsport G230RC1 User manual

We deliver our 1:5 On-Road and 1:6 Truck models with standard air filter including factory oiled filter insert. This filter is sufficient for
the use on tracks with low formation of dust. To be on the safe side we recommend to change or rather clean the foam filter inserts and
oil them with the filter oil 06441. According to the higher formation of dust we standard equipped the 1:6 Off-Road models with the FG
Off-Road inlet air filter with oiled filter insert. Corresponding to the formation of dust you have to clean and oil the filter inserts of these
Off-Road filters, too.
Further inlet silencers, filter oils a.s.o. for FG models and other brands you will find in our main catalog on the pages 49, 132-135.
1. Fuel
For the correct fuel mixture we recommend to use Super Plus fuel together with a high-quality 2stroke oil f.e. Item N°. 08559 FG Panolin Racing
Oil. The mix ratio of the fuel ought to be around 1:25. Do not store fuel mixtures longer than 4-6 weeks as afterwards certain components of the
mixture may decompose. This could cause a reduction of the lubricating effect which results in higher wear and less power. First fill the oil into the
canister, then the fuel.
Mix ratio 1:25: 1Liter Super Plus - 40ml oil
5Liter Super Plus - 200ml oil
2. Initial operation of the engine
Before each starting up of the engine check the air filter on dirt and correct and firm seating. Test the engine for leaks at manifold, cylinder foot
and carburetor-insulator area. Should the engine be slightly greasy or damp we recommend to replace the gasket. The basic adjustment of the
engine is preset by the factory.
3. Starting the cold engine
Close the carburetor throttle valve and bring it into neutral position. Now shut the choke flap at carburetor or air filter (Zenoah G230/G260RC and
Chung Yang). Press the primer pump at the carburetor until it is filled with fuel. Pull the rope starter slowly until you feel the first resistance, then
pull strongly until the engine ignites audible. Normally the engine will die down again after the initial start. Now open the choke flap and pull the
rope starter once again until the engine runs.
4. Starting the warm engine
Keep the choke flap open, press the primer pump until it is filled with fuel and actuate the rope starter. To turn the engine off, press the stop but-
ton until the engine stops.
5. Carburetor adjustment
The carburetor adjustment is preset by the factory according to the local conditions. Depending on air filter, exhaust silencer and usage site a cor-
rection may be necessary. Operate the engine until it has reached its working temperature. If the engine decelerates a little during the accelerati-
on, then it runs too lean. In this case turn the no-load adjusting screw L (1/8 rotation) anticlockwise. If the engine revs up only slowly stammering
and under clouds of smoke, then the engine probably runs with an overrich mixture. In that case turn the no-load adjusting screw L (1/8 rotation)
clockwise. In order to adjust the maximum range of speed, lift the rear wheels and operate the engine under hot running conditions shortly at full
speed. Now you can turn the full-load adjusting screw H to the left (if the mixture is too lean) or to the right (overrich mixture).
ATTENTION! Operate the engine under no-load conditions only shortly at the maximum speed range. In most cases the no-load adjusting screw
has to be readjusted if the adjustments of the engine were modified.
6. Basic adjustment of the carburetor
The declared values are reference values. In some cases a re-adjusting may be necessary. If you have the feeling that the adjusting screws L or H
are completely misadjusted, then close both adjusting screws carefully in clockwise direction. Afterwards open both adjusting screws L and H
around 1,25 – 1,5 rotations anticlockwise.
Avoid maximum speed ranges under no-load conditions during the first two tank fillings and with a cold engine, also longer full-speed drives. Be-
fore the first operation we also recommend to check the effective radius of the radio control system with running engine. A disturbance through
the ignition system is possible. To suppress the interference we recommend to use our shielded spark plug cap Item N°. 07328/05.
Never operate the engine in closed rooms without sufficient ventilation. Further safety instructions are enclosed with the engines.
FG engine instruction 23ccm, 26ccm and 29ccm engines

Zenoah-Motor
Zenoah engine
Pumpe
Primer
Kurzschlussschalter
Ignition switch
Luftfilter
Air filter
Isolator
Insulator
Vergaser
Carburetor
Choke-Hebel
Choke lever
Volllast-Gemischschraube H
Full-load adjusting screw H
Leerlauf-Gemischschraube L
No-load adjusting screw L
Standgasschraube
Neutral gear adjusting screw
Zündkerze
Spark plug
Motorgehäuse mit Befestigungsschraube
Engine housing with fixing screw
Startergehäuse mit Befestigungsschraube
Starter housing with fixing screw
Startergriff
Pull start
Starting of an overriched engine:
If you realize already when starting that the engine or the piston blocks, then the spark plug has to be taken out. Dry the wet spark plug with the
flame of a lighter or of a small gas burner. Bring the engine in neutral position (carburetor closed) and pull the rope repeatedly without mounted
spark plug. Screw in the hot spark plug, plug on the socket and pull the rope without the choke. If the spark plug appears wet again, remove the
fuel pipe from the carburetor and seal it. Then repeat the above described procedure. After the engine has started, let it run shortly, then switch
it off and attach the fuel pipe at the carburetor again. Then start the engine as usual.
Cleaning jobs at 1:6 Buggy and Monster models:
If you drive the models mostly off-road we recommend to control the air filter after each fill-up. If you still can see the oiled foam surface all-over
the complete outline, the air filter foam can be used furthermore.
If the surface is covered with a dirt film the foam filter has to be exchanged. Rinse the foam filter with washing-up liquid (always from inside to
outside), let it dry, check it on fissures and lubricate it with oil again. The most simple way to lubricate the foam filter is to seal the boring of the
foam filter with your thumb and fill it completely with air filter oil Item N°. 06441. Then press the foam carefully together until the whole foam is
completely drenched in oil. Remove surplus oil through kneading with a tissue or a cloth.
After rides on grass it’s imperative to demount the engine housing of the cylinder in order to remove the grass between the cylinder cooling fins.
If you don’t follow this instruction there may be the risk that not enough cooling air can circulate around the cylinder. This can lead to a signifi-
cant loss of power or even to a jamming of the piston. In order to make the cleaning procedure easier without dismounting the engine the gui-
ding rails at the engine housing can be removed. To take the engine housing off just remove the 2 fixing screws.
Control the starter housing too if in-coming grass surrounds the starter housing. The ventilation openings of the starter housing have to be com-
pletely cleansed to make sure that enough cooling air can be ingested again.
After rides under wet conditions f. e. rain or after cleaning the model with water we recommend to detach the clutch and free the fixing screws
as well as the clutch blocks from water. Otherwise it could be possible that fretting corrosion occurs which affects the correct function of the
clutch. It has turned out as helpful to lubricate the fixing screws slightly with copper paste (do not use too much paste, otherwise grease may
get on the clutch blocks).
FG insider tips

Sooting of the spark plug:
If you drive your model over a longer period only very slow this may result in a sooting of the spark plug. The consequences are spark failures,
as the case may be the engine can not be started anymore. Combustion residues occur at the bottom of the insulator. The ignition voltage is
now transmitted over the conductive soot film to the ground at the plug thread, but without the desired ignition spark (therefore very small or
weak ignition spark). In this case we recommend to lift the rear wheels of the model and speed up to full throttle repeatedly for a few moments.
This secures that the soot residues are combusted again according to the arising higher temperature. Possibly the spark plug has to be unscre-
wed and cleaned (see picture). In that case proceed as follows: Unscrew the spark plug and press the spark plug socket on the spark plug. Hold
the outside thread of the spark plug with a bared flat pliers against the cylinder and activate the engine with the rope. Now you should be able
to see an ignition spark clearly at the spark plug. If no ignition spark is visible and the annular passage is still highly sooted we recommend to
remove the sedimented oil carbon (sooting) between insulator and housing with a steel needle. Then rinse the annular passage with FG Cleaning
Spray and let it air. Mount the spark plug back in the engine and start it.
Afterwards operate the engine a few seconds at full throttle so that the spark plug is cleaned. For the further use of the engine please see to a
correct carburetor adjustment. Don’t adjust the engine too rich as then the same problem may occur again (see instruction 5. carburetor adjust-
ments). If you operate your model often at low throttle we also recommend to use the FG spark plug 07343/06. This spark plug has a higher
heat range and therefore it reduces the sooting.
Engine has spark failures or no ignition spark:
Check the connection between spark plug and spark plug socket. The spark plug socket must sit firm on the spark plug. If that’s not the case re-
place the spark plug socket against a new one.
Increased and irregular idle speed:
The engine has an irregular increased idle speed. Furthermore it’s very difficult or rather impossible to adjust the carburetor. In that case we re-
commend to check the condition of insulator and carburetor gasket, exchange defective parts if necessary.
Table of contents
Other FG Modellsport Engine manuals
