FIAM. x1R User manual

user guide
Electronic lock for security doors
x1R

2
Dear Customer,
The door is equipped with an electronic lock with a motor-driven bolt closing mechanism
with built-in digital control.
FIAM’ s research and experience have led to the development of a product that offers the
state of the art in terms of security and reliability. To find out all about this product and
make the best use of all it has to offer, read this booklet and keep it handy. It will come in
useful again whenever you want to reprogram or check your access, as well for doing
ordinary maintenance and solving any problems.
WHAT IS YOUR X1R ELECTRONIC LOCK AND HOW DOES IT FUNCTION:
Your door is an intelligent door. That is because the x1R is a lock with more than the
traditional key mechanism, although that is also always available just in case there is a power
cut or any electric or electronic breakdown or damage, as it also offers electronically
controlled management of the opening of your security door. The door is locked
automatically as soon as it is closed.
This concept summarises countless performances that you can get from the x1R: these will be
illustrated simply and intuitively in the pages of this manual.

3
GENERAL PLAN OF THE SYSTEM
1
2
3
4
Battery
holder
x.Key
transponder (TAG)
radio-control
External plaques
Spring
latch
Internal plaques
5
1A
1B
6.26.3
6.1
6

4
EXTERNAL PLAQUE
This term is used to define the electronic checks that use various technologies to allow the user access to the room us-
ing an encrypted “code” that generates an electrical impulse that allows the door to be opened. The lock can be con-
trolled using two different access systems:
TAG (Transponder – RFID).
• Instruction from page 5 to page 12.
Numerical Keypad with built-in TAG reader.
• Instruction from page 13 to page 20.
In addition the door can be controlled
using a radio-control .
• Instruction from page 21 to page 25.
Follow the specific instructions for the system fitted on your door.
NOTE:
For both versions, circuits or other components are housed in the external plaques, and if these are intercepted in
case of an attempted violation, they can cause the lock to open.
INTERNAL PLAQUES:
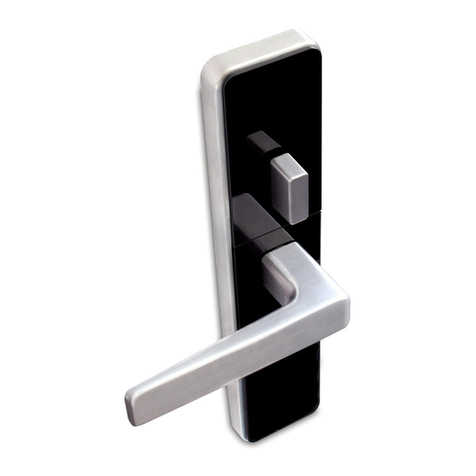
The internal plaque houses two keys for opening and closing the lock by means of a mo-
tor built into it.
Push the green to open the door. When the (smaller) black key is pushed, this causes the link-
ages to move out quickly, and consequently the door is closed.
However, for normal use for which the lock is programmed in the factory (operating mode 1)
x1R independently and automatically sees to making your door safe, guaranteeing maximum
peace of mind at all times.
The two keys are also used for programming the operating functions. This plaque is equipped
with an LED and a buzzer to provide an acoustic signal.
2
6
1B
1A
1
GENERAL PLAN OF THE SYSTEM

5
Read this chapter carefully to ensure that your security door functions
correctly and guarantees your maximum security.
Both the manufacturer and the installer of your door have used standard-
ised TAG to run the preliminary and final on-site tests. Now, in order to
guarantee your maximum security, you must OF NECESSITY personalise y-
our electronic keys .
If your needs so demand, up to a maximum of 128 TAG keys can be pro-
grammed.
Once you have completed your personal registration, the keys used
by your door’s manufacturer and installer will be cancelled auto-
matically from the electronic memory, so no unauthorised person
will be able to access your home. The ones that you have registered
will be the only keys capable of opening your lock.
PRELIMINARY PHASE: ACTIVATING THE NEW KEYS
You must register at least one of the TAG keys supplied as the “master
key”, while all the others will be registered at the level of “service”.
The TAG “master keys” enable their holder to:
• open the lock
• access the programming
• change the functioning mode
• activate new master keys
• activate and deactivate the service keys
• reset the memory completely
Once they have been activated, the “service” TAG keys enable their holder to:
• open the lock
NOTE:
We strongly recommend that you register at least two TAG “master keys”,
as they are the only ones that enable their holder to access the program-
ming function, so make any changes to the list of activated TAG keys.
If your master key is lost or stolen, you can use your duplicate TAG mas-
ter key to waste no time changing the complete list of activated keys, in-
cluding the service keys, so that the old master key that was lost or stolen
cannot be used to open your door any more.
To facilitate transport and have it instantly available when the need arises,
you can house the mechanical key used to open your door in case of a
power cut or electric or electronic breakdown inside the TAG. If the electronic
keys that have been supplied to you are not suitable for this option, ask y-
our dealer for more information.
4
BASIC PROGRAMMING
SYSTEM WITH TAG TRANSPONDER

6
ACTIVATING THE TAG “MASTER KEY”:
access the “programming” facility
A. with the door open, press the spring latch , with one finger and keep
it pressed, then bring any TAG (of those supplied) close to the receiver
located on the external plaque (fig. 1).
B. the acoustic alarm will emit a scale of rising sounds to tell you that the
lock is in the “programming” mode.
The lock will only remain in programming mode as long as you keep
the spring latch pressed. If you release the spring latch, you will auto-
matically leave the programming mode.
C. so, while keeping the spring latch , constantly pressed all the time, now
press the black and green buttons located on the internal plaque
(fig. 2) at the same time and keep them pressed for at least two sec-
onds. The acoustic alarm will emit one long tone to confirm.
D. now chose any of the TAG x.Keys supplied and bring it close to the receiver
located on the external plaque . The acoustic alarm will emit two short
tones to confirm programming of the TAG as the “master key”.
release the pressure on the spring latch to exit the programming mode.
ACTIVATING THE “SERVICE” TAGS:
access the “programming” facility
A. With the door open, hold spring latch down with one finger and
bring the TAG programmed before at a “master” level near the receiv-
er on the external plaque (fig. 1).
B. the acoustic alarm will emit a scale of rising sounds to tell you that the
lock is in the “programming” mode.
The lock will only remain in programming mode as long as you keep
the spring latch pressed. If you release the spring latch, you will auto-
matically leave the programming mode.
C. so, while keeping the spring latch constantly pressed all the time,
now press the black button located on the internal plaque (fig. 3).
and keep it pressed for at least one second: the buzzer emits just one short
tone (1 beep). Every TAG that you bring close to the receiver (fig. 1) will
be registered at the “service” level. The buzzer confirms programming
of each TAG by means of a short sound (1 beep). Once the program-
ming phase has been completed, proceed to enabling all the TAGs pro-
grammed at a “service” level, by holding down for at least one second
the black button on internal plaque (fig. 3). The buzzer emits two
brief sounds (2 beeps).
NOTE:
If at the start of phase C the buzzer emits TWO short sounds (2 beeps) press
the black key again so that the buzzer only emits ONE short sound (1
beep), confirming that the lock is now set up for programming new “ser-
vice” TAGS
release the pressure on the spring latch to exit the programming mode.
P5
p
2
2
5
1
5
P5
1
2
5
1
5
p
BASIC PROGRAMMING
FIG.1
FIG.2
FIG.3

7
BASIC PROGRAMMING
NOTE:
deciding about to whom you will entrust your master TAG and service
TAG is entirely a question of the hierarchies you intend to activate. Con-
sidering that the master TAG , as we already pointed out, both has the or-
dinary function of opening the door and is capable of accessing every
type and degree of programming level, it must obviously be used and
kept by the home owner.
In addition, remember that the master TAG can also exclude access for
one or more service TAG , while the opposite cannot happen.
For example, the owner of the average family home may want to entrust
a service TAG to the maid.
So if you want to block free access during a period when you are away from
home, all you have to do is disable the consent for the TAG held by your
maid to be used from the electronic memory. Although she still has the key,
it will be deactivated. You will be able to reactivate its use if necessary
when you return (see page 10).
ACTIVATING OTHER “MASTER TAGS”:
access the “programming” facility
A. with the door open, press the spring latch , with one finger and keep
it pressed, then bring the transponder previously registered as the “mas-
ter TAG ” close to the receiver located on the external plaque (fig. 1).
B. the acoustic alarm will emit a scale of rising sounds to tell you that the
lock is in the “programming” mode.
The lock will only remain in programming mode as long as you keep
the spring latch pressed. If you release the spring latch, you will auto-
matically leave the programming mode.
C. so, while keeping the spring latch , constantly pressed all the time, press
the black button located on the internal plaque (fig. 3) and keep it
pressed for at least one second: The buzzer emits two short sounds (2
beeps).
NOTE:
If the buzzer only emits one short sound (1 beep), press the black key a-
gain so that the buzzer emits TWO short sounds (2 beeps) confirming that
the lock is now set up for programming new “master” level TAGS.
D. The TAG moved close to the reader on the external plaque (fig. 1) is
therefore programmed at “master2 level. As long as it remains in this s-
tatus, or until spring latch is released, any other TAG that is brought
near the reader will be programmed at “master” level.
release the pressure on the spring latch to exit the programming mode.
P5
5
1
2
5
1
5
p
FIG.1
FIG.3

8
The FIAM x1R electronic key functions very simply:
From outside the home, when you bring the TAG x.Key close to the read-
ing area located on the external plaque (fig. 4)), the lock will open and
you can access the interior. If the functioning criteria have been programmed
to do this, the door will be locked automatically when you close the door.
There are other options for exiting through the door:
• press the the green key located on the internal plaque (Fig. 5)
• press a remote button (optional) which can be located also remote from
the door (for example, the interphone key or an ordinary button)
• through the mechanical key
NOTE:
remember that the FIAM x1R electronic lock can function always and in any
case, including critical cases, from both outside and inside, with the aid of
the mechanical key, which can be transported inside the TAG.
FUNCTIONING METHODS
The functions and performances of the FIAM x1R electronic lock can be
programmed in five different modes:
Mode 1: when the command to open is given, the lock withdraws the
bolts and holds back the spring latch, giving access to the interior. Once it
has opened the lock and the door, the spring latch will be released. Later,
when the door is closed again, the lock will automatically shoot the bolts.
Mode 2: when the command to open is given, the lock withdraws the
bolts but not the spring latch, which must be held back with the handle or
the mechanical key to give access to the interior. Later, when the door is
closed again, the lock will automatically shoot the bolts.
Mode 3: when the command to open is given, the lock withdraws the
bolts and holds back the spring latch, giving access to the interior. Once it
has opened the lock and the door, the spring latch will be released. Later,
when the door is closed again, the lock will not automatically shoot the
bolts. This means that the lock must be closed mechanically.
Mode 4: when the command to open is given, the lock withdraws the
bolts but not the spring latch, which must be held back with the handle or
the mechanical key to give access to the interior. Later, when the door is
closed again, the lock will not automatically shoot the bolts. This means
that the lock must be closed mechanically.
Mode 5: when the command to open is given, the lock withdraws the
spring latch only, giving access to the interior. In this functioning mode, the
bolts can only be opened and closed using the mechanical key in the cylin-
der.
NOTE:
you can monitor and check the condition of your door’s functions at any
moment: all you have to do is press the green and black keys on the in-
ternal plaque at the same time: the buzzer will emit a number of tones
(beeps) equivalent to the mode chosen from the list on this page.
2
1
HOW IT WORKS
FIG.4
FIG.5

9
CHANGING AND SETTING THE FUNCTIONING MODE
When the lock comes out of the factory, it is set to function in mode 1. To
change the functioning mode, you must:
access the “programming” facility
A. with the door open, press the spring latch with one finger and keep
it pressed, then bring the “master” TAG close to the receiver located on
the external plaque (fig. 1).
B. the acoustic alarm will emit a scale of rising sounds to tell you that the
lock is in the “programming” mode.
The lock will only remain in programming mode as long as you keep
the spring latch pressed. If you release the spring latch, you will auto-
matically leave the programming mode.
C. so, while keeping the spring latch constantly pressed all the time, now
press press the green key located on the internal plaque (fig 6) for at
least one second to modify the functioning mode. The buzzer emits a
number of short sounds (beeps) that corresponds to the operating mode.
D. Each time the green key is pressed you move on to the next mode.
For example: If when the green key is pushed the buzzer emits three short
sounds (three beeps), this means that the lock is in mode 3, in which case,
to change to mode 5, simply press the green key twice.
NOTE:
the functioning mode can only be changed by increasing it, i.e., from 1 to
2, from 2 to 3 and so on. After mode 5, you can return to mode 1 by press-
ing button green again.
release the pressure on the spring latch to exit the programming mode.
5
P
p
2
5
1
5
HOW IT WORKS
FIG.6
FIG.1

10
MANAGING THE TAG KEYS
The electronics used by the FIAM x1R locks enables you to manage all the TAG
used simply, rapidly and in complete security.
You can deactivate and reactivate the “service” TAG , also temporarily, add
or remove TAG from the list in use or cancel all of them.
To deactivate ALL the “service” TAG , you must:
access the “programming” facility
A. with the door open, press the spring latch with one finger and keep
it pressed, then bring the transponder registered as the “master TAG ”
close to the receiver located on the external plaque (fig. 1).
B. the acoustic alarm will emit a scale of rising sounds to tell you that the
lock is in the “programming” mode.
the lock will only remain in programming mode as long as you keep
the spring latch pressed. If you release the spring latch, you will auto-
matically leave the programming mode.
C. so, while keeping the spring latch constantly pressed all the time,
now press the black button located on the internal plaque (fig. 3)
for at least one second so that the buzzer emits 1 short tone (1 beep).
Warning: All the “service” TAGS are now disabled for opening the lock,
but are still stored in the electronic memory.
This operation simultaneously disables all the “service” numerical
codes as well and all the radio-controls in use.
release the pressure on the spring latch to exit the programming mode.
To reactivate ALL the “service” TAG , you must:
access the “programming” facility
A. with the door open, press the spring latch with one finger and keep
it pressed, then bring the transponder registered as the “master TAG ”
close to the receiver located on the external plaque (fig. 1).
B. the acoustic alarm will emit a scale of rising sounds to tell you that the
lock is in the “programming” mode.
The lock will only remain in programming mode as long as you keep
the spring latch pressed. If you release the spring latch, you will auto-
matically leave the programming mode.
C. so, while keeping the spring latch constantly pressed all the time,
now press the black button located on the internal plaque (fig 3) ) for
at least one second so that the buzzer emits 2 short tones (2 beeps).
All the “service” TAGS in the electronic memory have now been re-en-
abled to open the lock
This operation simultaneously re-enables all the “service” numerical
codes as well and all the radio-controls in use.
release the pressure on the spring latch to exit the programming mode.
5
P
p
5
P
2
5
1
5
p
2
5
1
5
BASIC PROGRAMMING
FIG.1
FIG.3

11
To definitively cancel ONE or MORE transponder TAG , you must:
access the “programming” facility
A. with the door open, press the spring latch with one finger and keep
it pressed, then bring the transponder registered as the “master TAG ”
close to the receiver located on the external plaque (fig. 1).
B. the acoustic alarm will emit a scale of rising sounds to tell you that the
lock is in the “programming” mode.
The lock will only remain in programming mode as long as you keep
the spring latch pressed. If you release the spring latch, you will auto-
matically leave the programming mode.
C. so, while keeping the spring latch constantly pressed all the time,
bring the TAG keys to be cancelled close to the reader located on the
external plaque (fig. 1), one at a time. Each time a TAG is cancelled
from the memory list, the buzzer will confirm by emitting 3 short tones
(3 beeps).
release the pressure on the spring latch to exit the programming mode.
To definitively cancel ALL the TAG keys (complete reset), you must:
access the “programming” facility
A. with the door open, press the spring latch with one finger and keep
it pressed, then bring the transponder registered as the “master TAG ”
close to the receiver located on the external plaque (fig. 1).
B. the acoustic alarm will emit a scale of rising sounds to tell you that the
lock is in the “programming” mode.
The lock will only remain in programming mode as long as you keep
the spring latch pressed. If you release the spring latch, you will auto-
matically leave the programming mode.
C. so, while keeping the spring latch constantly pressed all the time,
now press green and black buttons located on the internal plaque (fig.
2) at the same time for at least two seconds. The acoustic alarm will emit
one long tone to confirm.
This operation simultaneously deletes all the numerical codes as
well and all the radio-controls in use.
release the pressure on the spring latch to exit the programming mode.
5
P
1
5
p
5
P
p
2
5
1 4
5
1
5
BASIC PROGRAMMING
FIG.1
FIG.2

12
SAFETY BLOCKAGE OF THE KEYS
The keys on the internal plaque can be rendered inactive. Under normal op-
erating conditions these are used for opening (green) and closing (black)
the door using the motorisation on the lock.
This is done to prevent accidental or involuntary opening, which may de-
tract from the security of your home. The presence of children in the home
for example, is one of the conditions that may mar security.
To deactivate the keys:
A. Hold the green and black keys on the internal plaque (fig. 7) down si-
multaneously for at least ten seconds.
B. When the keys are released they are inactive.
To reactivate the keys:
A. Hold the green and black keys on internal plaque (fig. 7) down si-
multaneously for at least ten seconds.
B. When the keys are released they work again normally.
According to the system installed by your installer, your x1R electronic lock
will function with alkaline batteries or will be powered by mains-recharge-
able batteries.
In both cases, the batteries are housed at the edge of the door and all you
have to do, to access them to replace or maintain them, is loosen the screws
located on the front of the battery holder and take it out with care
(fig. 7).
When replacing the batteries, comply with the indications and the techni-
cal data listed below in this manual, then replace the battery holder, taking
care not to damage the electricity cables, and fix it with the screws provid-
ed.
Alkaline batteries: 1,5V Ni-Cd Type D
Rechargeable batteries: 1,2V Ni-Mh Type D
2
Fiam consiglia l’utilizzo di pile
3
2
BASIC PROGRAMMING
BATTERIES
FIG.8
FIG.7

13
Read this section carefully to make sure the product is working sat-
isfactorily to guarantee you with the maximum security.
Both your door manufacturer and installer have carried out trial tests using
a general code. Now you must NECESSARILY store your personalized code
number and that of your electronic keys , where required, in the mem-
ory in order to be guaranteed with the maximum security.
You can memorize up to a maximum of 128 code numbers and/or TAG, if
required.
Registering your personalized codes means that no other unautho-
rized code can be used, i.e. the codes (and TAG) registered by you will
be the only electronic commands capable of opening your door.
PRELIMINARY PHASE: MEMORIZING THE NEW ENTRANCE CODES
Numeric codes must be programmed at two different levels: at least one at
“master” level whilst the others will be at “service” level.
The “master” codes enable their holder to:
• open the lock
• have access to programming
• change the functional mode
• activate new codes and/or "master" keys
• activate and deactivate “service” codes and/or keys
• totally reset the memory
With the enabled “service” codes the holder may:
• open the lock
Personalized codes, be they either “master” or “service”, must be
made up of a minimum of four to a maximum of eight figures.
If your system includes using both keyboard and TAG x.Keys, you must
first follow the instructions for memorizing the numeric codes, then go
to page 5 of this manual where you will find details on how to register
and use the transponders.
4
BASIC PROGRAMMING
SYSTEM WITH KEYBOARD AND INTEGRATED TAG TRANSPONDER

14
ACTIVATING THE “MASTER” CODE:
access the “programming” facility
A. with the door open, keep your finger pressed on spring latch and press
the 1-2-3-4 code on the keyboard, then press the # key (to confirm) (fig.
10).
B. the acoustic alarm will emit a rising scale of beeps to warn you that the
lock is in the “programming” mode.
The lock will only remain in this mode (programming) for as long as
you keep the spring latch pressed. You will automatically leave the pro-
gramming mode by releasing it.
C. Keeping the spring latch constantly pressed, press the black and green
keys located on the internal plaque (fig. 2) together and keep them
pressed for at least two seconds. The acoustic alarm will emit one long beep
as confirmation.
D. Now digit your personal Master Code (minimum 4 figures, maximum 8)
and press the # key. The acoustic alarm will emit two short beeps to con-
firm that your “master” code has been memorized.
release the pressure on the spring latch to exit the programming mode.
ACTIVATING THE “SERVICE” CODE:
access the “programming” facility
A. with the door open, keep your finger pressed on spring latch , press the
code memorized beforehand at “master” level on the keyboard fol-
lowed by the # key (fig. 10).
B. the acoustic alarm will emit a rising scale of beeps to warn you that the
lock is in the “programming” mode.
The lock will only remain in this mode (programming) for as long as
you keep the spring latch pressed. You will automatically leave the pro-
gramming mode by releasing it.
C. Keeping the spring latch constantly pressed, press the black key located
on the internal plaque (fig. 3) for at least one second. The buzzer will
emit one brief beep. Each new code entered (minimum 4 figures, maxi-
mum 8) and confirmed by the # key will be registered with the “service”
level. The buzzer will confirm memorization of all the codes with one
brief beep. Once memorization has been completed carry on with en-
abling all the codes registered at the “service” level by pressing the black
key located on the internal plaque (fig. 3) for at least one second. The
buzzer will emit two short beeps.
NOTE:
If the buzzer should emit TWO short beeps at the start of phase C, then press
the black key again until the buzzer emits ONE short beep only, confirm-
ing that the lock is now set for memorizing new “service” codes.
release the pressure on the spring latch to exit the programming mode.
5
P
p
5
P
p
2
2
5
1A
5
2
5
1A
5
BASIC PROGRAMMING
FIG.10
FIG.2
FIG.3

15
FIG.10
FIG.3
NOTE:
The decision as to who will be responsible for the master code and service
codes is entirely a question of the hierarchy one intends to activate. Con-
sidering that the master code, as already mentioned, apart from being nor-
mally used to open the door, can also be used for access to any program-
ming level, it should evidently be kept and used by the person responsible
for the premises.
We would also remind you that the master code can also temporarily exclude
one or more of the service codes, but this cannot be done the other way
round. As an explicative example, in a typical family the responsible mem-
ber of the household can assign a service code to a domestic worker.
If you want to prevent said person from entering while you are away, you
just have to disable the use of the service code used by the latter from the
electronic memory; this mean that it will be deactivated even though still in
their hands.
When you return you can re-enable the code, where necessary (see page 18).
ACTIVATING OTHER “MASTER CODES”:
access the “programming” facility
A. with the door open, keep your finger pressed on spring latch and press
the “master” code on the keyboard, followed by the # key (fig. 10).
B. the acoustic alarm will emit a rising scale of beeps to warn you that the lock
is in the “programming” mode.
The lock will only remain in this mode (programming) for as long as
you keep the spring latch pressed. You will automatically leave the pro-
gramming mode by releasing it.
C. Keeping the spring latch constantly pressed, press the black key locat-
ed on the internal plaque (fig. 3) for at least one second. The buzzer
will emit two short beeps.
NOTE:
If the buzzer emits one beep only, press the black key again until the buzzer
emits TWO short beeps confirming that the lock is now set for memorizing
new “master” codes.
D. digit the numeric code, minimum four and maximum eight figures (fig.
10) and after confirmation press the # key. The code just memorized will
then be registered at “master” level. Any other code entered in the same
way will also be registered at “master” level, while this status is active or
until the spring latch has been released.
release the pressure on the spring latch to exit the programming mode.
5
5
P
p
2
5
5
1A
BASIC PROGRAMMING

16
FIG.11
FIG.5
The FIAM x1R electronic key works very simply:
Pressing your personal entrance code on the keyboard , followed by the
# key, (fig. 11)will open the lock and you will be able to enter the premises.
The lock will automatically lock up when you close the door again, as long as
this functional mode has been provided.
There are various options for leaving the premises.
• pressing the green key located on the internal plaque (Fig. 5)
• pressing a remote key (optional) which can be located at a distance from
the door (for example, the interphone key or an ordinary button)
• using the mechanical key
NOTE:
Please remember that the FIAM x1R electronic lock can always work at any
time, even if there are problems, both from the inside and outside by using
the mechanical key.
FUNCTIONAL METHODS
The function and service of the FIAM x1R electronic lock can be programmed
in five different modes:
Mode 1: after the opening command has been given the lock draws back the
bolts and holds back the spring latch for you to enter. The spring latch is re-
leased once it has opened the lock and the door. The lock will automatically
draw the bolts after the door has closed.
Mode 2: after the opening command has been given the lock draws back the
bolts but not the spring latch, which must be drawn back by a handle or me-
chanical key for you to enter. The lock will automatically draw the bolts after
the door has closed.
Mode 3: after the opening command has been given the lock draws back the
bolts and holds back the spring latch for you to enter. The spring latch is re-
leased once it has opened the lock and the door. The lock will NOT auto-
matically draw the bolts after the door has closed. The lock must therefore be
closed mechanically
Mode 4: after the opening command has been given the lock draws back the
bolts but not the spring latch which must be drawn back by a handle or me-
chanical key for you to enter. The lock will NOT automatically draw the bolts
after the door has closed. The lock must therefore be closed mechanically.
Mode 5: after the opening command has been given the lock draws back and
holds the spring latch only for you to enter. The bolts can only be opened
and closed using the mechanical cylinder key in this functional mode.
NOTE:
you can find out and check the working conditions of your door at any time
by pressing the green and black keys on the internal plaque together; the
buzzer will emit the same number of beeps as the number of the modali-
ties listed in this page.
1A
2
HOW IT WORKS

17
FIG.10
FIG.6
CHANGING AND SETTING THE FUNCTIONAL MODE
The lock is set to work in mode 1 when it comes out of the factory. To
change the functional mode, it will be necessary to:
access the “programming” facility
A. with the door open, keep your finger pressed on spring latch and
press the “master” code on the keyboard followed by the # key (fig.
10).
B. the acoustic alarm will emit a rising scale of beeps, to warn you that the
lock is in the “programming” mode.
The lock will only remain in this mode (programming) for as long as
you keep the spring latch pressed. You will automatically leave the pro-
gramming mode by releasing it.
C. Keeping the spring latch constantly pressed, press the green key lo-
cated on the internal plaque (fig. 6) for at least one second. The
buzzer will emit the same number of short beeps as the number of the
mode being used.
D. Each time you press the green key you will pass on to the next mode.
For example: if the buzzer emits three short beeps when you press the
green key, this means that the lock is in mode 3, in which case, you sim-
ply press the green key twice if you want to to change to mode 5.
NOTE:
the functional mode can only be changed going up the scale, i.e., from 1
to 2, from 2 to 3 and so on. After mode 5, you go back to mode 1 by
pressing the green button again.
release the pressure on the spring latch to exit the programming mode.
5
P
p
2
5
1A
5
BASIC PROGRAMMING

18
FIG.10
FIG.3
OPERATING THE ENTRANCE CODES
You can operate the personalized entrance codes simply and rapidly in to-
tal security with the FIAM x1R locks electronic system. It is in fact possible
to disable and re-enable the “service” codes, even temporarily, by adding
or eliminating codes to the list of those being used or totally cancel them.
To disable ALL the “service” codes, you must:
access the “programming” facility
A. with the door open, keep your finger pressed on spring latch and
press the master code on the keyboard , then press the # key (fig.
10).
B. the acoustic alarm will emit a rising scale of beeps, to warn you that the
lock is in the “programming” mode
The lock will only remain in this mode (programming) for as long as
you keep the spring latch pressed. You will automatically leave the pro-
gramming mode by releasing it.
C. Keeping the spring latch constantly pressed, press the black button
located on the internal plaque (fig. 3) for at least one second until the
buzzer emits 1 short beep.
All the “service” numerical codes are now deactivated for opening the
lock, but are still stored in the electronic memory.
This operation also simultaneously disables all the “service” TAGs
and any radio controls being used.
release the pressure on the spring latch to exit the programming mode.
To re-enable ALL the “service” codes, you must:
access the “programming” facility
A. with the door open, keep your finger pressed on spring latch , and press
the master code on the keyboard then press the # key (fig. 10).
B. the acoustic alarm will emit a rising a scale of beeps, to warn you that the
lock is in the “programming” mode.
The lock will only remain in this mode (programming) for as long as
you keep the spring latch pressed. You will automatically leave the pro-
gramming mode by releasing it.
C. Keeping the spring latch constantly pressed, press the black button
located on the internal plaque (fig. 3) for at least one second until the
buzzer emits two short beeps.
All the “service” numeric codes stored in the electronic memory are now
re-enabled for when the lock opens
This operation also simultaneously re-enables all the “service” TAGs
and any radio controls being used.
release the pressure on the spring latch to exit the programming mode.
5
P
2
5
1A
5
p
5
P
p
2
5
1A
5
BASIC PROGRAMMING

19
FIG.10
FIG.2
To definitively cancel ONE or MORE entrance codes, you must:
access the “programming” facility
A. with the door open, keep your finger pressed on spring latch and press
the master code on the keyboard , followed by the # key (fig. 10).
B. the acoustic alarm will emit a rising scale of beeps, to warn you that the
lock is in the “programming” mode.
The lock will only remain in this mode (programming) for as long as
you keep the spring latch pressed. You will automatically leave the pro-
gramming mode by releasing it.
C. Keeping the spring latch constantly pressed, digit the numeric code that
must be cancelled followed by the # key (fig. 10). The buzzer will confirm
each code eliminated from the electronic memory with 3 brief beeps.
release the pressure on the spring latch to exit the programming mode.
To definitively cancel ALL the entrance codes (total reset), you must:
access the “programming” facility
A. with the door open, keep your finger pressed on spring latch and press
the master code on the keyboard , followed by the # key (fig. 10).
B. the acoustic alarm will emit a rising scale of beeps, to warn you that the
lock is in the “programming” mode.
The lock will only remain in this mode (programming) for as long as
you keep the spring latch pressed. You will automatically leave the pro-
gramming mode by releasing it.
C. Keeping the spring latch constantly pressed, press the green and black
keys located on the internal plaque (fig. 2) together for at least two sec-
onds. The buzzer will emit one long beep to confirm.
This operation also simultaneously deletes all the TAGs and any re-
mote-controls being used.
release the pressure on the spring latch to exit the programming mode.
5
P
1A
5
p
5
P
p
2
5
5
1A
5
BASIC PROGRAMMING

20
BASIC PROGRAMMING
SAFETY BLOCK FOR THE KEYS
The keys on the internal plaque which are normally used for opening (green)
or closing (black) the door with the motor driven lock, can be rendered in-
active.
This is to prevent it from being accidentally or unwantedly opened making
your home less safe. For example any children in the house could be a cause
for compromising safety.
To deactivate the keys:
A. press the green and black keys on the internal plaque (fig. 7) togeth-
er for at least ten seconds.
B. releasing the keys, the buttons are now disactivated.
To reactivate the keys:
A. press the green and black keys on the internal plaque (fig. 7) togeth-
er for at least ten seconds.
B. Releasing the keys, the buttons are reactivated to normal working con-
ditions.
Your door with its FIAM x1R electronic lock will work with alkaline cell bat-
teries or will be powered by buffer batteries rechargeable from the mains, de-
pending on the system installed by your installer.
In both cases, the cell batteries and batteries are anyhow housed on the
door and you only have to loosen the screws located on the front of the
battery holder , and carefully remove it, if it is in need of replacement or
maintenance (fig. 8).
Strictly follow the instructions and technical details given further on in this
manual to replace cell batteries and batteries and then put the battery hold-
er back into place taking care not to damage the wiring and fix by its screws.
Alkaline batteries: 1,5V Ni-Cd Type D
Rechargeable batteries: 1,2V Ni-Mh Type D
Fiam consiglia l’utilizzo di pile
3
2
2
BATTERIES
FIG.8
FIG.7
Popular Lock manuals by other brands
Safety 1st
Safety 1st OutSmart SECRET BUTTON quick start guide
Wano
Wano VGLock vG-BL5 user manual
Kaba Mas
Kaba Mas Low Profile 52 series installation guide

Nerival
Nerival Ner 5000LR user manual
Siegenia
Siegenia KFV BS 230 Series Assembly instructions
National Cabinet Lock
National Cabinet Lock C8711 Dimensional drawing

