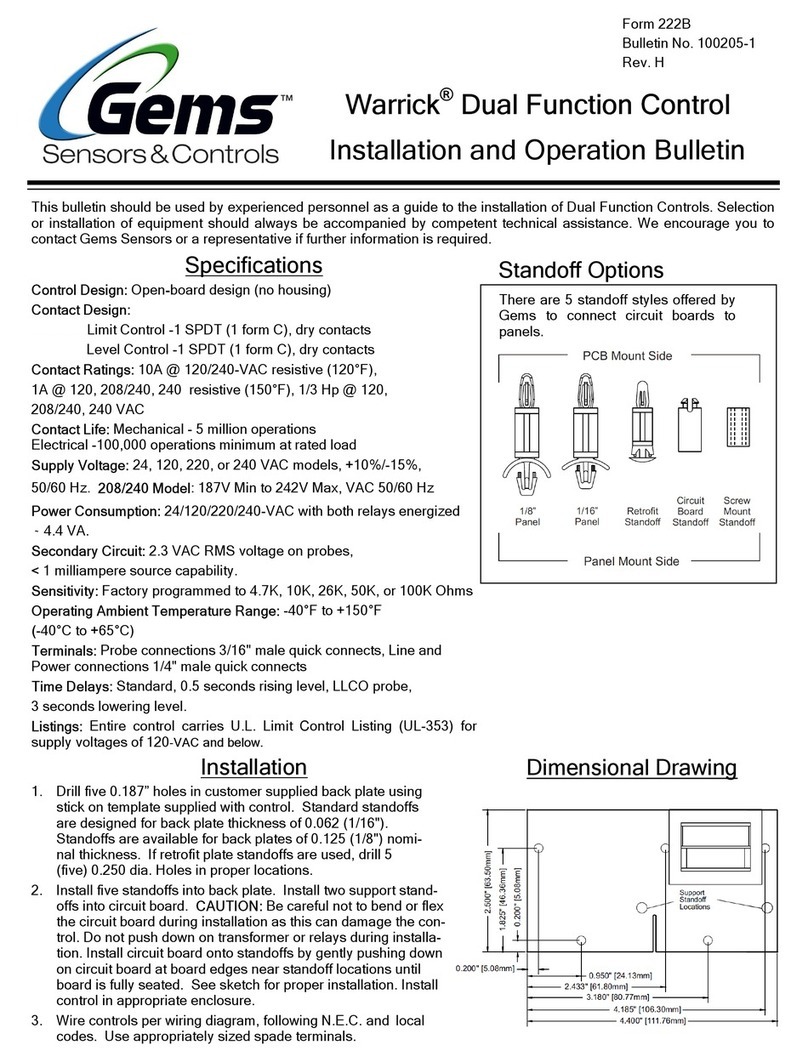
FieldServer ProtoCessor FPC-FD2 User guide

Kernel Version:
5.22
Document Revision:
4
ProtoCessor/ProtoCarrier Start-Up Guide
APPLICABILITY & EFFECTIVITY
Explains the operation and installation of the following hardware:
ProtoCessor: FPC-FD2; FPC-F03; FPC-F04
ProtoCarrier: FPC-C01; FPC-CD2
The instructions are effective for the above as of December2012

ProtoCessor/ProtoCarrier Start-Up Guide Table of Contents
ProtoCessor 1991 Tarob Court Milpitas, California, 95035 USA Web: www.protocessor.com
Tel: (408) 964 4444 Fax: 408-262-2269 Toll Free: (888) 509 1970 x141 email: support@protocessor.com
TABLE OF CONTENTS
1Introduction ................................................................................................................................................... 4
1.1 BTL Mark –BACnet Testing Laboratory........................................................................................................4
2ProtoCessor FFP (Full Function ProtoCessor).................................................................................................. 5
2.1 FFP-485 ProtoCessor (FPC-FD2) (Replaces FPC-FO2) ...................................................................................5
2.2 FFP-ETH ProtoCessor (FPC-F03) ...................................................................................................................5
2.3 FFP-LON ProtoCessor (FPC-F04)...................................................................................................................5
2.4 Powering up the ProtoCessor. .....................................................................................................................6
3Using the ProtoCarrier solution...................................................................................................................... 7
3.1 ProtoCarrier 232 (FPC-C01)..........................................................................................................................7
3.1.1 Board Layout............................................................................................................................................7
3.2 ProtoCarrier 485 (FPC-CD2) .........................................................................................................................8
3.2.1 Board Layout............................................................................................................................................8
4DIP Switch Configuration ............................................................................................................................... 9
4.1.1 Using A0 –A7 to set Node ID ...................................................................................................................9
4.1.2 Using B0 –B3 to set Baud Rate..............................................................................................................10
4.1.3 Using S0 –S3 to select and load Configuration Files .............................................................................10
5Connecting the ProtoCessor to the ProtoCarrier Boards .............................................................................. 11
5.1 Connection using RS-232 ProtoCarrier (FPC–C01) .....................................................................................11
5.1.1 Power Pin assignments: .........................................................................................................................11
5.1.2 Voltage Selection ...................................................................................................................................11
5.1.3 Summary of SolderLinks.........................................................................................................................11
5.2 Connection using RS-485 ProtoCarrier (FPC-CD2)......................................................................................12
5.2.1 Connection to FPC-FD2 ..........................................................................................................................12
5.2.2 Connection to FPC-F04 ...........................................................................................................................12
5.2.3 6-pin Phoenix Connector Pin Assignments .............................................................................................12
5.2.4 Voltage Selection ...................................................................................................................................13
6Software Interface Connection to the ProtoCessor/ProtoCarrier ................................................................. 14
6.1 Connect the PC to the ProtoCessor/ProtoCarrier via the Ethernet port....................................................14
6.2 Use the Web GUI to Connect to the ProtoCessor/ProtoCarrier ................................................................15
6.3 Set IP Address for BACnet/IP......................................................................................................................15
7Configuring the ProtoCessor ........................................................................................................................ 17
7.1 Retrieve the Sample Configuration File .....................................................................................................17
7.2 Change the Configuration File to Meet the Application ............................................................................17
7.3 Load the Updated Configuration file..........................................................................................................18
7.4 Test and Commission the ProtoCessor ......................................................................................................19
8LED Interpretation........................................................................................................................................ 20
8.1 Power up process of ProtoCessors’ LED’s ..................................................................................................20
8.1.1 FPC-FD2..................................................................................................................................................20
8.1.2 FPC- F04 .................................................................................................................................................21
8.1.3 FFP-F03 ..................................................................................................................................................22
8.2 Troubleshooting Tips..................................................................................................................................22
8.3 ProtoCarrier 232 (FPC-C01)........................................................................................................................22
8.3.1 RS-232 Signal LEDs .................................................................................................................................22

ProtoCessor/ProtoCarrier Start-Up Guide Table of Contents
ProtoCessor 1991 Tarob Court Milpitas, California, 95035 USA Web: www.protocessor.com
Tel: (408) 964 4444 Fax: 408-262-2269 Toll Free: (888) 509 1970 x141 email: support@protocessor.com
8.4 ProtoCarrier 485 (FPC-CD2) .......................................................................................................................23
8.4.1 RS-485 Signal LEDs .................................................................................................................................23
Appendix A. Useful Features................................................................................................................................ 24
Appendix A.1. Enhanced Network Security .............................................................................................................24
Appendix B. Reference ........................................................................................................................................ 25
Appendix B.1. ProtoCessor FFP Specifications ........................................................................................................25
Appendix B.2. ProtoCarrier Specifications...............................................................................................................25
Appendix B.3. Mounting Drawings ..........................................................................................................................26
Appendix B.3.1. FPC-FD2 on FPC-CD2...............................................................................................................26
Appendix B.3.2. FPC-F03 on FPC-CD2 ...............................................................................................................26
Appendix B.3.3. FPC-F04 on FPC-CD2 ...............................................................................................................27
Appendix B.4. Address DIP Switch Settings .............................................................................................................27
Appendix C. Limited 2 year Warranty .................................................................................................................. 34

ProtoCessor/ProtoCarrier Start-Up Guide Page 4 of 34
ProtoCessor 1991 Tarob Court Milpitas, California, 95035 USA Web: www.protocessor.com
Tel: (408) 964 4444 Fax: 408-262-2269 Toll Free: (888) 509 1970 x141 email: support@protocessor.com
1INTRODUCTION
This document describes the installation and operation of the ProtoCessor FPC-FD2; FPC-F03 and FPC-F04 protocol
gateway solutions and the FPC-C01 and FPC-CD2 ProtoCarrier boards.
ProtoCarrier boards can be powered from a fixed 5V DC supply or a 9V - 30V AC/DC. The input voltage is rectified
and regulated to meet the requirements of the ProtoCessor devices.
The ProtoCarrier-232 FPC-C01 board provides a serial port interface to the TTL socket serial port provided on the
ProtoCessor. The board allows easy connection to the serial ports using a DB-9 connector, connected as a DTE
(Data Terminal Equipment) so that it may be connected to DCE (Data Communication Equipment) device e.g. a
modem. Full serial status indication is provided with LED’s.
The ProtoCarrier-485 FPC-CD2 board provides an RS-485 interface to the TTL socket serial port provided on the
ProtoCessor. The board uses a screw terminal connection.
1.1 BTL Mark –BACnet Testing Laboratory
The BTL mark is a symbol that indicates to a consumer that a product has passed a
series of rigorous tests conducted by an independent laboratory which verifies that the
product correctly implements the BACnet features claimed in the listing. The mark is a
symbol of a high-quality BACnet product. For more information about the BACnet
Testing Laboratory go to: http://www.bacnetinternational.net/btl/.
The ProtoCessor FFP-485 (FPC-FD2) and the ProtoCarrier-485 (FPC-CD2) board are BTL certified and carry the BTL
certification Logo
When selling the modules separately to OEM customers, we use the same ProtoCessor and BTL certified code that
is used in the ProtoCarrier. BTL has provided a procedure for OEM’s using the ProtoCessor FFP-485 to easily
submit their product for BTL certification (with minimal testing).

ProtoCessor/ProtoCarrier Start-Up Guide Page 5 of 34
ProtoCessor 1991 Tarob Court Milpitas, California, 95035 USA Web: www.protocessor.com
Tel: (408) 964 4444 Fax: 408-262-2269 Toll Free: (888) 509 1970 x141 email: support@protocessor.com
2PROTOCESSOR FFP (FULL FUNCTION PROTOCESSOR)
These modules are designed on the OEM’s controller by implementing a ProtoCessor serial TTL socket (5 VDC). See
voltage ranges in Appendix B.1
2.1 FFP-485 ProtoCessor (FPC-FD2) (Replaces FPC-FO2)
2.2 FFP-ETH ProtoCessor (FPC-F03)
2.3 FFP-LON ProtoCessor (FPC-F04)
RS-485 Phoenix
connector for
Field serial
protocol support
Ethernet port for
Diagnostics and
Host or Field
protocol support
Dip Switches
(See 4)
End of line
termination switch
Soft Reset button
Ethernet port for
Diagnostics and
Host or Field
protocol support
ProtoCessor TTL
Socket - Supporting
RX and TX signals –
5VDC (Underneath)
ProtoCessor TTL
Socket - Supporting RX
and TX signals –5VDC
(Underneath)
Rx, Tx LED’s
LED’s
LonWorks-FTT-
10 port (2-wire)
for Field
LonWorks
protocol support
Ethernet port for
Diagnostics and
Host or Field
protocol support
ProtoCessor TTL
Socket - Supporting
RX and TX signals –
5VDC (Underneath)
Rx, Tx LED’s
Soft Reset button
LonWorks
Commissioning pin

ProtoCessor/ProtoCarrier Start-Up Guide Page 6 of 34
ProtoCessor 1991 Tarob Court Milpitas, California, 95035 USA Web: www.protocessor.com
Tel: (408) 964 4444 Fax: 408-262-2269 Toll Free: (888) 509 1970 x141 email: support@protocessor.com
2.4 Powering up the ProtoCessor.
1. Set the DIP switches (FPC-FD2). See Section 4
2. Connect up the Field and Host cables.
3. Connect the power.
4. If the Field protocol is an Ethernet protocol, refer to Section 6 for information on Software interface
connections.

ProtoCessor/ProtoCarrier Start-Up Guide Page 7 of 34
ProtoCessor 1991 Tarob Court Milpitas, California, 95035 USA Web: www.protocessor.com
Tel: (408) 964 4444 Fax: 408-262-2269 Toll Free: (888) 509 1970 x141 email: support@protocessor.com
3USING THE PROTOCARRIER SOLUTION
The ProtoCarrier solution is recommended in cases where it is not possible to include a ProtoCessor socket on the
OEM board. A ProtoCarrier RS-485 or RS-232 card can be attached to the OEM’s existing hardware (Width=2.2 in.
Length=4.2 in.). The ProtoCarrier includes a serial port to connect to the OEM’s Host or Field port. The
ProtoCessor socket on the ProtoCarrier can accept any ProtoCessor.
ProtoCarrier can connect to the OEM’s RS-232 or RS-485 or Ethernet port and translate to any Serial,
Ethernet or LonWorks protocols.
Supports 5VDC or 9-30VAC/VDC.
3.1 ProtoCarrier 232 (FPC-C01)
The ProtoCarrier-232 FPC-C01 board is a carrier board for ProtoCessor devices providing a serial port interface to
the TTL socket serial port provided on the ProtoCessor. The board allows easy connection to the serial ports using
a DB-9 connector, connected as a DTE (Data Terminal Equipment) so that it may be connected to DCE (Data
Communication Equipment) device e.g. OEM’s Serial RS-232 device. Full serial status indication is provided with
LED’s.
The board can be powered from a fixed 5V DC supply or a 9V - 30V AC/DC. The input voltage is rectified and
regulated to meet the requirements of the ProtoCessor devices.
3.1.1 Board Layout
The important ports and devices on the ProtoCarrier-232 FPC-C01 board are indicated below.
DB9 Serial port
Signal LED’s (See
8.3.1)
Power +/- and FG
5VDC, 9-30 VAC or
VDC.
ProtoCessor TTL Socket
accepts any ProtoCessor
Module
Voltage selection
5VDC, 9-30 VAC or
VDC (See5.1.2)
Power LED.

ProtoCessor/ProtoCarrier Start-Up Guide Page 8 of 34
ProtoCessor 1991 Tarob Court Milpitas, California, 95035 USA Web: www.protocessor.com
Tel: (408) 964 4444 Fax: 408-262-2269 Toll Free: (888) 509 1970 x141 email: support@protocessor.com
3.2 ProtoCarrier 485 (FPC-CD2)
The ProtoCarrier-485 board is a carrier board for ProtoCessor devices providing a RS-485 interface to the TTL
socket serial port provided on the ProtoCessor. The board can be powered from a fixed 5V DC supply or a 9V - 30V
AC/DC. The input voltage is rectified and regulated to meet the requirements of the ProtoCessor devices.
3.2.1 Board Layout
The following diagram shows the layout of the ProtoCarrier-485 board indicating the most important ports and
devices.
RS-485 Port
Signal LED’s
(See 8.4.1)
Connector
(labeled at
base).
Power +/- and
FG 5VDC
Voltage
Selector
(See 5.2.4)
Power
LED (See
8.4.1)
ProtoCessor TTL
Socket accepts any
ProtoCessor Module
Pin
1
Pin 10
Pin 20
Pin 11
Dip Switches
(See 4)

ProtoCessor/ProtoCarrier Start-Up Guide Page 9 of 34
ProtoCessor 1991 Tarob Court Milpitas, California, 95035 USA Web: www.protocessor.com
Tel: (408) 964 4444 Fax: 408-262-2269 Toll Free: (888) 509 1970 x141 email: support@protocessor.com
4DIP SWITCH CONFIGURATION
The DIP switches on the FPC-FD2 and FPC-CD2 allow users to set the Baud Rate, Node-ID, and MAC address on the
Field RS-485 protocol as well as to automatically download configuration files for certain protocols. They can be
enabled on request before the unit ships from the FieldServer’s factory or in the field by editing the configuration
file. (Refer to the ProtoCessor Configuration Manual).
If the FPC-FD2 is used with the FPC-CD2, the DIP switches on the FPC-CD2 must be used. The switches
on the FPC-FD2 are disabled.
The DIP switch settings are the same for FPC-FD2 and FPC-CD2
Physical DIP
Switch
Settings
ProtoCessor
FFP-485
Equals
ProtoCarrier
Bank A
A1
=
A0
A2
=
A1
A3
=
A2
A4
=
A3
A5
=
A4
A6
=
A5
A7
=
A6
A8
=
A7
Bank B
B1
=
B0
B2
=
B1
B3
=
B2
B4
=
B3
S0
S1
S2
S3
4.1.1 Using A0 –A7 to set Node ID
DIP switches A0 –A7 can be used to set the Node ID or MAC Address (or both) DIP switch settings for the full range
of addresses are tabled in Appendix B.4
A7
A6
A5
A4
A3
A2
A1
A0
Address
Off
Off
Off
Off
Off
Off
Off
On
1
.
.
.
.
.
.
.
.
.
.
.
.
.
.
.
.
.
.
.
.
.
.
.
.
On
Off
Off
Off
Off
Off
Off
Off
128
.
.
.
.
.
.
.
.
.
.
.
.
.
.
.
.
.
.
.
.
.
.
.
.
On
On
On
On
On
On
On
On
255

ProtoCessor/ProtoCarrier Start-Up Guide Page 10 of 34
ProtoCessor 1991 Tarob Court Milpitas, California, 95035 USA Web: www.protocessor.com
Tel: (408) 964 4444 Fax: 408-262-2269 Toll Free: (888) 509 1970 x141 email: support@protocessor.com
4.1.2 Using B0 –B3 to set Baud Rate
For setting serial field protocol baud rate, the DIP switches B0 –B3 can be set for the following speeds.
Baud
B3
B2
B1
B0
Auto1
Off
Off
Off
Off
110
Off
Off
Off
On
300
Off
Off
On
Off
600
Off
Off
On
On
1200
Off
On
Off
Off
2400
Off
On
Off
On
4800
Off
On
On
Off
9600
Off
On
On
On
19200
On
Off
Off
Off
20833
On
Off
Off
On
28800
On
Off
On
Off
38400
On
Off
On
On
57600
On
On
Off
Off
76800
On
On
Off
On
115200
On
On
On
Off
4.1.3 Using S0 –S3 to select and load Configuration Files
The S bank of DIP switches, S0 - S3 can be used to select and load a particular configuration file from 6-7
Configuration files that can be stored on the ProtoCessor
The DIP switch settings can be viewed by uploading the configuration file using the RUI Utility. (Refer to Section
6.1.)
1
Auto-baud is only supported for BACnet MSTP

ProtoCessor/ProtoCarrier Start-Up Guide Page 11 of 34
ProtoCessor 1991 Tarob Court Milpitas, California, 95035 USA Web: www.protocessor.com
Tel: (408) 964 4444 Fax: 408-262-2269 Toll Free: (888) 509 1970 x141 email: support@protocessor.com
5CONNECTING THE PROTOCESSOR TO THE PROTOCARRIER BOARDS
5.1 Connection using RS-232 ProtoCarrier (FPC–C01)
If connecting a FFP-FD2, configure DIP Switches as described in Section 4
Plug the ProtoCessor into the ProtoCessor socket on the ProtoCarrier board as depicted below.
The DB9 connector on the RS-232 board connects to the serial port on a third party device.
Conect power and select Voltage as described in Sections 5.1.1 to 5.1.3.
5.1.1 Power Pin assignments:
Pin No
Pin Assignment
Pin 1
V +
Pin 2
V -
Pin 3
FRAME GND
5.1.2 Voltage Selection
By default the Voltage is set for 9V –30V AC/DC input. To use a fixed 5V DC input the SolderLink P1 needs to be
cut and SolderLinks P2 and P3 need to be connected.
5.1.3 Summary of SolderLinks
Link
Function
9V –30V AC/DC input
Select
Deselect
P1
These links are used to select power input. For 9V –30V AC/DC input
(default) P1 is selected and P2, P3 deselected.
For 5V DC supply, P1 must be deselected and P2, P3 selected.
Solder across
the link.
Clear solder
from link.
P2
P3
Power +/- and FG
5VDC, 9-30 VAC or
VDC.
DB9 Serial port
RS-485 Phoenix
connector for Field
serial protocol
support
To use fixed 5V DC input, cut
solderlink P1 and connect
solderlink P2 & P3.

ProtoCessor/ProtoCarrier Start-Up Guide Page 12 of 34
ProtoCessor 1991 Tarob Court Milpitas, California, 95035 USA Web: www.protocessor.com
Tel: (408) 964 4444 Fax: 408-262-2269 Toll Free: (888) 509 1970 x141 email: support@protocessor.com
5.2 Connection using RS-485 ProtoCarrier (FPC-CD2)
If DIP Switches are enabled, configure as described in Section 4. DIP Switches are disabled by default and
can be enabled via the Configuration file. (Refer to ProtoCessor Configuration Manual). Note that if DIP
Switches on the FPC-CD2 are enabled, the DIP Switches on the FPC-FD2 are disabled.
Plug the ProtoCessor into the ProtoCessor socket on the ProtoCarrier board as depicted below.
The ProtoCarrier-485’s 6 pin green connector, connects to Power and to the serial RS-485 port on a third
party device. The pinouts for the 6 connector are located at the base of the 6 pin connector.
Select Voltage as described in Section 5.2.4
5.2.1 Connection to FPC-FD2
5.2.2 Connection to FPC-F04
5.2.3 6-pin Phoenix Connector Pin Assignments
Pin No
Pin Assignment
Pin 1
RS-485 +
Pin 2
RS-485 –
Pin 3
RS-485 GND
Pin 4
V +
Pin 5
V -
Pin 6
FRAME GND
Power +/- and FG
5VDC, 9-30 VAC or
VDC.
RS-485 Port
LonWorks-FTT-10
port (2-wire) for
Field LonWorks
protocol support
RS-485 DB9 port
for Field serial
protocol support
Power +/- and FG
5VDC, 9-30 VAC or
VDC.
RS-485 Port

ProtoCessor/ProtoCarrier Start-Up Guide Page 13 of 34
ProtoCessor 1991 Tarob Court Milpitas, California, 95035 USA Web: www.protocessor.com
Tel: (408) 964 4444 Fax: 408-262-2269 Toll Free: (888) 509 1970 x141 email: support@protocessor.com
5.2.4 Voltage Selection
Voltage selection is done using a jumper on Headers JP3 and JP4
For 9V-30V AC or DC input the
Jumpers on JP3 and JP4 should
be in the position shown in blue
For a fixed 5V DC input the
Jumpers on JP3 and JP4 should
be in the position shown in
orange
A power LED is included to
display whether the board is
using 5V power or not

ProtoCessor/ProtoCarrier Start-Up Guide Page 14 of 34
ProtoCessor 1991 Tarob Court Milpitas, California, 95035 USA Web: www.protocessor.com
Tel: (408) 964 4444 Fax: 408-262-2269 Toll Free: (888) 509 1970 x141 email: support@protocessor.com
6SOFTWARE INTERFACE CONNECTION TO THE PROTOCESSOR/PROTOCARRIER
6.1 Connect the PC to the ProtoCessor/ProtoCarrier via the Ethernet port
Figure 1: Ethernet port location of ProtoCessor
Connect a standard CAT5 Ethernet cable (straight through or cross) between the PC and
ProtoCessor/ProtoCarrier
The Default IP Address of the ProtoCessor is 192.168.1.24, Subnet Mask is 255.255.255.0. If the PC and
the ProtoCessor/ProtoCarrier are on different IP Networks, assign a static IP Address to the PC on the
192.168.1.xxx network
Go to > >
Right-click on Local Area Connection > Properties
Highlight >
Select: Use the following IP address
Click twice
Ethernet Port

ProtoCessor/ProtoCarrier Start-Up Guide Page 15 of 34
ProtoCessor 1991 Tarob Court Milpitas, California, 95035 USA Web: www.protocessor.com
Tel: (408) 964 4444 Fax: 408-262-2269 Toll Free: (888) 509 1970 x141 email: support@protocessor.com
6.2 Use the Web GUI to Connect to the ProtoCessor/ProtoCarrier
Open PC web browser enter the default IP address of the ProtoCessor/ProtoCarrier 192.168.1.24
determine if the ProtoCessor/ProtoCarrier is up and communicating.
Figure 2: FST Web GUI screen
6.3 Set IP Address for BACnet/IP
From the GUI main home page, click on setup and then Network Settings to enter the Edit IP Address
Settings menu.
Modify the IP address (N1 IP address field) of the ProtoCessor/ProtoCarrier Ethernet port.
If necessary, change the Netmask (N1 Netmask field).
Type in a new Subnet Mask
If necessary, change the IP Gateway (Default Gateway field)
Type in a new IP Gateway
Note: If the ProtoCessor/ProtoCarrier is connected to a router, the IP Gateway of the
ProtoCessor/ProtoCarrier should be set to the IP address of the router that it is connected to
Reset ProtoCessor/ProtoCarrier
Unplug Ethernet cable from PC and connect it to the network hub or router

ProtoCessor/ProtoCarrier Start-Up Guide Page 16 of 34
ProtoCessor 1991 Tarob Court Milpitas, California, 95035 USA Web: www.protocessor.com
Tel: (408) 964 4444 Fax: 408-262-2269 Toll Free: (888) 509 1970 x141 email: support@protocessor.com

ProtoCessor/ProtoCarrier Start-Up Guide Page 17 of 34
ProtoCessor 1991 Tarob Court Milpitas, California, 95035 USA Web: www.protocessor.com
Tel: (408) 964 4444 Fax: 408-262-2269 Toll Free: (888) 509 1970 x141 email: support@protocessor.com
7CONFIGURING THE PROTOCESSOR
7.1 Retrieve the Sample Configuration File
The configuration of the ProtoCessor is provided to the ProtoCessor’s operating system via a comma-delimited file
called “CONFIG.CSV”.
If a custom configuration was ordered, the ProtoCessor will be programmed with the relevant device registers in
the Config.csv file for the first time start-up. If not, the product is shipped with a sample config.csv that shows an
example of the drivers ordered.
In the main menu of the FS-GUI screen, go to Setup, File Transfer, Retrieve.
Click on config.csv, and open or save the file
7.2 Change the Configuration File to Meet the Application
Refer to the ProtoCessor Configuration Manual in conjunction with the Driver supplements for information on
configuring the ProtoCessor.

ProtoCessor/ProtoCarrier Start-Up Guide Page 18 of 34
ProtoCessor 1991 Tarob Court Milpitas, California, 95035 USA Web: www.protocessor.com
Tel: (408) 964 4444 Fax: 408-262-2269 Toll Free: (888) 509 1970 x141 email: support@protocessor.com
7.3 Load the Updated Configuration file
In the main menu of the FS-GUI screen, go to Setup, File Transfer, Update
Browse and select the .csv file, open, then click Submit
Once download is complete, click the System Restart Button (or simply cycle power to the ProtoCessor) to
put the new file into operation. Note that it is possible to do multiple downloads to the ProtoCessor
before resetting it.

ProtoCessor/ProtoCarrier Start-Up Guide Page 19 of 34
ProtoCessor 1991 Tarob Court Milpitas, California, 95035 USA Web: www.protocessor.com
Tel: (408) 964 4444 Fax: 408-262-2269 Toll Free: (888) 509 1970 x141 email: support@protocessor.com
7.4 Test and Commission the ProtoCessor
Connect the ProtoCessor to the third party device(s), and test the application.
From the main menu of FS-GUI click on View, Connections to see the number of messages on each
protocol.
For troubleshooting assistance refer to any of the troubleshooting Appendices in the related Driver
Supplements and Configuration Manual. FieldServer Technologies also offers a Technical support
page on the FieldServer website at www.FieldServer.com, which contains a significant number of
resources and documentation that may be of assistance.

ProtoCessor/ProtoCarrier Start-Up Guide Page 20 of 34
ProtoCessor 1991 Tarob Court Milpitas, California, 95035 USA Web: www.protocessor.com
Tel: (408) 964 4444 Fax: 408-262-2269 Toll Free: (888) 509 1970 x141 email: support@protocessor.com
8LED INTERPRETATION
8.1 Power up process of Pro toCessors’ LED’s
8.1.1 FPC-FD2
Light
Description
PWR
This is the power light and should show steady green at all times when the FPC-FD2 is powered.
SYS ERR
The SYS ERR LED will go on solid 15 seconds after power up. It will turn off after 5 seconds. A steady red
light will indicate there is a system error on the ProtoCessor. If this occurs, immediately report the related
“system error” shown in the error screen of the RUI interface to FieldServer Technologies for evaluation.
COMM
ERR
COMM ERR LED will go on solid 15 seconds after power up. It will turn off after 5 seconds. A steady red
light will indicate the communications problem if there is a configured node connected to the ProtoCessor
that is offline. To establish the cause of the error, go to the error screen of the RUI interface.
Config
ERR
Config ERR LED will go on solid 15 seconds after power up. It will turn off after 5 seconds. A steady amber
light will indicate a configuration error exists in the active configuration. See the Error Screen in the
Remote User Interface for a description of the configuration error.
Node
Offline
Node Offline LED will go on solid 15 seconds after power up. It will turn off after 5 seconds. If the Node
Offline LED stays on solid, a node offline condition has occurred.
Unused
15 seconds after powering up the 4 unused LEDs will turn on solid for 5 seconds, then turn off.
RX
On normal operation of FPC-FD2, the RX LED will flash when a message is received on the field port of the
ProtoCessor.
TX
On normal operation of FPC-FD2, the TX LED will flash when a message is sent on the field port of the
ProtoCessor
RUN
RUN LED will flash 20 seconds after power up, signifying normal operation. The FPC-FD2 will be able to
access RUINET once this LED starts flashing. During the first 20 seconds, the LED should be off
PWR
UNUSED
R1 RS485 TX
R1 RS485 RX
SYS ERR
COMM ERR
Config ERR
Node Offline
RUN
This manual suits for next models
4
Table of contents
Popular Control Unit manuals by other brands
Truma
Truma Panel MES Module A Operating instructions & installation instructions
Siemens
Siemens SENTRON product manual
Allmatic
Allmatic BIOS2 ECO Manual for installation

SEW-Eurodrive
SEW-Eurodrive Movidrive MDX61B manual

Honeywell
Honeywell ADEMCO 4100SM Installation and setup guide
HBM
HBM QuantumX MX840 operating manual
