FIILPOW A6 PRO User manual
User Manual
A6 PRO
TIRE INFLATOR

Thank you for choosing FIILPOW.
Thank you for purchasing FIILPOW Tire inflator A6 Pro. With up to 150PSI pressure value, this inflator can help
you to deal with emergencies at ease.
Contents
1. PRODUCT OVERVIEW
2. PACKAGE CONTENTS
3. CONNECTING AIR TUBE WITH INFLATED ITEMS
4. CONNECTING THE AIR TUBE AND NOZZLE
5. CONNECTING THE INFLATOR WITH THE CAR
6. TURN ON/OFF THE INFLATOR
7. DETECTING CURRENT PRESSURE VALUE
8. DETERMINING THE RIGHT PRESSURE VALUE
9. MANUAL MODE AND 4 SMART MODES
10. START / PAUSE
11. DISCONNECTING THE AIR TUBE
12. LIGHT
13. TROUBLESHOOTING
14. SPECIFICATIONS
15. SAFETY INSTRUCTIONS
16. INSTRUCTIONS ON ENVIRONMENT PROTECTION
17. WARRANTY CARD
- 01 -
02
03
04
04
05
06
06
06
08
11
11
12
12
13
14
15
16
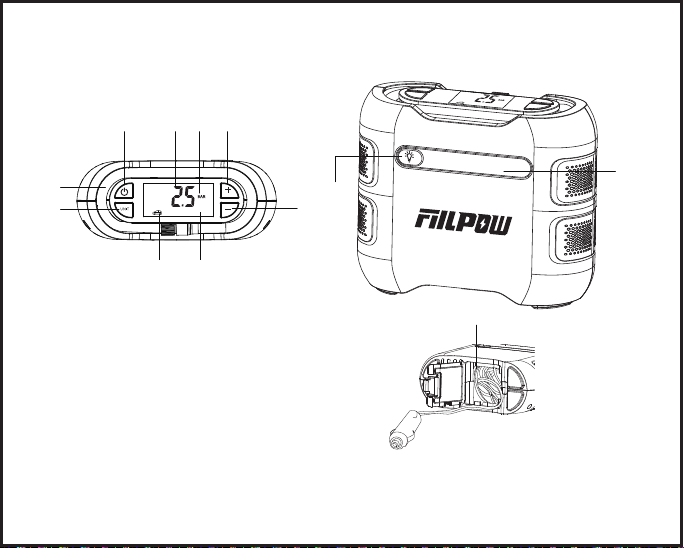
1. PRODUCT OVERVIEW
10
11
- 02 -
12
1 2 3 4
6
5
7
8
9
1.Power button
2.Pressure value
3.Pressure unit
4.“+” button
5.“-” button
6.LED screen
7.Preset mode
8.Unit button
9.Air tube and connector
10.Emergency light
11.Light button
12.DC charging cable

2. PACKAGE CONTENTS
A6 Pro Tire
inflator × 1
Needle valve
adaptor × 1
Carrying
bag × 1
User
manual × 1
Extension
nozzle × 1
Schrader-Presta
valve
adaptor × 1
Replacement
fuse× 1
Carefully check package contents, if anything is missing or damaged, please contact online customer service for
support.
- 03 -

3. CONNECTING AIR TUBE WITH INFLATED ITEMS
4. CONNECTING THE AIR TUBE AND NOZZLE
1. Pull out the built-in air tube on the upside of inflator.
2. Connect the air tube with the inflated item.
Schrader Valve
Tires on cars, motorcycles, e-bikes, and most mountain bikes use a Schrader
valve.
To inflate: The inflator can be directly connected to a Schrader valve to start inflating.
To deflate: Use an proper tool(such as 4mm Allen wrench) to press the pin
inside the air valve to release air.
Presta Valve Adapter
Road bicycles and certain mountain bikes use a Presta valve which requires
the included Presta valve adapter to be used.
To inflate:
1. Connect the Presta valve adapter to the Schrader valve of the air tube.
2. Unscrew the ring of the Presta valve of the tire.
3. Connect the Presta valve adapter to the tire’s Presta valve to start inflating.
To deflate: Unscrew the ring of the tire’s Presta valve, and press the valve stem
down to release air.
Valve Type
Valve Type
Inflation Adapter
Inflation Adapter
- 04 -

5. CONNECTING THE INFLATOR WITH THE CAR
Needle Valve Adapter
To inflate balls like basketballs and footballs, the included needle valve
adapter will need to be used.
To inflate: Screw the needle valve adapter onto the Schrader valve
adapter, then insert the needle into the valve of the ball to start inflating.
To deflate: Insert the needle valve adapter into the valve of the ball, and
gently apply pressure to the ball to release air.
Valve Type Inflation Adapter
1. Open the cover of the DC cable compartment below the
inflator.
2. Take out the adapter of the DC cable and plug it into a
12V cigarette lighter socket.
Note:
Please make sure the car engine is running.
Please make sure the cigarette lighter socket functions
well before plugging the adapter of DC cable.
Small tips to replace the fuse:
1. Unscrew the cap on the head of the adapter of the DC
cable.
2. Take out the old fuse and insert the replacement fuse.
3. Screw back the cap.
- 05 -
OFF
SET
6. TURN ON/OFF THE INFLATOR
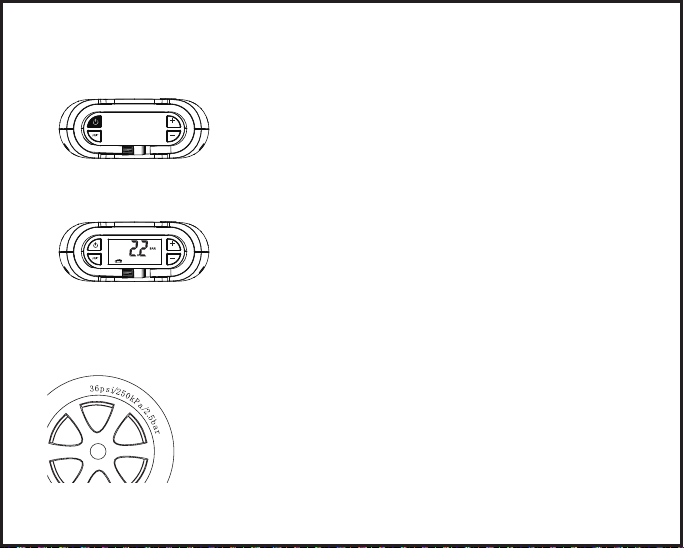
7. DETECTING CURRENT PRESSURE VALUE
8. DETERMINING THE RIGHT PRESSURE VALUE
Turn ON
Long press the power button 1.5 seconds to turn on.
Turn OFF
When the inflator is turned on, long press the power button 1.5
seconds to turn off.
When the inflator is turned on, connect the air tube to the inflated device, and
then the LED screen will automatically display current pressure value.
For safety and prevent injuries from bursting items due to over-inflation, always refer to the instructions or relevant
directions accompanying the item to be inflated before inflating it, in order to determine the correct air pressure.
Tires
The recommended air pressure of tires for cars, bicycles, and motorcycles is
indicated on the tire's sidewall. The recommended tire pressure for cars is also
indicated on the driver's side door jamb.
For details concerning load carrying capacity and recommended air pressures,
refer to your vehicle's instructions or manual.
- 06 -
Air Pressure Reference Table
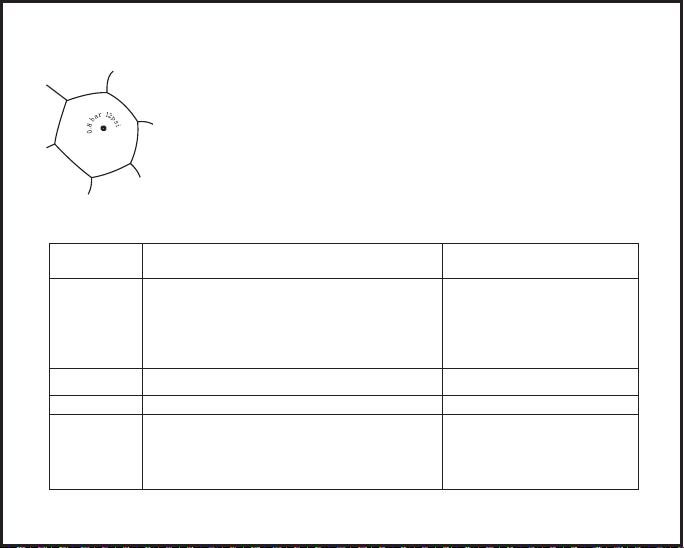
Balls
The recommended air pressure for footballs, basketballs, volleyballs, and other balls is
indicated near the ball's air valve.
Category
Bicycles
Motorcycle
Cars
Balls
Type Recommended
Pressure Range
12-, 14-, & 16-inch bicycle tires
20-, 22-, & 24-inch bicycle tires
26-, 27.5-, & 29-inch mountain bike tires
700c road bike clincher tires
700c road bike tubular tires
30 - 50psi
40 - 50psi
45 - 65psi
100 - 130psi
120 - 145psi
Scooter & street motorcycle tires
Car tires
1.8 - 3.0 bar
2.2 - 2.8 bar
Basketball
Soccer ball
Volleyball
Football
7 - 9 psi
8 - 16 psi
4 - 5 psi
12 - 14 psi
- 07 -

9. MANUAL MODE AND 4 SMART MODES
For safety, please read the recommended inflation pressure value provided by the manufacturer of the inflated
devices before inflating. Otherwise, it might cause unexpected injury or burst due to over-inflation.
Switch Mode
Switch Pressure Unit
Click the unit button to cycle through car mode→ motorcycle mode→bicycle
mode→ball mode→manual mode.
Note:
1. The tire inflator will automatically turned on by manual mode. When in the
manual mode, no mode icon is selected on the screen.
When on the manual mode, long press 1.5 seconds to switch from PSI,Bar,
Kpa pressure unit.
- 08 -
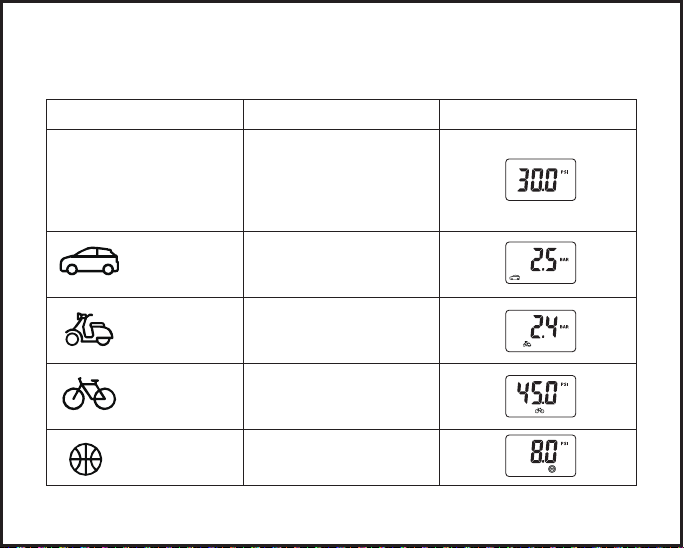
Default Pressure Value Of Different Modes
Mode Default Pressure Value
Manual mode
(When in the manual mode, no
mode icon is selected on the
screen. )
Car mode
Motorcycle mode
Bike mode
Ball mode
2.5BAR
2.4BAR
45PSI
8PSI
30PSI(Can be changed)
- 09 -

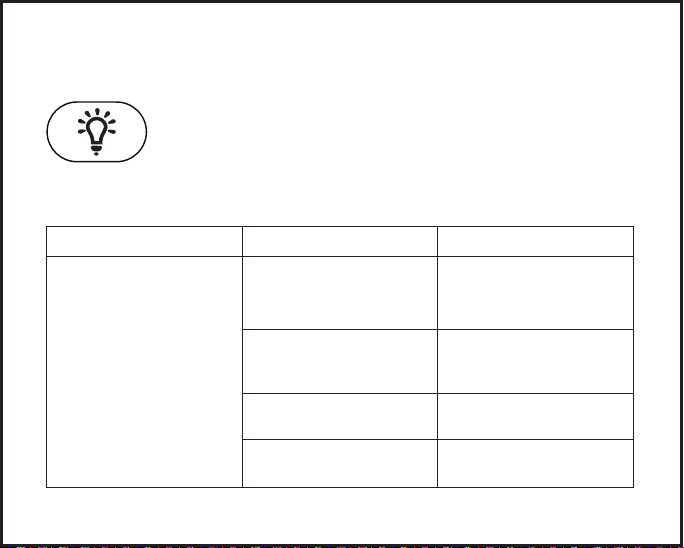
Note:
1.
2.
3.
Adjusting the Preset Pressure
With every single click, the current pressure value will increase/decrease by 1PSI (0.1Bar/ 6.9 KPa) according to
respective pressure unit.
Note: When adjusting a preset pressure, the blinking value indicates the target pressure. And a non-blinking
value indicates the real-time pressure.
After selecting a mode, press "+" or "-" button to increase or decrease the preset pressure
value. Press and hold the "+" or "-" button to quickly adjust the pressure value. After three
times’ blinks, the target pressure value will be confirmed.
The default pressure value of each smart mode is the most frequently used pressure value for its category.
Please refer to the instructions or user manual of the item being inflated for actual inflation pressure specifica-
tions.
In the manual mode, The last target pressure value will be saved as its default pressure value. When the
screen displays the real-time pressure value, click “+”, “-” button to check out default pressure value of the
manual mode.
The pressure value and pressure unit of the smart modes can not be changed. When one of the 4 modes
above is selected, it will automatically shift to manual mode, if any click of “+” or “-” button.
- 10 -

10. START / PAUSE
11. DISCONNECTING THE AIR TUBE
Start
When the target pressure value is confirmed, press the power button to start
inflating.
Pause
When inflating, press the power button to pause.
Auto-Stop:
In these three cases as below, the inflator will automatically stop inflating. Please restart the inflator to continue
inflating.
1. Inflating above 3 minutes when the inflating pressure value is over 120PSI.
2. Inflating above 5 minutes when the inflating pressure value is below 5PSI.
3. Inflating over the maximum inflating time of 30 minutes.
The inflator's air tube may get very hot after inflating. To prevent injuries, exercise caution when
disconnecting it from a valve. Some air may leak out of the valve when disconnecting the air
compressor. To avoid pressure loss, quickly disconnect the air hose from the valve.
- 11 -
13. TROUBLESHOOTING
When the inflator is turned on, press light button to turn on the light.
When the light is on, press light button to cycle through Spotlight→SOS→Strobe→OFF.
12. LIGHT
Problem Possible Reason Solution
The inflator does not
start.
The target pressure setting
might be below the actual
pressure of the item you are
inflating.
The power cord is not plugged
in.
The circuit breaker is stripped.
The fuse in the 12V DC cable
is blown.
Replace the fuse.
Plug the power cord into a
working power outlet.
Reset the circuit breaker.
Adjust the target pressure
setting to a higher pressure.
- 12 -
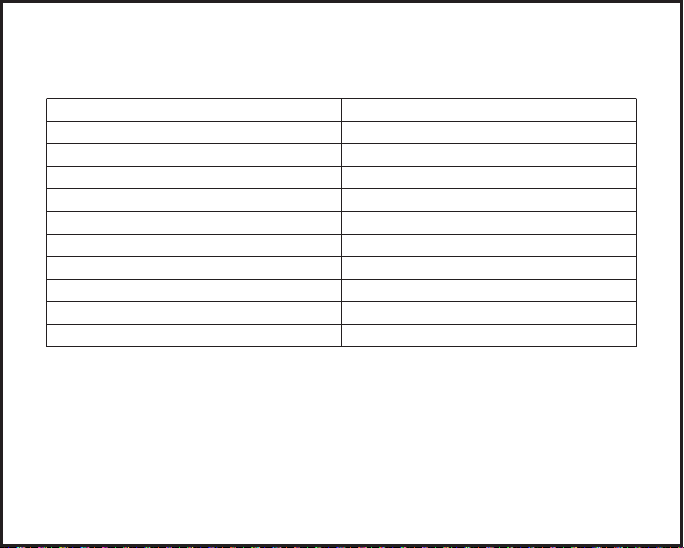
14. SPECIFICATIONS
- 13 -
Model
Max current
Inflating time (0 to 35PSI)
Air hose length
LED light power
Net weight
Rated voltage
Maximum measurement range
Power cable length
Pressure units
Accuracy of gauge
DC 12V
150PSI
3000mm
PSI,Bar,Kpa
±1.5PSI
A6 PRO
10A
6min
600mm
0.5W*5
930g

15. SAFETY INSTRUCTIONS
●
●
●
●
●
●
●
●
●
●
●
●
●
●
●
●
●
●
●
Read and follow all instruction before use.
To avoid damage to the compressor and the cigarette adaptor, please only use 12V DC (10-15amps) cable
with this inflator.
Inspect air inflator before use. If cracked, broken or damaged parts are found, qualified technicians should
repair damaged parts.
Do not leave the air inflator unattended while in operation. Keep out of reach of children.
Do not point the air outlet toward any person or animal.
Do not over inflate products beyond manufactures’ recommendations. Over inflating may cause unexpected
injury and burst.
This inflator is designed for occasional use only. Operation over an extended period of the time will overheat
the unit and damage the inflator.
Do not use the inflator while the vehicle is moving.
Do not kink or block the air hose while the inflator is working.
Make sure the inflator pull out after use, or flame out of the vehicle. Otherwise it might damage the inflator due
to burning circuit board.
Do not use this product for purposes other than its intended use.
Do not disassemble or tamper with this inflator.
Never expose the air inflator to rain, frost or temperatures above 60° C or temperatures below -30° C.
Do not expose the unit to moisture.
Keep the tire inflator or its components from getting wet.
Make sure the cord is not exposed to hot objects, oil or sharp edges.
Do not put the tire inflator in or around flammable environments.
Only use accessories and parts specified in the instruction book or recommended by the manufacturer.
Do not store the tire inflator in high-temperature or humid environment.
- 14 -

16. INSTRUCTIONS ON ENVIRONMENT PROTECTION
Do not dispose of this product in the usual household garbage at the end of its life cycle; hand it
over at a collection point for the recycling of electrical and electronic appliances. The symbol on the
product, the instructions for use or the packing will inform about the methods for disposal.
The materials are recyclable as mentioned in its marking. By recycling, material recycling or other forms of
re-utilization of old appliances, you are making an important contribution to protect our environment.
- 15 -

- 16 -
24-Month Coverage
Your Warranty Includes
How to Return Your FIILPOW Product
Within 24 months of purchase, we will provide timely and
effective online after-sales service. We will repair or replace
any defective product (due to manufacturing fault) within
the warranty period.
We will issue you a return label for your return.
Tear off the 'Return Details' page and fill in the details.
Include this inside your return package.
We will issue your replacement/refund on receiving the
return package.
Return Details
In order to process your return as quickly as possible, we
require the following information. Please fill out this form
and include it in your return package.
If your purchase was fulfilled by Amazon,
please use Amazon’s 30-day return service.
Purchase Name:
Order Number:
Date of Purchase:
Your Email Address:
Place of Purchase:
Website:www.fiilpow.comsupport@fiilpow.com

Tel :+1 347-307-8957 Mon-Fri 9AM-5PM (PT)
www.fiilpow.com
facebook.com/Fiilpowofficial/
support@fiilpow.com
Shenzhen Zhuangzhou Mengdie Trade Co., Ltd.
C1606Y, Tianan International Building, No. 3012, Renmin South
Road, Jiabei Community, Nanhu Street, Luohu District, Shenzhen
Table of contents


