Fine Offset Electronics WH40B User manual

1
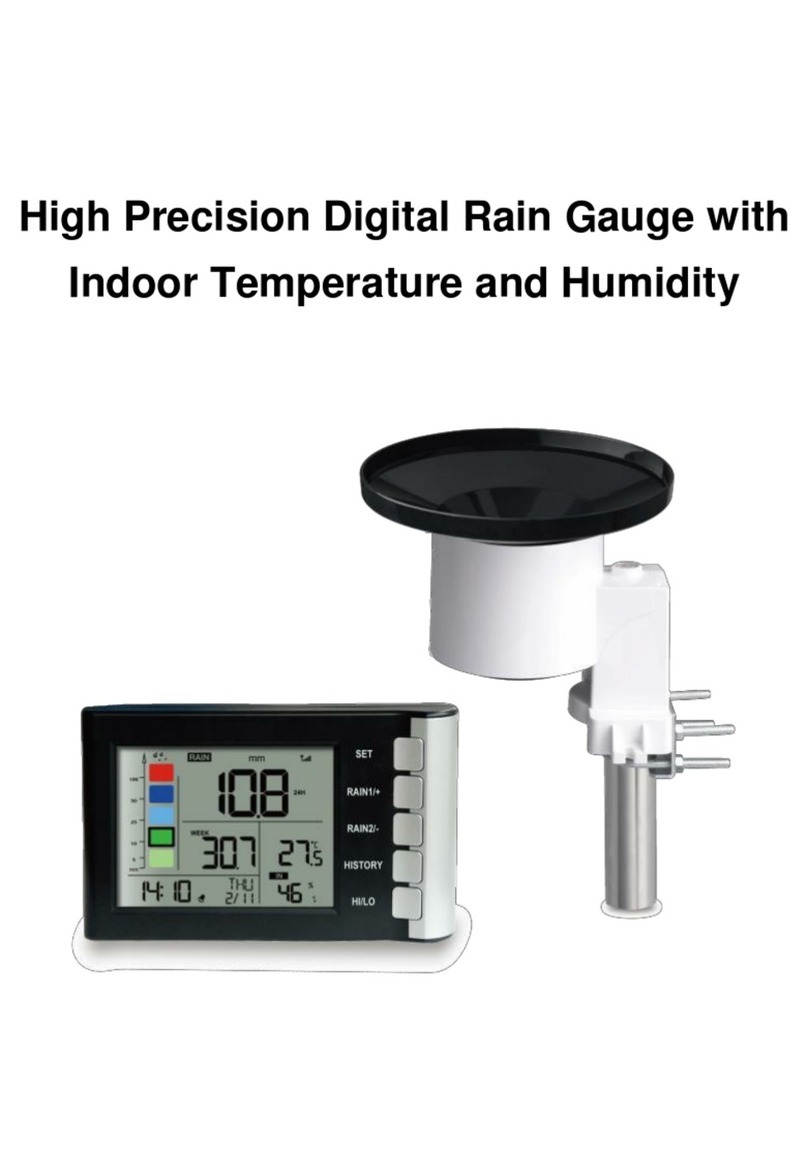
High Precision Digital Rain Gauge with
Indoor Temperature and Humidity
Model: WH40B

2
Contents
1. Introduce.....................................................................3
2. Get Started................................................................. 3
2.1 Parts List...........................................................3
2.2 Recommend Tools.......................................... 4
2.3 Installation........................................................ 4
2.4 Mount outdoor sensor.................................... 8
3. Console Operation.................................................. 11
3.1 Normal Mode................................................. 12
3.2 SET Mode...................................................... 13
3.3 Rain History Mode........................................ 14
3.4 MIN/MAX Mode.............................................15
3.5 HI/LO Alarm Set Mode................................. 15
3.6 Factory Reset/Clear Memory......................16
4. Function.................................................................... 17
5. Maintenance............................................................ 18
6. Troubleshooting Guide........................................... 19
7. Specifications...........................................................22
8. Liability Disclaimer.................................................. 23
9. FCC Statement........................................................23
10. Warranty Information............................................25

3
1. Introduce
Thanks for your purchasing of the WH40B High
Precision Digital Rain Gauge with Indoor
temperature and humidity. To ensure the best
product performance, please read this manual and
retain it for future reference.
2. Get Started
Note:
Before placing and installing all components of the
rain gauge at their final destination, please set up
the rain gauge with all parts being nearby for testing
the correct function.
Power up sequence must be performed in the order
shown in this section (insert batteries in the Remote
Sensor first, Display Console second).
Attention:
Do not mix old and new batteries
Do not mix Alkaline, Standard, Lithium or
Rechargeable batteries
Ensure batteries are installed correctly with
regard to polarity +/-
2.1 Parts List
One Display Console (Receiver)

4
One Rain Collector (Transmitter)
One User Manual
2.2 Recommend Tools
Hammer for installing remote transmitter(rain
collector).
2.3 Installation
Wireless Rain Collector Set Up
1. Rain collector
2. LED Indicator
3. Bubble level
4. Battery door
5. Screw hole
6. U-bolt install hole

5
1. Install batteries
Insert 1XAA batteries in the battery compartment.
The LED indicator will turn on for four seconds and
normally flash once every 49 seconds (the sensor
transmission update period).
Note: If no LED light up or is lighted permanently,
make sure the battery is inserted the correct way
or a proper reset is happened. Do not install the
batteries backwards. You can permanently
damage the outdoor sensor
Note: We recommend lithium batteries for cold
weather climates, but alkaline batteries are
sufficient for most climates. We do not recommend
rechargeable batteries. They have lower voltages,
do not operate well at wide temperature ranges, and
do not last as long, resulting in poorer reception.

6
Initial Display Console Set Up
1. Rainfall data display
2. Rainfall grade graph
3. Rainfall of day/week/month/year display
4. Time
5. Rain rate/event/1h/24h display
6. Indoor temperature
7. Indoor humidity
8. Alarm icon
9. Date/Week
10. Signal icon

7
11. Wall-mounted hole
12.Table stand
13. Battery door
2. Install the batteries. The unit will turn on all
segments of the LCD for 3 seconds after power on
and display setting value. Then the unit will start to
register the outdoor channel which takes 3 minutes.

8
Full display Normal display
2.4 Mount outdoor sensor
Mount with U-bolts
The mounting assembly includes two U-Bolts and a
bracket that tightens around a 1" to 2” diameter pole
(included a D32*H200mm stainless steel tube)
using the four U-Bolt nuts.

9
Note: Use the bubble level beside the rain sensor
as a guide to verify that the sensor is leveled.
Mount with screws
The mounting assembly also includes two screws
for installation on a flat place.

10
Note: Use the bubble level beside the rain sensor
as a guide to verify that the sensor is leveled.
Best Practices for Wireless Communication
Wireless communication is susceptible to
interference, distance, walls and metal barriers. We
recommend the following best practices for trouble
free wireless communication.
1. Electro-Magnetic Interference (EMI).
Keep the console several feet away from
computer monitors and TVs.
2. Radio Frequency Interference (RFI). If
you have other 915 MHz devices and
communication is intermittent, try turning off
these other devices for troubleshooting
purposes. You may need to relocate the
transmitters or receivers to avoid

11
intermittent communication.
3. Line of Sight Rating. This device is rated at
300 feet line of sight (no interference,
barriers or walls) but typically you will get
100 feet maximum under most real-world
installations, which include passing through
barriers or walls.
4. Metal Barriers. Radio frequency will not
pass through metal barriers such as
aluminum siding. If you have metal siding,
align the remote and console through a
window to get a clear line of sight.
3. Console Operation
Program mode
The screen is divided into 5 segments for selection.
There are seven program modes: normal, setting
mode, day rain history mode, month rain history
mode, max/min mode, HI/LO alarm set mode and
factory reset/clear memory.
All the modes can be exited at any time by pressing
the HISTORY key, or waiting for a 15 second
timeout to take effect.

12
Button Function
SET: enter the setting mode
RAIN 1/+:display RATE,EVENT,1H,24H( normal
mode) or + ( programming mode)
RAIN 2/-:display DAY, WEEK, MONTH, YEAR,
TOTAL( normal mode) or– ( programming mode)
HISTORY: display history records / return to normal
mode
HI/LO: display the MAX, MIN value( normal mode)
/ Set Alarm ( long press to enter setting alarm mode)
3.1 Normal Mode
3.1.1 In Normal Mode, press the “RAIN 1/+”
button to alternate the display of:

13
Display rain rate
Display rain event
Display rainfall total of 1h
Display rainfall total of 24h
Note: Long press button “RAIN 1/+” over 5s will
clear the current rainfall data displayed.
3.1.2 In Normal Mode, press the “RAIN 2/+”
button to alternate the display of:
Display rainfall of day
Display rainfall of week
Display rainfall of month
Display rainfall of year
Display rainfall of total
Note: Long press button “RAIN 2/+” over 5s will
clear the current rainfall data displayed.
3.1.3 In normal mode, press the button
“HISTORY” to enter Day Rain History Mode.
3.1.4 In normal mode, press the button “HI/LO”
to enter HI/LO Alarm Set Mode.
3.2 SET Mode
In Normal Mode, long press the “SET” button for 2

14
seconds to enter Set Mode. The first setting will
begin flashing. You can press the “SET” button
again to skip any step, as defined below.
a) 12/24 hour format
b) Manual time setting (hours/minutes)
c) Date format setting(D-M/ M-D)
d) Date setting(year/month/day)
e) Temperature unit setting(°C/°F)
f) Rainfall unit setting(mm/in)
Note: In the setting mode, press” RAIN1/+”
or ”RAIN2/-” buttons to change or scrolls the value.
Hold the button for 2 seconds can change fast.
The setting mode will return to normal display while
idle 15s or by pressing the button “HISTORY”.
3.3 Rain History Mode
In Normal Mode, short press the button “HISTORY”
once to enter Day Rain History Mode, press
“HISTORY” button twice will enter Month day history
view mode;
Short press the button “RAIN1/+” or “RAIN2/+” to
check the history rainfall data of the days or month
displayed.

15
3.4 MIN/MAX Mode
In Normal Mode, press the button “HI/LO” to
alternate the following max/min records with
timestamp:
a) Indoor temperature Max
b) Indoor temperature Min
c) Indoor humidity Max
d) Indoor humidity Min
Note: Long press button “RAIN 2/+” over 5s will
clear the current max/min records with timestamp
displayed.
The setting mode will return to normal display while
idle 15s
3.5 HI/LO Alarm Set Mode
In Normal Mode, long press the "HI/LO" button for 2
seconds to enter Alarm Set Mode. You can press
the "HI/LO" button again to skip any step, as defined
below.
a) Time alert ON/OFF;
b) Time alert value setting(hour/minute);
c) Rainfall Rate HI alert ON/OFF;
d) Rainfall Rate HI alert value setting;
e) Rainfall Event HI alert ON/OFF;
f) Rainfall Event HI alert value setting;
g) Indoor temperature HI alert ON/OFF;

16
h) Indoor temperature HI alert value setting;
i) Indoor temperature LO alert ON/OFF;
j) Indoor temperature LO alert value setting;
k) Indoor humidity HI alert ON/OFF;
l) Indoor humidity HI alert value setting;
m) Indoor humidity LO alert ON/OFF;
n) Indoor humidity LO alert value setting;
Note: In the alarm setting mode, press” RAIN1/+”
or ”RAIN2/-” buttons to change or scrolls the value.
Hold the button for 2 seconds can change fast.
When the alarm value is reached, the
corresponding alarm icon will flash and the
buzzer will ring for 2min. The ringing can be
stopped by pressing any button.
The setting mode will return to normal display while
idle 15s or by pressing the button “HISTORY”.
3.6 Factory Reset/Clear Memory
a. Press the button “SET” and “HI/LO” at the same
time and power up the display will enter Factory
Reset All previously set value will be reset to its
default.
b. Press the button “RAIN1/+” and “RAIN2/+” for 5s,
will register the transmitter signal for 3 minutes.

17
4. Function
a) Date
Calendar (Month/date,2017-2099 Default Year 2017)
12/24 hr format selected
Alarm clock
b) Indoor temperature and humidity
Every 60 second the unit will measure indoor
temperature and humidity.
Indoor temperature and humidity MAX,MIN records
with timestamp
Temperature/humidity high/low alert
c) Rain
Every 49 second the unit will receive wireless rain
sensor.
Rain1 record view: RATE,EVENT,1H,24H.
Rain2 record view: DAY, WEEK, MONTH, YEAR,
TOTAL
Rain1 ( Rate, Event, 1h, 24h rain data ) against
graph display
Rain Rate/Event alert
d) Rainfall history (24 monthly rain history and the
730 days have rain rainfall records)
e) Wireless Signal Strength Indicator
During the synchronization, it will reduce one signal
segment if it has not received the signal once from
the transmitter. It will increase one signal segment if
it has received the signal once.

18
5. Maintenance
1. Clean the rain gauge once every 3 months.
Rotate the funnel counter-clockwise and lift to
expose the rain gauge mechanism, and clean
with a damp cloth. Remove any dirt, debris and
insects. If bug infestation is an issue, spray the
array lightly with insecticide.
Received the signal once
Lost the signal once

19
2. Replace batteries every 1-2 years. If left in too
long, the batteries may leak due to
environmental challenges. In harsh
environments, inspect the batteries every 3
months.
3. When replacing the batteries, apply a corrosion
preventive compound on the battery terminals,
available at Amazon and most hardware stores.
4. In snowy environments, spray the top of the
rain collector with anti-icing silicon spray to
prevent snow build up.
6. Troubleshooting Guide
Problem
Solution
Wireless remote
(outdoor unit)
not reporting in
to console.
There are
dashes (--) on
the display
console.
Check the remote-transmitter LED for
flashing.
The outside sensor has an LED under the
plastic, just above the battery
compartment. The LED will flash every 48
seconds.
If the LED is not flashing every 48 seconds,
replace the batteries in the outside sensor.
If the batteries were recently replaced,
check the polarity. If the sensor is flashing
every 48 seconds, proceed to the next
step.
There may be a temporary loss of

20
Problem
Solution
communication due to reception loss
related to interference or other location
factors, or the batteries may have been
changed in the remote and the console has
not been reset.
The solution may be as simple as
powering down and up the console.
1. Make sure you have fresh batteries in
the display console.
2. With the sensor array and console 10
feet away from each other, remove the
batteries from the display console and
wait 10 seconds. Put the batteries back
in.
3. Do not touch any buttons for
several minutes.
4. The remote sensor search icon
will splash on the display. Wait several
minutes for this icon to turn off.
5. If the search icon turns off and the
outdoor temperature and humidity are
still showing dashes (--), the remote
sensor is defective. If the sensor
properly syncs up, proceed to the next
step “How to prevent intermittent
wireless communication”
How to prevent intermittent wireless
communication issues:
1. Install a fresh set of batteries in the
remote sensor array and console. For
cold weather environments, install
Table of contents
Other Fine Offset Electronics Measuring Instrument manuals
