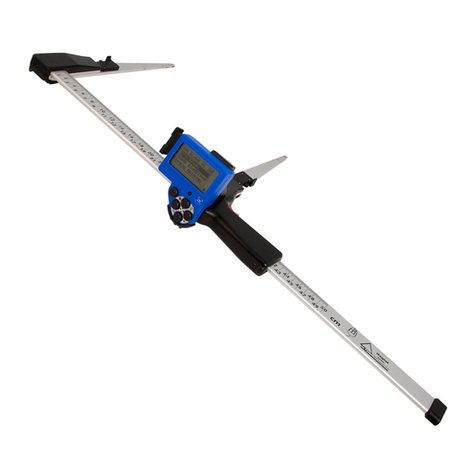
Haglof Mantax Digitech II User manual

ENG
MD II
USER’S MANUAL
Firmware: MDII 3.3 – From MD II serial number: 35500
THE MANTAX DIGITECH MD II IS A DIGITAL CALIPER MADE BY HAGLÖF SWEDEN AB. THE
MD II OFFERS GREAT FUNCTIONALITY, ADAPTIVE TECHNOLOGY, EASY HANDLING AND
PRECISION RESULTS.
2016-09-01

Contents
1
© 2016, Haglöf Sweden AB
THE MD II ............................................................ 2
PRODUCT OVERVIEW ............................................... 3
Data Terminal ................................................ 4
Measuring Scale “SmartScale”....................... 5
Slim Jaws and Robust Design ............................. 5
Rechargeable Batteries ...................................... 5
The SmartScale............................................... 6
HARDWARE HANDLING....................................... 7
DEMOUNTING THE DATA TERMINAL ............................ 7
MOUNTING THE DATA TERMINAL................................ 7
Buttons ........................................................... 8
Arrow Keys ......................................................... 9
Display Symbols................................................ 10
CHARGING BATTERIES IN TERMINAL AND SCALE........... 11
Charging the Terminal.................................. 11
Charging the SmartScale.............................. 11
HANDLING SMARTSCALE ........................................ 12
Foldable Jaws ............................................... 12
Adjusting the Angle of the Jaws ................... 12
Lock on Handle............................................. 13
Adjusting the Handle.................................... 13
Synchronization Data Terminal and
SmartScale.................................................... 14
Calibration.................................................... 14
Controlling the SmartScale........................... 15
Maintenance ................................................ 15
HANDLING OF SOFTWARE..................................16
Menu................................................................ 16
MEASURE AND REGISTER........................................ 17
Tree Species.................................................. 17
Diameter Measurement............................... 17
Height or Length........................................... 18
Heights via IR................................................ 18
Delete Latest Register while you Measure ... 18
LINE –SEND WIRELESS DATA ................................. 19
Connect to Last Device ................................. 19
Connect to New Device ................................ 19
LOCAL –MEASURE AND STORE .............................. 20
SEND –SEND TO HAGLOF LINK .............................. 20
INSPECT -SEE STORED DATA ................................ 21
CLR–SELECT TO DELETE FROM MEMORY ................. 21
Delete a Registration.................................... 21
Delete all Registrations ................................ 21
Finish – Esc ................................................... 21
SET –SETTINGS.................................................... 22
Species – Select Species................................ 22
Create Tree Species.......................................... 23
Program set. – Program Settings................. 24
MD II mode...................................................... 24
Digitech mode ................................................. 25
2 x dia – Cross Measure................................... 26
Circumference ................................................. 27
Decimal – Show Decimal on Diameter............. 28
System set. – System Settings for MD II....... 28
Random – Random Sample Tree.................. 29
Activate and Set Sample Tree .......................... 29
Deactivate Random Tree ................................. 29
ZZZZ –TURN OFF MD II........................................ 30
USB –SET MD II IN USB MODE............................. 30
SYSTEM SETTINGS MD II .................................... 31
COMMUNICATION................................................. 31
USB............................................................... 31
Connection USB ............................................... 31
Bluetooth®.................................................... 32
Bluetooth Mode............................................... 32
Bluetooth - Slave.............................................. 32
Bluetooth - Master........................................... 33
TECHNICAL SPECIFICATION ................................ 35
MD II DATA TERMINAL........................................... 35
MD II SMARTSCALE............................................... 36
Packing......................................................... 36
DATA FORMAT...................................................... 37
XML .............................................................. 37
NMEA ........................................................... 38
Digitech Mode.............................................. 38
MD II COM - ANDROID APP ............................... 39
INSTALL THE MD II COM APP.................................. 39
HANDLING ........................................................... 40
SOME POINTS ON WARRANTY AND SERVICE............... 41
DISCLAIMER, WARRANTY AND LEGAL
INFORMATION................................................... 41
DECLARATION OF CONFORMITY........................ 43
Declaration of conformity, Compliance
statement/Déclaration de conformité ......... 43
FCC ............................................................... 43
IC Canada ..................................................... 43
FCC Part 15.21 Statement ............................ 44
MD II
USER’S Manual
Firmware: MDII 3.3 – From
MD II serial number: 35500
REV 2 ENGLISH: 19-01-08
2
© 2016, Haglöf Sweden AB
THE MD II
The MD II is a digital diameter caliper, developed and
manufactured by Haglöf Sweden AB. The development focus has
been to design a modern and tree diameter caliper for
professional use, packed with modern technology, that offers
great versatility and is user friendly yet rugged and robust.
•Icon based menu system with updated firmware.
•Low weight:890g/500 m scale; 1000g/600mm scale; 1110g/800 mm scale.
•Foldable jaws with patented technology.
•Built-in rechargeable Li-Ion batteries.
•Low energy consumption – approx. one week per charge.
•USB connection for quick and safe communication.
•Wireless Bluetooth® communication with external devices.
•Secure data storage with built-in 1Gb SD memory card.
•Store up to 1 000 000 individual trees with data on diameter and height.
•Proven functional, non-incremental and energy saving measuring system.
•Built-in IR-receiver for height transfer from Haglöf Sweden height measurers Vertex and Vertex Laser.
•Graphical backlit display for excellent visibility.
The MD II is a modern tree diameter caliper with an icon-based firmware application designed for quick
start and easy handling. The MD II allows for registering of tree species, diameter and height, and the data
can be stored locally or transferred online to cellphone, handheld computer, PC or tablet with Bluetooth
technology. The MD II can be ordered with metrical (mm) measuring scale or as imperial (inch) version.
Data can be stored in XML-file and sent to PC with a standard USB-cable. The XML-file can be opened in
Excel or imported to database for further processing.
The MD II Com is a file handling program that can be used to transform the XML-files from the MD II to text
files, and to generate different reports such as list of standing trees, tab separated text-file or as printouts.
Apart from connecting the MD II to a Bluetooth serial port, the MD II can be used as a virtual Bluetooth
enabled keyboard. The MD II will send data as a keyboard press to program such as Open Text file, Excel,
mail or as cellphone text message.
Unique lists of tree species including with up to 100 individual species names can be created, and special
settings include cross measured diameters with mean diameter value and circumference results feature in
the display.
If you have worked with previous Mantax Digitech models and software applications, the MD II can be set
to Mantax Digitech mode. The MD II data format will be identical to the format used for Mantax Digitech.

MD II
USER’S Manual
Firmware: MDII 3.3 – From
MD II serial number: 35500
REV: 19-01-08
3
© 2016, Haglöf Sweden AB
PRODUCT OVERVIEW
1. MD II Measuring Scale
2. Data Terminal
3. Holder for Data Terminal
4. Adjustment Screw for Jaws
5. Loudspeaker
6. USB Interface and Battery Charge Contact
7. Enter Button (mechanical)
2
1
3
4
5
3
7
6

MD II
USER’S Manual
Firmware: MDII 3.3 – From
MD II serial number: 35500
REV: 19-01-08
4
© 2016, Haglöf Sweden AB
DATA TERMINAL
1. LCD Display
2. IR Receiver
3. Enter key
4. Arrow keys (4 ea)
5. Loudspeaker
6. USB Interface and Battery Charge Contact
1
2
3
4
6
5

MD II
USER’S Manual
Firmware: MDII 3.3 – From
MD II serial number: 35500
REV: 19-01-08
5
© 2016, Haglöf Sweden AB
MEASURING SCALE “SMARTSCALE”
The measuring scale for MD II is called “SmartScale” and consists from the foldable jaws and the non-
incremental measuring system with battery and radio. The radio uses ISM band 2.4GHz. The SmartScale is
synchronized to the data terminal, and sends data to this specific terminal. If changing/replacing either the
SmartScale or the data terminal, a new synchronization must be made (see section Data Terminal). The
SmartScale for MD II is available in the following lengths: 500mm, 600mm, 650mm, 800mm, 950mm, 1000mm
and 18”, 24”, 30” and 36”. The MD II SmartScales can also be ordered with circumference print (500mm,
600mm, 650mm, 800mm, 950mm and 1000mm length).
SLIM JAWS AND ROBUST DESIGN
The MD II caliper is designed for easy reach and simple use and the firm jaw has a special design for use in
dense forests and to measure in log piles.
The caliper is built strong with robust design and reinforced metal chassis. Image [2] shows a stripped version
of the SmartScale.
RECHARGEABLE BATTERIES
Both the SmartScale and the MD II terminal have built-in Li-Ion batteries and low energy consumption with
approx. one week of work/charge. The batteries are charged through the USB port, the USB adapter and a mini
USB cable that can be connected to PC or to external USB charger. See Charging the SmartScale.
2
1

MD II
USER’S Manual
Firmware: MDII 3.3 – From
MD II serial number: 35500
REV: 19-01-08
6
© 2016, Haglöf Sweden AB
THE SMARTSCALE
1. Foldable jaws
2. Lock for foldable jaws
3. Attachment data terminal
4. Enter key
5. LED indicator for measuring scale battery
6. Scale
7. Movable handle
8. Handle lock
9. Connection battery charger contact
10. Support for data terminal
11. Adjustment screw for slide bushings
1
1
2
2
5
6
4
7
3
8
9
4
10
11

MD II
USER’S Manual
Firmware: MDII 3.3 – From
MD II serial number: 35500
REV: 19-01-08
7
© 2016, Haglöf Sweden AB
HARDWARE HANDLING
DEMOUNTING THE DATA TERMINAL
1. Push the shackle [1] to upright position.
2. Lift the data terminal [2] straight up and angle out the down part of the terminal.
MOUNTING THE DATA TERMINAL
1. The shackle [1] on the handle folded up.
2. Mount the data terminal [2] by hooking the support [3] in the compartments [4] on the upper part of
the terminal. Lift the support [3] with the data terminal and angle the lower part to the movable
handle. Sink down the data terminal and lock it in position with the shackle [1].
1
2
3
4

MD II
USER’S Manual
Firmware: MDII 3.3 – From
MD II serial number: 35500
REV: 19-01-08
8
© 2016, Haglöf Sweden AB
BUTTONS
The data terminal is assembled on the movable handle. The red enter button on the handle (1) can be used to
register diameters. Registering can also be done with the enter button on the terminal (2).
The arrow keys (3) are used to navigate in the program and to enter data. Different functions are activated
when pressing two keys simultaneously, for example to activate backlit display or to turn off the terminal.
1
2
3

MD II
USER’S Manual
Firmware: MDII 3.3 – From
MD II serial number: 35500
REV: 19-01-08
9
© 2016, Haglöf Sweden AB
ARROW KEYS
The arrow keys are used to navigate in the program and to enter data. Different functions are activated when
pressing two keys at the same time, see below.
No
Icon Key/s Description
1 Left Step left
2 Right Step right
3 Up Step up
4 Down Step down
5
Up + Left Turn-off
6
Up + Right Turn on display light
7
Down + Left Quit, Escape
8
Down + Right Activate IR receiver
Example multi-function button
Press Escape to leave a menu or a measurement operation. Press both
keys simultaneously (see image).

MD II
USER’S Manual
Firmware: MDII 3.3 – From
MD II serial number: 35500
REV: 19-01-08
10
© 2016, Haglöf Sweden AB
DISPLAY SYMBOLS
The graphical black/white display has 128x64 pixels and a backlit function that can be activated with quick keys.
The display light will be active for approx. 30 sec’s for each key press. To turn off the light, use the same key
press as when activating the function. Note that the caliper consumes more power when this function is active.
Symbols on the right side of the display indicate the following:
Bluetooth communication active
Backlit function active
USB interface tension
Flash = charging
Poor battery 3.00-3.30V
Normal battery 3.30-3.50V
Full battery 3.50-4.20V

MD II
USER’S Manual
Firmware: MDII 3.3 – From
MD II serial number: 35500
REV: 19-01-08
11
© 2016, Haglöf Sweden AB
CHARGING BATTERIES IN TERMINAL AND SCALE
The MD II SmartScale and MD II data terminal have built-in rechargeable Li-Ion batteries. Fully charged, the
batteries last for approx. one week of measuring work. Charge the batteries with 5V through the USB-ports and
USB adapter along with a mini USB cable that can be connected to PC, USB car charger or external USB charger.
Charging normally takes 3-4 hours, depending on temperature and other. The charging time will shorten when
the terminal is set in USB mode. USB mode is normally entered automatically.
NOTE THAT THE SCALE ALSO NEEDS TO BE CHARGED!
CHARGING THE TERMINAL
1. Connect the USB cable (Mini-B) [3] in the USB
adapter [1].
2. Connect the other end (Type A) [4] to a USB port
in your PC or to a USB charger.
3. Connect the USB adapter [1] with a USB cable on
the data terminal.
4. Set to USB mode for quicker charge.
CHARGING THE SMARTSCALE
1Connect the USB adapter [1] with the mini USB
cable [3] and the USB charger [4], PC or USB-car
charger to the SmartScale, see image. Charging
time is approx. 3 hours.
2The LED [2] indicator is on when charging the
SmartScale. When the LED [2] blinks this is an
indication of low battery. This indicator goes out
when the battery is charged.
3The data terminal warns during measuring when
power is low in the SmartScale battery.
1
1
2
3
4

MD II
USER’S Manual
Firmware: MDII 3.3 – From
MD II serial number: 35500
REV: 19-01-08
12
© 2016, Haglöf Sweden AB
HANDLING SMARTSCALE
FOLDABLE JAWS
The SmartScale measuring scale has foldable jaws. To fold the jaws, move the lock forward and fold (see
image). Pull the handle as far to the side as possible. The jaws are locked into each other as shown above.
ADJUSTING THE ANGLE OF THE JAWS
After some time of use it may be necessary to adjust the
angle of the jaws. Use a 2 mm Allen Key, see image.

MD II
USER’S Manual
Firmware: MDII 3.3 – From
MD II serial number: 35500
REV: 19-01-08
13
© 2016, Haglöf Sweden AB
LOCK ON HANDLE
The movable jaw on the handle can be locked when the jaws are retracted, which is is practical when
transporting the MD II. To unlock, press on the small ”hump” on one of the jaw locks [1] on the underside of
the caliper and move the handle to the side. The locks can be removed if preferred.
ADJUSTING THE HANDLE
The handle has built-in friction pads. Use the 2 mm Allen key to adjust the handle. The key is included on
delivery in the MD II package.
1

MD II
USER’S Manual
Firmware: MDII 3.3 – From
MD II serial number: 35500
REV: 19-01-08
14
© 2016, Haglöf Sweden AB
SYNCHRONIZATION DATA TERMINAL AND SMARTSCALE
For the radio to connect, the data terminal needs to be synchronized with the SmartScale. The function is
available in the system menu. Note that synchronization is made on an open channel, and it is recommended
not to keep other SmartScale devices in close proximity (<10m/yds.) to avoid interruption of the
synchronization process.
Go to SET - System.Set
1. Set the SmartScale to 25cm.
2. Activate the System menu— Settings — Radio — Sync.Scale in the MD II data terminal.
CALIBRATION
The SmartScale will normally not need to be calibrated. Check on a regular basis the displayed diameter to be
equal to digits shown on the measuring scale, or use a calibration profile to control the measure. For
divergences larger than (+-1mm) the caliper should be calibrated.
Use calibration profile, see below:
1Go to SET - System.Set och then Calibrate.
2Pull the movable jaw to 0 cm and press ENTER.
3Pull the movable jaw to 50 cm and press ENTER. The caliper is calibrated.
Select menu SET - System Set. and then Calibrate.
If Calibration was unsuccessful, control the following:
•Error code -1: Hardware error. Try recalibrating.
•Error code -2: Calibration error. Try recalibrating.
•Error code -3: Measuring system interference. Try recalibrating.
•Error code -4: No radio contact. Try to synchronize SmartScale and data terminal.

MD II
USER’S Manual
Firmware: MDII 3.3 – From
MD II serial number: 35500
REV: 19-01-08
15
© 2016, Haglöf Sweden AB
CONTROLLING THE SMARTSCALE
Controls of the SmartScale are made in the application, or menu SET – System Set. -TESTER and Scale.
Use a calibration profile (art no 16-102-1007), or the printed scale on the SmartScale.
Make sure that the diameter value featured in the display is equal to the profile measure or the printed scale.
MAINTENANCE
Use a clean, and if required, slighly damp cloth to clean the terminal housing. Be careful not to scratch the
display. It is not recommended to use cleansing liquid or chemicals of any kind. To clean the aluminum scale
use a clean cloth and if necessary mild detergent. Rub paint stains and resin with a small amount of denatured
alcohol on the cloth.

MD II
USER’S Manual
Firmware: MDII 3.3 – From
MD II serial number: 35500
REV: 19-01-08
16
© 2016, Haglöf Sweden AB
HANDLING OF SOFTWARE
MENU
LINE - Start measuring work with Bluetooth transfer.
Connect to latest used Bluetooth device.
Search for new Bluetooth device and connect this to the MD II.
Exit and return.
LOCAL – Start measuring work and save data on MD II terminal.
INSPECT – Inspect data saved on MD II terminal.
SEND – Send file locally to the Haglof Link app.
CLR – Select to delete data saved on MD II terminal.
Delete tree of option. (NO REGRETS!)
Delete all registered data. I tis mandatory to confirm with YES before all data is deleted.
(NO REGRETS!)
Exit and return.
SET – Settings for program and system.
Select tree species to use/activate. Press right arrow key to activate/deactivate.
Program settings. Use ENTER to activate or deactivate.
MD II-mode is active (Mantax Digitech mode deactive) and data is
saved in XML-file if stored on MD II terminal.
Mantax Digitech mode is active (MD II mode deactive). The MD II
functions and data format are compatible with the Mantax Digitech
caliper model when data is transferred online (LINE).
Activate cross measuring of diameters. The MD II will save a mean
diameter measure. The icon is shown in lower display frame
when this mode is active.
Activate to show circumference instead of diameter measure. The
icon is shown in lower display frame when this mode is active.
Activate to show measuring value with one decimal.
System settings for the MD II such as Bluetooth and Calibration of scale.
Set to select sample trees with the MD II for tree species 1 to 4. The formula (Kxd2/D2). K
= (part of %) between 0 and 99,
d
= Diameter,
D
= Mean diameter.
Exit and return.
ZZzz – Sleep
USB - Activate USB mode. This is (normally) automatic when USB-cable is connected to PC.

MD II
USER’S Manual
Firmware: MDII 3.3 – From
MD II serial number: 35500
REV: 19-01-08
17
© 2016, Haglöf Sweden AB
MEASURE AND REGISTER
Use the MD II to register tree species, to measure diameters with millimeter accuracy and to register
measuring values for heights or lengths.
Data values can be stored in the MD II memory, or transferred online via Bluetooth to external devices such as
cellphones, tablets or handheld computers.
•To store data in memory LOCAL – Measure and Store
•To send data LINE – Send Wireless Data
All work is performed as described below independent on if data is stored in the MD II or transferred to
another device.
TREE SPECIES
Change tree species by pressing right and left arrow key. The species are numbered
from 1 to 100 and the names for the different species can be edited, see Create Tree
Species.
1. Tree species. Change with ←left or →right arrow key.
2. Diameter. Change with the measuring scale.
3. Quick scroll. Hold →right arrow key depressed.
DIAMETER MEASUREMENT
To measure and register a tree diameter, place the jaws on each
side of the diameter to measure. Register by pressing Enter.
•The MD II display shows latest registered diameter and is
updated when a new diameter is registered.
•To show current diameter without registering it, press
briefly on ↓ down arrow key.
•If you need to register a larger diameter than the
physical length of the SmartScale, you can temporarily
“double” the scale by pressing ↓down arrow key for approx. 2 sec’s (jaws together at 0 cm) until the
diameter is displayed as white text on black background.Set the desired diameter value and press
Enter to register.
•To perform cross measuring (also “cross scaling”), press and keep ↓down arrow key depressed until
the digit (2) is shown on the right side of the diameter value. Measure and register the next diameter
with Enter. The mean value from the two diameters is the registered value.
•The MD II can be set to always demand two diameters/mean diameter value: Cross Measuring.
2
1
SP1
25.3cm

MD II
USER’S Manual
Firmware: MDII 3.3 – From
MD II serial number: 35500
REV: 19-01-08
18
© 2016, Haglöf Sweden AB
HEIGHT OR LENGTH
Heights, and in current cases lengths, can be registered after the diameter of the tree is registered.
1. Register height/length by pressing ↑up
arrow key. The field is activated with black
background.
2. Change the value with the measuring scale
or adjust with ↑ up or ↓ arrow keys.
3. Save with Enter.
Heights can be transferred from IR-supported
(Infrared) height measuring instruments. Up to three
heights per tree can be transferred. Heights via IR.
HEIGHTS VIA IR
Transfer height values from the Vertex and Vertex Laser instruments (or other compatible instruments) with IR
technology.
1. The IR reading is activated when pressing →Right and
↓Down arrow key simultaneously.
1. Data can be transferred from the height measuring
instrument by pressing SEND key (IR/SEND). Refer to
instrument manual for details. Aim the IR port on your
instrument straight to the IR port on the MD II terminal
to transfer data.
2. Accept/register the transferred height value(s) by
pressing the Enter key on the MD II.
DELETE LATEST REGISTER WHILE YOU MEASURE
To delete your latest registered value, press and hold ←left arrow key depressed a few seconds.
SP1
25.3cm
25.3cm
215

MD II
USER’S Manual
Firmware: MDII 3.3 – From
MD II serial number: 35500
REV: 19-01-08
19
© 2016, Haglöf Sweden AB
LINE – SEND WIRELESS DATA
LINE mode is used to send all data for tree species, diameter, and heights to device that is connected
with Bluetooth®. No data is stored in the MD II in this mode.
Bluetooth technology enables wireless communication between instruments within a limited range (<10m) and
with limited energy consumption.
Adjust the communication settings in the MD II. See section on Bluetooth before connecting. All settings should
be aligned also in the connecting device.
1. Bluetooth needs to be activated and visible on the device before initiating connection.
2. Go to and press Enter and select
oCONNECT TO LAST DEVICE
oCONNECT TO NEW DEVICE
CONNECT TO LAST DEVICE
1. Go to and press Enter to reconnect to latest used Bluetooth device.
The MD II will search for this device and reconnect.
2. Start measuring work. Measure and Register.
3. To abort/quit press Esc = ← left arrow and ↓ down arrow key simultaneously.
CONNECT TO NEW DEVICE
1. Press Enter to connect to a new device.
2. The MD II starts a search for new devices.
3. A list of devices appears.
4. Select which device to use and press Enter.
5. A code may be requested when connecting. The MD II uses standard code 1234. State this code for
the connecting device.
a. If Bluetooth in the MD II is set to Master mode, the external device code may be requested.
Refer to the user’s manual for the external device. See Bluetooth®.
6. When connection is up Measure and Register.
7. To abort/quit press Esc = ← left arrow and ↓ down arrow key simultaneously
This manual suits for next models
1
Table of contents
Other Haglof Measuring Instrument manuals

Haglof
Haglof MD II User manual

Haglof
Haglof Postax User manual

Haglof
Haglof Vertex 5 User manual

Haglof
Haglof Digitech User manual

Haglof
Haglof DP II User manual

Haglof
Haglof Vertex 5 User manual

Haglof
Haglof Vertex Laser Geo User manual

Haglof
Haglof DME User manual

Haglof
Haglof HCH User manual

Haglof
Haglof Vertex III V1.5 User manual