Fireco Deafgard User manual
Operating Guide
English Version 3.3

eep this Guide in a safe place.
Contents Page
What is Deafgard? 2
First Check 3
Important Safety Information Prior to Use 4
LCD & eypad 5
The LEDs - Strobe and Status 6
Getting Started 7
Setting the Time 9
Fire Alarm Test 10
Using Deafgard 11
Wake-up Alarm 12
Self Test 13
Sensitivity Adjustment 14
Batteries 15
Trouble Shooting 16
Error Messages 17
Manufacturer’s Warranty 19
Notes 20
Deafgard - Quick User Guide 23
1
2
What is Deafgard?
Deafgard is a Battery powered movable Fire and Wake-up alarm.
Importantly, Deafgard ‘listens’ for the fire alarm in a building for persons
who are not able to hear. When it ‘hears’ the building fire alarm, the
Deafgard Pillow Pad vibrates and the Strobe Lights flash.
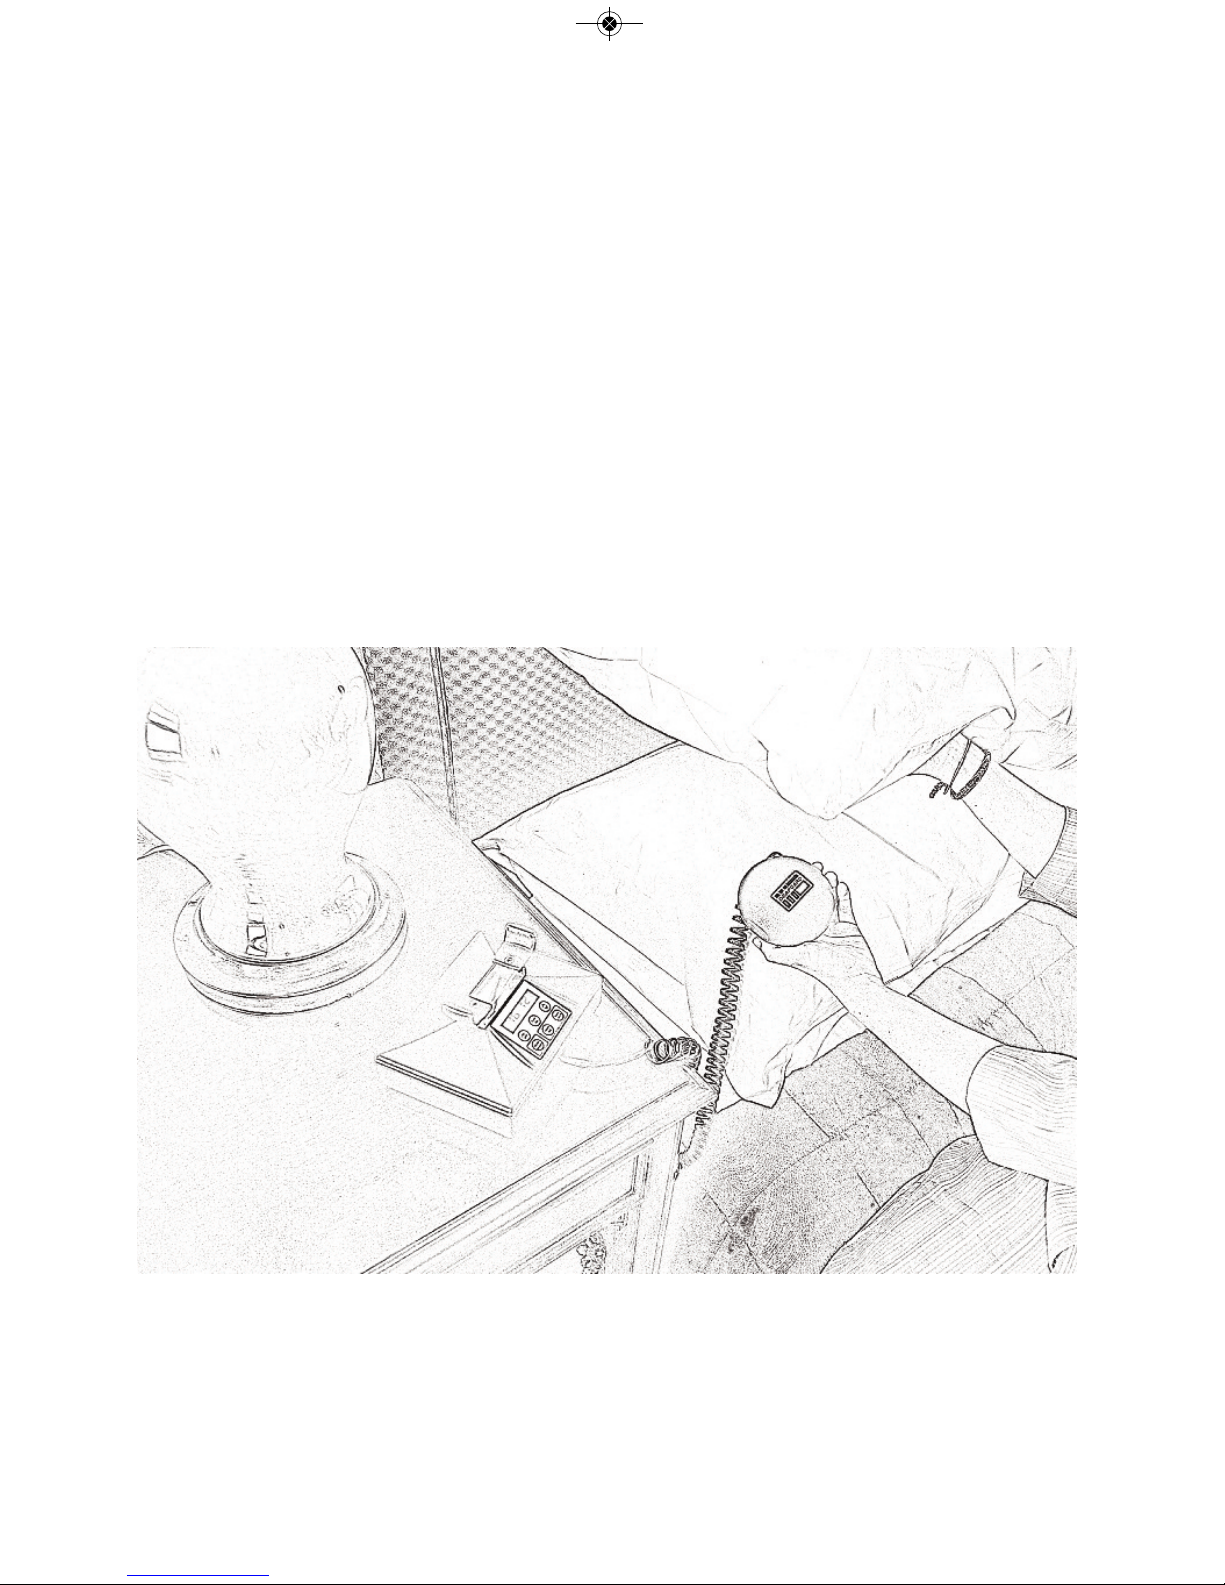
It is designed to be used on a bed-side cabinet from where the Pillow Pad
should be placed under the pillow or mattress.

3
Have you removed all the contents from the Carton?
You should have:
1. One Deafgard with Pillow Pad and Cable.
2. One Carry Bag.
3. Four ‘C’ size (LR14) Batteries.
4. One blue Deafgard Sticker (for your deaf or hard of hearing customers).
5. This Operating Guide.
First Check

Deafgard must only be used for the purpose for which it is
designed. It is not suitable for external use. Read this guide and
follow the instructions carefully. eep this Guide in a safe place
e.g. in your Fire Log Book, for future reference.
Supplementary information about the sound of a fire alarm:
The British Standard for fire alarm installation, BS5839-1: 2013,
(Clause 16.2), states: -
“The s und pressure level f alarm signals sh uld be generally, thr ugh ut all
accessible areas f the building n t less than 65dB(A) . . . where the s und
pressure level f backgr und n ise is greater than 60dB(A), the s und pres-
sure level f the fire alarm signal sh uld be 5dB ab ve the s und pressure
level f the backgr und n ise.”
It also states:-
The s und pressure level f alarm signals “sh uld be n t less than 75dB(A)
at the bed head within r ms in which the fire alarm system is intended t
r use pe ple fr m sleep.”
Deafgard has been designed to the relevant parts of BS 5446-3:
Specification for smoke alarm kits for deaf and hard of hearing people.
Important Safety Information Prior to Use
4
5
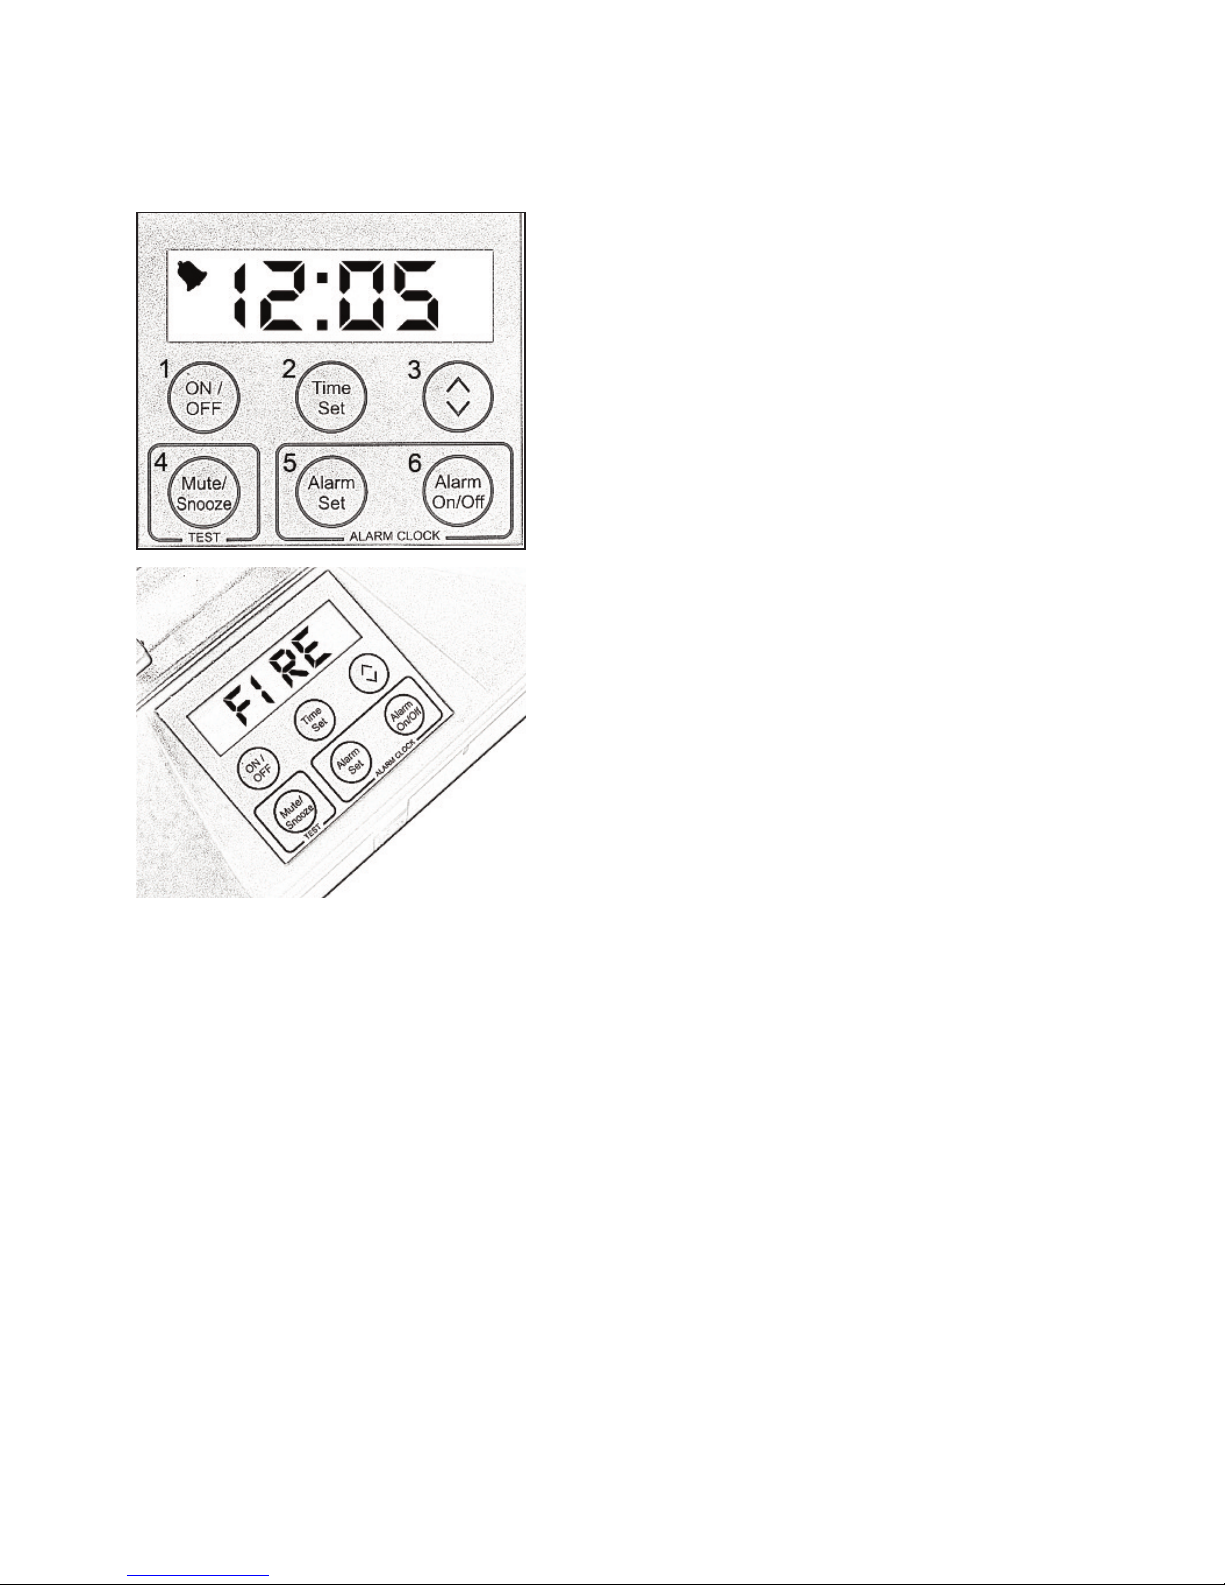
LCD & eypad
The LCD is back-lit and is used to
display the Time, Wake-up Alarm
settings, low Battery conditions and
any faults.
In a fire alarm condition, the LCD will
display ‘FIRE’.
The LCD will display any error
messages.
Note: See page 17 for Error
Messages.
eypad
1. Button 1 ON/OFF - Power On/Off.
2. Button 2 TIME SET - Used to set
Time.
3. Button 3 SCROLL Adjust Clock
and Wake-up Alarm settings.
4. Button 4 MUTE/SNOOZE - Used to
mute Wake-up Alarm as well as
testing the Deafgard unit.
5. Button 5 ALARM SET - Used to set
the Wake-up Alarm.
6. Button 6 ALARM ON/OFF - Turns
Wake-up Alarm On/Off.
Common LCD readouts:
FIRE: Fire alarm has sounded
PAD: Pillow Pad cable has
detached or has a fault.
SELF: Deafgard is
conducting a Self Test
TEST: Deafgard is
conducting a test after Button
4 has been pressed.
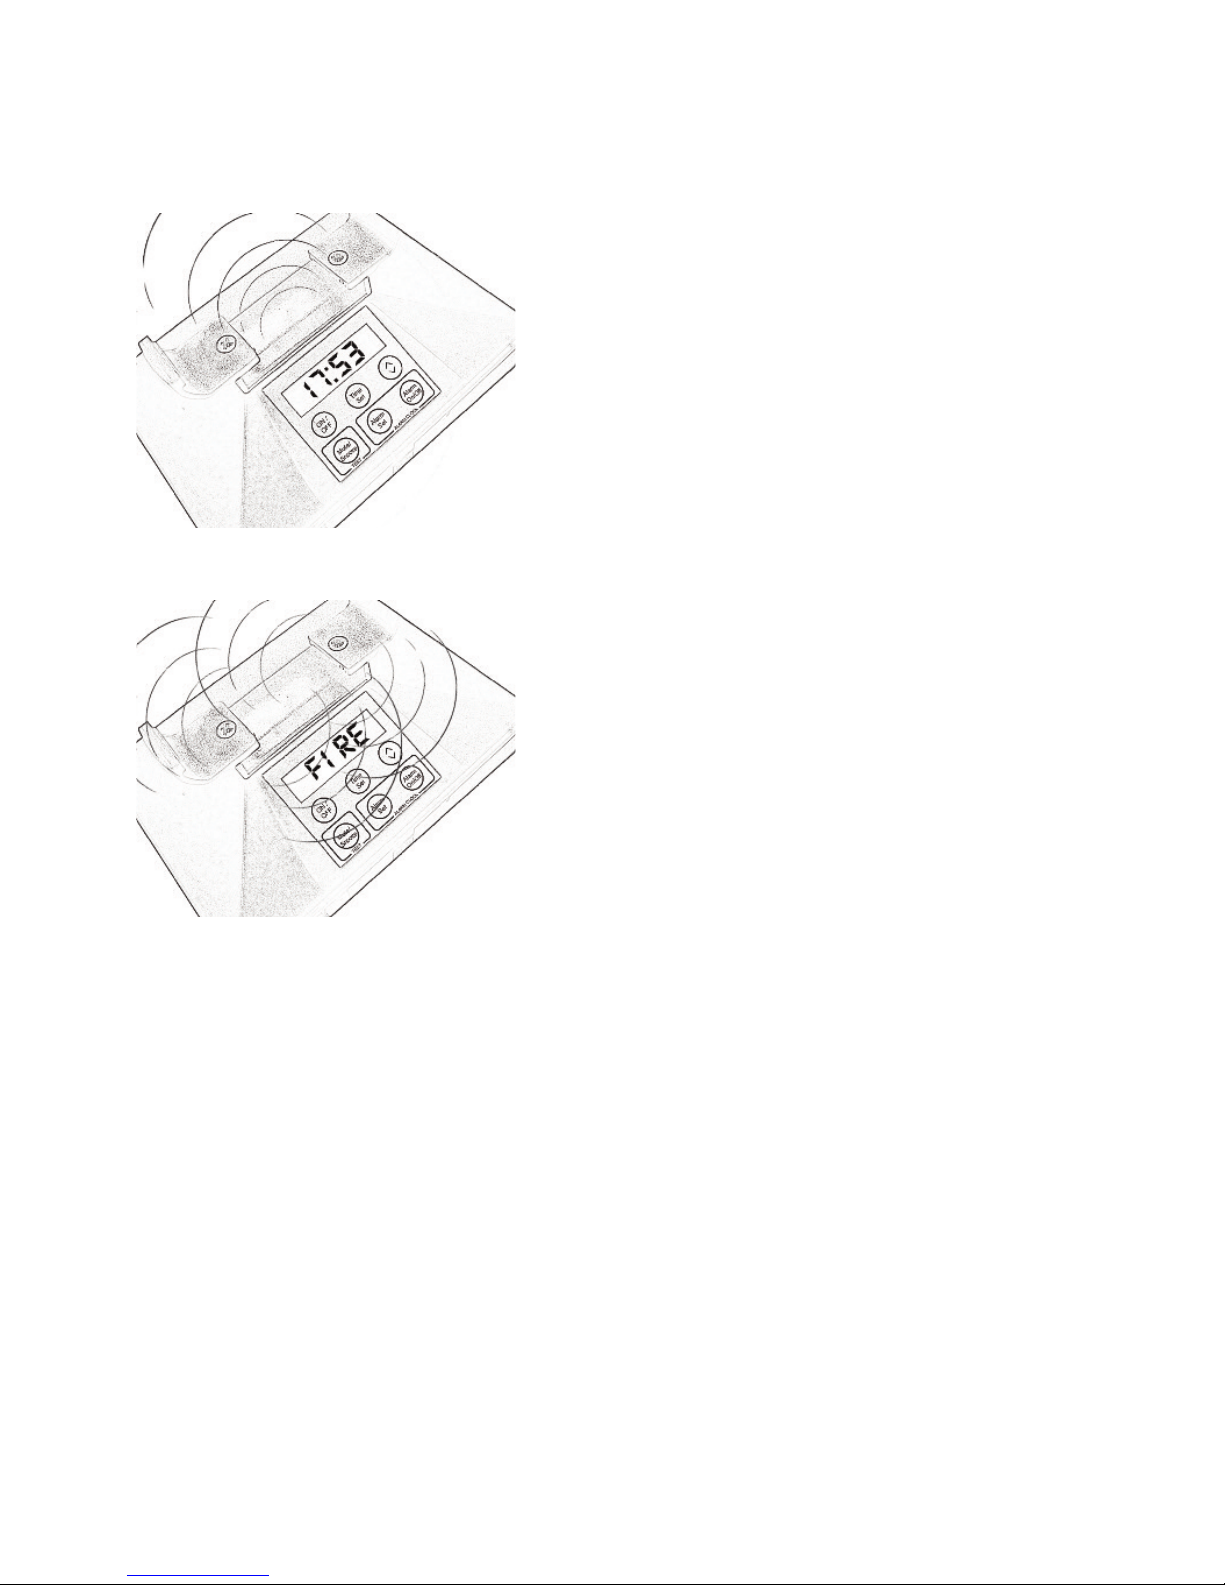
The LEDs - Strobe and Status
6
The LED lens houses the 3 LEDs - one
Status LED (GREEN) in the centre and
two Strobe LEDs (RED) either side.
The Strobe LEDs will flash when in a
fire condition or if a major fault has
occurred.
The Status LED will flash according to
the Deafgard status.
If Deafgard is turned On, under normal
conditions the Status LED will flash
green once every 15 seconds.
The Status LED will flash red once
every 8 seconds if there is a minor fault,
such as a Pillow Pad error when the
LCD will also display ‘PAD’.
If a major fault occurs the Status LED
will flash RED once every 4 seconds.
This will happen if Deafgard batteries
become critically low. With this fault
condition, at 15 second intervals, the
Strobe LEDs will flash and the Pillow
Pad will vibrate for 4 seconds.
The Status LED will illuminate red
throughout a fire alarm condition.

7
Getting Started
1. Ensure the Pillow Pad Cable has not
been disconnected from the Base.
Note: The Pillow Pad should
remain in the cradle.
2. Unscrew the Front battery Cover: pull
the Cover away from the Base until
you feel resistance.
Note: The battery orientation
diagram on the inside.
3. Insert two batteries with both
Positive (+) ends facing out towards
Battery Closer.
Note: The correct orientation is
important.
4. Screw the Battery Closer closed.
Note: To not over-tighten.
a. The clock will be displayed.
b. Both Strobes should have flashed
twice.
c. A ‘bleep’ should have been heard
once.
d. The LED should be flashing RED
once every 7 seconds.

8
Note: Due to the ‘noise’ of handling the unit, the Display is likely
to read FIRE and the Strobe Lights will flash for 10 seconds.
5. Repeat step 2 - 4 for Rear Battery Closer.
Note: Do not over-tighten.
Note: The Deafgard clock will be displayed on the LCD and starts
running once the front batteries are installed.
Getting Started c ntinued
Setting the Time
Note: Deafgard operates a 24 hour
clock but does not adjust
automatically for Daylight saving
time.
The Time must be set whenever both
sets of batteries are removed or
replaced.
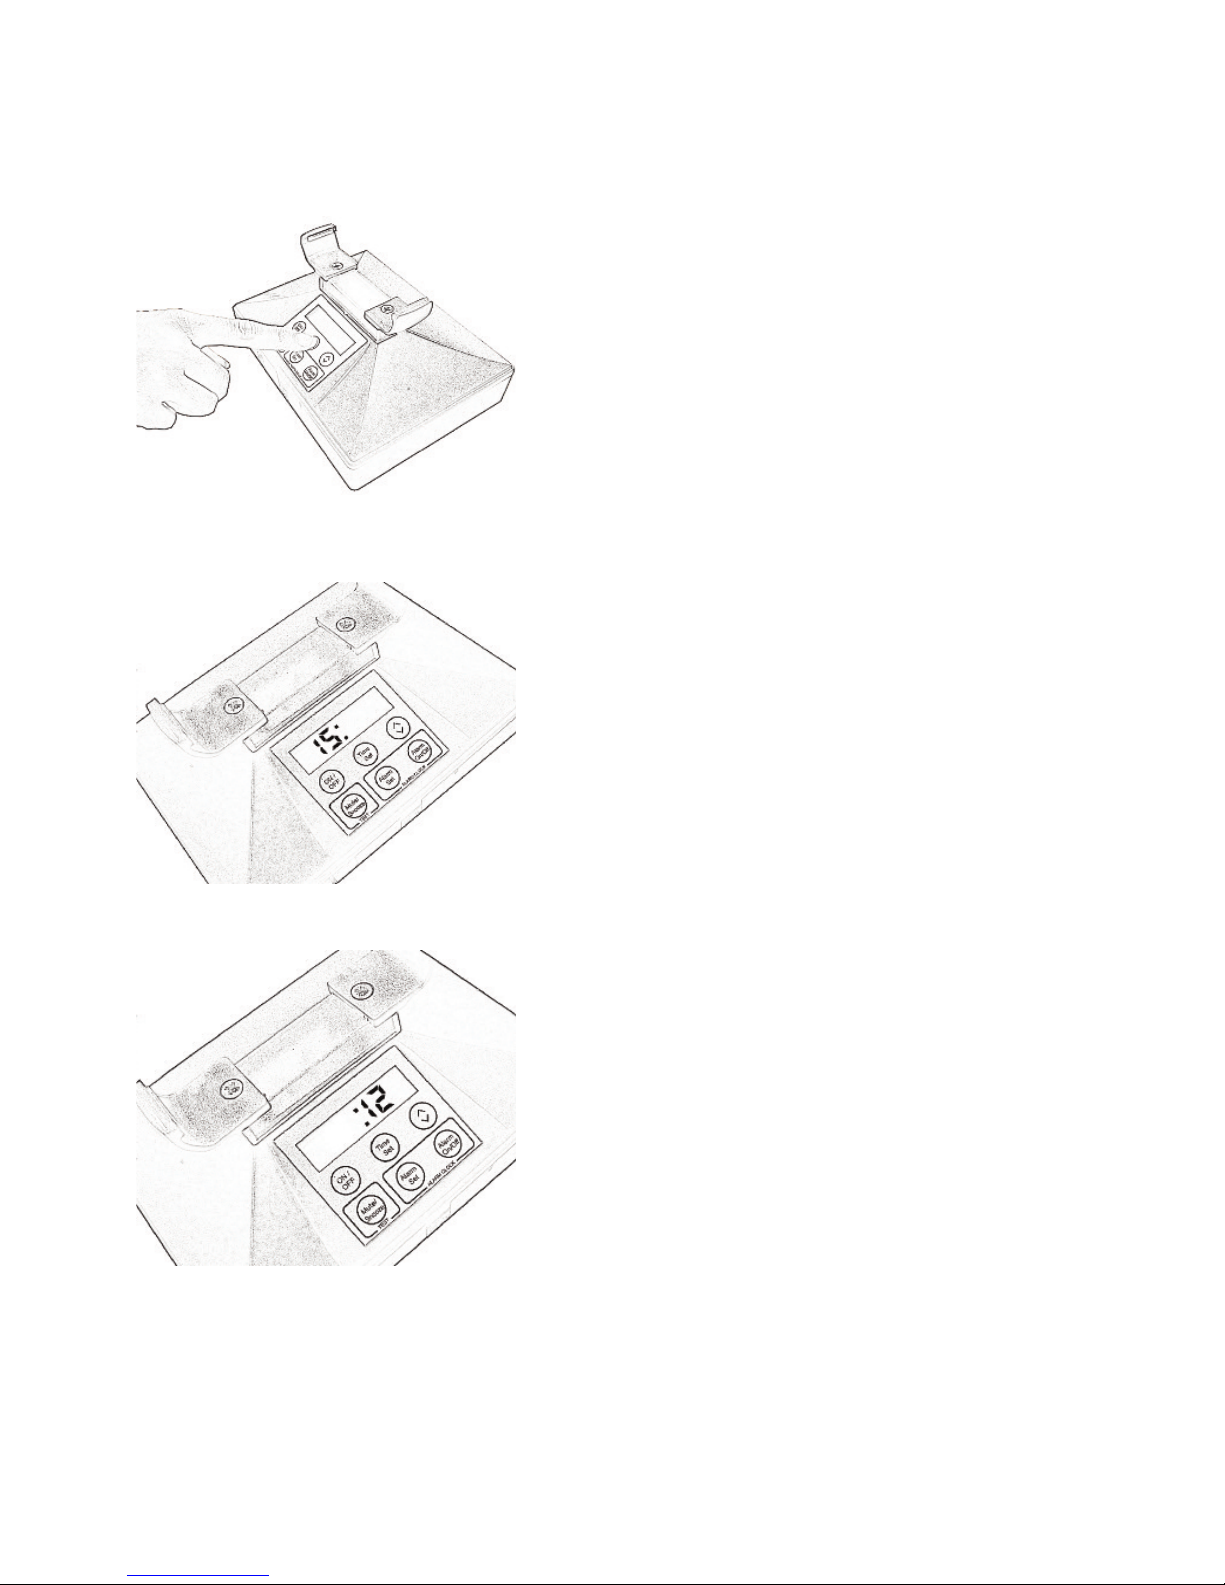
a. Depress Button 2 TIME SET and
hold it down until only the hour
numeral is shown.
b. Depress Button 3 SCROLL to ad
just to the Hour.
c. Depress Button 2 TIME SET to set
the Minutes.
d. Depress Button 3 SCROLL to
adjust the Minutes.
e. Depress Button 2 TIME SET and
the correct time of day should be
set.
Note: Both Hour and Minutes
should be showing and the centre
colon flashing.
9

Fire Alarm Test
1. Place Deafgard where it is to be used,
i.e. on the bedside table. Place the
Pillow Pad under the pillow.
2. Sound the fire alarm for a minimum of
30 seconds.
3. Deafgard will activate within 20
seconds of the fire alarm sounding.
4. Deafgard will remain in a fire alarm
condition until the fire alarm ceases.
5. Should Deafgard not respond to your
fire alarm, it may be that your alarm
is too quiet. See Sensitivity
Adjustment or contact the Technical
Advice line.
Note: When Deafgard activates
‘FIRE’ will be displayed on the
LCD, the Strobe LEDs on the top of
the unit will flash and the Pillow
Pad will vibrate.
The Deafgard unit should be
placed next to the bed during use
with the Pillow Pad under the
pillow.
10
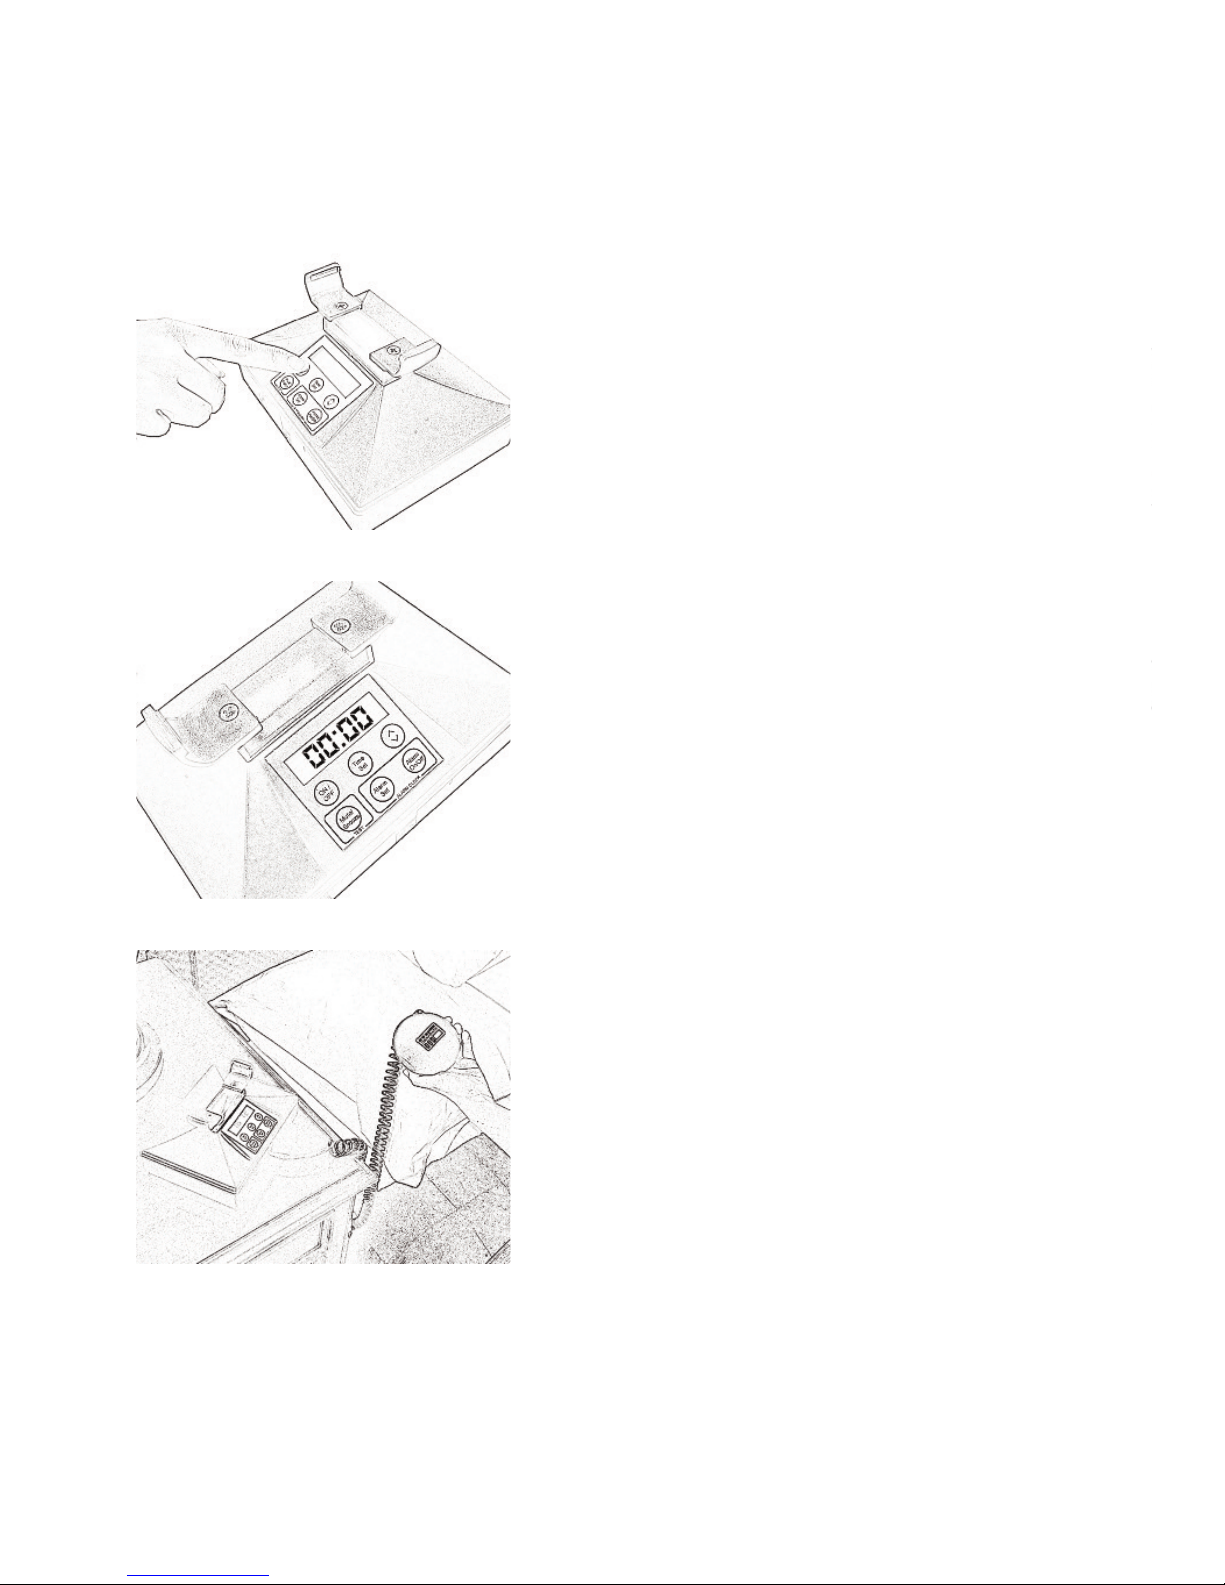
1. To turn the unit On press Button 1
ON/OFF.
2. The LCD will show 00:00 at first
power up or if the batteries have
been removed, otherwise the time
will be displayed.
3. The Status LED will flash green every
15 seconds to show the unit is
working correctly.
4. To turn the unit Off hold Button 1
ON/OFF for 6 seconds, or until the
LCD turns Off.
Note: Once turned off Deafgard
will not react to the Fire Alarm or
work as a wake-up device and the
status LED will no longer flash.
Once the unit is in location it is
recommended that the unit be
left on throughout the day.
Using Deafgard
11
12
Wake-up Alarm - Alarm Cl ck
Deafgard can be used as a wake-up
Alarm as well as a fire alarm for the deaf
and hard of hearing. When the Wake-up
Alarm activates the Pillow Pad will
vibrate constantly and the LCD will
become back-lit.
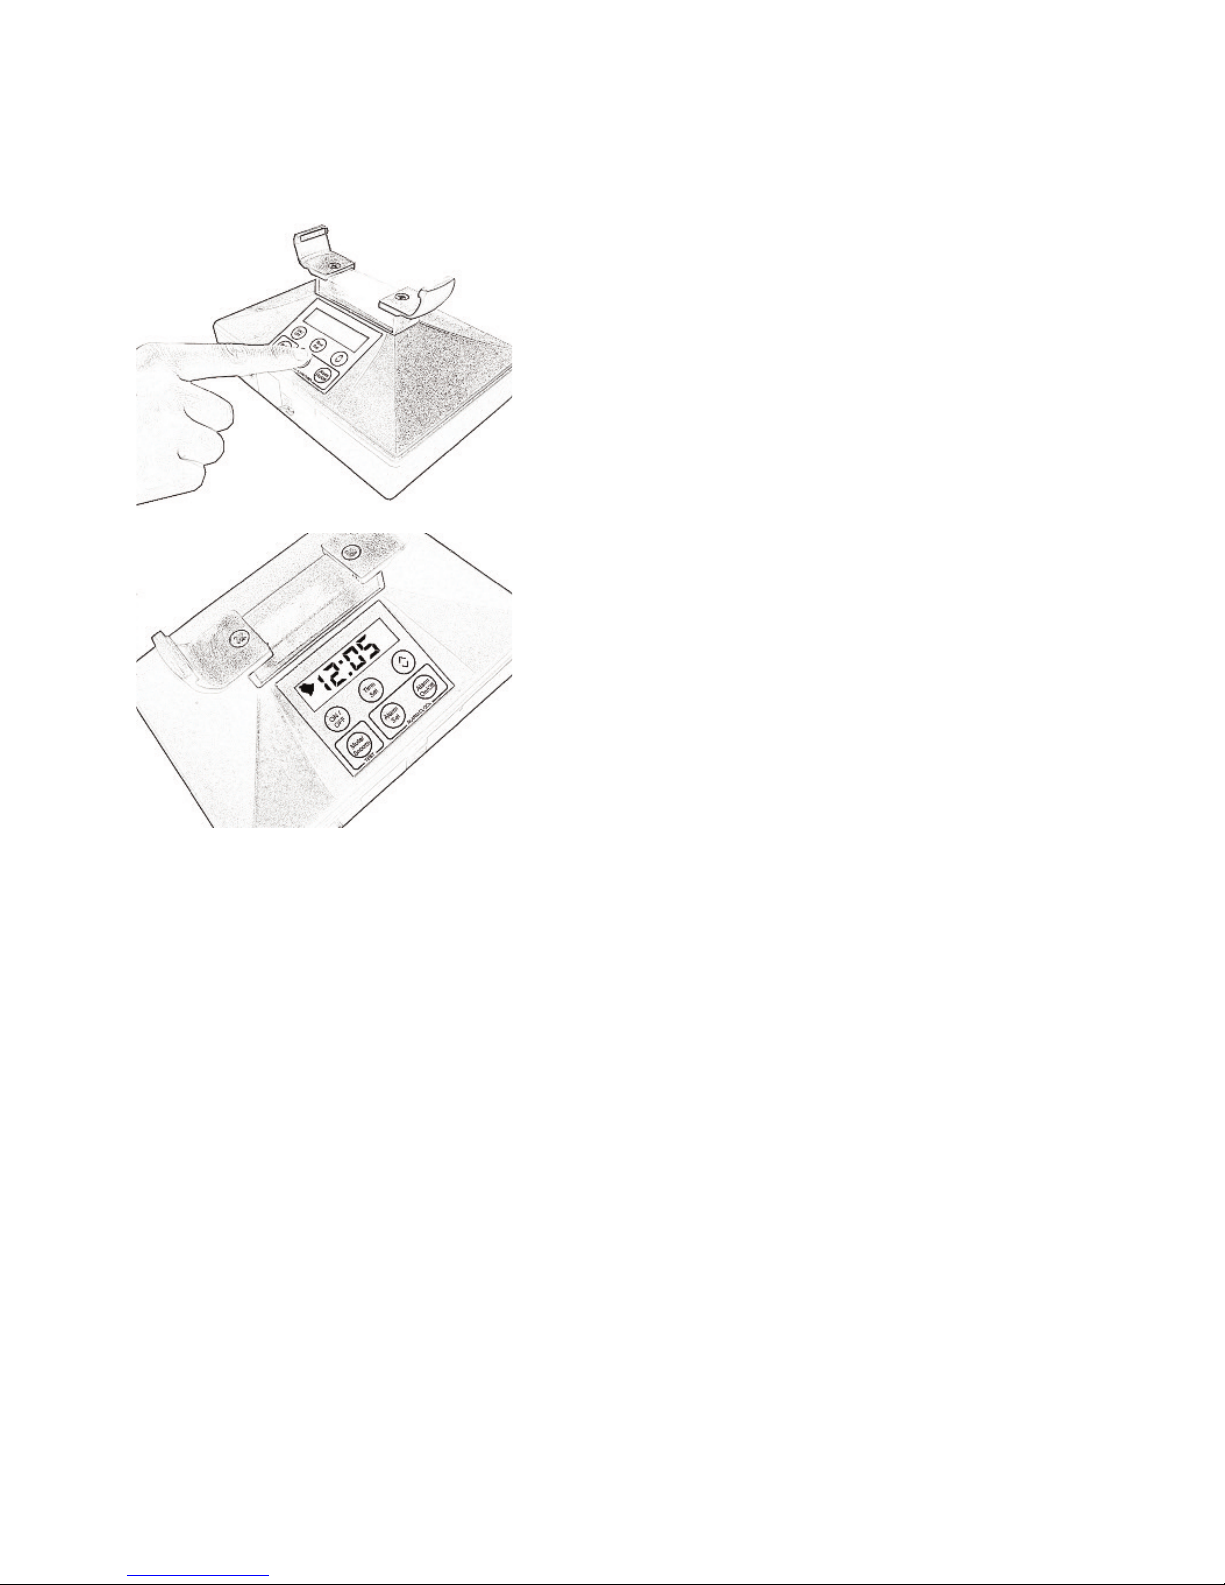
1. To set the Alarm Clock depress
Button 5 ALARM SET and hold it
until only the hour numeral is shown
on the LCD. Pressing this button
again allows you to set the minute.
2. Use Button 3 SCROLL to adjust the
time. Holding down this button
increments the numeral in 1/2 second
stages.
Once set, the bell symbol will be
displayed on the LCD to show the
Wake-up Alarm function is set and
On.
To turn the Alarm Clock On and
Off press Button 6 ALARM
ON/OFF.
Note: The Strobe LEDs flash only
when the fire message is received.
When activated, the
Wake-up Alarm can be
turned Off by pressing
Button 6 ALARM ON/OFF.
Button 4 MUTE/SNOOZE
will snooze the Wake-up
Alarm for 8 minutes on
first press, 4 minutes on
second and 2 minutes on
third.

Self Test
Deafgard performs a Self Test on
Battery insertion and every 7 days after
that. During the Self Test, Deafgard will
check its hardware and the LCD will
read ‘SELF’. Should Deafgard detect an
internal fault it will sound a warning
tone, vibrate its Pillow Pad, the Status
LED will flash red and the LCD will
display the error.
To check the correct activation of
Deafgard press and hold the
Mute/Snooze button. It will go through
a process of self checking and if it finds
a fault this will be displayed on the LCD
screen. If an error occurs call the
Technical Advice line.
We recommend you do this test
regularly especially if the Deafgard unit
has not been used for some time.
Note: The Pillow Pad will not
vibrate if placed in the Cradle.
13

14
Sensitivity Adjustment
On identifying a necessary adjustment,
use a narrow electrical flat-headed
screwdriver. Take care not to
over-adjust as this will render the unit
inoperative.
Sensitivity Adjustment if Deafgard
is not sensitive enough, i.e. does
not respond to the fire alarm:
1. Carefully insert screwdriver into hole
on back of the unit.
2. Turn clockwise through no more than
5 degrees (a small adjustment is
equivalent to a large alteration in
sensitivity).
3. Test Deafgard to the fire alarm.
4. If problems persist, repeat steps 1-3.
Note: The Adjustment Screw is
limited in both directions, once you
can feel resistance against turning
- stop to avoid damaging the unit.
If Deafgard is too sensitive (responds to
no apparent sound) follow steps 1-4,
but turn anti-clockwise in Step 2.
Note: Deafgard is factory
set to be triggered into a
fire alarm condition at
75dB(A), as recommended
by BS 5839-1:2002.
Deafgard can be adjusted
to respond to alarms as
quiet as 70 dB.
Only adjust sensitivity as
a last resort.
15
Use Alkaline Only (Do Not Use
Rechargeable batteries).
The 4 x C Size Procell Alkaline batteries
supplied should last at least 12 months.
Deafgard continually checks the Battery
life ensuring safe operation.
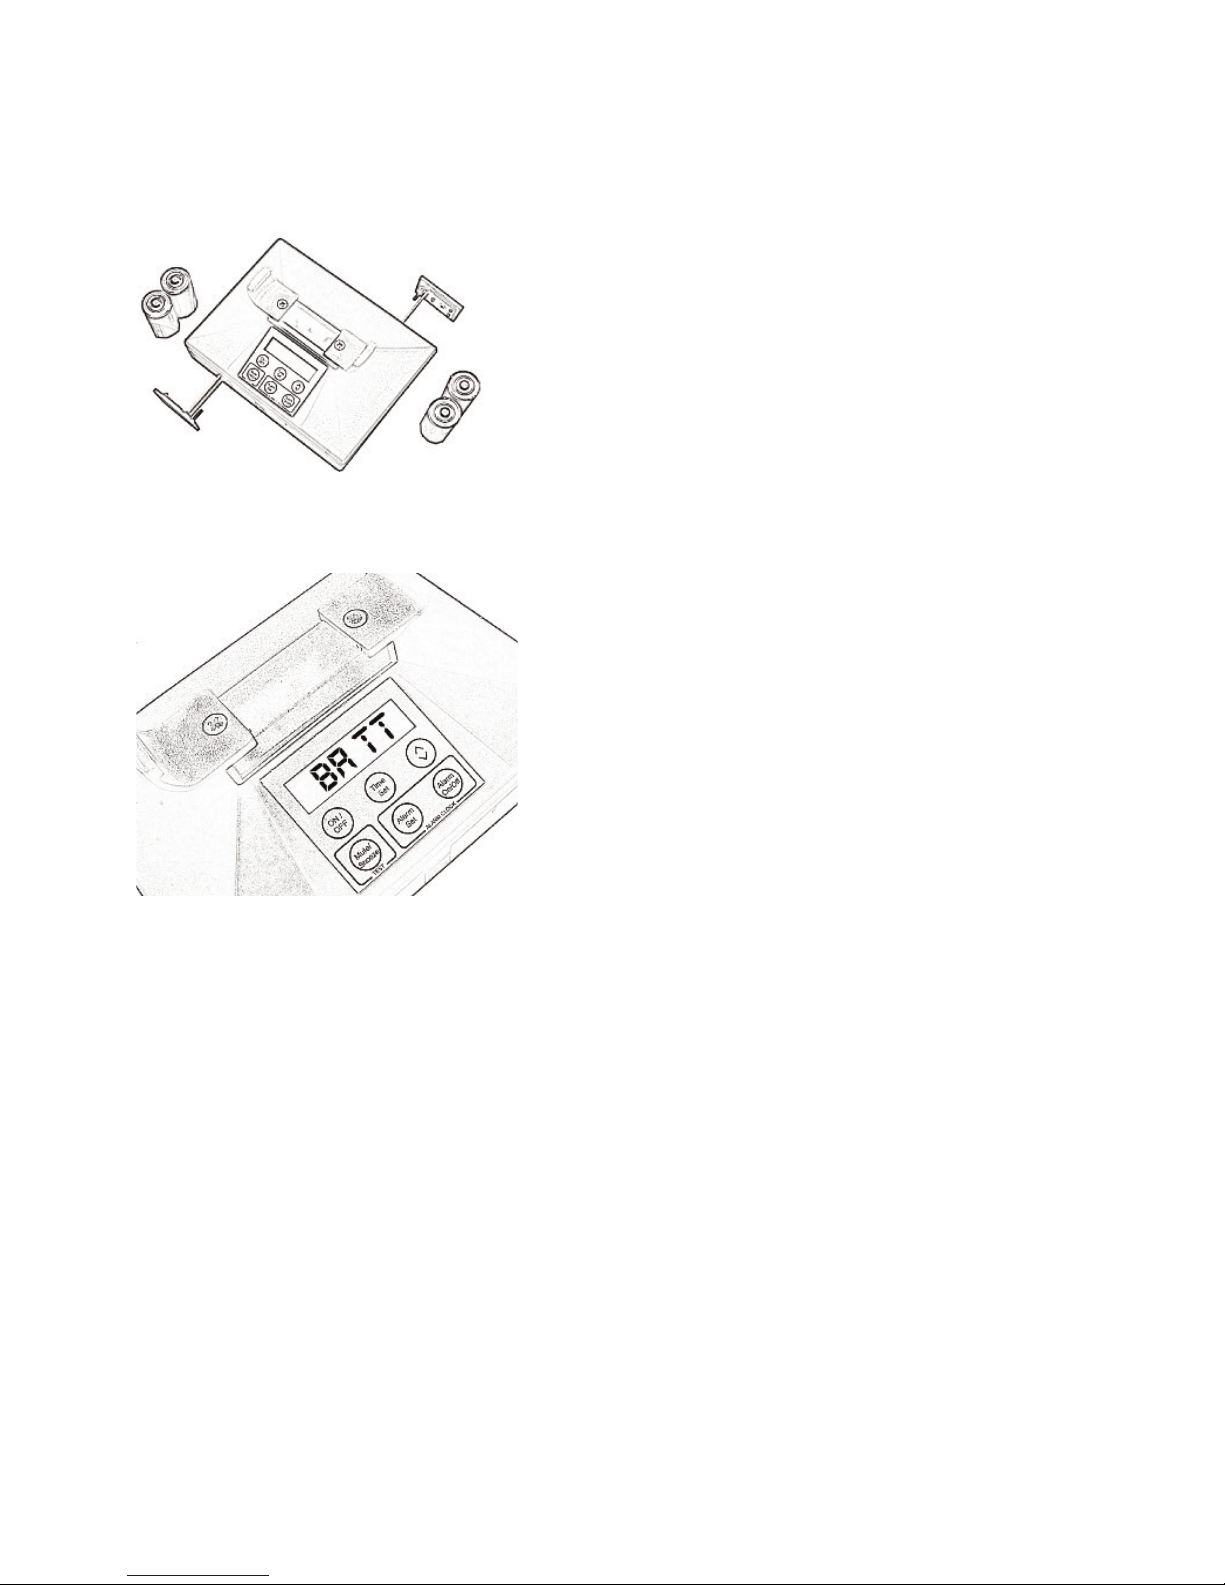
1. Open Battery Compartments using a
screwdriver.
2. Insert the batteries into the Battery
Compartments (+) positive side
facing out. Inserting the batteries the
wrong way could cause damage.
3. When closing the Battery
Compartments take care not to over
tighten.
When “BATT” is displayed on the LCD
there are 7 days of Battery life
remaining, it is recommended the
batteries are replaced immediately.
Note: Deafgard saves all Wake-up
Alarm times after batteries are
removed. But the clock time will
need to be set.
Deafgard does not adjust
automatically for Daylight saving
time.
Batteries - use 4 x C Size LR14

Trouble Shooting
The following are the most frequently
asked questions regarding the Deafgard
unit, with a quick checklist to follow:
1. Why does Deafgard not react to
your fire alarm?
• Check fire alarm is louder than 75dB.
• Check batteries.
• Check fire alarm is sounding for at
least 30 seconds.
• Adjust sensitivity of the Deafgard
unit.
2. Why does the Pillow Pad not
vibrate?
• Check Power is On.
• Check batteries.
• Check cable from Pillow Pad is
connected securely to the Deafgard
unit.
• Check Pillow Pad is not in the cradle.
3. Why do Strobe LEDs not flash?
• Check Power is On.
• Check batteries.
• Check cable from Pillow Pad is
connected securely to the Deafgard
unit.
4. Why is there no display on the
LCD?
• Check Power is On.
• Check batteries.
If all the above points are satisfied
and further assistance is required
please contact the Technical
Advice line.
Note: Deafgard will
display error messages on
the LCD if a fault occurs. If
this happens perform a
reset on the unit by
removing and re-inserting
of all batteries. If error
remains contact the
Technical Advice line.
16

17
Error Messages
ER01 – PAD
This may be shown on the LCD as ‘ER01’ or ‘PAD’. The Deafgard will
regularly check the pillow pad to ensure it is present.
Resolution: Remove Pillow Pad from Cradle and then remove batteries wait
20 seconds and re-insert batteries, perform self test by pressing
“Mute/Snooze” button. If this does not resolve the error please contact
Technical Advice line.
ER02 – Motor Jam
Whenever the Deafgard performs a self test routine (once every 24Hrs, or on
demand) the operation of the pillow pad motor is checked. The motor is
turned on and then the battery voltage is checked. If the voltage drop is too
great it is determined that the motor is drawing too much current and has
stalled. A Motor Jam error code will then be displayed.
Resolution: Depress and hold Button 4 MUTE/SNOOZE until ‘TEST’ is
shown on Display (after approximately 4 seconds).
a. ‘TEST’ should be shown on Display.
b. Both Strobes should be flashing.
c. The ‘bleep’ should be continuous.
d. The LED should flash GREEN once every 15 seconds.
e. The Pillow pad should be vibrating.
After 10 seconds the Test should stop and:
a. Display should show 0:01 or similar, dependent upon time elapsed.
b. Both Strobes should be Off.
c. No ‘bleep’ should be heard.
d. The LED should flash GREEN once every 15 seconds.

18
Error Messages c ntinued
ER04 – Audio Error
Whenever the Deafgard performs a self test routine (once every 24Hrs, or on
demand) the operation of the buzzer and audio circuit is checked. The
buzzer is turned on and the output from the audio detection circuits are
checked. If any values are outside of the range expected an Audio Error
code is indicated.
Resolution: Follow ER01 Resolution however, the Pillow Pad must be
disconnected from the unit and then replaced BEFORE the batteries
are re-inserted
ER08 – Flash Error
Whenever the Deafgard performs a self test routine (once every 24Hrs, or on
demand) the operation of the buzzer and audio circuit is checked. The
strobe circuit is checked. The strobe is turned on and the battery voltage is
checked. If it is determined that the strobe is not drawing enough current,
or it is drawing too much current a Flash Error code will be displayed.
Resolution: Follow ER01 Resolution
ER10 – Comms Error
Information passed between the LCD board and the main processor board
regularly and also whenever any buttons are pressed, or the status changes.
If a problem is detected with the communications between the two boards
a Comms Error code is displayed.
Resolution: Follow ER01 Resolution
ER20 – Battery Pack Flat
This may be shown on the LCD as ‘BATT’. Whenever the Deafgard performs
a self test routine (once every 24Hrs, or on demand) the battery pack volt-
ages are checked. If the either battery pack voltage drops to or below 1.87V
it is deemed to be flat and the error code will be
displayed. If the battery is not flat, but is low, the normal low battery
indication will be visible on the LCD. Deafgard is a dual battery supply
product and uses each set of batteries equally, which will give the Deafgard
one year minimum battery life.
Resolution: Replace both battery packs and with new “C” size batteries.

19
Manufacturer’s Warranty
For Technical Assistance contact the U Technical Advice line on:
0845 241 75 75 (Local Rate) or +44 (0) 1273 320 688
e-mail us at [email protected]
www.deafgard.com
For all other queries please contact your supplier.
English Version 3.3
Fireco Limited (“we” and “us”) warrants to the customer (“you” and “your”)
that the product will be free from defects in material and workmanship for a
period of 24 months from the date of purchase. If the product is defective
whilst under warranty we will, at our option, repair the product or replace it
free of charge.
If the product appears to develop a defect while under warranty please first
check that the product is being correctly used in accordance with this
Operating Guide and that the batteries are functioning. If this does not
resolve the problem please contact us in writing at the e-mail address
shown below or telephone the Technical Advice line.
The warranty does not apply to any defect in the product arising from fair
wear and tear, wilful damage, accident, negligence by you or any third
party, abnormal working conditions failure to follow the instructions in this
Guide, misuse or alteration or repair of the product without our prior
approval. The warranty does not cover batteries, which may need to be
replaced within the period of the warranty. We will not be liable to you for
any loss of profits, administrative inconvenience or indirect or
consequential loss or damage arising out of any defect in the product.
Where the products are sold under a consumer transaction (as defined by
the Consumer Transactions (Restrictions on Statements) Order 1976) your
statutory rights are not affected by the terms of this warranty.
Other manuals for Deafgard
2
Table of contents
Popular Fire Alarm manuals by other brands

Ei Electronics
Ei Electronics Ei2110 User instructions

Apollo
Apollo 45681-265 installation guide

Detection Systems
Detection Systems DS9400 Series operating instructions

Clymac
Clymac ZP3 operating instructions

Faraday
Faraday RND-2 installation instructions

Johnson Controls
Johnson Controls SWIFT instruction manual


