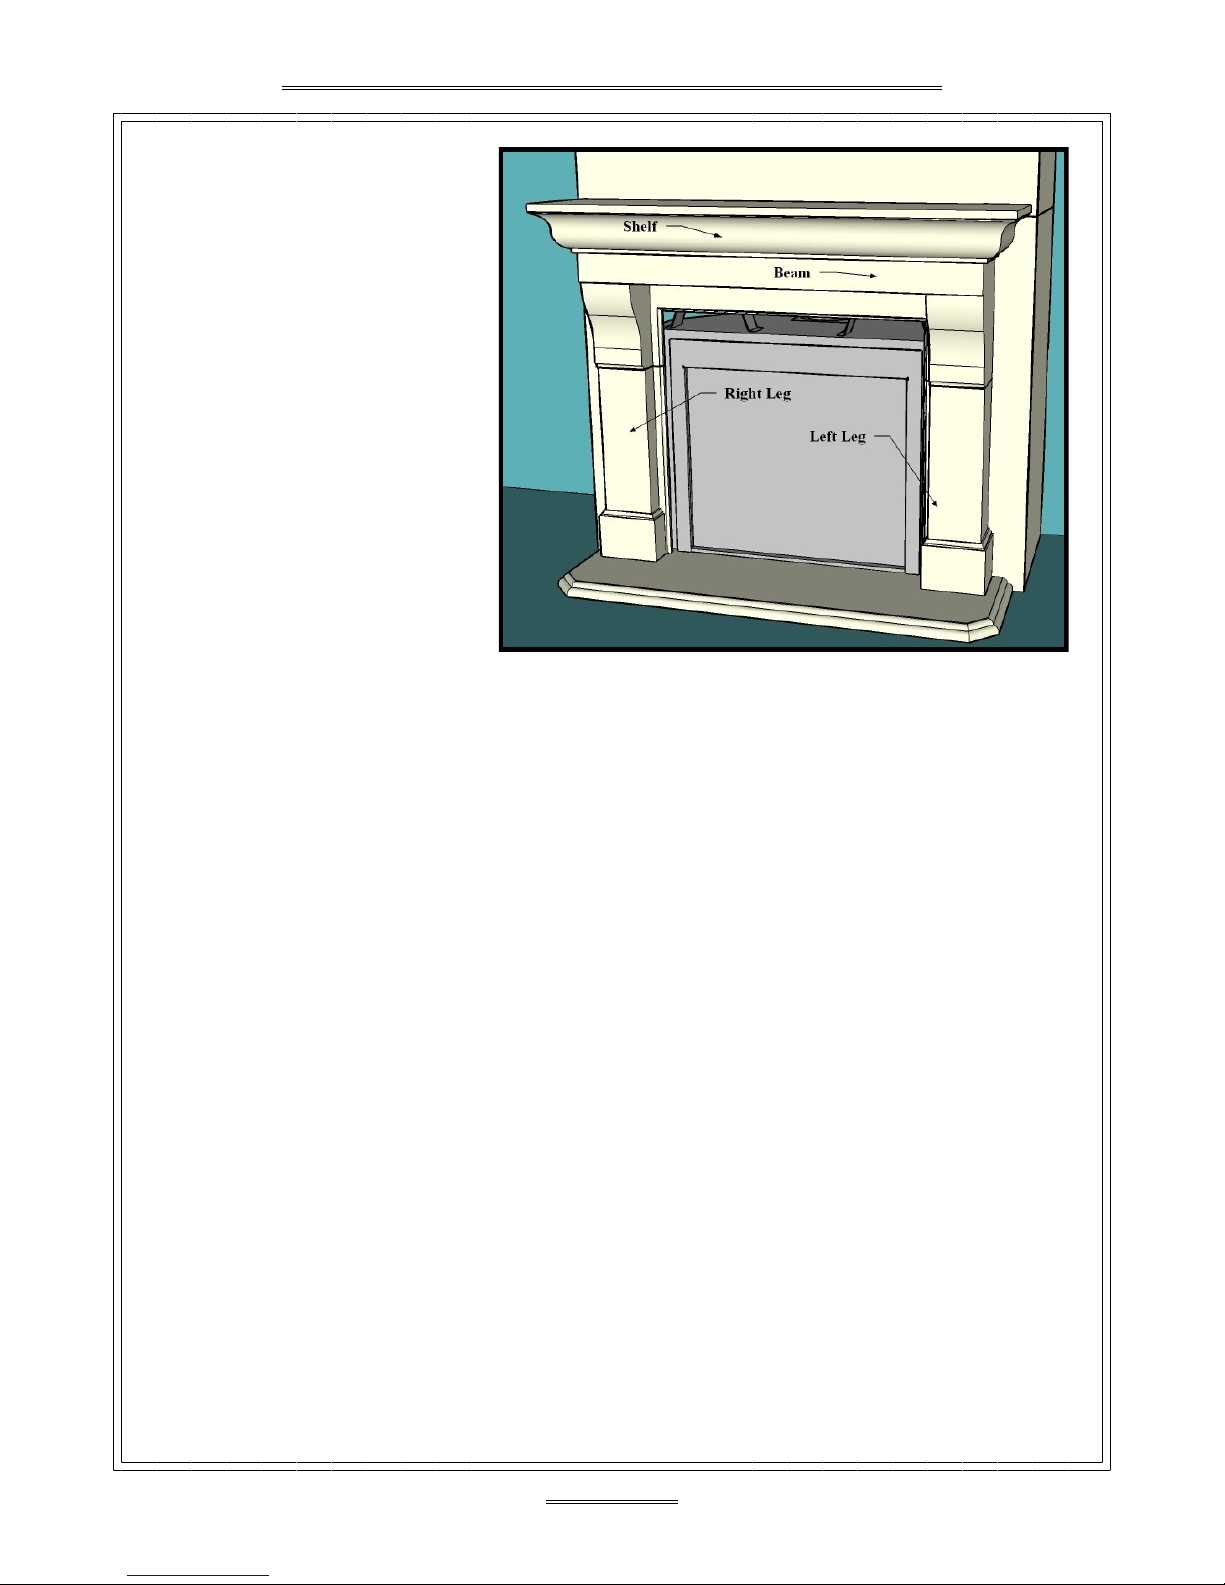
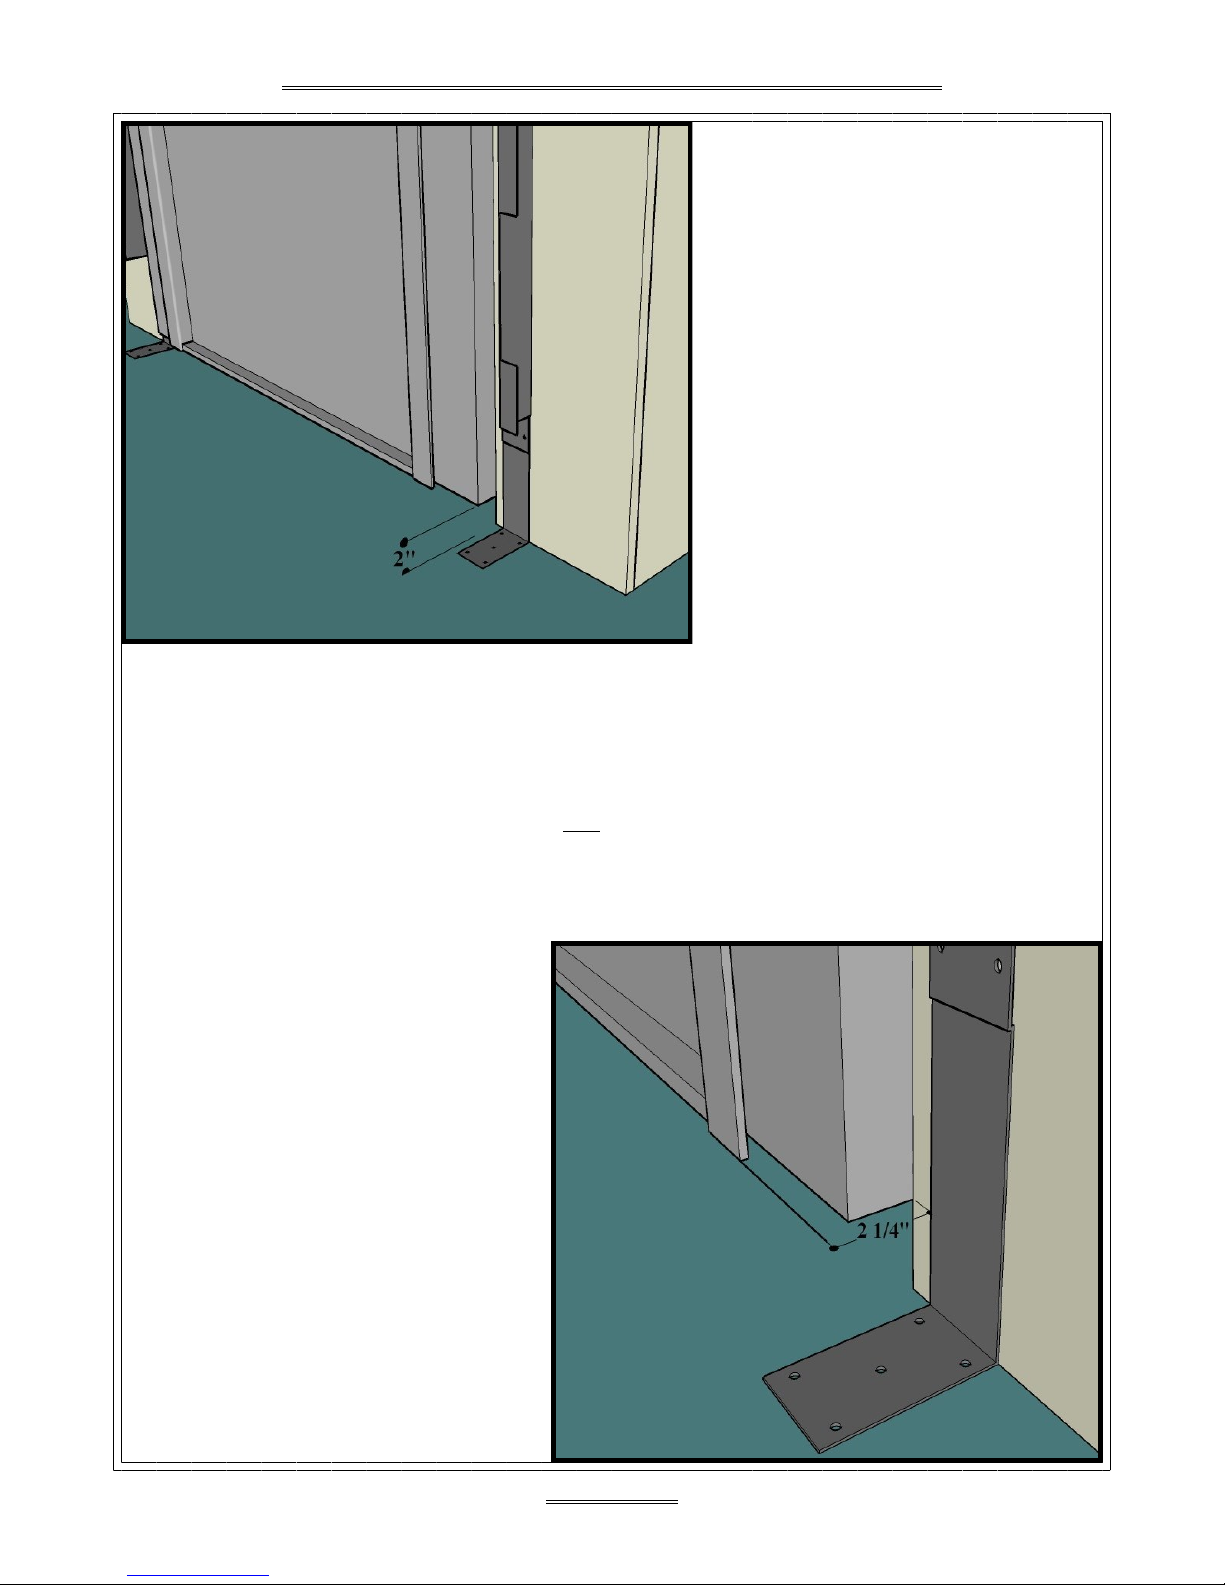
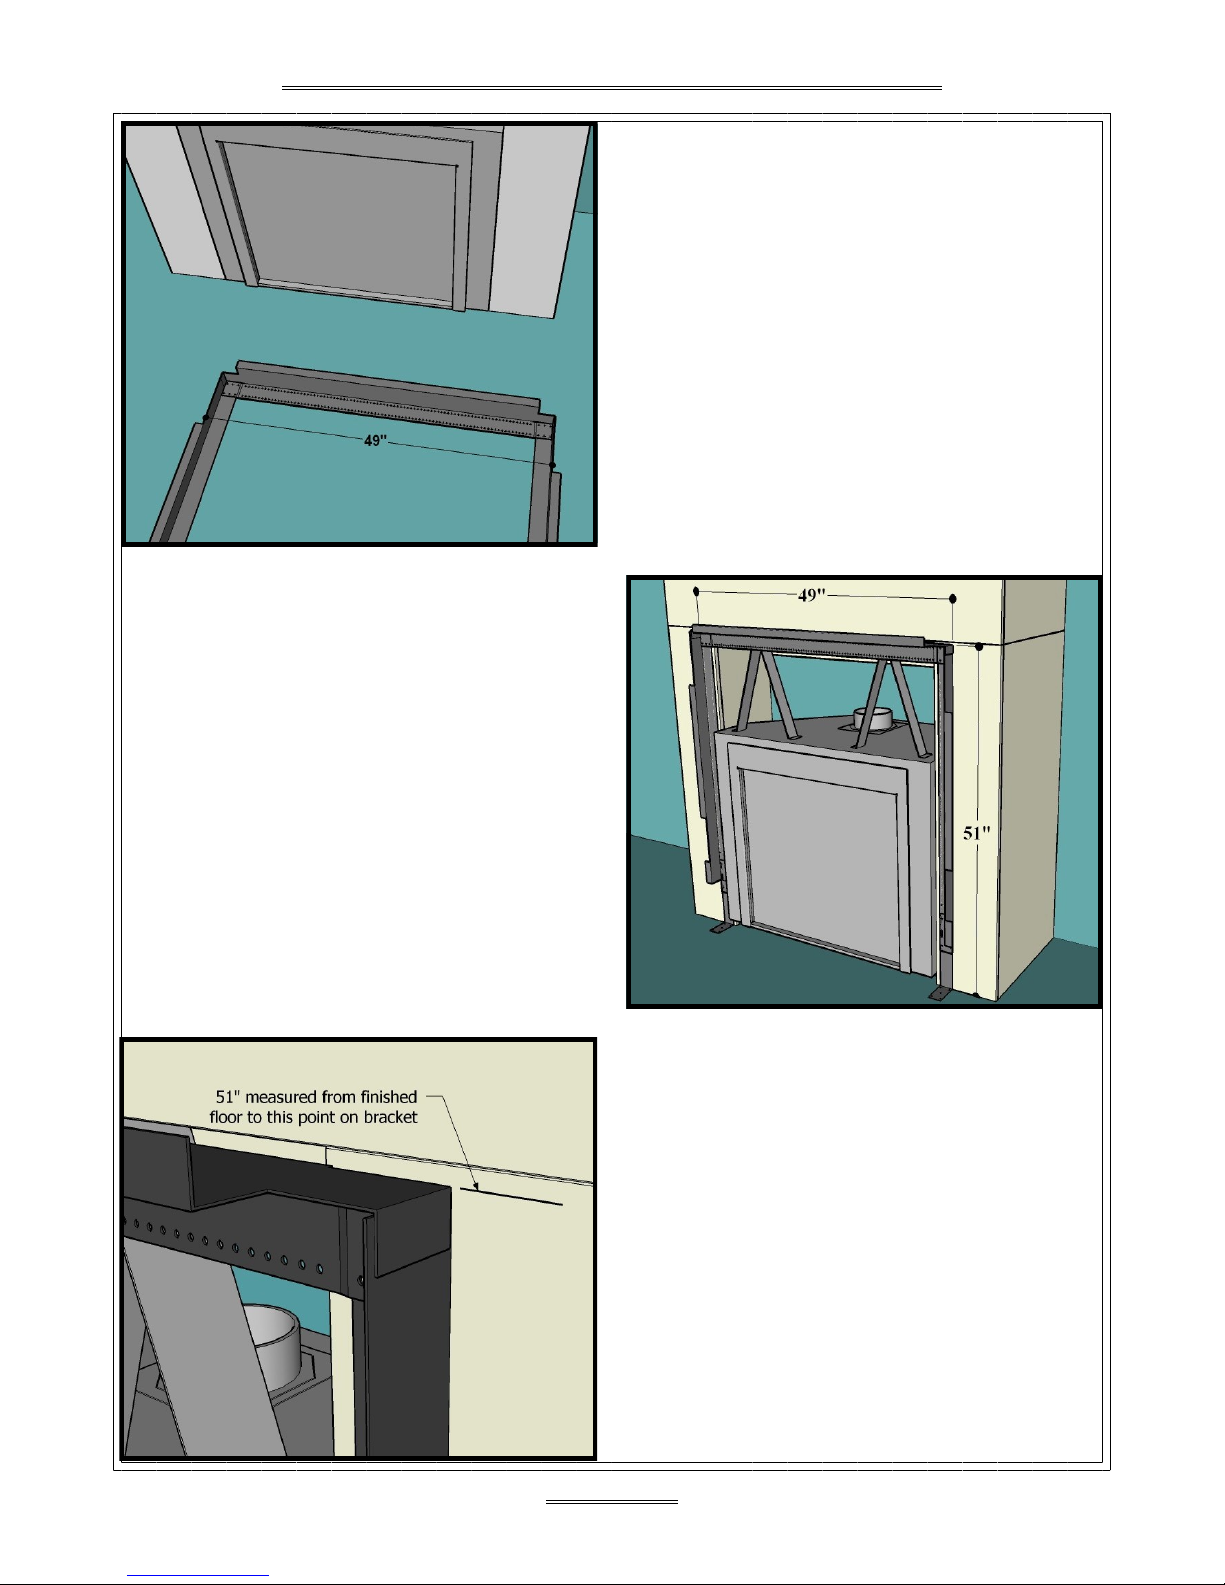
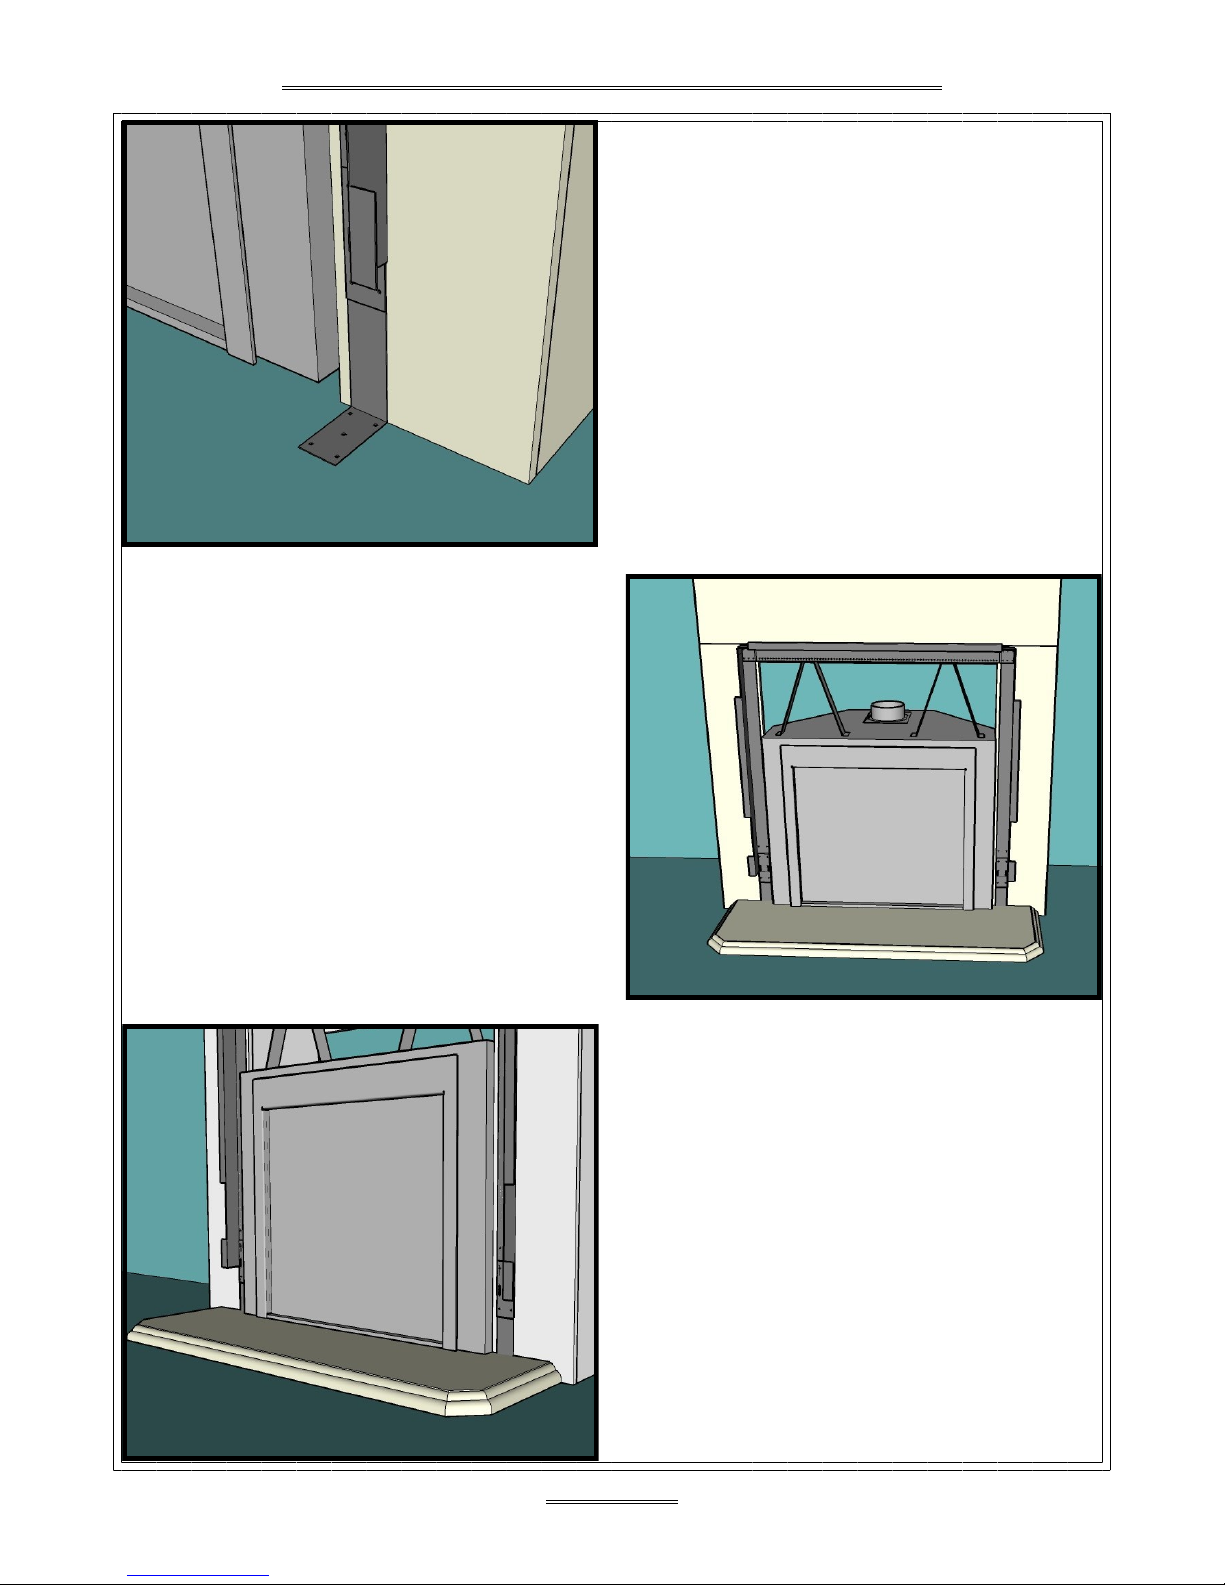
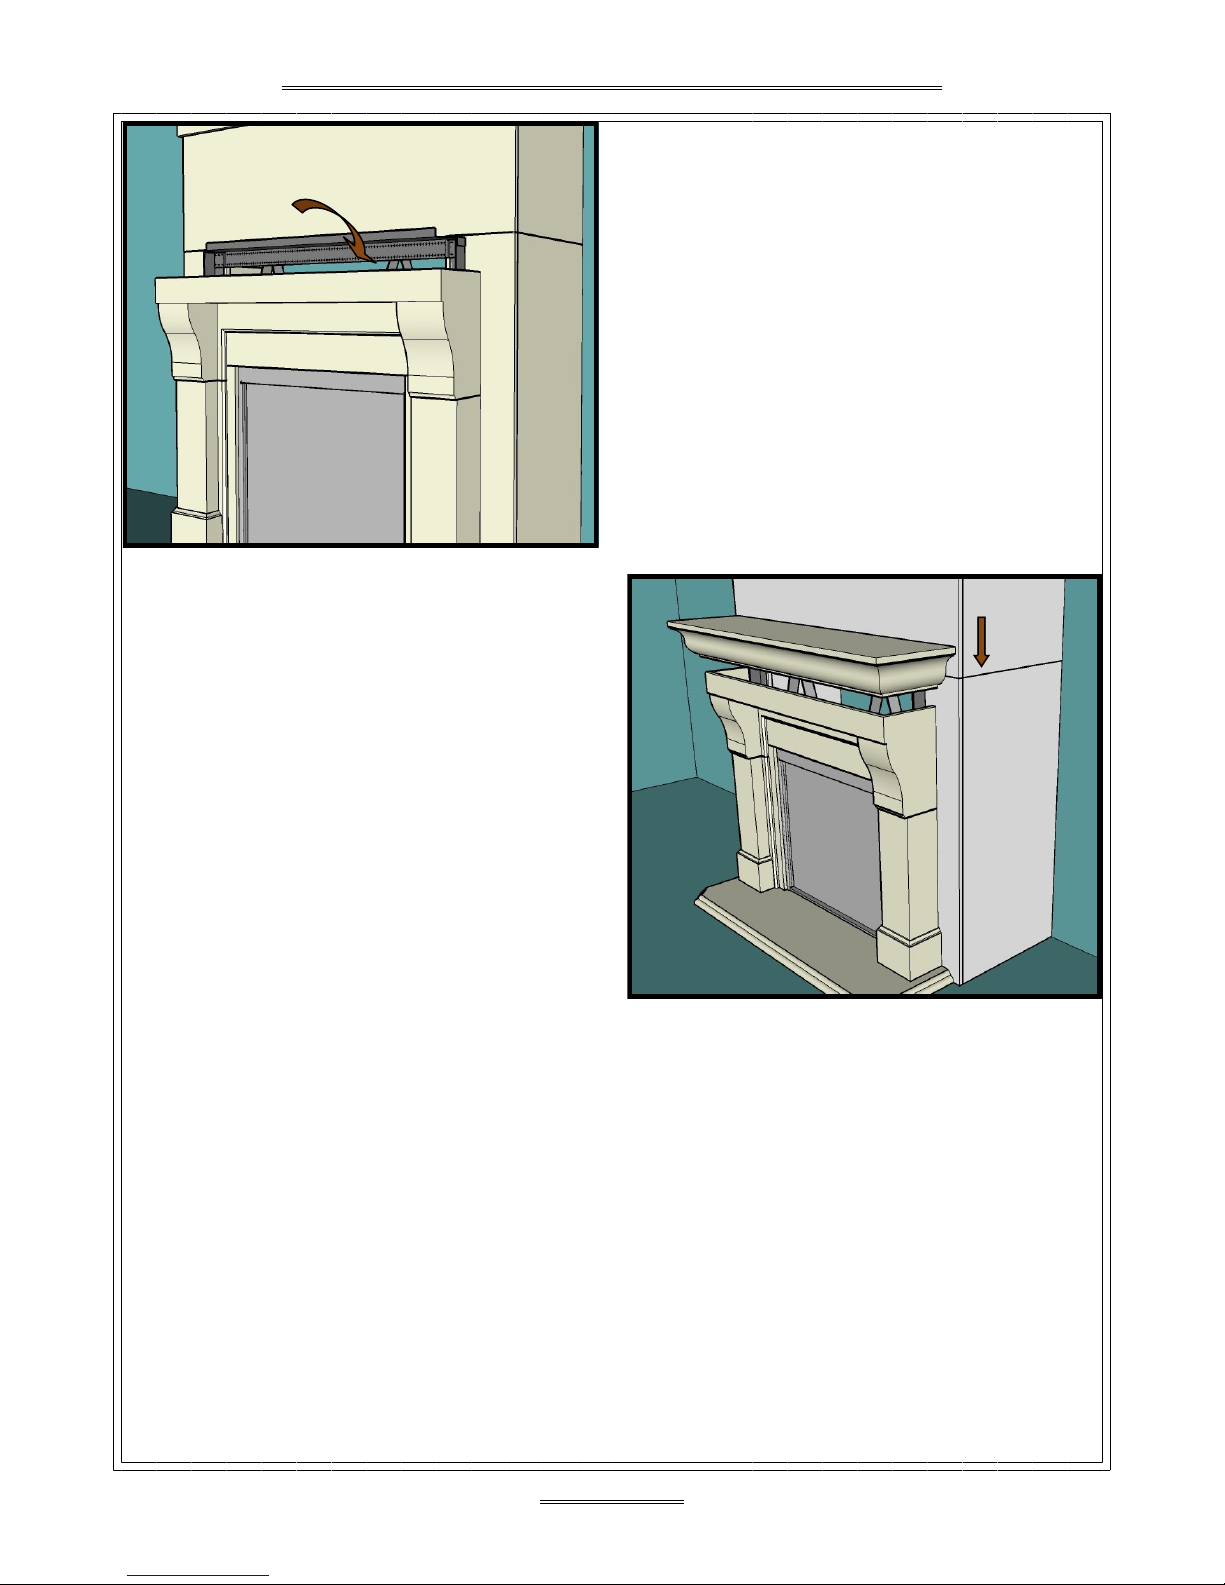
Fires of Tradition Corvallis 4008GRC User manual


Other Fires of Tradition Indoor Fireplace manuals


Popular Indoor Fireplace manuals by other brands


Marco
Marco Designer Series installation instructions

Valor
Valor Regency OXYSAFE 2 Installer's guide

FRANCO BELGE
FRANCO BELGE e-Ubinas owner's manual

Esse
Esse green switch Installation and operating instructions

Lamborghini Caloreclima
Lamborghini Caloreclima EM 9/2-E Installation and maintenance manual

Dimplex
Dimplex DNV20AB manual

Paramount Fitness
Paramount Fitness EF-WM362 MO Installation and operation instruction

White Mountain Hearth
White Mountain Hearth VFBL-30-1 Installation instructions and owner's manual

Lennox Hearth Products
Lennox Hearth Products MPD35ST-NE Homeowner's care and operation instructions

Faber
Faber Vejen installation manual

Vermont Castings
Vermont Castings Defiant Encore 0028 Service manual

Quadra-Fire
Quadra-Fire 7100FP-GD-B installation manual