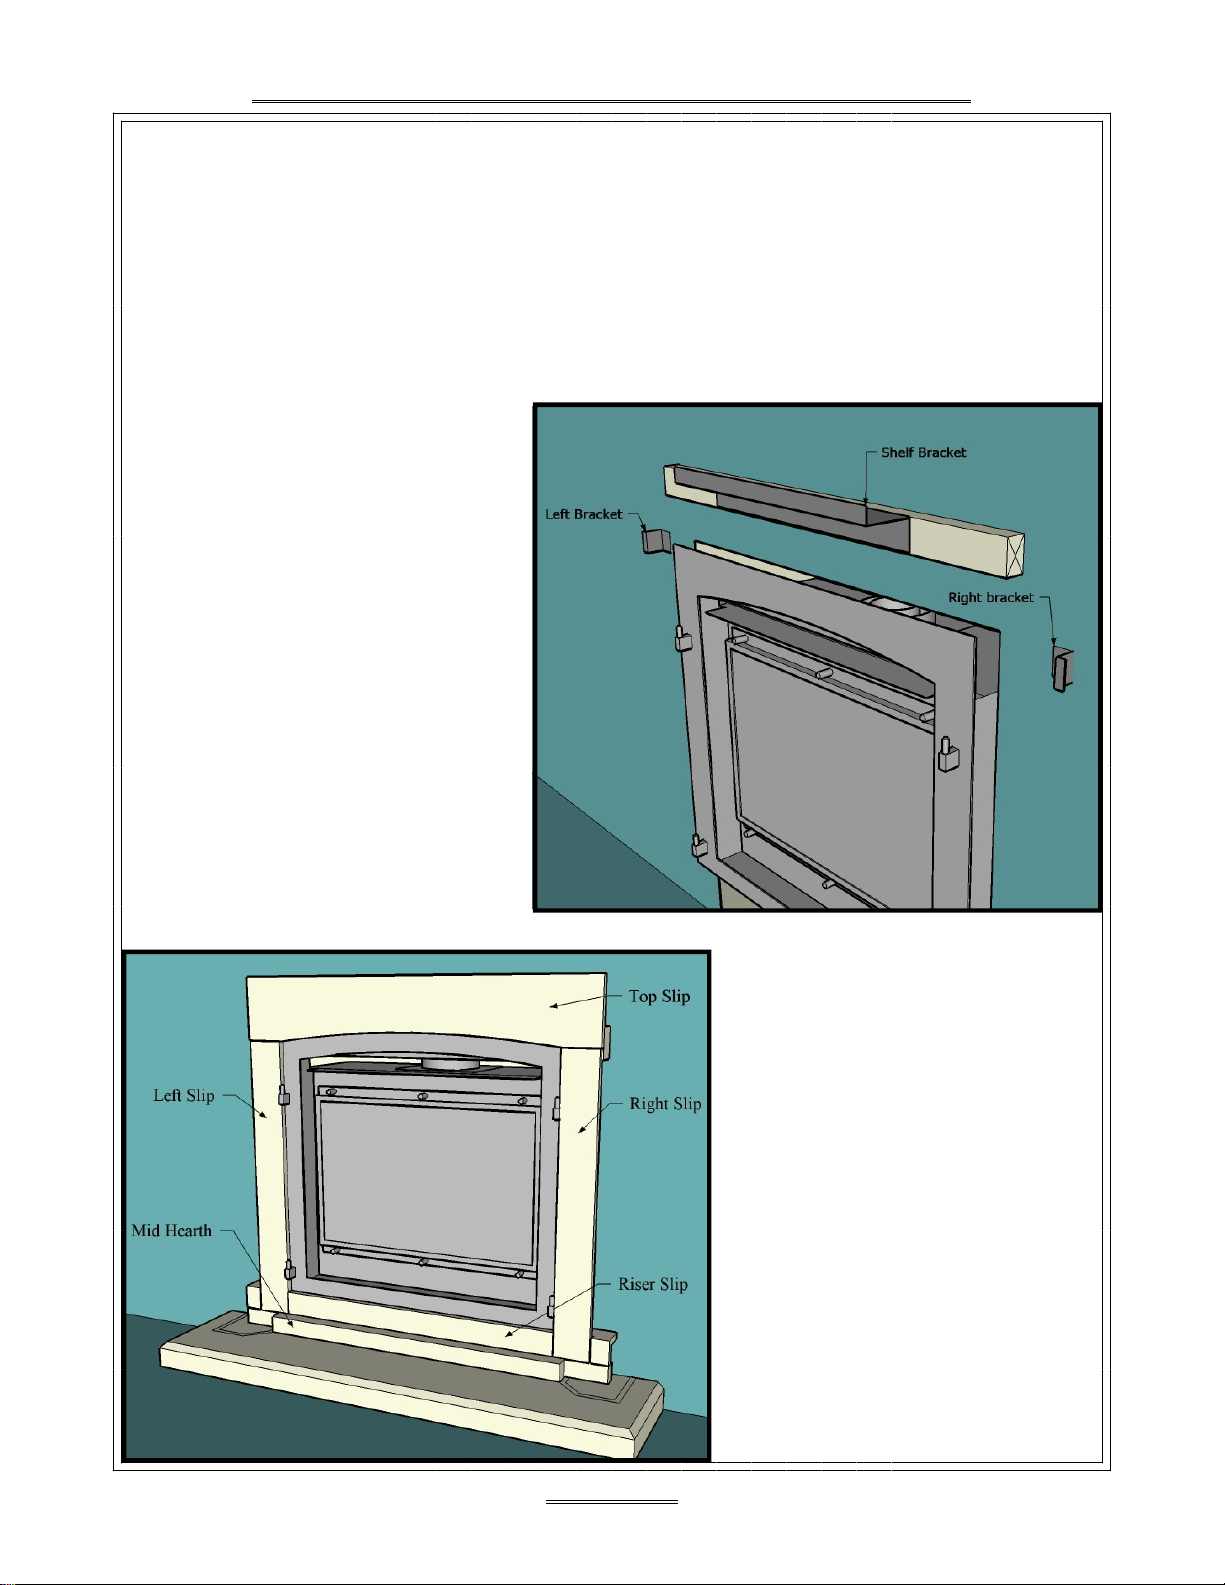
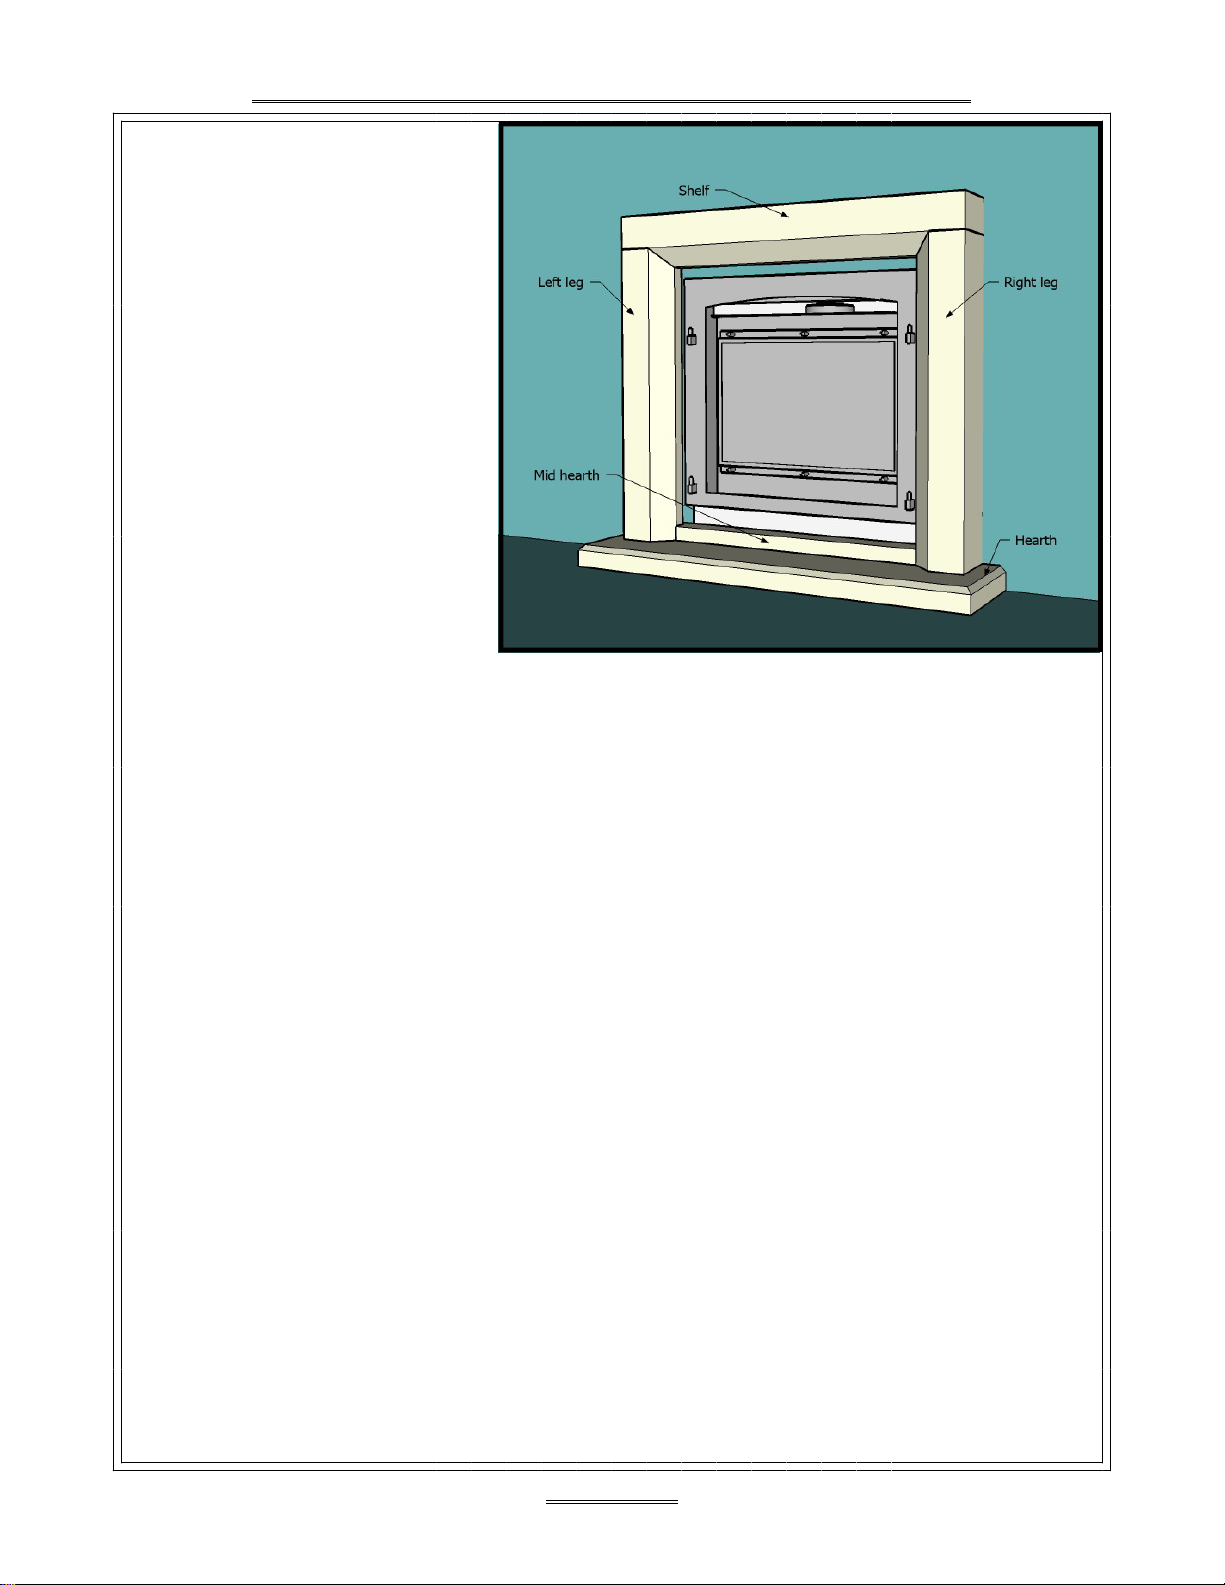
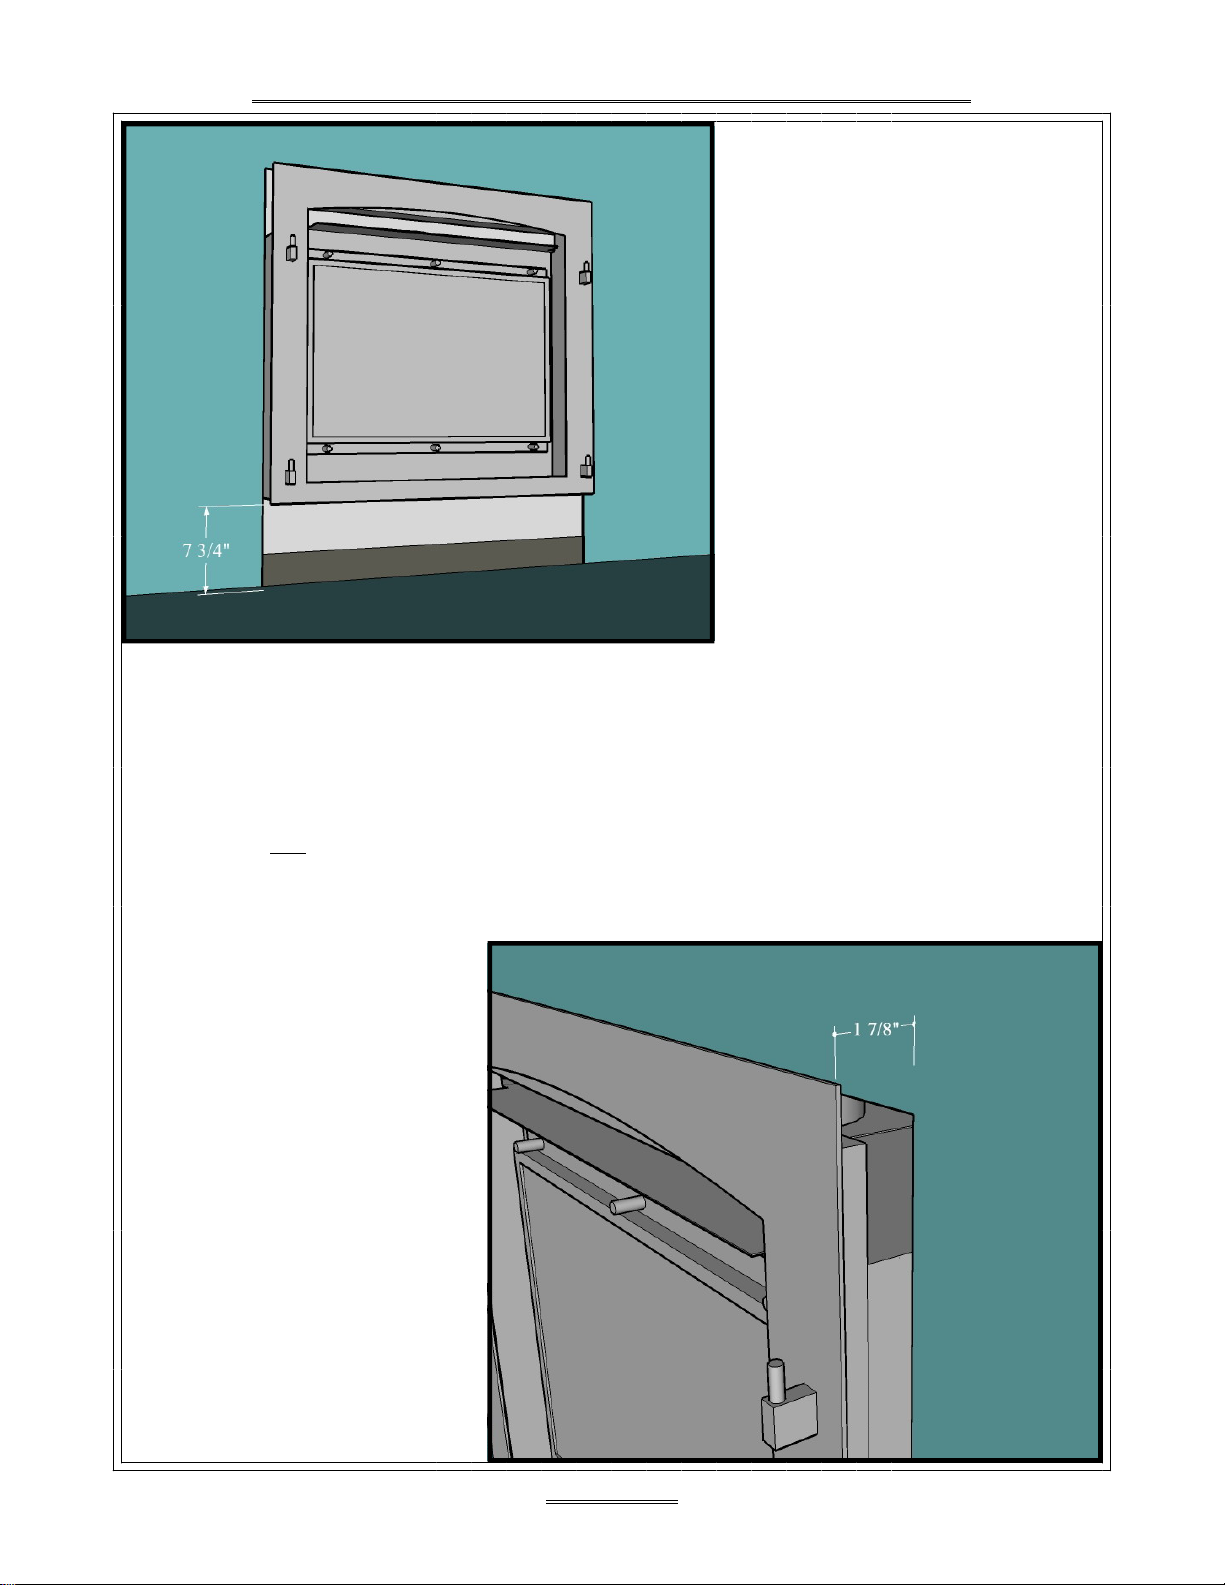
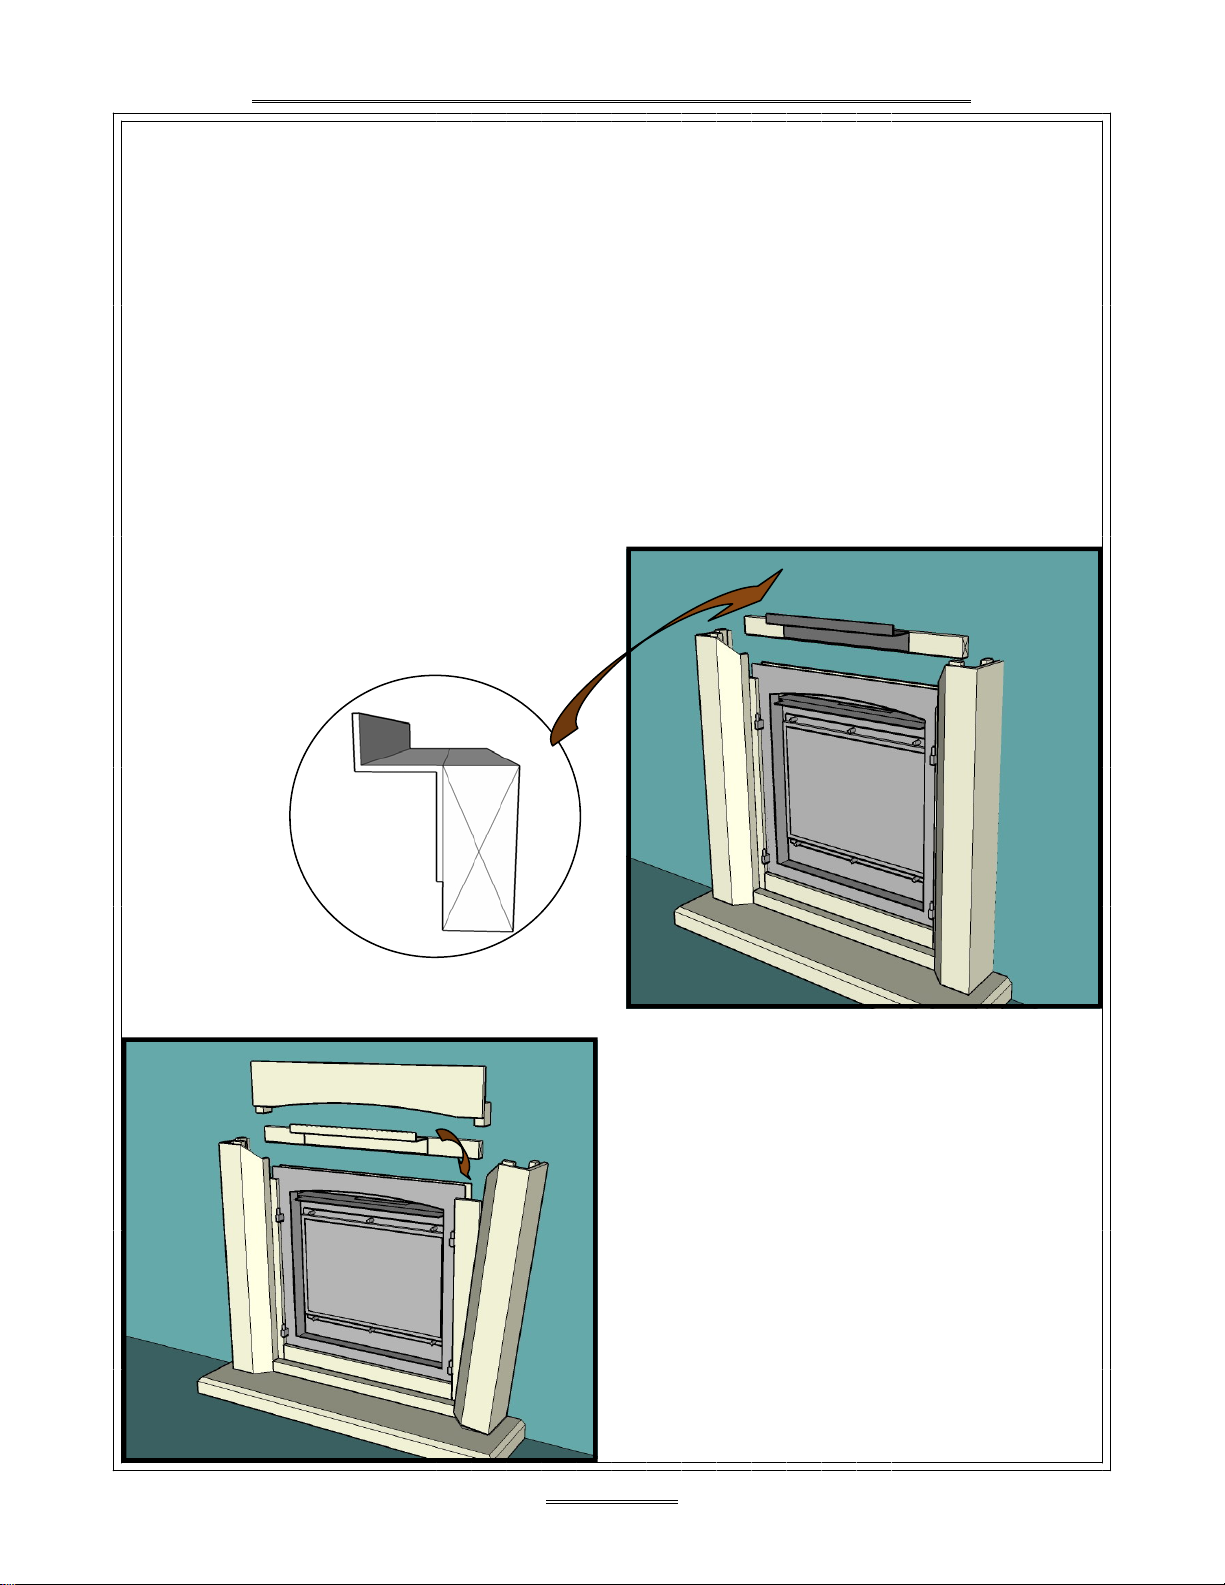
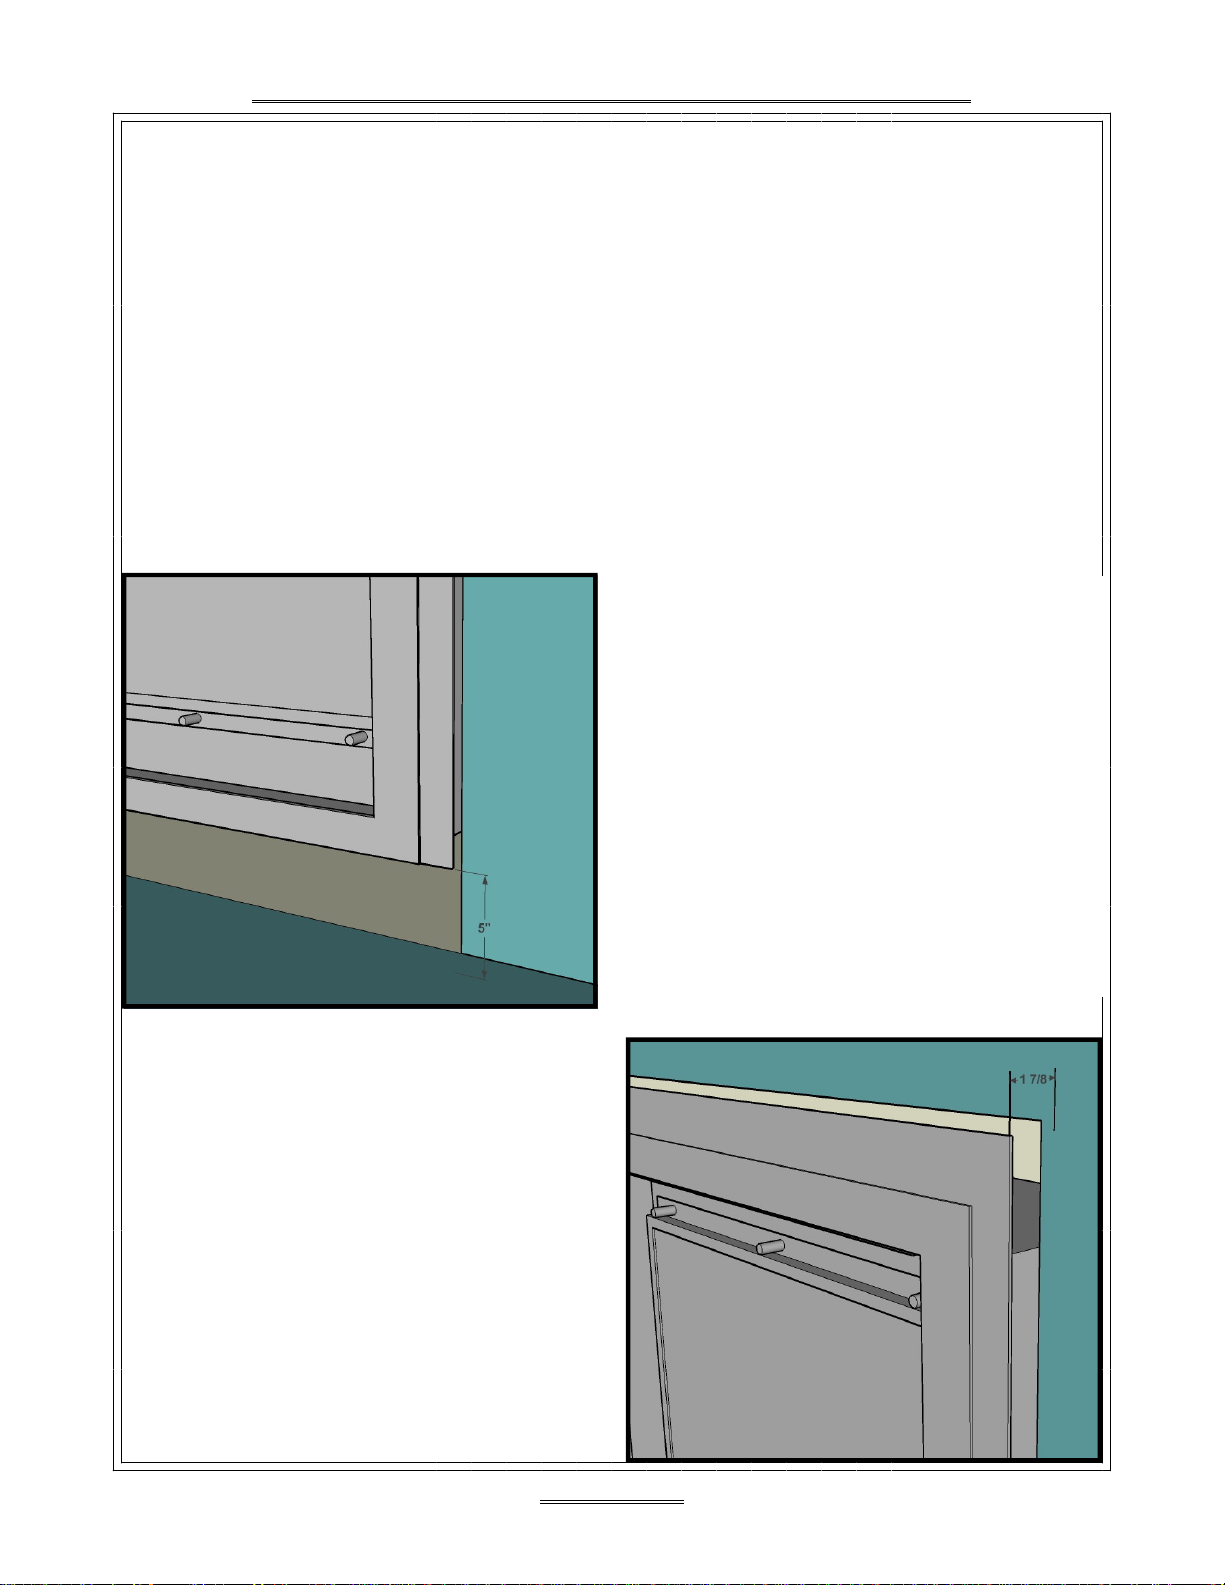
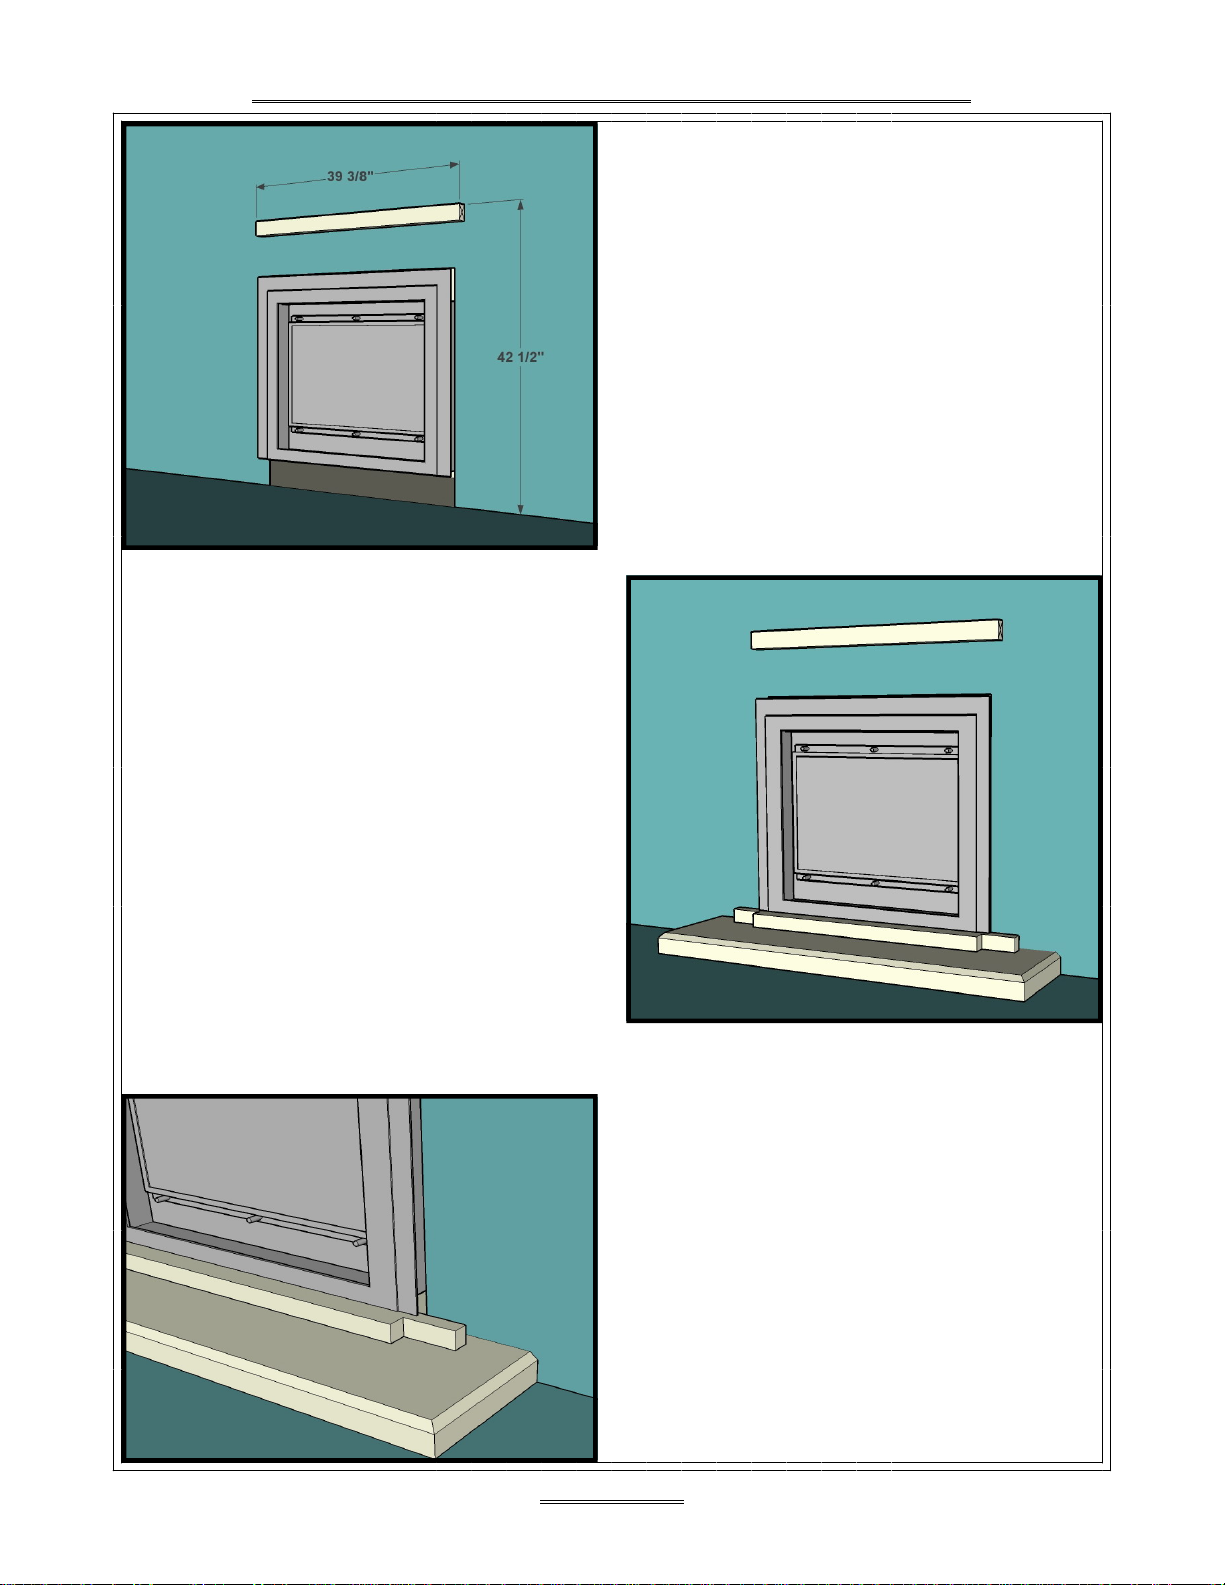
Fires of Tradition Solano Jurastone 4012 Configuration guide


Other Fires of Tradition Indoor Fireplace manuals


Popular Indoor Fireplace manuals by other brands

Baxi Fires Division
Baxi Fires Division 347 BLACK BEAUTY owner's guide

CFM
CFM HEF22 Installation instructions and homeowner's manual

Klarstein
Klarstein ELBRUS manual

Verine
Verine Meridian MK2 Installation, maintenance & user instructions

Spartherm
Spartherm Insert-600 Installation and operating instructions

Desa
Desa VFF-32S-AKA OWNER'S OPERATION AND INSTALLATION MANUAL

Baxi
Baxi 739 Installer and owner guide

Lennox Hearth Products
Lennox Hearth Products CAMBRIA Installation and operation instructions

Pacific energy
Pacific energy Wood Insert Design-D Installation and operating instructions

Element4
Element4 Summum 100 installation manual

Glow Fire
Glow Fire Lessing Assembly instructions

Astria
Astria Rhapsody42TEN Installation and operation instructions

Allen + Roth
Allen + Roth 2360FM-24-259 manual

Muskoka
Muskoka MFB25WS Use & care guide

Acquisitions
Acquisitions X-FIRE 1200 user guide

Palazzetti
Palazzetti ECOFIRE VIVIENNE US PRODUCT TECHNICAL DETAILS

Esschert Design
Esschert Design Fancy Flames FF424 instructions

Archgard
Archgard Optima 3600O Installation & operation