7
SN 138804 - ...
23
1
240
100
65
b
a
a
a
Stûv 30 - installation - 07/13
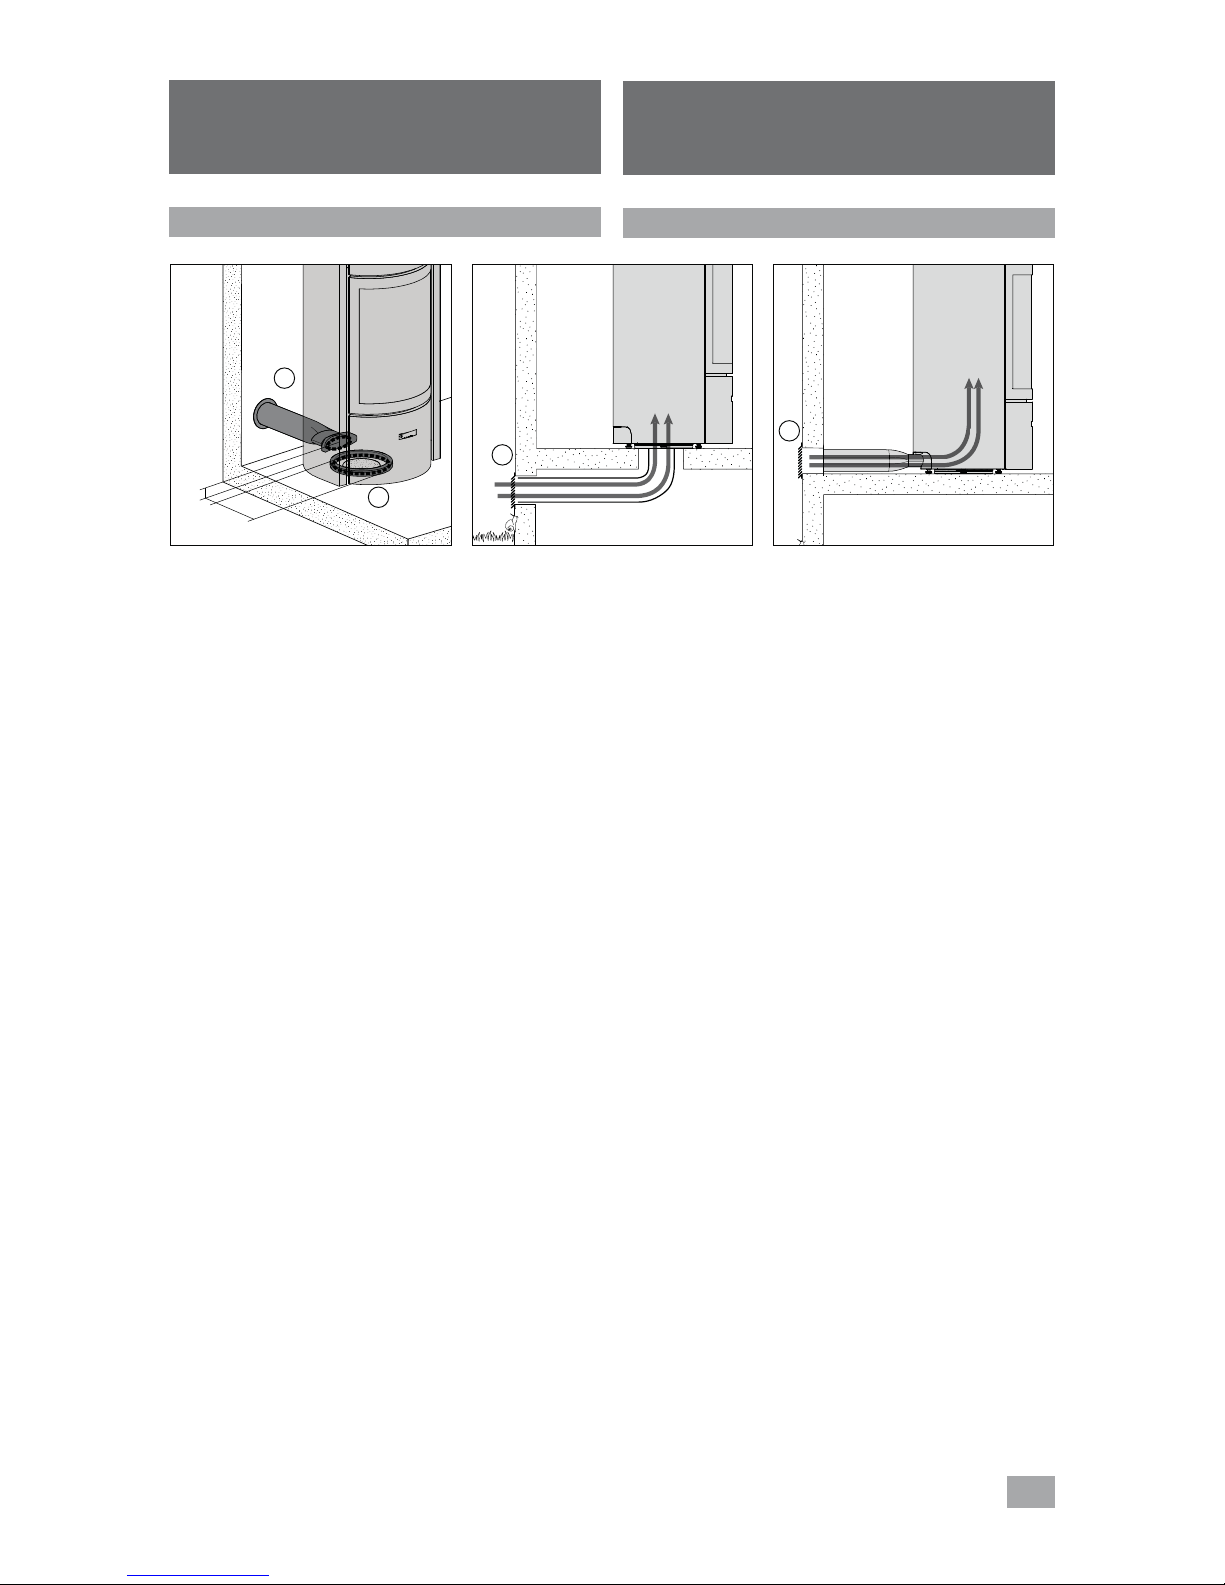
Arrivée d'air pour la combustion
Le foyer a besoin d'air pour la combustion (particulièrement
lorsqu'il fonctionne à feu ouvert). Ces besoins varient en
fonction de la nature du bâti.
La solution idéale
Le Stûv30 est conçu pour être connecté directement à une
arrivée d'air extérieur (indépendant de l'air de la maison).
Nous recommandons cette disposition. La connexion peut se
faire par en dessous du foyer [schémas 1a et 2]
ou par l'arrière [schéma 1b & 3]. Stûv propose des
raccordements optionnels pour chacune de ces
configurations.
Si le foyer n'est pas directement raccordé à une arrivée d'air
extérieur…
Une arrivée d'air suffisante
(Ø 4 3/4"), doit idéalement déboucher à proximité du foyer.
Cette arrivée d’air proviendra d’un vide ventilé, d’un local
ventilé (cave) ou de l’extérieur.
Cette disposition est obligatoire dans certains pays.
Le conduit qui amène l'air extérieur...(qu'il soit connecté au
foyer ou pas)
... sera protégé à l'extérieur par une grille [schémas2a-3a]
dont la section de passage libre est au moins équivalente à la
section d'arrivée d'air. Attention aux infiltrations d'eau et à
l'influence des vents qui peuvent annihiler le système.
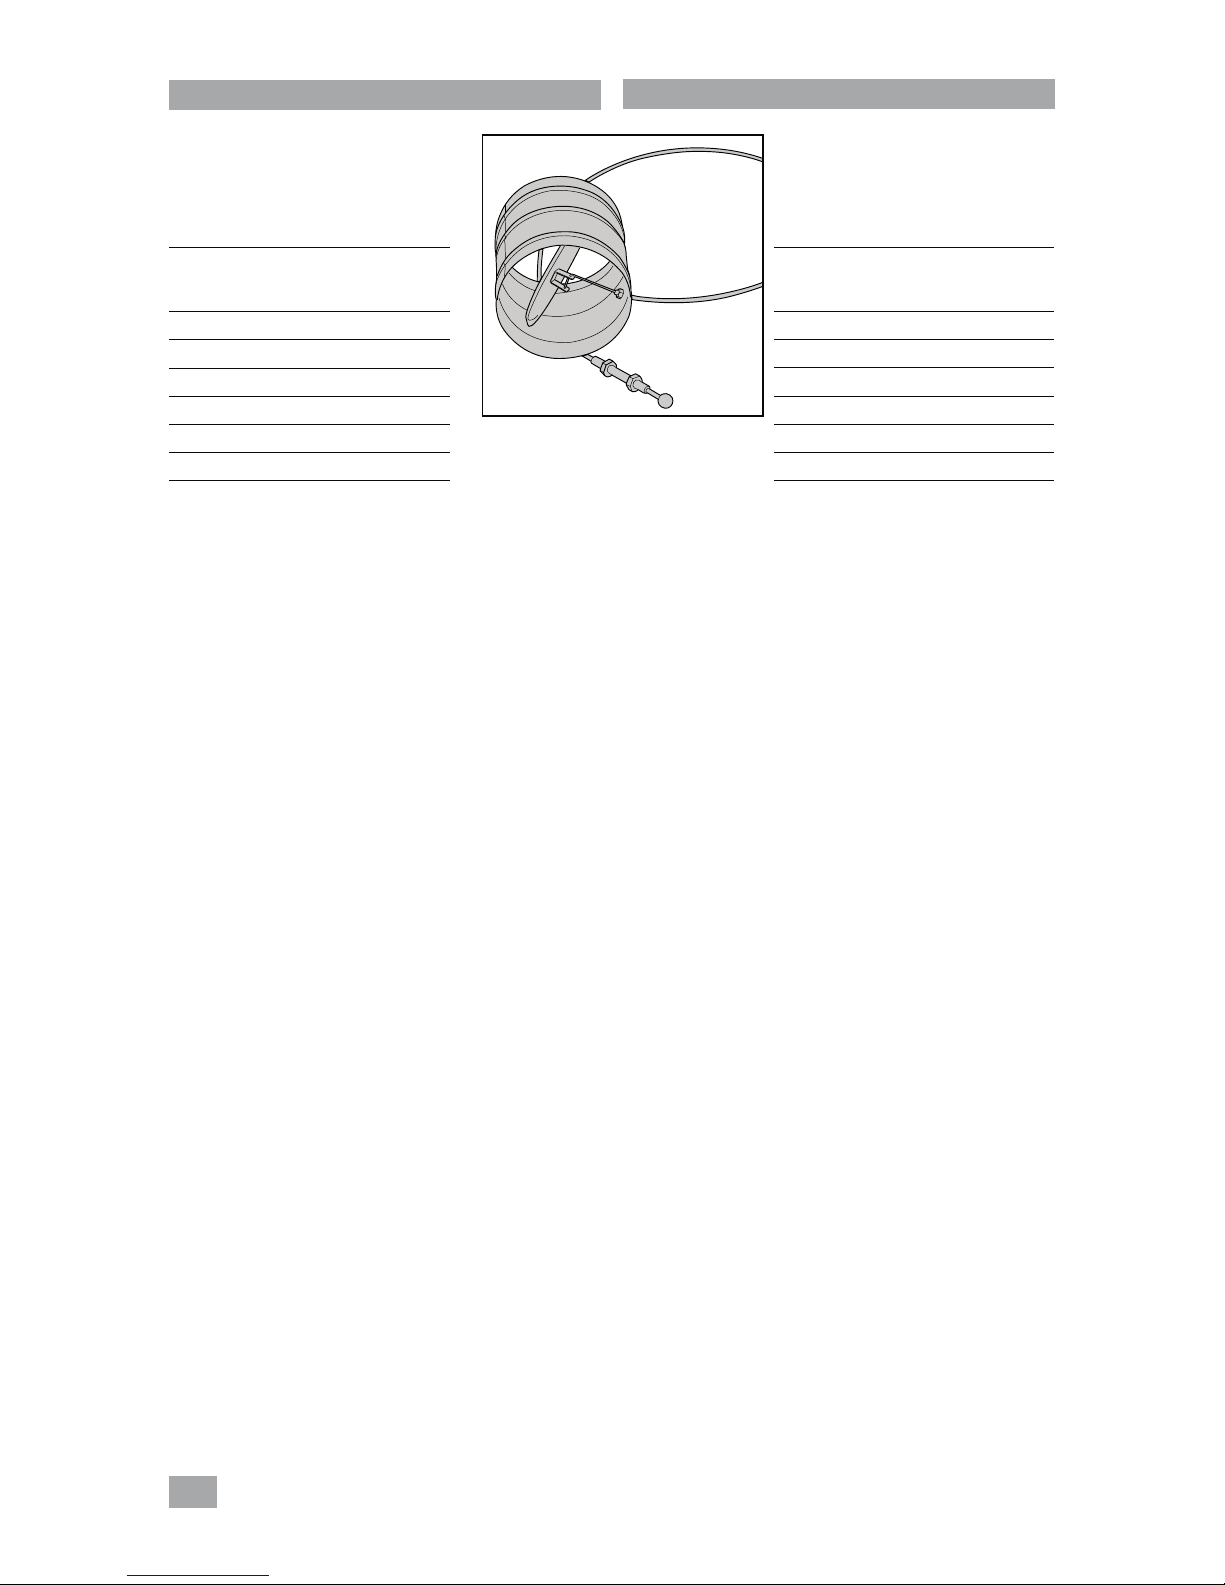
... sera idéalement équipé d'un clapet de fermeture (par
exemple le clapet Stûv [photo4]) pour éviter de refroidir la
pièce quand le foyer n'est pas en fonctionnement.
.... sera le plus court possible pour éviter des pertes de
charges et pour ne pas refroidir la maison.
Si vous utilisez notre conduit flexible Ø4", nous
recommandons une longueur maximale de 6m et pas plus de
6coudes (voir tableau qui suit).
Si vous dépassez ces prescriptions, il faudra compenser par
un diamètre plus important et/ou un tube plus lisse.
PRÉPARATION DU CHANTIER
PREPARATION OF THE AREA
The free standing fireplace requires air for combustion.
(particularly when working in open-fire mode).These requirements
vary depending on the nature of the building.
The ideal solution
The Stûv 30 is designed to be directly connected to an outside
air inlet (independent of the air in the house). We recommend
this set-up. The connection can be made below the free standing
fireplace [diagrams 1/a et 2] or at the back [diagram 1/b & 3].Stûv
offers optional connections for each of these configurations.
If the free standing fireplace is not connected
directly to an outside air inlet...
A sufficient air inlet (Ø 4 3/4") should ideally be created close to
the free standing fireplace.
This air inlet comes from a ventilated empty space, a ventilated
room (cellar) or from outside (mandatory regulation in some
countries).
The flue that brings in outside air… (whether it is
connected to the free standing fireplace or not)
...will be protected on the outside by a grill [diagram2/a-3/a] the
free passage section of which is at least equivalent to the section
of the air inlet. Please note that the infiltration of water and the
effect of the wind can damage the system.
...will ideally be fitted with a closure valve (for example, the Stûv
valve – see below) [photo4] to prevent the room from becoming
cold when the free standing fireplace is not in use.
...will be as short as possible to prevent pressure loss and to
prevent making the house cold.
If you use our standard flexible Ø 4" flue, we recommend a
maximum length of 6m and no more than 6 elbows (see table
next page).
If you exceed these guidelines, you must compensate with a
greater diameter and/or a smoother duct.
Careful not to crush the flue.
Combustion air inlet