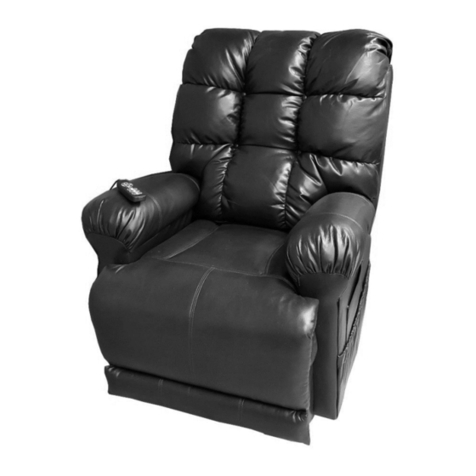
FirstStreet The Perfect Sleep Chair User manual

e Perfect Sleep Chair
1-800-958-8324
1998 Run Mill Road
Colonial Heights, VA 23834
www.rststreetonline.com
e Best Power Li and Recline Chair Made in the USA
Please fill in your Power Lift & Recline Chair information below. This
information will be useful in the event that you should ever need to
contact Golden Technologies, Inc. concerning your lift chair.
Date of Purchase _____________________________________________
Model ______________________________________________________
Serial Number _______________________________________________
Your Golden Technologies, Inc. representative or dealer
Name ______________________________________________________
Company ___________________________________________________
Address ____________________________________________________
____________________________________________________________
CAUTION
Do not allow children to play on this mechanized
furniture or operate the mechanism.
Leg rest folds down on closing so that a child could
possibly be injured.
Always leave chair in a sitting position. Keep hands
and feet clear of mechanism. Only the occupant
should operate it.
FOR YOUR RECORDS
YOUR LIFE IN MOTION
MSWARBMC-0513
for Boomers and Beyond
OWNER’S MANUAL
Your Golden Technologies, Inc dealer:
1998 Run Mill Road
Colonial Heights, VA 23834
for Boomers and Beyond
OWNER’S MANUAL

1
Safety Guidelines
The symbols below are used in the owner’s manual and/or on the product
to identify warnings and notify you of important safety information. Make sure
you read and understand them completely.
WARNING! Indicate(s) a hazardous situation which, if not
avoided, could result in death or serious injury. This icon is
represented as a black symbol on a yellow triangle with a
black border.
MANDATORY! Failure to perform mandatory actions could
cause personal injury and/or equipment damage. This icon
is represented as a white symbol on a blue dot with a white
border.
PROHIBITED! Indicate(s) an action(s) that should not be
performed under any circumstance. Failure to adhere could
cause personal injury and/or equipment damage. This icon is
represented
as a black symbol with a red circle and red slash.
Safety Symbols
The symbols below identify warnings, mandatory actions, and prohibited
actions. They can be found in the owner’s manual and/or on the product. Make
sure you understand all safety labels before operating the product. Do not remove
safety labels from your product.
Read and follow
owner’s manual!
Pinch/Crush Point
Hazard!
Transformer
Crush Hazard!
Child and/or Pet
Crush Hazard!
Fire Hazard!
continued on next page

2
continued from previous page
Safety Guidelines
Class II Device!
Indoor use only!
Do Not Smoke!
Electrical hazard!
Do not dispose in trash!
Batteries required!

3
MANDATORY
READ THIS MANUAL FIRST BEFORE INSTALLING
OR OPERATING YOUR PERFECT SLEEP CHAIR.
Your power lift and recline chair has been engineered from the
leg levelers up to provide the ultimate in strength and
reliability. Great care has been taken to provide you with total comfort and
safety. Each chair is thoroughly inspected and tested prior to shipment.
WARNING
Your Perfect Sleep Chair is a medical device. Therefore, you are
required to exercise caution when operating it to ensure your
personal safety and that of others around you. The following are
rules for the safe operation of your Perfect Sleep Chair.
Care should be taken in the unpacking of this unit, so as not to
cause injury to persons or damage to the unit. Dispose of all plastic
bags and covers, as they can be a smothering hazard to small
children.
Do not allow children or pets near the chair while
the chair is operating.
Do not allow children to play with or operate the
chair at any time.
Hand control should be unplugged and placed out of
the reach of children when the chair is not in use.
Do not flop down into the chair when getting into it, or while it is in
its lift position. Flopping down into the chair will damage it and could
cause personal injury.
Do not allow anyone to sit on your lap, or on the arm of the chair, or on
the footrest while in or operating the chair, as it may cause tipping and
could result in personal injury.
Do not place fingers or hands between the seat cushion and the inside
arm of the chair while sitting in the chair or when the chair is in
operation or plugged into a power source.
Do not retrieve fallen objects from inside or under the chair while the
chair is plugged into a power source.

4
Do not operate the chair if there are any persons,
pets or other obstructions under or in front of the
footrest, under the chair or behind the chair.
Do not smoke while operating, sitting or resting in the chair.
To reduce risk of electrical shock, do not immerse any of the
electrical components into a liquid, or spill any liquids onto electrical
components. Do not open any of the electrical components. There are
no serviceable parts.
Warranty will be void if any of the electrical components are opened by
other than a qualified service person.
Make sure the chair is placed at the specified distance from a wall/
corner (page 7). Failure to do so can damage the chair and will void
the warranty.
Do not use any type of electrical extension cord to plug your
chair into an electrical outlet. Make sure that all electrical
products and their wires are positioned away from your chair
as the metal lift frame mechanism could crush them and
create a fire hazard and/or may cause personal injury.
Do not operate your lift chair while intoxicated or taking medications
that impair your mental or physical abilities to operate the chair safely.
Consult with your doctor about any medications you are taking that
may affect the safe operation of the chair.
Do not operate this product if you have any medical conditions that
result in limited, debilitating mental or physical capacity. You should
consult your doctor before using this product.
Consult with your physician regarding using the Trendelenburg
position.

5
L.E.D. light
L.E.D. light
From motor
To outlet
115-120V A.C.
DC Power
Bottom view of
Transformer
Transformer
Plug
Install two 9 volt batteries in
transformer for battery backup
(See page 10)
(batteries included for your
convenience)
Wall
Side
View
Corner
To p
View
26" 26"
26"
3. Place the chair in the desired
position in the room, keeping it 26"
away from the wall. If placing the
chair into a corner, keep it 26"
from the wall as shown.
INSTRUCTIONS FOR THE PERFECT SLEEP CHAIR
1. Remove the transformer from the transformer box (located behind the lower
outside back) and install two 9 volt alkaline batteries into the sockets on the
transformer. Place transformer on the floor behind the chair.
2. Plug the transformer into a 115-120V 60Hz A.C. outlet and connect the power
cable from the chair into the transformer as shown. Power cable is located under
the chair attached to the motor shaft with white zip tie. Remove zip tie, extend
cable under and out behind the chair.
4. Adjust the leg levelers on the bottom of the chair if necessary to level the chair.
Some high pile carpets can obstruct the footrest operation by rubbing against it.
Raise the levelers to a height above the pile.
5. Slide the hand control from between the back and arm out toward the back of
the chair. Secure the cord into the quick release cable clamp located above the
magazine pocket on the arm of the chair.
Distance required from the wall when reclined:
Wall: 26 inches - Corner: 26 inches

6
6-Button Hand Control operation
Note that remote control designs and labeling may change over
time. These changes do not limit the functionality of your chair.
Refer to the manual that came with your Perfect Sleep Chair for
instructions matching your specific version.
1. To recline the back of the chair, press button (S1) and hold until the back
reaches the desired position. Then release the button.
2. To bring the back of the chair to an upright position, press button (S2)
and hold until the back reaches the desired position. Then release the button.
3. To raise the foot rest, press button (S3) and hold until the foot rest reaches
the desired position. Then release the button.
4. To lower the foot rest and lift the chair, press button (S4) and hold until the
footrest closes, then release the button. If you want to lift the chair, continue
holding button until chair reaches the desired height. Then release the button.
5. To lower the chair from a raised position, press button (S5) and hold until
the chair reaches the floor. Then release the button. If you want to raise the
footrest, continue holding the button until the footrest reaches the desired
position. Then release the button. Button (S4) will also lower the chair from
a raised position.
6. To lift the chair from a seated position (footrest closed), press button (S6).
Continue holding button until chair reaches the desired height. Then release
the button.

7
7. To lift the chair with the back
open (back down, footrest closed),
press button (S4). Continue holding
the button until the chair reaches
the desired height. Then release the
button.
8. To close and lift the chair from a
reclined position (footrest up, back
down), press button (S6). If you want
to bring the chair to a seated position,
hold the button until the footrest
closes, then release it. Press button
(S2) to bring the back the rest of the
way up to seated position. If you want
to close and lift the chair, hold down the
button until the chair stops. All 3 motors will
automatically shut off when the back closes
all the way and the chair reaches its highest
position.
9. Getting into your lift chair. While standing
next to your chair, press button (S4 or S6) and
raise the chair to a height you can sit against.
This height will vary from person to person
S1
L.E.D.
light
S2
S3 S4
S5 S6

8
PERFECT SLEEP CHAIR POSITIONS
Your Perfect Sleep Chair has been equipped with a performance lift
system. The lift system offers a wide range of body positioning, so you can
choose the position that best suits your needs. The lift system
accomplishes this by providing four primary motions: three recline,
one lift and combinations of those motions, allowing you to settle into
your favorite comfort position. Shown below are some of the available
positions. There are many to choose from. You may stop your Perfect
Sleep Chair at one of the positions shown or anywhere in between just by
releasing the buttons on the hand control when the chair reaches the
position you desire.
Drawings are for illustration purpose only.
TV Watching Zero Gravity Like
depending on the individual’s needs. Raise the chair high enough so you do not
have to flop down into the chair. Flopping down into the chair will damage
it and could cause personal injury. Press button (S3 or S5). As the chair
continues downward, adjust yourself into a position that is comfortable to you.
Continue holding button until chair is in the seated position (chair firmly on
the floor), then release the button. Continue operating the chair with buttons
S1 thru S6 until you reach your desired position.
10.Getting out of your chair. Press button (S4 or S6) and raise the chair to a
height that enables you to easily stand. Release the button. Return the chair
to the seated position (chair firmly on the floor) after getting out of the chair
so children, pets or obstructions do not get under the chair. Repeat no. 9 when
you want to sit down.
Note: The motors are set to shut off when they reach their fully extended
or fully retracted position if the selected button is not released. If you
should go past your desired position, select the button to bring you
back to your desired position. You can repeat the process as often as
you like.

9
Battery Back Up System
Your Perfect Sleep Chair comes with a battery back up system so the chair can
return to the seated position in the event of a household power failure. A fresh
set of standard 9V batteries have enough energy to bring the chair to a seated
position from either recline or lift. The batteries do not have enough energy nor
are they intended to operate the chair for a prolonged period of time in the absence of
standard household voltage (120 volt, 60 Hz). Batteries should be replaced
after a single use. Batteries should be changed semi-annually (such as with
smoke alarm batteries). For your convenience, an initial set of batteries
is provided for your use. It is the user’s responsibility to ensure that fresh
batteries are used in the battery back up system. To help ensure the longest
life of the batteries, users are encouraged to not allow the remotes to become
wedged in between the seat cushions and the chair as this may activate the
backlights on the remote and create a slow drain of the batteries. (See
installation page 7.)

10
#
CARE AND MAINTENANCE
Your lift chair will require routine maintenance checks. You can perform some
of these checks, while others may require assistance from a provider. By
following these maintenance checks, you can make sure your lift chair gives
you years of trouble-free operation. If you have any questions or concerns
regarding your lift chair’s care and maintenance, contact your provider.
9Before cleaning your lift chair, consult your provider for the proper types
of cleaner and cleaning methods.
9Keep all electrical components free from moisture and liquid spills.
Intended for indoor use only.
9Periodically inspect all wiring harnesses to make sure they are not cut,
damaged, frayed, or disconnected. If damage of any type is present,
unplug the lift chair and contact your provider.
9Periodically check all fasteners for tightness, wear, and corrosion. If any
of these are present, unplug the lift chair and contact your provider.
Warning: Be careful of pinch points and sharp metal parts (wear
gloves).
9Replace the batteries after one use. Replace the batteries yearly, even if
they were not used. Batteries are intended for one use only!
MANUFACTURER'S WARRANTY
Every Perfect Sleep Chair comes with a Lifetime Limited
Manufacturer's Warranty on the frame and lift mechanism, with
electronic components covered for the first 3 years from purchase.
Specific warranty information, including who to contact with
warranty repair claims, varies by chair production date and model
and comes in the information package delivered with your chair.
If you have any questions on the specific warranty for your chair,
please contact our Customer Service Department at 1-800-958-8324.
They can look up your order and provide you with the contact
information for the manufacturer responsible for servicing your
chair.

✃
GOLDEN TECHNOLOGIES
401 BRIDGE ST
OLD FORGE PA 18518-2323
PLACE
STAMP
HERE
!
NOTES:
for Boomers and Beyond
e Best Power Li and Recline Chair Made in the USA
#

CAUTION
Do not allow children to play on this mechanized
furniture or operate the mechanism.
Leg rest folds down on closing so that a child could
possibly be injured.
Always leave chair in a sitting position. Keep hands
and feet clear of mechanism. Only the occupant
should operate it.
05-20
For Your reCordS
Please fill in your Perfect Sleep Chair information below. This
information will be useful in the event that you should ever need to
contact us concerning your lift chair.
Date of Purchase _____________________________________________
Model ______________________________________________________
Serial Number _______________________________________________
1998 Ruffin Mill Road
Colonial Heights, VA 23834
Table of contents
Other FirstStreet Indoor Furnishing manuals
Popular Indoor Furnishing manuals by other brands
GFW
GFW TOULOUSE Assembly instructions
Sorelle
Sorelle Montgomery Bookcase Assembly instruction

Berlin Gardens
Berlin Gardens GCDT0048D Assembly Directions
Furniture Values International
Furniture Values International aspenhome I248-366-1 Assembly instructions
Costway
Costway JV10347 user manual

Swiss Madison
Swiss Madison SM-BV710WG instruction manual
SOHL FURNITURE
SOHL FURNITURE SEWB-2 Assembly instructions

MMM
MMM Duna Assembly instructions
YitaHome
YitaHome FTHKCT-0021 Assembly instructions

ROOMS TO GO
ROOMS TO GO KIDS CREEKSIDE 2.0 3804440P manual
MasterCraft
MasterCraft 068-0014-8 instruction manual

Whittier Wood Furniture
Whittier Wood Furniture 3460AFCAFa Assembly instructions
