manuals.online logo
Brands
  1. Home
  2. •
  3. Brands
  4. •
  5. Fisher-Price
  6. •
  7. Swing Set
  8. •
  9. Fisher-Price BGB34 User manual

Fisher-Price BGB34 User manual

1
BGB34
fisher-price.com
IMPORTANT! Please keep these instructions for future reference.
Please read these instructions before assembly and use of this product.
¡IMPORTANTE! Guardar estas instrucciones para futura referencia.
Leer estas instrucciones antes de ensamblar y usar el producto.
2
WARNING
ADVERTENCIA
Prevent death: Keep seat fully reclined until child is at least 4 months old
AND can hold head up without help. Young infants have limited head and neck
control. If seat is too upright, infant’s head can drop forward and compress
the airway, resulting in DEATH.
Prevent serious injury or death from falls or strangling in the
restraint system:
• Always use the restraint system.
• Discontinue use when an active child attempts to climb out.
• This product is not intended to replace a crib or bassinet for prolonged
periods of sleep.
• Never leave child unattended.
Evitar la muerte: Mantener la silla totalmente reclinada hasta que el bebé
cumpla 4 meses de edad Ypueda mantener la cabeza derecha sin ayuda. Los
bebés pequeños tienen un control limitado de cabeza y cuello. Si la silla está
en posición vertical, la cabeza del bebé podría caer hacia el frente y comprimir
el flujo de aire, causando la MUERTE.
Para evitar lesiones graves o la muerte como resultado de caídas o quedar
estrangulado en el sistema de sujeción:
• Siempre usar el sistema de sujeción.
• Descontinuar el uso cuando un niño activo intente salirse del producto.
• Este producto no está diseñado para reemplazar una cuna o moisés por
periodos prolongados de sueño.
• No dejar a los niños fuera de su alcance.
Consumer Information
Información para el consumidor
3
Consumer Information
Información para el consumidor
IMPORTANT! Maximum Weight Limit: 25 lb (11,3 kg). If your child weighs less than 25 lb
(11,3 kg), but is really active and appears to be able to climb out of the swing, immediately
discontinue its use.
• Adult assembly is required.
• Tools needed for assembly: Allen Wrench (included) and Phillips screwdriver (not included).
• Requires four D (LR20) alkaline batteries for operation (not included).
• Requires an AC adaptor (input 120 - 240 VAC, 50 - 60Hz, with an output of 6 VDC) for
operation (included).
• Always use the swing where there is adequate ventilation. To prevent overheating, keep
the swing away from heat sources such as radiators, heat registers, direct sunlight,
stoves, amplifiers, or other appliances which produce heat.
• Never use extension cords with the AC adaptor.
• Never use the swing near water (ie.: bathtub, sink, laundry tub or wet basement, etc.).
• Do not connect to more than the recommended number of power supplies.
• The product must only be used with the recommended AC adaptor.
• The AC adaptor is not a toy.
• Disconnect the AC adaptor from the swing before cleaning.
• Product features and decorations may vary from photographs.
¡IMPORTANTE! Capacidad máxima: 11,3 kg (25 lb). Si el niño pesa menos de 11,3 kg
(25 lb) pero es muy activo y parece poder salirse del columpio, dejar de usar el
producto inmediatamente.
• Requiere montaje por un adulto.
• Herramientas necesarias: llave hexagonal (incluida) y desatornillador de cruz (no incluido).
• Funciona con cuatro pilas alcalinas tipo 4 x D (LR20) x 1,5V (no incluidas).
• Funciona con un adaptador de corriente alterna (entrada de 120 - 240 V~, 50 - 60 Hz con
una salida de 6 Vcc) (incluido).
• Siempre usar el columpio donde haya ventilación adecuada. Para evitar
sobrecalentamiento, mantener el columpio alejado de fuentes de calor tales como
radiadores, registradoras de calor, contacto solar directo, estufas, amplificadores u otro
equipo que genere calor.
• Nunca usar extensiones de cables eléctricos con el adaptador de corriente alterna.
• No usar el columpio cerca de agua (p. ej., bañera, lavabo, fregadero, sótano mojado, etc.).
• No conectar a más suministros eléctricos de los recomendados.
• Solo usar el producto con el adaptador de corriente alterna recomendado.
• El adaptador de corriente alterna no es un juguete.
• Desconectar el adaptador de corriente alterna del columpio antes de limpiarlo.
• Las características y decoración del producto pueden variar de las mostradas.
4
Parts Piezas
Seat with Restraint System
Asiento con sistema de sujeción
2 Lower Legs
2 patas inferiores
2 Feet
2 extremidades
Canopy Stay
Marco del dosel
2 Upper Legs
2 patas superiores
Lower Seat Tube
Tubo de asiento
inferior
AC Adaptor
Adaptador de
corriente alterna
Allen Wrench
Llave hexagonal
M5 x 40 mm Bolt - 2
Perno M5 x 40 mm - 2
All fasteners show actual size. Tighten and loosen the screws and bolts with the
enclosed Allen wrench or a Phillips screwdriver.
Se muestran a tamaño real. Apretar o aflojar los tornillos y pernos con la llave
hexagonal incluida o desatornillador de cruz.
#8 x ¾" (1,9 cm) Screw - 6
Tornillo №8 x 1,9 cm - 6
Body Support
Soporte corporal
Pad with Headrest
Almohadilla con cabezal
Side Rail
Barandilla lateral
Side Rail
Barandilla lateral
Motorized Frame
Armazón motorizado
Cloud Clip
Clip de nube
5
Foot
Extremidad
Assembly Montaje
IMPORTANT! Before each use or assembly, inspect this product for damaged hardware, loose
joints, missing parts or sharp edges. DO NOT use if any parts are missing or broken. Contact
Fisher-Price®for replacement parts and instructions if needed. Never substitute parts.
¡IMPORTANTE! Antes de cada uso o montaje, inspeccionar este producto para verificar que
no tenga piezas dañadas, conexiones sueltas, piezas faltantes o bordes filosos. NO usar el
producto si falta o está rota alguna pieza. Ponerse en contacto con la oficina Mattel más
próxima a su localidad para obtener piezas de repuesto e instrucciones, de ser necesario.
No usar piezas de otras marcas.
1
• Fit a foot onto the ends of each lower leg.
• Insert a #8 x ¾" (1,9 cm) screw through the bottom of each foot and into the lower leg.
Fully tighten each screw with a Phillips screwdriver.
• Ajustar una extremidad en los extremos de la pata inferior.
• Insertar un tornillo №8 x 1,9 cm en la parte de abajo de cada extremidad y en la pata
inferior. Apretar totalmente los tornillos con un desatornillador de cruz.
Lower Leg
Pata inferior
6
2
Assembly Montaje
Lower Leg
Pata inferior
Upper Leg
Pata superior
• While pressing the button on the straight end of an lower leg, insert the lower leg into
a upper leg. Make sure the button on the lower leg “snaps” into the hole in the upper leg.
• Repeat this procedure to assemble the other lower leg to the other upper leg.
• Mientras presiona el botón del extremo recto de una pata inferior, introducirla en una pata
superior. Asegurarse de que el botón de la pata inferior se ajuste en el orificio de la
pata superior.
• Repetir este procedimiento para ensamblar la otra pata inferior en la otra pata superior.
Motorized Frame Tube
Tubo del armazón motorizado
3
• While pressing the button on each leg assembly, fit it into a tube on the motorized frame.
Make sure the button on each leg “snaps” into the hole in the tube.
• Mientras presiona el botón de cada unidad de pata, insertarla en un tubo en el armazón
motorizado. Asegurarse de que el botón de cada pata se ajuste en el orificio del tubo.
Tubo
del
armazón
motor
PRESS
PRESIONAR
7
4
• Stand the assembly upright.
• Pull the legs out so that the buttons “snap” into the holes in the motorized frame.
• When standing behind the product, all four feet should be flat upon the floor.
• Poner la unidad de montaje en posición vertical.
• Jalar las patas hacia afuera de modo que los botones se ajusten en los orificios del
armazón motorizado.
• Estando parado atrás del producto, las cuatro patas deben estar planas sobre el suelo.
Assembly Montaje
BACK VIEW
VISTA DE ATRÁS
BACK VIEW
VI
ST
A DE A
TR
Á
S
5
• Plug the power cord from the motorized frame assembly into the power cord in the
frame assembly.
• Enchufar el cable eléctrico de la unidad del armazón motorizado en el cable eléctrico de
la unidad del armazón.
8
6Seat
Asiento
• Fit the side rails to the side tabs on the seat.
• Insert four #8 x ¾" (1,9 cm) screws into the side rails.
• Fully tighten the screws with a Philips screwdriver.
• Ajustar las barandillas laterales en las lengüetas laterales del asiento.
• Insertar cuatro tornillos № 8 x 1,9 cm en las barandillas laterales.
• Apretar totalmente los tornillos con un desatornillador de cruz.
Assembly Montaje
Side Rail
Barandilla lateral
Side Rail
Barandilla lateral
7
• Insert the waist belts through the lowest slots in the pad. Make sure the waist belts are
not twisted.
• Insert the restraint pad through the lower slot and the waist restraints through the upper
slots in the body support.
• Insertar los cinturones de la cintura en las ranuras más bajas de la almohadilla.
Asegurarse de que los cinturones no estén torcidos.
• Insertar la almohadilla de sujeción en la ranura inferior y los cinturones de la cintura en
las ranuras superiores del soporte corporal.
Pad
Almohadilla
Body Support
Soporte corporal
Waist Belts
Cinturones de
la cintura
9
Assembly Montaje
8
Lower Slots
Ranuras inferiores
Shoulder Belts
Cinturones de
los hombros
Shoulder Belts
Cinturones de
los hombros
Smaller Baby
• Insert the ends of the shoulder belts through the lower slots in the seat pad back.
Bebé más pequeño
• Insertar los extremos de los cinturones de hombro en las ranuras inferiores de la parte trasera
de la almohadilla.
9
Upper Slots
Ranuras superiores
Larger Baby
• Insert the shoulder belts through the upper slots in the seat pad back.
Bebé más grande
• Insertar los cinturones de hombro en las ranuras superiores de la parte trasera de
la almohadilla.
10
Assembly Montaje
10
• Fit the pad edges around the rim of the seat.
• Ajustar los bordes de la almohadilla alrededor del borde del asiento.
11
Elastic Loops
Ganchos elásticos
SIDE VIEW
VISTA DEL LADO
• Hook both elastic loops at the top of the seat pad around the pegs at the top of the seat.
• Hook both elastic loops at the bottom of the seat pad around the pegs at the bottom of
the seat.
• Enganchar los dos ganchos elásticos en la parte superior de la almohadilla alrededor de
las clavijas en la parte de arriba del asiento.
• Enganchar los dos ganchos elásticos de la parte inferior de la almohadilla alrededor de las
clavijas en la parte de abajo del asiento.
11
M5 x 40 mm Bolt
Perno M5 x 40 mm
13
• Insert an M5 x 40 mm bolt into the short tube. Fully tighten the bolt with the Allen wrench.
• Insertar un perno M5 x 40 mm en el tubo corto. Usar la llave para apretar el perno.
Assembly Montaje
12
Lower Seat Tube
Tubo de asiento
inferior
Short Tube
Tubo corto
SIDE VIEW
VISTA DEL LADO
• Fit the lower seat tube into the short tube on the seat back.
• Ajustar el tubo de asiento inferior en el tubo corto del respaldo.
12
15 FRONT VIEW
VISTA DELANTERA
M5 x 40 mm Bolt
Perno M5 x 40 mm
• Insert an M5 x 40 mm bolt into the upper seat tube. Fully tighten the bolt with the
Allen wrench.
• Insertar un perno M5 x 40 mm en el tubo superior de la silla. Usar la llave para apretar
el perno.
Assembly Montaje
14 Upper Seat Tube
Tubo de asiento superior
Lower Seat Tube
Tubo de asiento inferior
• Tip the assembly on its side.
• Fit the lower seat tube onto the upper seat tube.
• Poner la unidad sobre un lado.
• Ajustar el tubo de asiento inferior en el tubo de asiento superior.
13
16
• Fit the end of the canopy stay into the button hole in the canopy sleeve A. Slide the
canopy stay through the canopy sleeve B.
• Fit the free end of the canopy stay into the button hole C.
• Introducir el extremo del marco del dosel en el orificio de botón de la funda del dosel A.
Deslizar el marco del dosel por la funda del dosel B.
• Introducir el extremo libre del marco del dosel en el orificio de botón C.
Canopy
Dosel
Clip
Sujetador
Assembly Montaje
17
• Lift the top of the canopy and fit it into the clip on the swing tube.
• Levantar la parte de arriba del dosel y ajustarla en el sujetador del tubo del columpio.
A
C
B
14
Assembly Montaje
18
Cloud Clip
Clip de nube
• Fit the cloud clip into the groove in the dome.
• Ajustar el clip de nube en la ranura de la cúpula.
15
Battery Installation Colocación de las pilas
Hint: Install batteries if you need to use this swing away from an outlet. We recommend
using alkaline batteries for longer battery life.
Nota: instalar las pilas para usar este columpio donde no haya tomacorrientes eléctricos.
Se recomienda usar pilas alcalinas para una mayor duración.
1,5V x 4
D (LR20)
Battery Compartment Door
Tapa del compartimento de pilas
• Loosen the screws in the battery compartment door with a Phillips screwdriver and
remove the battery compartment door.
• Insert four D (LR20) alkaline batteries into the battery compartment.
• Replace the battery compartment door and tighten the screws.
Note: Low battery power may cause product movement to slow, sound and lights to
become faint or product to turn off all together. If this should happen, use the AC adaptor
as a power source or replace the batteries. Replace the batteries with four alkaline
D (LR20) batteries.
• If this product begins to operate erratically, you may need to reset the electronics.
Turn the power off and then back on.
• Aflojar los tornillos de la tapa del compartimento de pilas con un desatornillador de cruz
y retirar la tapa.
• Insertar cuatro pilas alcalinas tipo 4 x D (LR20) x 1,5V en el compartimento.
• Cerrar la tapa del compartimento de pilas y apretar los tornillos.
Nota: si las pilas están gastadas, el movimiento y sonido del producto pueden debilitarse
o quizá el producto deje de funcionar del todo. Si esto sucede, usar el adaptador de
corriente alterna como fuente de alimentación o bien sustituir las pilas. Sustituir las pilas
por cuatro pilas alcalinas tipo 4 x D (LR20) x 1,5V.
• Si este producto no funciona correctamente, restablecer el circuito electrónico. Poner el
botón de encendido en apagado y nuevamente en encendido.
• Protect the environment by not disposing of this product with household waste
(2002/96/EC). Check your local authority for recycling advice and facilities.
• Proteger el medio ambiente no desechando este producto en la basura del hogar
(2002/96/EC). Consultar con la agencia local pertinente en cuanto a información
y centros de reciclaje.
16
In exceptional circumstances, batteries may leak fluids that can cause a chemical burn
injury or ruin your product. To avoid battery leakage:
• Do not mix old and new batteries or batteries of different types: alkaline, standard
(carbon-zinc) or rechargeable (nickel-cadmium).
• Insert batteries as indicated inside the battery compartment.
• Remove batteries during long periods of non-use. Always remove exhausted batteries
from the product. Dispose of batteries safely. Do not dispose of this product in a fire. The
batteries inside may explode or leak.
• Never short-circuit the battery terminals.
• Use only batteries of the same or equivalent type, as recommended.
• Do not charge non-rechargeable batteries.
• Remove rechargeable batteries from the product before charging.
• If removable, rechargeable batteries are used, they are only to be charged under
adult supervision.
En circunstancias excepcionales, las pilas pueden derramar líquido que puede causar
quemaduras o dañar el producto. Para evitar derrames:
• No mezclar pilas nuevas con gastadas ni mezclar pilas alcalinas, estándar (carbono-cinc)
o recargables (níquel-cadmio).
• Cerciorarse de que la polaridad de las pilas sea la correcta.
• Sacar las pilas gastadas del producto y desecharlas apropiadamente. Sacar las pilas si el
producto no va a ser usado durante un periodo prolongado. No quemar las pilas ya que
podrían explotar o derramar el líquido incorporado en ellas.
• No provocar un cortocircuito con las terminales.
• Usar sólo el tipo de pilas recomendadas (o su equivalente).
• No cargar pilas no recargables.
• Sacar las pilas recargables antes de cargarlas.
• La carga de las pilas recargables sólo debe realizarse con la supervisión de un adulto.
Battery Safety Information
Información de seguridad acerca de las pilas
This Class B digital apparatus complies with Canadian ICES-003. Operation is subject to
the following two conditions: (1) this device may not cause harmful interference and
(2) this device must accept any interference received, including interference that may cause
undesired operation.
ICES-003
NMB-003
Cet appareil numérique de la classe B est conforme à la norme NMB-003 du Canada.
L’utilisation de ce dispositif est autorisée seulement aux conditions suivantes : (1) il ne
doit pas produire de brouillage et (2) l’utilisateur du dispositif doit être prêt à accepter tout
brouillage radioélectrique reçu, même si ce brouillage est susceptible de compromettre le
fonctionnement du dispositif.
17
Setup and Use Preparación y uso
WARNING
ADVERTENCIA
Prevent death: Keep seat fully reclined until child is at least 4 months old
AND can hold head up without help. Young infants have limited head and neck
control. If seat is too upright, infant’s head can drop forward and compress
the airway, resulting in DEATH.
Prevent serious injury or death from falls or strangling in the
restraint system:
• Always use the restraint system.
• Discontinue use when an active child attempts to climb out.
• This product is not intended to replace a crib or bassinet for prolonged
periods of sleep.
• Never leave child unattended.
Evitar la muerte: Mantener la silla totalmente reclinada hasta que el bebé
cumpla 4 meses de edad Ypueda mantener la cabeza derecha sin ayuda. Los
bebés pequeños tienen un control limitado de cabeza y cuello. Si la silla está
en posición vertical, la cabeza del bebé podría caer hacia el frente y comprimir
el flujo de aire, causando la MUERTE.
Para evitar lesiones graves o la muerte como resultado de caídas o quedar
estrangulado en el sistema de sujeción:
• Siempre usar el sistema de sujeción.
• Descontinuar el uso cuando un niño activo intente salirse del producto.
• Este producto no está diseñado para reemplazar una cuna o moisés por
periodos prolongados de sueño.
• No dejar a los niños fuera de su alcance.
18
Setup and Use Preparación y uso
Restraint Pad
Almohadilla de sujeción
Waist Belt
Cinturón de
la cintura
Shoulder Belt
Cinturón de los
hombros
Waist Belt
Cinturón de
la cintura
Shoulder Belt
Cinturón de
los hombros
1
Restraint System
• Place your child in the seat. Position the restraint pad between your child's legs.
• Fit the end of each waist belt through the end of each shoulder belt.
• Fasten the waist/shoulder belts to the restraint pad. Make sure you hear a "click" on
both sides.
• Check to be sure the restraint system is securely attached by pulling it away from your
child. The restraint system should remain attached.
Sistema de sujeción
• Sentar al niño en la silla. Colocar la almohadilla de sujeción entre las piernas del niño.
• Insertar el extremo de cada cinturón de la cintura en el extremo de cada cinturón
del hombro.
• Ajustar los cinturones de la cintura/hombros en la almohadilla de sujeción. Asegurarse de
oír un clic en ambos lados.
• Asegurarse de que el sistema de sujeción esté bien asegurado, jalándolo en dirección
opuesta al niño. El sistema de sujeción debe permanecer conectado.
2
• Tighten each waist belt so that the restraint system is snug against your child. Please refer
to the next section for instructions to tighten the waist/shoulder belts.
• Apretar cada cinturón de la cintura de modo que el sistema de sujeción quede bien
ajustado al niño/a. Consultar la siguiente sección para mayores detalles sobre cómo
apretar los cinturones de la cintura/hombros.
Restraint System
Sistema de sujeción
19
Setup and Use Preparación y uso
3LOOSEN
AFLOJAR
TIGHTEN
APRETAR
• To tighten the waist belts: Feed the anchored end of the belt up through the buckle to
form a loop A. Pull the free end of the belt B. Repeat this procedure to tighten the
other belt.
• To loosen the waist belts: Feed the free end of the belt up through the buckle to form
a loop A. Enlarge the loop by pulling on the end of the loop toward the buckle. Pull the
anchored end of the belt to shorten the free end of the belt B. Repeat this procedure to
loosen the other belt.
Note: After adjusting the belts to fit your child, make sure you pull on them to be sure they
are securely fastened.
• Para apretar los cinturones de la cintura: Introducir el extremo fijo del cinturón en la
hebilla para formar un espacio A. Jalar el extremo libre del cinturón B. Repetir este
procedimiento para apretar el otro cinturón.
• Para aflojar los cinturones de la cintura: Introducir el extremo libre del cinturón en
la hebilla para formar un espacio A. Agrandar el espacio jalando el extremo libre del
cinturón hacia la hebilla. Jalar el extremo fijo del cinturón para acortar el extremo libre del
cinturón B. Repetir este procedimiento para aflojar el otro cinturón.
Atención: Después de ajustar los cinturones al tamaño del niño, asegurarse de jalarlos para
verificar que están bien ajustados.
LOOSEN
AFLOJAR
TIGHTEN
APRETAR
Adjusters
Ajustadores
4
To tighten the shoulder belts:
• Hold the adjuster Aand pull the front shoulder strap down B.
To loosen the shoulder belts:
• Slide the adjuster down.
Para apretar los cinturones de los hombros:
• Sujetar el ajustador Ay jalar hacia abajo el cinturón delantero del hombro B.
Para aflojar los cinturones de los hombros:
• Deslizar hacia abajo el ajustador.
20
Cradle
Cuna Swing
Columpio
Setup and Use Preparación y uso
5
PRESS
PRESIONAR
TURN
TURN
GIRAR
GIRAR
You can adjust the motion of the swing: side to side or front to back.
• Press the seat tube button to unlock the seat tube.
• Rotate the seat tube to the desired position.
Podrá ajustar el movimiento del columpio: lado a lado o de adelante hacia atrás.
• Oprimir el botón del tubo del asiento para liberar el tubo del asiento.
• Girar el tubo del asiento a la posición deseada.

Other manuals for BGB34

1

Popular Swing Set manuals by other brands

Lakeland Mills CF1128 manual

Lakeland Mills

Lakeland Mills CF1128 manual

gartenpirat Premium 4.2 GP1305 Assembly instruction

gartenpirat

gartenpirat Premium 4.2 GP1305 Assembly instruction

OOGarden FOSSA manual

OOGarden

OOGarden FOSSA manual

Plum 22100 Assembly instructions

Plum

Plum 22100 Assembly instructions

Rowlinson Garden Products Dartmouth Assembly instructions

Rowlinson Garden Products

Rowlinson Garden Products Dartmouth Assembly instructions

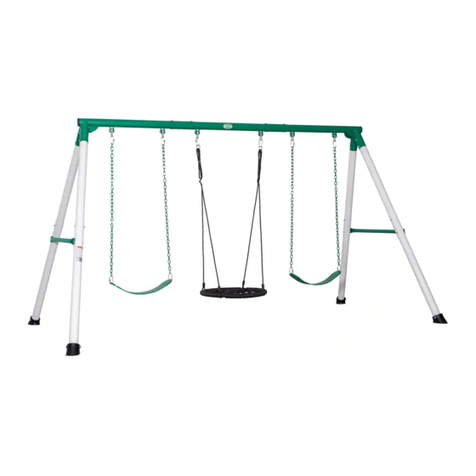
Component Playgrounds MT32-10 manual

Component Playgrounds

Component Playgrounds MT32-10 manual

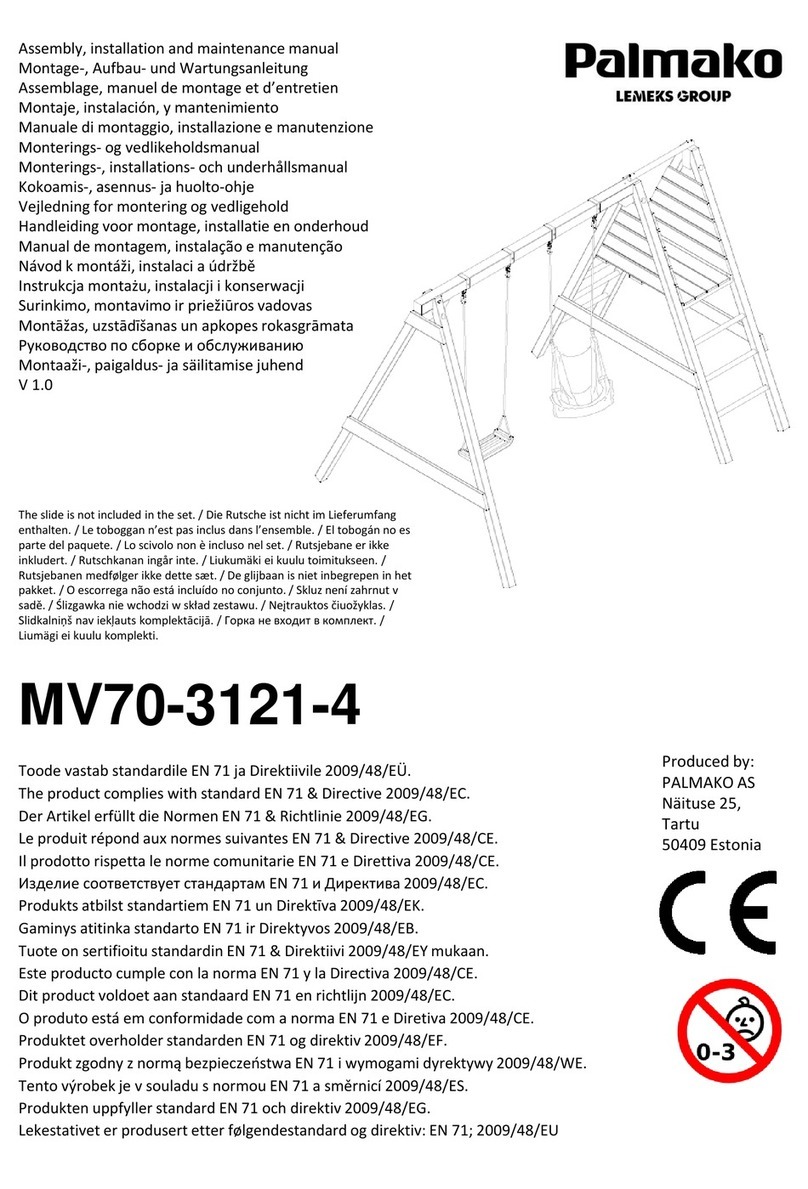
Lemeks Palmako MV70-3121-4 Assembly, installation and maintenance manual

Lemeks

Lemeks Palmako MV70-3121-4 Assembly, installation and maintenance manual

Playskool 1-2-3 Swing instructions

Playskool

Playskool 1-2-3 Swing instructions

Lifetime 90200 Assembly instructions

Lifetime

Lifetime 90200 Assembly instructions

HAGS Lillie Expansion module installation guide

HAGS

HAGS Lillie Expansion module installation guide

Alice's Garden MELTEMI manual

Alice's Garden

Alice's Garden MELTEMI manual

TP active fun TP Kite Wooden Double Swing Set and Slide Instructions for assembly, maintenance and safe use

TP active fun

TP active fun TP Kite Wooden Double Swing Set and Slide Instructions for assembly, maintenance and safe use

Sears Ty Pennington Style D71 M1228 Use & care guide

Sears

Sears Ty Pennington Style D71 M1228 Use & care guide

Canvas HIGHFIELD BALANCELLE 088-2299-0 Assembly instructions

Canvas

Canvas HIGHFIELD BALANCELLE 088-2299-0 Assembly instructions

PlaySafe Middleton Swing Set Owner's manual and assembly instruction

PlaySafe

PlaySafe Middleton Swing Set Owner's manual and assembly instruction

Trigano Agility AG101 Assembly manual

Trigano

Trigano Agility AG101 Assembly manual

Component Playgrounds PH30-10 installation instructions

Component Playgrounds

Component Playgrounds PH30-10 installation instructions

Component Playgrounds CP-AF36-8 manual

Component Playgrounds

Component Playgrounds CP-AF36-8 manual

manuals.online logo
manuals.online logoBrands
  • About & Mission
  • Contact us
  • Privacy Policy
  • Terms and Conditions

Copyright 2025 Manuals.Online. All Rights Reserved.