manuals.online logo
Brands
  1. Home
  2. •
  3. Brands
  4. •
  5. Fishman
  6. •
  7. Amplifier
  8. •
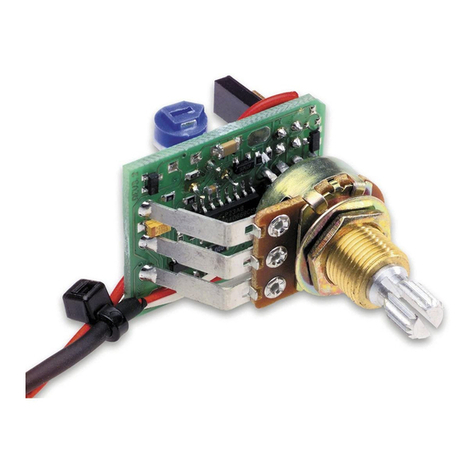
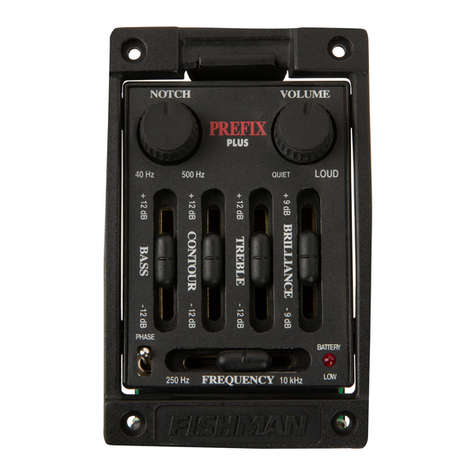
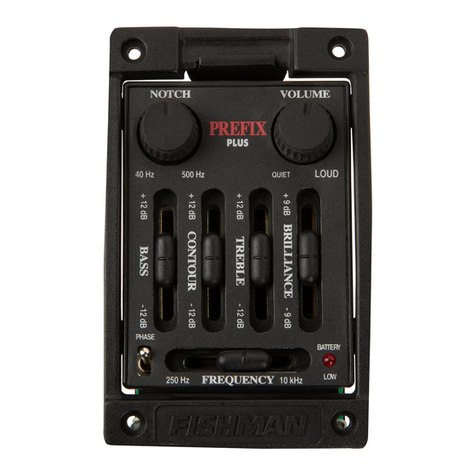
  9. Fishman PREFIX PRO SERIES PREAMP User manual

Fishman PREFIX PRO SERIES PREAMP User manual

This manual suits for next models

1

Other Fishman Amplifier manuals

Fishman Loudbox Mini User manual

Fishman

Fishman Loudbox Mini User manual

Fishman LOUDBOX ARTIST User manual

Fishman

Fishman LOUDBOX ARTIST User manual

Fishman LOUDBOX PRO User manual

Fishman

Fishman LOUDBOX PRO User manual

Fishman PRESYS BLEND ONBOARD PREAMP User manual

Fishman

Fishman PRESYS BLEND ONBOARD PREAMP User manual

Fishman PRESYS ONBOARD PREAMP User manual

Fishman

Fishman PRESYS ONBOARD PREAMP User manual

Fishman F1 AURA+ User manual

Fishman

Fishman F1 AURA+ User manual

Fishman Prefix Pro blend User manual

Fishman

Fishman Prefix Pro blend User manual

Fishman Stereo Amplifier User manual

Fishman

Fishman Stereo Amplifier User manual

Fishman PRO-EQ PLATINUM BASS User manual

Fishman

Fishman PRO-EQ PLATINUM BASS User manual

Fishman PRESYS PLUS User manual

Fishman

Fishman PRESYS PLUS User manual

Fishman PRESYS I User manual

Fishman

Fishman PRESYS I User manual

Fishman BP-100 User manual

Fishman

Fishman BP-100 User manual

Fishman ACOUSTIC MATRIX NATURAL I User manual

Fishman

Fishman ACOUSTIC MATRIX NATURAL I User manual

Fishman ACOUSTIC MATRIX PROFESSIONAL User manual

Fishman

Fishman ACOUSTIC MATRIX PROFESSIONAL User manual

Fishman Ellipse Aura PRO-AUR User manual

Fishman

Fishman Ellipse Aura PRO-AUR User manual

Fishman LOUDBOX PERFORMER - ANNEXE 324 User manual

Fishman

Fishman LOUDBOX PERFORMER - ANNEXE 324 User manual

Fishman AG-125 - User manual

Fishman

Fishman AG-125 - User manual

Fishman OUTBOARD PREAMP User manual

Fishman

Fishman OUTBOARD PREAMP User manual

Fishman ACOUSTIC BASS BLENDER User manual

Fishman

Fishman ACOUSTIC BASS BLENDER User manual

Fishman AGP-2 User manual

Fishman

Fishman AGP-2 User manual

Fishman TONEDEQ | AFX User manual

Fishman

Fishman TONEDEQ | AFX User manual

Fishman Kula User manual

Fishman

Fishman Kula User manual

Fishman MATRIX INFINITY - User manual

Fishman

Fishman MATRIX INFINITY - User manual

Fishman POWERCHIP Safety guide

Fishman

Fishman POWERCHIP Safety guide

Popular Amplifier manuals by other brands

Magnat Audio EDITION FOUR Owner's manual/warranty document

Magnat Audio

Magnat Audio EDITION FOUR Owner's manual/warranty document

Inter-m PA-2000A Operation manual

Inter-m

Inter-m PA-2000A Operation manual

Yamaha TX6n owner's manual

Yamaha

Yamaha TX6n owner's manual

Peavey TNT 150 user guide

Peavey

Peavey TNT 150 user guide

Bosch LBB 1903/10 Installation and user instructions

Bosch

Bosch LBB 1903/10 Installation and user instructions

Avocent Emerge DA1200D Installer/user guide

Avocent

Avocent Emerge DA1200D Installer/user guide

Redgum RGi35 operating instructions

Redgum

Redgum RGi35 operating instructions

Cambridge Audio AXA25 user manual

Cambridge Audio

Cambridge Audio AXA25 user manual

Alpine MRP-M200 owner's manual

Alpine

Alpine MRP-M200 owner's manual

Technical Pro H1502UrBT user manual

Technical Pro

Technical Pro H1502UrBT user manual

FMS EMGZ307 operating manual

FMS

FMS EMGZ307 operating manual

Racal Instruments 5601 user manual

Racal Instruments

Racal Instruments 5601 user manual

Valcom V-1094A Technical specifications

Valcom

Valcom V-1094A Technical specifications

Cambridge Audio 851D user manual

Cambridge Audio

Cambridge Audio 851D user manual

QSC 3800 Specifications

QSC

QSC 3800 Specifications

NAD C300 owner's manual

NAD

NAD C300 owner's manual

Rotel RMB-1077 owner's manual

Rotel

Rotel RMB-1077 owner's manual

Peavey Monitor 300 Series operating guide

Peavey

Peavey Monitor 300 Series operating guide

manuals.online logo
manuals.online logoBrands
  • About & Mission
  • Contact us
  • Privacy Policy
  • Terms and Conditions

Copyright 2025 Manuals.Online. All Rights Reserved.

1
www.fishman.com
Read Me First!
Installation of this product is a simple procedure,
but we recommend this job only if you are an
experienced repair technician.
Requirements
Saddle slot
Minimum saddle slot length: 2.775” (70.4mm)
Maximum E to E spacing at saddle: 2.5” (63.5mm)
The Prefix Pro Series preamp will only fit in guitars
with a clearance of at least 1
11⁄16” (42.86mm) be-
tween the top and back braces, at the point where
the preamp chassis swings inside the instrument.
This path is defined as a 1
5⁄8“ radius, with the hinge
point on the bezel being the center of the circle.
Installation
Preliminary
1. Widen the endpin hole to 15⁄32” (11.9mm) to
accommodate the endpin jack.
2. Drill a 3⁄32” hole (2.4mm) in the saddle slot for the
pickup wire, no less than .100” (2.5mm) from the
nearest string. Install the pickup per Acoustic Matrix
installation instructions.
Cut out the preamp cavity
Please note: For instruments with solid wood sides
(especially maple), we strongly recommend that you
glue 2.5” (63.5mm) x .5” (12.7mm) plywood patches
in the areas inside the guitar where the screw holes
will be drilled. Doing so will prevent the area around
the mounting holes from cracking or splintering
and will strengthen the side of the instrument at
the cutout.
1. Choose the flattest possible location for the pre-
amp on the side of the instrument. The flattest and
most comfortable location for the player is often at
the upper bout, just above the instrument’s waist
and well below the shoulder. Note that the bezel has
a limited ability to bend just enough to conform to
the curved sides of most standard sized instruments.
Caution! When mounting the Prefix Pro Series
preamp on solid wood instruments with highly
curved sides (such as small bodied acoustic-
electrics), exercise extreme caution when choosing
the preamp location.
A highly curved mounting surface may cause the
preamp to bind against the mounting bezel or in
worst cases may cause the wood to crack around the
preamp mounting holes.
2. Attach the enclosed cutout template at the de-
sired location and cut out the cavity for the preamp.
3. Drill the preamp mounting holes with a #45 drill
(.082”/2.08mm).
Output cable / endpin jack wiring
Important note: To ensure full pivot action for the
preamp, remember to leave an extra 3” (76.2mm)
of slack when you decide the output cable’s
final length.
Solder the wire connections
1. Determine the proper length for the cable, then, if
necessary, strip and tin the output wires.
2. To gain better access to the terminals on the
endpin jack, gently bend back the Strain Relief/
Sleeve tab before you begin to solder.
Jack connections
• Red wire to Tip (short terminal)
• Black wire to Switch (longest terminal)
• Shield wire to Sleeve (strain relief)
• Ring is not connected (middle terminal)
PREFIX PRO SERIES PREAMP
INSTALLATION GUIDE
Shield to
Sleeve
Red Wire
to Tip
Black Wire
to Switch
GUITAR BODY
PREAMP
15
/8”

www.fishman.com
Endpin jack
Install the endpin jack per Switchjack Installation
Guide.
Mount the preamp
1. Insert the pickup in the saddle slot.
2. Carefully pull back the foil shield on the preamp
(located next to the output cable) to expose the
terminal block.
3. Tighten the terminal block screws with a small
slotted screwdriver.
4. Pull the slack on the pickup wire until it lies within
the terminal block compartment, tucked in behind
the screw boss where the wire exits.
5. Check the foil shield sides to make sure that the
shape is intact and the corners are square.
6. Carefully replace the foil enclosure. Note that
when properly installed, the foil enclosure will
cleanly surround both the terminal block and one of
the screw bosses. If the sides of the foil jam up on
the terminal block or screw boss, adjust the fit so
that the enclosure closes easily.
7. Replace the two screws that hold the foil in place.
Be careful not to cross thread the holes.
8. Angle the preamp 90° from the bezel and
insert it in the cut-out, then fasten the preamp
bezel using the four self-tapping screws and the
two plastic backing plates.
Complete the installation
Install a 9V alkaline battery.
To keep the wires inside the guitar from rattling,
secure them with the included adhesive backed
clips. Attach the wire guide clips to the side of the
instrument.
Plastic Backing Brackets
Soundboard
Self-Tapping Screws
514-300-115 Rev A 5-09
TERMINAL BLOCK SCREWS
GROUND WIRE SIGNAL WIRE
PICKUP WIRE ENTR
Y
FOIL SHIELD