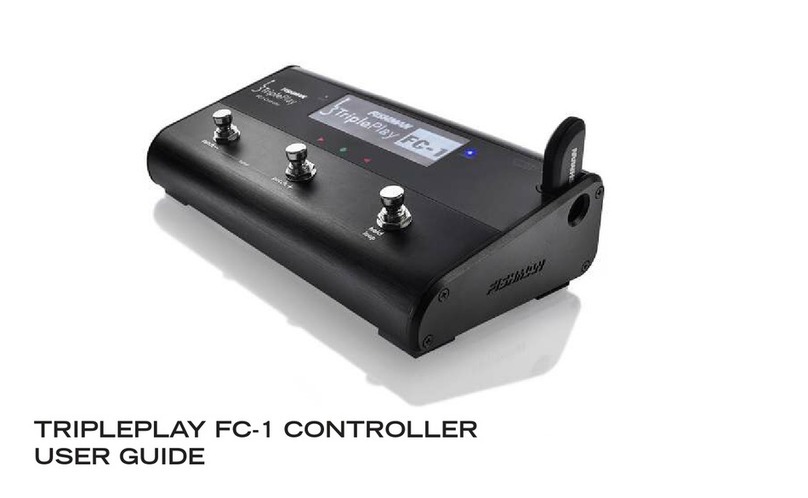
Fishman TriplePlay User manual

For more detailed instructions please visit www.fishman.com/tripleplay

2
For more detailed instructions please visit www.fishman.com/tripleplay
Thank you for making Fishman a part of your musical experience.
We are proud to offer the best products available; high-quality
professional-grade tools which empower you to sound your very
best. All of our products are designed with the upmost thought and
care given to quality and sound. We hope you enjoy TriplePlay and
the limitless creativity it provides!
Welcome, and Thank You!

3
For more detailed instructions please visit www.fishman.com/tripleplay
WIRELESS MIDI
Guitar Controller
• What is TriplePlay?
• What’s Included
• Hardware Installation
• Charging
• Pairing
• Getting Started
• Basic Mode Operation
• Hardware Mode Operation
•TriplePlay Setups
•Guitar Audio Configuration
• FC-1 Setups
•TriplePlay Tips
• TriplePlay Definitions
TriplePlay Guide Contents:

4
For more detailed instructions please visit www.fishman.com/tripleplay

1
For more detailed instructions please visit www.fishman.com/tripleplay
What is TriplePlay?
The TriplePlay Controller uses industry-leading software algorithms in conjunction with its hexaphonic
magnetic pickup to detect the pitch of the notes played on a guitar and convert them into MIDI-note messages.
MIDI ("Musical Instrument Digital Interface") is an industry-standard communications protocol that is used to
control a wide range of electronic musical instruments, computers, and other devices for playing, editing, and
recording music. Using TriplePlay to control these devices, your guitar can sound like any instrument, real or
imagined. TriplePlay enhances the capability of a guitar by allowing access to an infinite number of sampled and
synthesized sounds.
TriplePlay MIDI Guitar controller allows you to do the following:
• Perform MIDI note-detection on steel 6-string guitars, including most electric and acoustic guitars
• Control any device that can receive MIDI-over-USB
• Connect to hardware synthesizers with a MIDI interface or Audio Interface with MIDI
• Play Virtual Instruments on a computer, tablet, or mobile device
TriplePlay Software:
Included with your purchase is the TriplePlay Software, which provides access to an extensive suite of virtual
instruments, synthesizers, and other digital music creation tools. To download the latest software, register here:
https://www.fishman.com/support/tripleplay-registration/
The TriplePlay software includes:
• More than 1,200 sounds designed specifically for the TriplePlay Software
• VST plugin host providing advanced features like fretboard splits, multiple layered VST instruments,
guitar audio input channel with effects, and much more
• Configuration settings for calibrating the controller and modifying other advanced features
• The full-featured TriplePlay Connect iOS application, which allows iPad users to start
playing sounds right out of the box without a desktop computer
For more detailed information, please visit us at www.fishman.com/TriplePlay

2
For more detailed instructions please visit www.fishman.com/tripleplay
What’s Included
2 End-Pin Brackets, each for mounting the controller
onto guitars of different body shapes
TriplePlay includes a pickup and controller that mount on your guitar, a small wireless USB receiver that plugs
into your computer, a USB charging cable, hardware for multiple mounting options, and installation tools. You
also get a library of software featuring stunning collections of sounds and virtual instruments.
TriplePlay Controller with attached hex-pickup TriplePlay USB Receiver dongle
USB Cable

3
Formoredetailedinstructionspleasevisit
www.fishman.com/tripleplay
TriplePlayHardwareInstallationQuickStart
Installationoverview.You’llbeattachingboththeTriplePlaycontrollerandhexaphonicpickupto your
guitar.Thisisaquickoverview-seetheonlinedocumentationformore detailed instructions. Note that the
installationmayrequireslightadjustmenttoyourguitar.Ifyouarenotcomfortable with these procedures,
pleaseconsiderusingaprofessionaltechniciantocompleteyourinstallation.
MountingtheTriplePlayController:
Therearetwodifferentwaysofmountingthecontrolleronyour
guitar,bothofwhichusetheMagneticRingMount.Thisringmountis adhered either directly to the face of the
instrument(“Directmount”method),orontooneoftheEnd-PinBrackets(“End-PinBracket mount” method),
whichallowsforacompletelynon-invasiveinstallation.Mostusersselecttheend-pinbracket mounting
method,butdirectmountingcanbeusefulforinstallingthecontrollerinunique locations upon the instrument.
Option1
Option2-recommendedmethod
DirectMount-
Selectalocationonyourguitarandtesttheplacementofthe
controllertoensureagoodfit,thensimplyremovetheadhesivebacking from
theMagneticRingMount,placethemountadhesive-sidedowndirectlyonto
thesurfaceofyourguitar,andpressfirmlyfor30seconds.
Note:
Theadhesiveusedforthismethodisremovable,butpleaseuse caution
whendoingsoinordertoprotectthesurfacefinishofyour instrument. Sliding
dentalflossalongtheundersideoftheadhesiveisaneffectivemethod for
removingthebracket.
End-PinBracketMount-
Thismethodallowsyoutomountthecontroller
withoutapplyinganyadhesivetoyourguitar.YourTriplePlaycontrollercomes
withtwoEnd-PinBrackets:aright-angledbracketforflat-toppedguitars,and
aslantedoneforcurved-toppedguitars.Selectwhichbracketbestfitsyour
guitar,andrefertothenextpageforinstallationinstructions.
For more detailed instructions please visit www.fishman.com/tripleplay
What’s Included (continued)
Screwdriver and Guitar-Shaped Spacer Tool for
adjusting height of hex-pickup and to measure
distance between strings and hex-pickup
Tune-O-Matic Bridge Bracket 4 Pickup Mounts, each
a different thickness to accommodate a
wide range of string heights
Magnetic Ring Mount that
attaches to guitar body or End-Pin Bracket

4
For more detailed instructions please visit www.fishman.com/tripleplay
TriplePlay Hardware Installation Quick Start
Installation overview. You’ll be attaching both the TriplePlay controller and hexaphonic pickup to your
guitar. This is a quick overview - see the online documentation for more detailed instructions. Note that the
installation may require slight adjustment to your guitar. If you are not comfortable with these procedures,
please consider using a professional technician to complete your installation.
Mounting the TriplePlay Controller: There are two different ways of mounting the controller on your
guitar, both of which use the Magnetic Ring Mount. This ring mount is adhered either directly to the face of the
instrument (“Direct mount” method), or onto one of the End-Pin Brackets (“End-Pin Bracket mount” method),
which allows for a completely non-invasive installation. Most users select the end-pin bracket mounting
method, but direct mounting can be useful for installing the controller in unique locations upon the instrument.
Option 1
Option 2 - recommended method
Direct Mount - Select a location on your guitar and test the placement of the
controller to ensure a good fit, then simply remove the adhesive backing from
the Magnetic Ring Mount, place the mount adhesive-side down directly onto
the surface of your guitar, and press firmly for 30 seconds.
Note: The adhesive used for this method is removable, but please use caution
when doing so in order to protect the surface finish of your instrument. Sliding
dental floss along the underside of the adhesive is an effective method for
removing the bracket.
End-Pin Bracket Mount - This method allows you to mount the controller
without applying any adhesive to your guitar. Your TriplePlay controller comes
with two End-Pin Brackets: a right-angled bracket for flat-topped guitars, and
a slanted one for curved-topped guitars. Select which bracket best fits your
guitar, and refer to the next page for installation instructions.

5
For more detailed instructions please visit www.fishman.com/tripleplay
TriplePlay Hardware Installation Quick Start (continued)
Mounting the controller using the end-pin bracket:
1
2
Loosen your guitar's end-pin, then attach
the selected End-Pin Bracket by sliding the
bracket's slotted tab onto the guitar's
end-pin screw. Lower the bracket onto the face of
your guitar, and re-tighten the end-pin.
Test-fit the Magnetic Ring Mount
to the End-Pin Bracket with the
adhesive backing facing down.
3
When ready, remove the adhesive backing
and attach the Magnetic Ring Mount to the
End-Pin Bracket. Press firmly for 30 seconds
along the entire length of the Magnetic Ring Mount
to ensure a good bond to the End-Pin Bracket.

6
For more detailed instructions please visit www.fishman.com/tripleplay
TriplePlay Hardware Installation Quick Start
(continued)
Mounting the TriplePlay hex-pickup:
Guitars with a Tune-O-Matic Bridge require an additional procedure before attaching the
hex-pickup. For all other bridge types, refer to the Vibrato Bridge Guitar Setup procedure.
Vibrato Bridge Guitar Setup: (Strat** type bridge)
The hex-pickup attaches to your guitar by snapping into one of
four supplied Pickup Mounts. This adhesive-backed Pickup
Mount will be placed on your guitar between the bridge and the
bridge pickup, as close to the bridge as possible. Each Pickup
Mount has a different thickness to accommodate a wide range
of string-heights. The pickup easily snaps into and out of the
Pickup Mount, which remains affixed to your guitar.
See section - ‘Mounting the hex-pickup on your guitar’
Tune-O-Matic Bridge Guitar Setup: (Les Paul* type bridge)
On guitars with Tune-O-Matic bridges, you must first prepare a
Tune-O-Matic Bridge Bracket. This bracket sits between the main
bridge assembly and the supporting bridge mount posts. You will
need to remove the strings on your guitar to install the bridge
bracket. Once the bracket is in-place, the hex-pickup will be
installed on top of the bracket.
See section - ‘Preparing a Tune-O-Matic Bridge Bracket’

7
For more detailed instructions please visit www.fishman.com/tripleplay
TriplePlay Hardware Installation Quick Start (continued)
Preparing a Tune-O-Matic Bridge Bracket:
In order to properly install the Tune-O-Matic Bridge Bracket, you will need to remove the strings on
your guitar. The supplied bracket is designed to fit on the bridge mount posts. You may need to
re-adjust the height of the bridge after installing the bracket, as it may add some height to the
bridge assembly. The hex-pickup mount will be affixed to this bracket.
2
Place the bridge back onto the bridge
mount posts and replace the strings on your
guitar.
1
After removing the strings, lift the bridge
off of the bridge mounts. Fit the supplied
Tune-O-Matic Bridge Bracket onto the
bridge mount posts so that the bracket sits
between the bridge and bridge pickup.
3
The tension of the strings will hold
everything in place. This bracket is where
you will mount the hex-pickup.
Proceed to the section "Mounting the hex-pickup
on your guitar"

8
For more detailed instructions please visit www.fishman.com/tripleplay
TriplePlay Hardware Installation Quick Start (continued)
Mounting the hex-pickup on your guitar:
Each of the supplied Pickup Mounts have a
different thickness to facilitate proper
spacing between the pickup and strings.
Test fit each mount to determine the best fit - simply
snap the hex-pickup into the Pickup Mount, then
slide that assembly under the strings just in front of
the bridge. The hex-pickup should be as close to
the strings as possible without touching them.
1
Pay close attention! The next 6 steps are critical.
Setting the correct spacing between the hex-pickup and guitar strings is essential for
achieving the best accuracy and performance. If the hex-pickup is too far away from the
strings, the TriplePlay controller will have trouble detecting notes properly. If the
hex-pickup is too close to the strings, the controller can trigger notes unpredictably
with wide pitch fluctuations. Follow the steps below to ensure that you have the correct
spacing.

9
For more detailed instructions please visit www.fishman.com/tripleplay
TriplePlay Hardware Installation Quick Start (continued)
Mounting the hex-pickup on your guitar:
Use the Guitar-Shaped Spacer Tool to check
how close the hex-pickup is to the strings.
It’s important to get the spacing such that
the tool can slide between the hex-pickup and strings
with very little additional space. The spacing is too
close if you have to force the tool between the
strings. You’ll have the opportunity to make micro
adjustments in step 6.
2
Note: If the spacing is too close to the strings, despite any micro adjustments, consider replacing
the Pickup Mount with one of the other mounts provided. In rare cases, the strings are too close
to the guitar body to allow the correct spacing between the hex-pickup and strings. If this is the
case, you may need to adjust the height of the bridge or possibly adjust the neck of your guitar.
We strongly suggest to have an experienced guitar technician make these adjustments for you.

10
For more detailed instructions please visit www.fishman.com/tripleplay
TriplePlay Hardware Installation Quick Start (continued)
Mounting the hex-pickup on your guitar:
Carefully slide the hex-pickup out of the
mount, then press down and rub along the
top of the mount to ensure that there is
good adhesion to the guitar body. The Pickup
Mount will remain on your guitar.
Note: The adhesive used for this method is removable,
however use caution when doing so in order to protect
the surface finish of your instrument. Sliding dental floss
along the underside of the adhesive is an effective
method for removing the bracket.
4
3
Once you have chosen the best Pickup
Mount, re-insert the hex-pickup into it,
peel off the adhesive backing, and
carefully slide the assembly underneath the strings
without allowing it to touch the face of the guitar.
Shift this assembly as close to the bridge as
possible. As the hex-pickup is magnetic, allow the
strings to hold it in place while you carefully adjust
the pickup so that the strings line up in the center
of each of the six pickup elements. Once
positioned, press the assembly down onto the
face of the guitar, and hold for 30 seconds.

11
For more detailed instructions please visit www.fishman.com/tripleplay
TriplePlay Hardware Installation Quick Start (continued)
Mounting the hex-pickup on your guitar:
There are small screws on either side of
the pickup that, when turned, will raise or
lower the hex-pickup for micro adjust-
ments. Turn the screws until the spacing allows the
Guitar-Shaped Spacer Tool to slide between the
hex-pickup and strings with very little additional
space.
6
Re-check the spacing between the pickup
and strings with the Guitar-Shaped Spacer
Tool. The tool should slide between the
hex-pickup and strings with very little additional
space. The spacing is too close if you have to force
the tool between the strings.
5

12
For more detailed instructions please visit www.fishman.com/tripleplay
TriplePlay Charging
Charging the controller.
Connect the USB cable to the controller, and plug into one of your computer’s USB ports or a wall socket
USB power adapter. A small LED on the controller glows green while the unit is charging and turns off once the
charge is complete. Allow 90 minutes for the controller to be fully charged. You can expect about 20 hours of
battery life from your charged controller. We recommend fully charging the controller before using it for the first
time.
Users should not attempt replacement of the TriplePlay battery themselves. It is possible to send your
TriplePlay controller back to Fishman in order to have the battery replaced for a small fee. However, if a
battery replacement is attempted: Replace only with same type of battery, Model U600.

13
For more detailed instructions please visit www.fishman.com/tripleplay
TriplePlay Pairing
Pairing the controller and USB receiver
TriplePlay transmits wirelessly via a proprietary radio protocol that is prioritized for transmitting MIDI. This type
of transmission is much more accurate than Bluetooth or wireless network and allows TriplePlay to send data at
near-zero latency (1ms). The controller and receiver need to pair in order to work properly. This step generally
needs to be performed once and is remembered automatically during future use. Follow the instructions below
to pair the controller and receiver.
• Turn the controller on and insert the receiver into the USB port of a computer, tablet, or device that
accepts USB MIDI.
• LED lights on the controller and receiver will flash moderately, showing that the controller and receiver
are not paired.
• The LED lights themselves are push buttons - press both buttons to pair, and the LED lights will start to
flash rapidly while they connect to each other.
• Once paired, the receiver LED will glow steadily, while the controller’s LED flashes slowly.
Note: TriplePlay will not work unless the controller and receiver are paired!

14
For more detailed instructions please visit www.fishman.com/tripleplay
TriplePlay Getting Started
Installing the TriplePlay software is quick and easy!
TriplePlay includes custom software designed specifically for your controller. Follow the instructions below to
download the software. The process is quick and easy and will have you playing sounds on your computer in
minutes.
1. Register your product by using
the QR code below or navigate
to https://www.fishman.com/
support/tripleplay-registration/
2. Find the Software Unlock
Card provided in the
TriplePlay Wireless box.
3. Scratch off the coating at the bottom
left of the back of the card to reveal
the Software Unlock Code. You will
enter this code when you register.
Once you have registered TriplePlay, download the latest TriplePlay software installer available
in the software downloads section and follow the instructions.
TriplePlay Software - TriplePlay's Best Friend
We highly recommend you download and use the the free TriplePlay Software package when connecting to
your computer and DAW. In addition to offering a wide range of instruments and other music-making features
and utilities, it helps you tune your TriplePlay to achieve the most accurate performance.
The Sensitivity Settings utility included with the software package is particularly important to the proper setup
of the TriplePlay hex pickup. While the default settings will provide acceptable tracking, you can achieve the
best performance by setting the sensitivity of each string so that your loudest played notes nearly reach the top
of the meter. Proper sensitivity adjustment is particularly important when using TriplePlay with hardware synths.

15
For more detailed instructions please visit www.fishman.com/tripleplay
guitar
mix
synth
0
1
2
3
4
5
6
7
8
9
1
0
TriplePlay Basic Mode Operation
Just turn it on and connect!
What is Basic Mode? If you want to get started playing right away without using the TriplePlay software, simply
plug the TriplePlay USB receiver into the USB port of a computer, tablet, mobile, or device that accepts USB
MIDI. If you have not already done so, pair the receiver with your controller. TriplePlay will appear as a MIDI
device transmitting all strings on MIDI Channel 1.
plug the USB receiver into any device that accepts USB MIDI
Working in Basic Mode
• Up/Down Buttons - send MIDI
Program changes: Bank 0,
Program +/-1
(starting from program 001)
• Enter/Back Buttons - turn On/Off
Pitch-bending: Enter = Off
or Back = On
• Volume Knob - sends MIDI
Volume CC 007
• Guitar/Synth Switch - N/A in
Basic Mode. Only works with the
TriplePlay software or FC-1 Pedal
Up Button
+ Program Change
Enter Button
Pitch Bend Trigger
Down Button
- Program Change
On/Off Switch
Pairing Button
Volume Knob
Guitar/Synth Switch
Basic Mode Controls
Switch controller ‘On’ to start in Basic Mode
(Starts in Basic Mode unless connected to TriplePlay software)
Back Button
Pitch Bend Auto

16
For more detailed instructions please visit www.fishman.com/tripleplay
TriplePlay Hardware Mode Operation
Hardware Mode Operation
The TriplePlay controller has the ability to store Hardware Presets, a set of MIDI commands meant to send data
to hardware MIDI devices such as a synthesizer. These presets are configurable in the TriplePlay software,
but we have provided a few default presets that are most useful when connecting to hardware devices on the fly.
To start the TriplePlay controller in Hardware Mode:
• While holding down the ‘Up Button’ (shown in “Hardware Mode Controls" graphic), switch the controller
to ‘On.’
• The 001 Poly Preset, shown in the diagram below, will be the first preset loaded.
• Press the Up/Down buttons to step thru the presets.
The chart below shows the first 4 hardware presets. You can select the presets with the Up/Down buttons on the
controller. All hardware presets can be programmed with the TriplePlay software.
TriplePlay Controller Hardware Presets Pitch Bend Range Pitch Bend Mode MIDI Channel Mode
001 Poly Preset +/- 2 semitones Trigger Poly Mode - MIDI Ch. 1
002 Poly Preset +/- 12 semitones Auto Poly Mode - MIDI Ch. 1
003 Mono Preset +/- 2 semitones Trigger Mono Mode - MIDI Ch. 1-6
004 Mono Preset +/- 12 semitones Auto Mono Mode - MIDI Ch. 1-6
005-128 Poly Presets +/- 12 semitones Trigger Poly Mode - MIDI Ch. 1
128-240 Mono Presets +/- 12 semitones Auto Mono Mode - MIDI Ch. 1-6
Other manuals for TriplePlay
5
Table of contents
Other Fishman Recording Equipment manuals

Fishman
Fishman TriplePlay User manual

Fishman
Fishman TriplePlay User manual

Fishman
Fishman TRIPLEPLAY FC-1 User manual

Fishman
Fishman FLUENCE KEITH MERROW User manual

Fishman
Fishman Loudbox 100 Use and care manual

Fishman
Fishman RARE EARTH MIC BLEND User manual

Fishman
Fishman TONEDEQ User manual

Fishman
Fishman OEM TRIPLEPLAY User manual