Flash WHITEsmile Whitening Lamp User manual

Whitening Lamp
flaesh.com
Instructions for use

2
flaesh.com
Latest LED technology
Guided treatment function
Determination of whitening
shades achieved
Cosmetic and medical
tooth whitening
Whitening System
Whitening Gel
With chlorophyll, for effective
and gentle treatments.

3
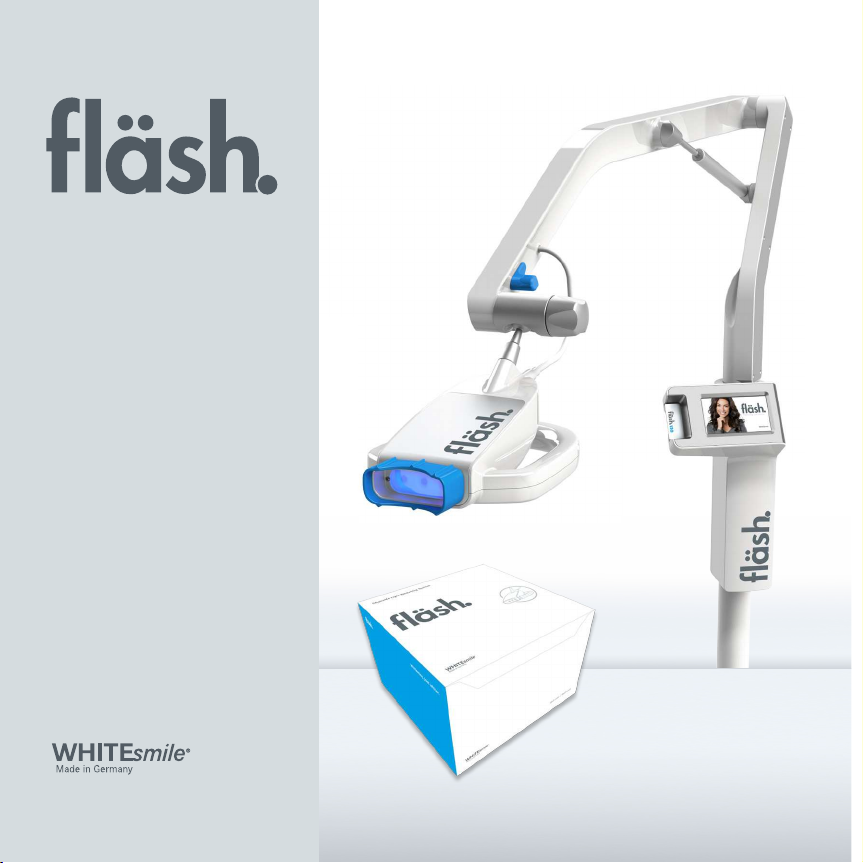
fläsh Whitening Lamp – Instructions for use
Content
1. Packaging / components ............................................... Page 4
----------------------------------------------------------------------------------------------------------------------------------------------------------------------------------------------------------------------------------------------------------------------------------------------------------------------------------------------------------------------
2. Installation .......................................................... Page 5
----------------------------------------------------------------------------------------------------------------------------------------------------------------------------------------------------------------------------------------------------------------------------------------------------------------------------------------------------------------------
3. Technical specifications ................................................ Page 6
----------------------------------------------------------------------------------------------------------------------------------------------------------------------------------------------------------------------------------------------------------------------------------------------------------------------------------------------------------------------
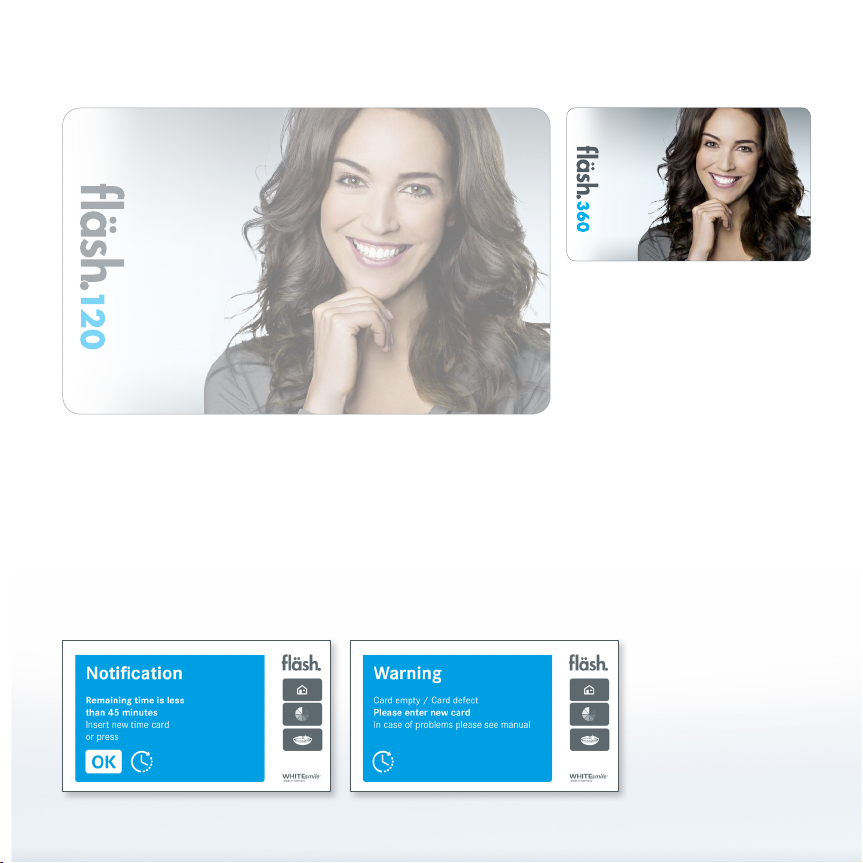
4. fläshcard time management system ...................................... Page 7
----------------------------------------------------------------------------------------------------------------------------------------------------------------------------------------------------------------------------------------------------------------------------------------------------------------------------------------------------------------------
5. Easy lift system ...................................................... Page 8
---------------------------------------------------------------------------------------------------------------------------------------------------------------------------------------------------------------------------------------------------------------------------------------------------------------------------------------------------------------------
6. Adjusting lamp / storage ............................................... Page 9
----------------------------------------------------------------------------------------------------------------------------------------------------------------------------------------------------------------------------------------------------------------------------------------------------------------------------------------------------------------------
7. Operation of the user interface
7.1 Home screen and functions ......................................... Page 10-11
7.2 Tooth shade achieved determination .................................. Page 12
7.3 Default settings .................................................. Page 13
7.4 Guided treatment function .......................................... Page 14-15
---------------------------------------------------------------------------------------------------------------------------------------------------------------------------------------------------------------------------------------------------------------------------------------------------------------------------------------------------------------------
8. Whitening procedure – operation of the lamp ............................... Page 16
----------------------------------------------------------------------------------------------------------------------------------------------------------------------------------------------------------------------------------------------------------------------------------------------------------------------------------------------------------------------
9. Power supply / fuse ................................................... Page 17
---------------------------------------------------------------------------------------------------------------------------------------------------------------------------------------------------------------------------------------------------------------------------------------------------------------------------------------------------------------------
10. Cleaning ............................................................ Page 17
---------------------------------------------------------------------------------------------------------------------------------------------------------------------------------------------------------------------------------------------------------------------------------------------------------------------------------------------------------------------
11. Note ............................................................... Page 17
---------------------------------------------------------------------------------------------------------------------------------------------------------------------------------------------------------------------------------------------------------------------------------------------------------------------------------------------------------------------
12. Signs and Symbols .................................................... Page 18
---------------------------------------------------------------------------------------------------------------------------------------------------------------------------------------------------------------------------------------------------------------------------------------------------------------------------------------------------------------------
13. Warranty ............................................................ Page 19

4
1. Packaging / components
Content main carton: 1 lamp body /1 lamp head /5 wheels /1 counterweight with screw /1 power cable /
3 exchangeable front parts for lamp head (blue) /3 safety googles according DIN EN 166: 2002-04 (REF 5050).
Dimensions carton 1: 142 x 40 x 24 cm, 10 kg.
Packed separately: 1 lamp base. Dimensions carton 2: 62 x 62 x 15 cm, 4 kg.

5
2.
7.
1. 3.
4.
5.
6.
2. Installation
1. Attach the wheels into the base of the lamp.
2. Insert pole of lamp into base.
3. Attach counterweight with screw to
fix the pole on the base. Close tight.
4. To fold up the lamp press blue button on
arm and bring arm in a high position.
Open screw to insert ball connector
of the head. Tighten screw lightly.
5. Click power connector cable in
socket on the back of the head.
6. The blue exchangeable, autoclavable silicon
part has to be fixed on the lamp head.
7. Insert power cable.
The lamp is now ready for use.

6
fläsh Whitening Lamp is an electronic unit that
controls 3 blue LED (Light Emitting Diodes): This
unit is used to optimize dental tooth whitening
Technical Information
Power supply 100-240 V ~
50 Hz–60 Hz
Max input power 60W
Time-delay fuse 630 mAT
Light spectrum 460 nm
High-intensity lighting
source by blue led
max. 190 mW / cm²,
3 LED
Protection against
electric shock
Class Il
Device working and enviromental conditions
Storage Temperature -20°C to 45°C
Working Temperature 15°C to 30°C
IMQ and VDE accepted.
Physical Specifications
Power cord plug SCHUKO
Power cord length 2,50 m
Dimensions 152 × 120 × 63 cm
(max. dimensions
of build up lamp)
63 x 140 x 63 cm,
folded
Total weight ca. 14 kg
fläsh Whitening Lamp can be used only with fläsh
Light Whitening gels, available in 6 % or 32 %
hydrogen peroxide its usage is allowed only in
hospital environment, in clinics and in dental
studios. It must be used only by experts, qualified
for whitening treatments according to the local
legal requirements. The manufacturer accepts
no responsibility in the event of:
• actions or repair carried out by persons not
authorized by the manufacturer or importer.
• use on an electrical system not in conformance
with the terms of regulation CEI 64–8.
• a different use from the one specified
in this booklet.
Please refer to the manual!
IP22
Medical device CE 93/42: CLASS I
3. Technical specifications
100-240 V ~ 50–60 Hz 60W
WHITEsmile®GmbH
Weinheimer Straße 6
69488 Birkenau/Germany
Tel.: +49 (0) 62 01 /8 43 21 90
MADE IN GERMANY

7
4. fläshcard time management system
In each fläsh material kit for each patient 60 minutes treatment time are provided.
The card can be conveniently placed into the lamp. Remaining time is stored on
the card and can be used also on another fläsh Withening Lamp.
SINGLE MODE for single tooth whitening can be used without using the time on
the card. Please note that also SINGLE MODE requires a card to be in the slot (even
empty cards work.) In the single mode only the middle LED is on - do not use for
full whitening sessions – the result will be uneven in front and side.
>> Emergency card in case of a card failure. <<

8
The fläsh Whitening Lamp has a unique positioning system. The blue handle (1) releases the lamp to
an easy positioning in front of the patient on a 3D level. Once position is found the button is released
and the lamp stays put exactly where it should.
5. Easy lift system
(2) Fine adjustments can
be done with the lamp
head by loosen and
tighten the screw.
PLEASE NOTE: THE LAMP CANNOT BE MOVED WITHOUT THE BLUE BUTTON!

9
The fläsh Whitening Lamp offers a lot of possibilities to adjust the head of the
lamp in front of the patient’s mouth. The head can be moved in 3 dimensions.
Additionally, the angle of the holding arm of the head can be adjusted.
As shown aside the lamp can be arranged in front of the patient’s position,
from the side and even from the back.
For storage use cable roll-up on back side of the fläsh whitening lamp.
6. Adjusting lamp/storage
152 cm 140 cm
120 cm 63 cm

10
CONSTANT
MODE
PAUSE
PULSE
MODE
START
SINGLE
MODE
STOP
TIME
ADJUSTMENT
1:00 to 20:00 min
POWER SELECTION
(only for CONSTANT and SINGLE mode)
I 25 % - II 50 % - III 75 % - IIII 100 %
HOME
TOOTH SHADE
GUIDED
TREATMENT
FUNCTION
DEFAULT
SETTINGS
REMAING
TIME ON
CARD
7. Operation of user interface
7.1 Home screen and functions

11
CONSTANT MODE All 3 LED‘s are constantly working. Light intensity
can be adjusted in 4 levels.
PULSE MODE The 3 LED‘s are activated in a sequence.
This mode has a high light intensity
with low temperature increase. It is
recommended for sensitive patients.
SINGLE MODE For single tooth whitening - only middle LED is on.
Light intensity can be adjusted in 4 levels.
Does not use time credits from the fläsh card.
A card (even empty) must be in the slot to operate.
Do not use single mode for full whitening.
It will result in an uneven whitening result.
TIME ADJUSTMENT Can be adjusted from
1:00 to 20:00 minutes.
POWER ADJUSTMENT For CONSTANT and SINGLE mode the light intensity can be
adjusted to 25 % /50 % / 75 % /100 %. The higher the
level the more temperature increase in the gel.
START Pressing the "START" button the procedure begins
and the LED‘s go on.
PAUSE Pressing the "PAUSE" button holds the process
and the time stays on the current value.
STOP Pressing the "STOP" button ends the procedure and the
lamp jumps back in the original setting.
TOOTH SHADE Determines the whitening shade achieved when pre
and post treatment shade is entered. Works with
classical or bleached guide.
GUIDED TREATMENT Allows step by step guided treatments for a perfect result.
FUNCTION
DEFAULT SETTINGS Allows to preset values for minutes per cycle, power
level, kind of shade guide used and language selection.
REMAINING TIME Shows the remaining time on fläshcard. Counts down
ON CARD if PULSE or CONSTANT program are used by the
minute. If card is not inserted or empty PULSE or
CONSTANT do not work.

12
7.2 Tooth shade achieved determination
Please select the shade guide you want to use in the default settings.
You can use the VITA classical shade guide or the VITA Bleached Guide*.
Determine the pre and post treatment shade and select it on the screen.
By touching the post treatment shades the fläsh Whitening Lamp
immediately shows the achieved tooth shade improvement.
*Registered trademark Vita Zahnfabrik, Bad Säckingen, Germany.

13
7.3 Default settings
The changes in the default settings are stored
in the lamp memory until changed again.

14
7.4 Guided treatment function
The unique guided treatment function allows
to go through the whole whitening procedure
step by step with illustrated user instructions.
It allows a standard procedure every time.
The function can be returned to a normal
operation by pressing the home button.

15

16
Plug power cable in electrical outlet 100-240 V.
Switch on power. See instruction of WHITEsmile
gel how to apply the fläsh whitening gel.
The following special instruction for working in
combination with fläsh Whitening Lamp must be
followed: All teeth that should not be bleached and
are therefore not covered with gel must be covered
with moist gauze in order to prevent heating. (to be
covered have to be restorations like crowns, bridges,
implant suprastructures and veneers or in case
of single tooth whitening the other teeth). Gingiva
protector can be used for better fixation.
Make sure that patient and operator are wearing orange
safety goggles according DIN EN 166:2002-04.
Restorations must
be covered with a
moist gauze.
At single tooth whitening
all other teeth must be
covered with moist gauze.
8. Whitening procedure – operation of the lamp
Working times of different fläsh gels:
fläsh Light Whitening 6 % HP:
4 x 15 minutes in one session
. . . . . . . . . . . . . . . . . . . . . . . . . . . . . . . . . . . . . . . . . .
fläsh Light Whitening 32 % HP:
3 x 15 minutes (maximum 4 x 15 minutes)
in one session
Place lamp in front of the patient slightly
touching the lip retractor.
fläsh Light Whitening Gel becomes clear after a
few minutes, showing the strong activation of
the fläsh Whitening Lamp. The gel is still active
and remains on the teeth until the end of the
cycle and the lamp goes off.

17
Double power supply switch with signals
„I“ for ON and „0“ for OFF.
100-240 V ~ 50 Hz–60 Hz VDE type float socket.
Double holder for No. 2 time delay fuses with
rapid disconnection.
Specifications are marked on close
to the power supply control box.
Control box is located under user interface box.
Before cleaning the device, switch it off. The device
can be cleaned with a soft cloth slightly moistened
with nontoxic and non-flammable solvents: tested
solvents available on the market are recommended.
Avoid the entry of liquid into device components.
Do not use strong solvents or sharp instruments.
Keep out of children‘s reach. To be used exclusively
as described in this instructions for use. The product
may only be used in keeping with the specific inst-
ructions for use. WHITEsmile does not accept any
responsibility for damage resulting from failure to
comply with the instructions for use or for uses other
than those foreseen by the field of application for the
product. The user is responsible for experimenting
with the material for uses not explicitly described
in the instructions for use.
The descriptions and date reported herein are
approximate and not binding. The content of
this user‘s manual is subject to variations.
1 6
2 7
3 8
4 9
5
9. Power supply / fuse
10. Cleaning
11. Note

18
12. Signs and symbols
CE-Symbol
Special recycling
(WEEE)
Serial number Article number
See user manual!
Protection against
electric shock class II
Manufacturer IP Protection
class 22
Type B
Switching on/off
For indoor use only
IP22
REF

19
WHITEsmile or your local dealer will repair or at its
option replace, without charge, your product which
proves to be defective in material or workmanship
under normal use, during the warranty period of 2
years from invoice date. Freight cost and compen-
sation for absent device are not covered by the
warranty. The above warranty does not cover
damages or problems which result from misuse,
abuse, accident, alteration, or incorrect use not in
accordance with the manufacturer‘s instructions.
WHITEsmile authorizes the repairing of its devices
to those laboratories with qualified personnel
(electrical engineers) who shall receive the neces-
sary information for repairing and testing the pro-
duct. The testing equipment and spare parts shall
be sent by request. Note: the repairing operation
must follow the actual required standards.
In case of breakdown of the apparatus
contact your local dealer or:
WHITEsmile®GmbH
Weinheimer Strasse 6
69488 Birkenau/Germany
Phone: +49 (0) 62 01 / 8 43 21-90
No compensation could be demanded from the
purchaser for the detention of the equipment.
13. Warranty

© WHITEsmile 2016
Subject to technical changes and errors in the text.
Order-No. 3620 · Version 1.0 · 05/2016
fläsh Whitening Lamp is Made in Germany
WHITEsmile GmbH
Weinheimer Straße 6
69488 Birkenau
Germany
Phone: +49 (0) 62 01 / 8 43 21-90
Fax: +49 (0) 62 01 / 8 43 21-99
E-Mail: contact@flaesh.com
Whitening Lamp
flaesh.com
Table of contents
Popular Dental Equipment manuals by other brands

NOVABONE
NOVABONE Dental Putty Instructions for use

iTero
iTero Element 5D Instructions for use

KaVo
KaVo DSE Compact 5195 Instructions for use

Sirona
Sirona ORTHOPHOS XGPlus DS/Ceph Service manual

OrthoAccel Technologies
OrthoAccel Technologies AcceleDent OPTIMA Directions for use

Planmeca
Planmeca PlanMill 40 S user manual