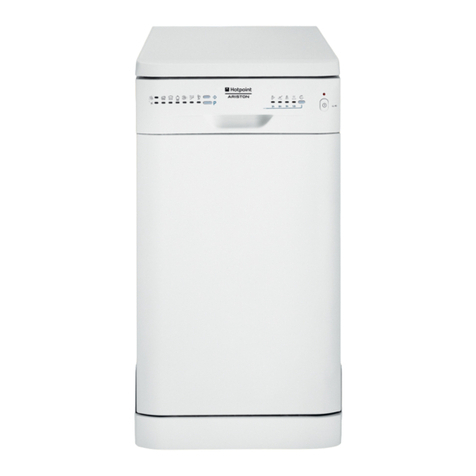
FLAVIA TD 55 VENETA P5 GR User manual

UK Use and handling instructions
SPN Insrucciones de uso у mantenimiento
GER Gebrauchsanweisung und wartung
FRA Mode d’emploi et d’entretien
ITA Instruzioni per I’uso e la manutenzione
POR Instrucoes de uso e manutencao
RUS Инструкция по применению
FLAVIA I DISHWASHERS
DESKTOP-MOUNTED
COMPACT-SIZE DISHWASHERS
TD 55 VENETA P5 GR
TD 55 VENETA P5 WH

Operation and installation manualWarranty service conditions
DISHWASHERS
Dear customer!
Thank you for purchasing a “FLAVIA” product. We hope, this appliance will meet your
expectations and become a reliable assistant of yours in your kitchen. For correct and safe
operation of the appliance, please carefully read all the chapters in the present manual.
Keep your manual for the entire service life of the product you have purchased.
Reading the first part of the manual, you will learn some important conditions to ensure
safe operation of the appliance. To keep your appliance in good condition for a long time,
we offer you a lot of helpful advices on the product care and cleaning. In the manual you
can find some hints on energy saving.
On the last pages of the manual you can also read recommendations which will help you
remove minor failures, if any, during operation of your appliance.
Your new appliance is made of high-quality materials and fully conforms to any standard of
the European Economic Community.
The manufacturer reserves the right to make changes to the product design in order to
improve its performance. Our household appliances are subject to continual improvement,
the performance is enhanced, and their design is updated. Therefore, figures and symbols
in the manual may differ from those for the model you have purchased.
Serial number explanation:
1406376200013
The manufacturing date is in the serial number of the product.
The serial number is on the internal label which is on the side of the dishwasher door
TM Flavia
FLAVIA LIMITED, Hong Kong, Admiralty district, 89, Queensway, Lippo Center Tower 2, 2107

Operation and installation manual Operation and installation manual
DISHWASHERS
1
Warranty service conditions
CONTENTS
Safety hints and statements .............................................................................. 2
Scope of supply ............................................................................................... 3
Brief operating manual...................................................................................... 4
Control panel ................................................................................................... 6
Dishwasher design .......................................................................................... 7
Table of operating modes .................................................................................. 9
Water softener .................................................................................................10
Detergent agent ..............................................................................................12
Rinsing agent ..................................................................................................13
Putting dishes into the dishwasher ....................................................................15
Turning on the appliance ..................................................................................16
Starting a washing cycle ..................................................................................16
How to cancel or change a washing program .....................................................16
Upon washing .................................................................................................16
Forgot to put a plate? .......................................................................................16
Filter system ...................................................................................................17
Dishwasher care ..............................................................................................17
Cleaning of movable nozzles ............................................................................18
Filter cleaning..................................................................................................18
Door cleaning .................................................................................................19
Descaling .......................................................................................................19
Installation procedure ..................................................................................... 20
Water supply connection ................................................................................. 22
Electrical connections .................................................................................... 22
Universal adapter connection .......................................................................... 23
Hints on troubleshooting ..................................................................................24
What you may not wash using this dishwasher .................................................. 27
Technical data ............................................................................................... 28
End of life disposal.......................................................................................... 29
The product has been manufactured in line with European standards and is CE,
TUV, ISO 9001 and EAC certified.
The manufacturer reserves the right to make changes to the product design in
order to improve its performance.

Operation and installation manual
DISHWASHERS
2
Attention!
To avoid failures when connecting
the appliance in cold months, keep
it unpacked at a room temperature
within at least 2 hours
When using the appliance, observe
safety precautions as follows:
ATTENTION: HYDROGEN
EXPLOSION HAZARD!
Under some conditions, hydrogen may form
in hot water supply systems, having been
not used for more than 2 weeks.
If you have not used hot water for more
than 2 weeks, open all the hot taps and let
water run for few minutes before you use
your dishwater again. This helps remove
hydrogen, if formed. As this gas is volatile,
do not smoke and do not use open flames
during this time. Our company is always
committed to use of such technologies
and means, enabling to reduce electric
energy consumption and conserve natural
resources. This is the way we contribute
to nature conservation and protection of
environment.
EARTHING
The appliance shall be earthed. In the
event of a failure or breakdown, earthing
will reduce a risk of electrical shock. The
appliance is equipped with a cord with
an earth wire and earth plug. Plug it into
a corresponding socket, installed and
earthed according to current regulations in
effect.
Improper connection of the earth wire
may lead to electrical shock. If you
doubt, whether earthing is correct,
please contact a qualified electrician
or representative of the Service
Center. Do not make changes to the
design of the plug supplied with the
appliance. If it doesn’t fit for your
socket, have the socket replaced for
which a professional electrician must
be involved.
ATTENTION!
Do not break the dishwasher door and dish
grid! Do neither sit down nor stand on it!
Do not touch heating elements during
heating and right after use.
Do not wash plastic dishware unless it
bears a special marking to confirm this may
be washed in a dishwasher. If the dishes
are unmarked, refer to the manufacturer’s
recommendations.
Use those washing and rinsing agents
specially developed for automated
dishwashers. Never use soap, agents for
laundry, hand cleaners.
Keep children away from washing agents
and the open door of the dishwasher,
because after use the dishwasher may
contain residuals of washing agents.
Do not leave the door open because you
can knock against that. When installing the
dishwasher, do not overbend and flatten
the electric wire.
Avoid intervention on the control system.
Little children and physically disabled
people are not permitted to use the
appliance.
SAFETY HINTS AND STATEMENTS

Operation and installation manual Operation and installation manual
DISHWASHERS
3
All the dishwashing detergents used are
alkali-based and very harmful, if swallowed.
Avoid contact with eyes and skin; keep
children away from the open door of the
dishwasher.
Do not switch on the dishwasher unless
any protection panel is installed. During
use be careful to open the dishwasher door
because water may spout.
Do not place heavy objects and do not
stand on the door of the dishwasher. The
appliance may tip over in that case
When putting dishes:
1) Be careful with sharp objects – put them
avoiding damage to the door seal;
2) Put sharp knives with the handle upward
to avoid cutting yourself. During use,
plastic objects shall not touch the
heating elements.
If an electric wire is found to be damaged,
this is either the manufacturer or a Service
Centre representative to replace it, or any
other qualified technician. The measure is
to be taken to avoid hazards of any kind.
Proper disposal of the packaging
Use the dishwasher only according to its
intended purpose.
If you are going to remove the dishwasher
for maintenance or repair, take off the
door of the compartment within which the
dishwasher is installed.
Do not leave little children unattended;
prevent them from playing with the
appliance.
Upon completion of a washing cycle,
please check, whether the detergent agent
container is empty or not.
Scope of supply *
The scope of supply includes as follows:
– dishwasher, 1 piece;
– basket (grid) for dishes, 1 piece;
– basket for flatware, 1 piece;
– measuring spoon, 1 piece;
– measuring cup, 1 piece;
– funnel, 1 piece;
– hose holder, 1 piece;
– drain hose, 1 piece;
– water supply hose, 1 piece;
– manual, 1 piece
* the scope of supply is subject to change
without prior notice.

Operation and installation manual
DISHWASHERS
4
Turn on your dishwasher Open the door. Press the ON / OFF button
Fill the doser with the dishwashing
detergent
Section “A”: each new washing cycle
Section “B”: prewashing only
Check the level of the rinsing agent
used. Add it, as required
“C” indicator on the doser or electronic indicator light
on the control panel
Check the salt level Use the electronic indicator light on the control panel
or check an amount of salt on the basis of a number of
washing cycles.
Put your dish- or flatware into
corresponding baskets
Clear away larger food residues. Then, remove burned
food residues after they have got softened. After that put
your dishware into baskets corresponding.
Select a desired washing program Select it using the “P” button.
Starting a washing cycle Open the water cock, press START / PAUSE. Your
dishwasher starts to operate in 10 seconds.
BRIEF OPERATING MANUAL

Operation and installation manual Operation and installation manual
DISHWASHERS
5
How to change the program 1. You can change a washing cycle selected, if your
dishwasher has been operating for a short while. If
long, the dishwasher detergent has already been
sprayed. That being the case, you have to add the
detergent
2. Press START / PAUSE. Press and hold “P” more
than 3 seconds to cancel the program you have
selected previously
3. Select a new program desired
4. Close the door. Your dishwasher has been restarted
What to do, if you forgot to put a plate or
a piece of flatware after having started
your dishwasher
1. Carefully open the door to interrupt the dishwasher
operation
2. After you have cut off water supply, fully open the
door
3. Put a plate or a piece of flatware you forgot
4. Close the door. Your dishwasher will restart in 10
seconds
What to do after power cut during a
washing cycle
If your washing program has been interrupted, connect
your dishwasher following the same procedure as for the
first use. Select a program desired again, add agents as
it may be required
Turning off Upon completion of a washing cycle, an audio signal will
be given 8 times, upon which the dishwasher will turn
off. Upon completion of washing, the door indicator will
be on (white). Press ON / OFF
Close the water tap and take dishes
(flatware) out of the baskets
ATTENTION: please wait approximately 15 minutes
before you take your dishware out of the baskets. Hot
dish- and flatware are very fragile and can be damaged.
This will also contribute to better drying of dishes. Start
with the lower basket

Operation and installation manual
DISHWASHERS
6
The control panel is shown in Fig. 1, with posi-
tions having functions as follows:
1. ON / OFF button
2. Delayed washing button (possible delay
times are 2, 4 and 8 hours)
3. Rinsing agent indicator light (it is on, if
the doser is empty; that being a case, you
have to add the rinsing agent)
4. Salt indicator light (water softening sys-
tem): if the light is on, please add some salt
into the salt container
5. Indicator light “Water cock closed”
6. Delayed washing indicator lights
7. PROGRAM SELECTION buttons. With
each pressing you go to the next program
8. START / PAUSE
9. Program indicator lights (individual for
each program).
Fig. 1
ATTENTION!
To ensure proper operation of your dishwasher, carefully read the whole manual before
its first use.
CONTROL PANEL

Operation and installation manual Operation and installation manual
DISHWASHERS
7
DISHWASHER DESIGN
(Fig. 2)
1. Water softening system (salt con-
tainer)
2. Detergent doser
3. Flatware basket
4. Filter
5. Rinsing agent dispenser
6. Sprayer
7. Shelf for cups
8. Basket
9. Filling hose connection point
10. Drain hose connection point.
ATTENTION! IMPORTANT!
During operation, the dishwasher
runs a program selected. The
program run time also includes some
inaction periods, within which it may
seem that washing is complete.
Do not open the door of the dishwasher be-
fore the run time of a program selected is
up. It is permitted to open the door, if you
need to put a plate you’ve forgotten to put
before the start, but you may only do this
before injection of the dishwashing deter-
gent.
The values of various program run times
are in the column “Cycle time” in the “Table
of operating modes”.
A corresponding pictogram is blinking to
signal you that the dishwasher is on and
Fig. 2

Operation and installation manual
DISHWASHERS
8
runs a program you have selected (blinking
during the whole cycle – Position 9, Fig. 1).
A sound signal informs you of the program
run completion; the signal is given within
approximately 8 seconds. The indicator
light of a program selected is off (Position
9, Fig. 1).
Should you, for some reason or another,
have missed the sound signal to inform
you of the program run completion, prior to
opening the door, make sure that the pro-
gram run has been completed. Look at the
pictogram: it must not be blinking, but be
off (Fig. 1). Press Button 1 on the control
panel (Fig. 1) to turn off the appliance, open
the door and take out clean dishware.
Should you accidentally have opened
the door prior to the program run com-
pletion, close it at once without press-
ing any buttons and wait till the program
run time is over.
IMPORTANT RECOMMENDATION!
To avoid unforeseen events upon
washing cycle completion, shut off
the water cock to supply water to the
dishwasher

Operation and installation manual Operation and installation manual
DISHWASHERS
9
Table of operating modes* (program table)*
Program Information for mode
selection Mode description
Dishwasher
detergent
consump-
tion, g
Washing
cycle
time,
min.
Расход
энергии
на цикл
мойки
(кВт/ч)
Расход
воды
(л)
Средство
для опо-
ласкива-
ния
Intensive
To be used for the most
contaminated dishware,
such as saucepans,
stewpots and plates with
dried food residues
Prewashing 50°C
Washing 70°C
Rinsing
Rinsing
Rinsing 70°C
Drying
3/15 g
3 in 1 140 0,9 10,0 «
Normal
To be used for moderately
contaminated dishware,
such as saucepans, cups
and plates
Standard everyday use
Prewashing
Washing 60°C
Rinsing
Rinsing 70°C
Drying
3/15 g
3 in 1 120 0,7 8,0 «
(*EN 50242)
To be used for slightly
contaminated dishware,
such as plates,
cups, bowls, slightly
contaminated saucepans
Prewashing
Washing 50°C
Rinsing
Rinsing 70°C
Drying
3/15 g
3 in 1 180 0,61 6,5 «
Glass
To be used for slightly
contaminated glass ware
and porcelain ware
Washing 45°C
Rinsing
Rinsing 60°C
Drying
18 g
3 in 1 75 0,5 7,0 «
90 min
To be used for slightly
contaminated dishware,
such as plates, cups,
bowls, etc.
Washing 65°C
Rinsing 70°C
Drying
18 g
3 in 1 90 0,65 7,0
Rapid
To be used for slightly
contaminated glass ware
and porcelain ware, as
well as crystal glass
No drying
Washing 40°C
Rinsing
Rinsing 40°C
15 g 30 0,23 6,0
* The table shows calculated values of water temperature. Actual temperatures may differ from calculated
ones.
** after the slash: prewashing consumption / washing consumption.
« means that you have to add rinsing agents into a doser corresponding
Washing modes shall be selected with the PROGRAM SELECTION button. Pressing the button once, you
go to the next program in the following order:
ECO – Glass – 90 min – Rapid – Intensive – Normal.

Operation and installation manual
DISHWASHERS
10
WATER SOFTENER
There are two methods to soften water:
either with a water softener, or a washing
agent.
Water hardness values may vary from place
to place. If your dishwasher uses hard wa-
ter, this may lead to formation of scale and
deposits on dishes.
The appliance is equipped with a special
softener to use salt, specially developed
for removal of lime and minerals from water.
HOW TO CHARGE SALT
INTO THE SOFTENER
Make sure to always use salts meant for
dishwashers only.
The salt container is beneath the lower grid.
The way to fill it in is as follows:
1. Remove the lower basket, unscrew the
salt container cover to remove that.
2. If you fill in the container for the first time,
fill it with water (1 l).
3. Insert the funnel end (included) into the
opening, charge approximately 1.5 kg of
salt. It is normal, if some water flows out
of the container.
4. Carefully screw in the cover.
NOTE:
1. The salt container should be refilled,
when the “S” pictogram (upper left cor-
ner of the control panel: Figure 1, Pos. 4)
starts to illuminate. Even if the container
is properly filled, the pictogram may still
illuminate until salt is dissolved com-
pletely.
2. If you have spilled the salt, you can wash
it out, using the “Rapid” program
SALT CONSUMPTION
CONTROL
The dishwasher enables to adjust salt con-
sumption, depending upon water hard-
ness, to optimize it in the way as follows:
1. Press the ON / OFF button, close the
door.
2. Press and hold (within 60 sec) START /
PAUSE.
3. On the front panel, program indicators
will flash, corresponding to settings H1,
H2, H3, H4, H5 and H6. Default setting is
H3.
4. Using START / PAUSE, set a desired
value of salt consumption, depending
upon water hardness (refer to “Water
hardness table”).
5. Settings are completed automatically,
in 5 sec.
These settings are required each time you
disconnect the dishwasher from the mains.
You may be informed of water hardness in

Operation and installation manual Operation and installation manual
DISHWASHERS
11
your location at local authorities or upon a
lab research of a water sample.
Water hardness Settings Program indicator
light which is on
(control panel)
odH 1) mmol/l 2)
0–5 0–0,9 1 Н1 Rapid
6 _11 1,0–2,0 2 Н2 90Min
12–17 2 ,1– 3 ,0 3* Н3 90 Min, Rapid
18–22 3 ,1– 4,0 4 Н4 Glass
23–34 4,1– 6,1 5 Н5 Glass, Rapid
35–45 6,2–8,0 6 Н6 Glass, 90 Min
1) Water hardness MU in Germany
2) Internationally accepted MU of water hardness
* factory setting

Operation and installation manual
DISHWASHERS
12
DISHWASHING DETERGENTS
ATTENTION!
Detergents are very caustic! Keep them
away from children!
The doser must be filled in before start of
each washing cycle, according to instruc-
tions from the “Table of operation modes”.
Your dishwasher consumes less rinsing
agents and dishwashing agents, as op-
posed to conventional appliances of that
kind. For a normal (standard) washing cycle,
a table spoon of the dishwashing detergent
would be enough. For heavily contaminated
dishware you should use a larger quantity of
the dishwashing detergent. Always add the
dishwashing detergent right before wash-
ing, otherwise it may get soaked, without
dissolving completely.
Proper use of detergents
Use special dishwashing detergents only.
Keep them in a dry place. Charge the de-
tergent powder into the doser right before
you start washing.
Tableted dishwashing detergents
Tableted dishwashing detergents of dif-
ferent manufacturers have different dis-
solution rates. Due to this, during short
programs, tablets may not dissolve com-
pletely. As a consequence, this would re-
duce their cleaning ability. Tableted dish-
washing detergents are better used for
intensive washing modes and that is to en-
sure their complete dissolution.
Detergent consumption
IF WATER USED IS TOO HARD, YOU
MAY AVOID FORMATION OF SCALES
AND DEPOSITS, ADDING A WASHING
AGENT!
An amount of the dishwashing detergent
used may vary, depending upon water
hardness.
To be informed of this value, please contact
the local department of water resources.
For harder water you will need a larger
amount of the dishwashing detergent. Keep
in mind that you should select an appropri-
ate amount, slightly changing it with small
portions, until you find a proper dosage ac-
cording to water hardness in your location.
Attention:
When using detergents “3 in 1”, makes
sure theirs size is appropriate so that
no problems would arise with placing
them into containers. Otherwise you
can damage the container.
Method to place detergents into a con-
tainer:
The detergent container is divided into 2

Operation and installation manual Operation and installation manual
DISHWASHERS
13
sections, “A” and “B”, correspondingly.
“A” is for placing a detergent used for wash-
ing; “B” is for placing a detergent used for
prewashing.
There are three types of detergents:
1. Detergents to contain phosphates and
chlorine.
2. Detergents to contain phosphates, but
no chlorine.
3. Detergents to contain neither phos-
phates, nor chlorine.
As a rule, new, powder-type detergents
contain no phosphates. Therefore, they do
not provide for water softening thanks to
presence of phosphates. That being a case,
it is strongly recommended to add salt with
water hardness to only make 6 dH. Use of
detergents with no phosphates in hard wa-
ter leads to formation of white stains upon
surfaces of dishware and glasses / cups.
You should add more detergent to achieve
better washing results. Detergents with no
chlorine only provide for slight whitening.
Using these detergents, it is impossible to
remove strong stains and spots of color. In
this case you have to select a program with
higher temperatures.
RINSING AGENT
This is to be used at the last stage to avoid for-
mation of drop marks on dishes. This also im-
proves drying, enabling water to “run off” the
surface of dishes.
Your dishwasher uses liquid rinsing agents.
The rinsing agent doser is inside, close to that
of the dishwashing detergent. To fill in the dos-
er, open the cover and fill in water, till the level
indicator turns black.
• To open the doser cover, turn it to the
left (“Open” position) and remove it.
• Fill in the doser with you rinsing agent.
Do not overfill!
• Close the cover, turning it to the right.
Do not overfill the doser, for it may result in ex-
cessive soaping. If you spill some, wipe it with
a soft cloth. Prior to opening the door, do not
forget to screw the cover.
Rinsing agent doser adjustment
Within the last rinsing cycle, a certain
amount of the rinsing agent is used. Simi-
lar to use of the dishwashing detergent, an
amount of the rinsing agent depends upon
water hardness. If you use too much rinsing

Operation and installation manual
DISHWASHERS
14
agent, this may lead to excessive foaming
and occurrence of stains on your dishware.
If water in your location is soft, you will need
no rinsing agent. But if you still need that,
dilute it with a corresponding amount of
water.
The doser has 6 positions. Always start
with Position 2. If the dishes dry out badly,
if there are drop marks on them, increase
an amount of the rinsing agent, switch-
ing to Position 3. Continue to increase the
amount, till there are no drop marks on your
dishes. We recommend using Position 4.
How to fill in the doser
with the rinsing agent
If the control panel does not include a rinsing
agent level control lamp, you can calculate a
required amount of the rinsing agent in the
following way. The doser has a liquid level
indicator. The black spot decreases in size
with the liquid volume decrease. The level
below 1/4 is not permitted.
Depending upon consumption of the rins-
ing agent, the black spot decreases in size
(see the figure):
Full
3/4
1/2
1/4 – refilling required
Empty

Operation and installation manual Operation and installation manual
DISHWASHERS
15
PUTTING IN DISHES
Your dishwasher can place 6 sets of dish-
and flatware. Before putting them into the
dishwasher, remove any residues of food.
No rinsing is required before putting the
flat- and dishware into the dishwasher.
Saucepans, soup plates, bowls and salad-
dishes must be placed bottom up. Do not
overcharge your dishwasher.
The flat- and dishware shall not interfere
with free rotation of water sprayers. Some
glasses can lose its polish upon several
washing cycles, please bear it in mind.
The figure below shows how it is recom-
mended to place the flat- and dishware into
the dishwasher.
1. Cups
2. Small bowls
3. Glasses
4. Saucers
5. Serving dish
6. Oval plates
7. Plates
8. Soup plates
9. Dessert plates
10. Basket for flatware
11. Tablespoons
Basket for flatware
The flatware shall be placed into the bas-
ket, with their handles down. Below is one
of the ways to properly place pieces of flat-
ware.
Tablespoons
Forks
Dessert spoons
Tea spoon
Knives
Salad spoons
Sauce spoons
Serving forks
ATTENTION! Avoid any pieces of
flatware to protrude from the basket
bottom.

Operation and installation manual
DISHWASHERS
16
SWITCHING ON THE APPLIANCE
Starting a washing cycle
1. Make sure the dishwasher is connect-
ed to the mains.
2. Make sure the water cock is opened all
the way.
3. Put your dishes (See “Putting the dish-
es”).
4. Fill in the rinsing agent and dishwash-
ing detergent (See “Dishwashing de-
tergents” and “Rinsing agents”).
5. Press ON / OFF button.
6. Press the program selection button,
select a washing cycle desired (See
“Table of operating modes”).
7. Shut the door. Press START / PAUSE.
The program selected will start within 3
sec.
How to cancel or change
the program selected
NOTE: a washing cycle, already started,
can only be changed within few minutes.
Otherwise, the detergent is already used,
water is supplied. Should it happen like this,
refill the detergent doser (See “Dishwash-
ing detergents”).
Open the door, press and hold the program
selection button within 3 sec at least. After
that you can change the previous program
and go to another one. Do not forget to
close the door.
Upon washing
When washing is over, an audio signal will be
given within 8 sec. Turn off the appliance,
pressing ON / OFF. Wait several minutes to let
dishes cool down and dry before taking it out
of the dishwasher.
Forgot to put a plate?
You can put a forgotten plate only before
the detergent is sprayed.
1. Open the door to interrupt a washing
cycle.

Operation and installation manual Operation and installation manual
DISHWASHERS
17
2. You can fully open the door when water
nozzles stop operating.
3. Put the plate.
4. Close the door. In 10 sec your dishwash-
er will restart.
ATTENTION! Be careful when opening
the door with the dishwasher operating
because you can be exposed to hot
water!
FILTER SYSTEM
The filter is within convenient reach for your
accommodation. The filter system includes
three components: main filter, coarse filter
and fine filter.
1. Main filter
Food and dirt residues, screened with this fil-
ter, are washed down by means of water jet
from the lower nozzle.
2. Coarse filter
Bigger particles, such as bones and pieces
of broken glass, that may clog discharge
pipes, are screened with the coarse fil-
ter. To remove particles, screened with it,
carefully squeeze the upper tags and take
out the filter.
3. Fine filter
This is designed to screen dirt and food
residues and prevent their contact with
dishware during the washing cycle.
ATTENTION!
Do not turn the fine filter upside
down!
DISHWASHER CARE
To clean the control panel, use a
slightly wet cloth. Then wipe the sur-
face dry. To clean other surfaces use
light polishing.
Never use sharp objects or hard
sponges to clean the dishwasher sur-
faces.
Protection against freezing
If you are going to keep your dishwasher in
a cold room during winter, ask service engi-
neers to do the following:
1. Disconnect the dishwasher, remove
the fuses.
2. Shut off the water supply cock, discon-
nect the delivery hose and inlet valve.
3. Drain water from the delivery hose and
inlet valve.
4. Connect the hose and valve again.
5. Take out the filter body and remove wa-
ter using a sponge.

Operation and installation manual
DISHWASHERS
18
Cleaning moving nozzles
The moving nozzles must be cleaned on a
regular basis, otherwise scales and hard
water deposits will clog them, as well as
water channels. For that, unscrew the nut,
remove the upper part of the nozzle. Af-
ter that remove them. Wash the nozzles in
warm soapy water, use a soft brush to clean
their openings.
Filter cleaning
To ensure the best results, you should clean
the filter system on a regular basis.
The filter effectively removes food particles
during a washing cycle, enabling water to
circulate. For this reason, the best thing is
to remove larger particles after each wash-
ing cycle, washing the filter with running
water. To remove the filter (see the figure
below), turn the upper part of the filter box
counterclockwise. Then, remove the coarse
and fine filters. The filter system is subject to
cleaning on a regular basis, once a month at
least.
Step 1: Rotate the upper part of the filter box
counterclockwise.
Step 2: Remove the coarse filter.
Step 3: Remove the fine filter.
Use a brush to clean the coarse and fine fil-
ters. Then, assemble the entire system and
insert that into the dishwasher, to positions
corresponding, slightly pushing downwards.
It is prohibited to use and operate the dish-
washer without the filter. Improper installa-
tion of the filter may result in deterioration of
the dishwasher performance and damage
to your dishware.
ATTENTION!
Never operate the dishwasher with-
out the filter!
This manual suits for next models
1
Table of contents
Other FLAVIA Dishwasher manuals
