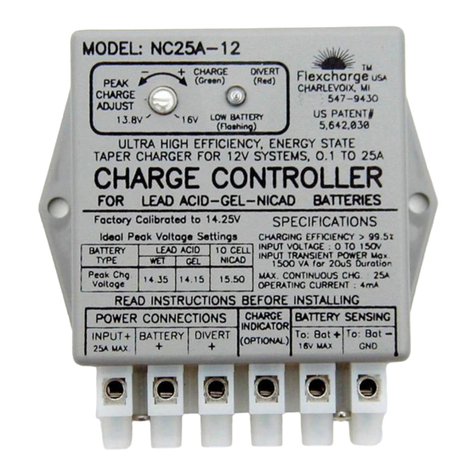
Flexcharge PV7 User manual

1217 State St., Charlevoix, MI 49720 Ph: (231) 547-9430 sales@flexcharge.com
Come See us at http://www.flexcharge.com
Page1
PV7-PV14 manual.doc
Model PV7 /D & PV14
Owners Manual
PV7
PV7D
PV14
Manual Edition: Rev 03
Sept 2018
High Efficiency, Industrial Grade,
Alternative Energy Battery Charge Controller
for Smaller PV Systems
For Flooded Lead Acid &
Sealed Gel & AGM Battery Technologies
DO NOT USE ON LITHIUM BATTERIES
MODEL: PV7/24, PV7D, PV14

1217 State St., Charlevoix, MI 49720 Ph: (231) 547-9430 sales@flexcharge.com
Come See us at http://www.flexcharge.com
Page2
PV7-PV14 manual.doc
W
W
WA
A
AR
R
RN
N
NI
I
IN
N
NG
G
GS
S
S
&
&
&
I
I
IM
M
MP
P
PO
O
OR
R
RT
T
TA
A
AN
N
NT
T
T
I
I
IN
N
NF
F
FO
O
OR
R
RM
M
MA
A
AT
T
TI
I
IO
O
ON
N
N
THE PV7 & PV14 CONTROLLERS ARE "ON/OFF" REGULATORS, NOT CONSTANT
VOLTAGE REGULATORS, AND THEREFORE CAN NOT BE TESTED BY SIMPLY
MEASURING THE OUTPUT VOLTAGE OF CONTROLLER. THE CONTROLLER
MUST BE CONNECTED AS SHOWN IN ONE OF THE SCHEMATICS BEFORE IT
WILL REGULATE.
READ THIS ENTIRE MANUAL TO LEARN HOW THE CONTROLLER FUNCTIONS
BEFORE CONCLUDING THAT YOUR CONTROLLER IS NOT REGULATING.
ALL WIRE TO WIRE AND CRIMP CONNECTIONS MUST BE SOLDERED OR
TREATED WITH AN ANTI-OXIDATION COATING FOR THIS, OR ANY CHARGE
CONTROLLER TO OPERATE DEPENDABLY.
THE PV7 & PV14 CONTROLLERS ARE DESIGNED FOR USE WITH SOLAR (PV)
AND OTHER CURRENT LIMITED CHARGING SOURCES.(SOURCES WHERE THE
POSITIVE AND NEGATIVE WIRES COULD BE CONNECTED TOGETHER CONTINUOUSLY WITH
OUT DAMAGING THE CHARGING SOURCE).
DO NOT USE THIS CONTROLLER WITH TOWED WATER AND WIND
GENERATORS, OR OUTBOARD MOTORS. IT WILL BE DAMAGED.
Table Of Contents
Page
Contents
1
Cover
2
Warnings & Table Of Contents
3
Controls and Indicators
4
Features
5
Installation Precautions
6 –7
Installation Instructions
8
Controller Specifications & Blocking Diode Selection Chart
9
Wiring Schematic –PV7 Charging a Single Battery Bank
10
Wiring Schematic –PV7D Charging Dual Battery Banks
11
Wiring Schematic –PV14 Charging a Single Battery Bank
12
Wiring Schematic –PV7 Expended to Charge Two or More Battery Banks
13
Wiring Schematic –PV7/D & PV14 Expanded to Charge From High Current Charging sources
14 - 15
Flexcharge Energy State Charge Method (ESCM)
16
Using Blocking Diodes (Discussion)
17
Troubleshooting Guide
18
Warranty Information

1217 State St., Charlevoix, MI 49720 Ph: (231) 547-9430 sales@flexcharge.com
Come See us at http://www.flexcharge.com
Page3
PV7-PV14 manual.doc
Controls and Indictors
PV + Input
Charging
Indicator
Battery #1
Positive
Battery #2
Positive
PV7/24
PV7D
PV14
PV -
BAT-

1217 State St., Charlevoix, MI 49720 Ph: (231) 547-9430 sales@flexcharge.com
Come See us at http://www.flexcharge.com
Page4
PV7-PV14 manual.doc
Features
2 Year Warranty
Assembled in the USA using high quality surface mount components.
High charging efficiency
Charges batteries from 0 (Zero) volts with full uninterrupted power.
Works with GEL, AGM, and Flooded Cell Lead Acid Batteries.
Expandable into a high ampere controller. Use up to 4ea 100A contactors to
regulate 400 amperes. Charge divert feature is available when expanded
The PV7 and PV14 circuitry consumes only 4mA (0.004A).
Charges batteries at full power, below the plate saturation point. This charges
batteries quickly while reducing the electrolyte depletion (water loss) by up to
90% over conventional constant voltage methods such as “PWM” & “High
Frequency” charge regulators.
Batteries begin charging at only 0.005A of charging current.
No RFI or EMI emissions to interfere with radio or data logging equipment.
Fuse protected.
Highly accurate voltage sensing make these controllers great for smaller, or
when expanded, for larger photovoltaic systems.
U/L 94V-O Rated Enclosure
Electronics are completely sealed and potted for use in 100% humidity
environments.

1217 State St., Charlevoix, MI 49720 Ph: (231) 547-9430 sales@flexcharge.com
Come See us at http://www.flexcharge.com
Page5
PV7-PV14 manual.doc
INSTALLATION PRECAUTIONS
MOUNTING
Choose a mounting location that will not exceed 140° F., where it will be exposed to solvents such as
diesel fuel or gasoline, or be subject to excessive vibration like on an engine block. The controller
should be mounted within 5 wired feet of the battery for best performance. The controllers
electronics are sealed in a UL listed polymer epoxy making the controller completely splash proof.
NOTE: The fuse is not waterproof. Move the fuse to a protected location near the battery if the
controller will be mounted in a potentially wet environment.
SOLDERING
Always solder or use an anti-oxidation coating on all crimp and wire to wire connections. As long as
the wire connections are exposed to oxygen, they are highly susceptible to corrosion. This will cause
your unsoldered connections to degrade or fail typically within a year after the installation.
OPERATING PRECAUTIONS
Do not operate the controller with the battery wires disconnected and the solar panel(s) exposed to
light. In some rare circumstances, the controller may overheat. Shut down the solar panel, or first
disconnect the PV+ wire from the controller before removing the battery. For best results, install a
fuse in the PV+ wire near the controller as mentioned below.
WIRE SIZES
Use at least #14 AWG to #10 AWG size wire for extensions. This will allow for good charging
efficiency an accurate voltage sensing by the controller.
BLOCKING DIODES
The PV7 and PV14 controllers isolate the solar panels from the batteries when they are not producing
power. Therefore a blocking diode is not necessary on the solar panel; however, if you are using
more than one panel in parallel, place a blocking diodes in each panel’s + wire or junction box. This
will protect a good panel from being drained into a potentially damaged panel. Individual panel
blocking diodes should always be used on all Amorphous type panels (Uni-solar).
EXTRA PROTECTION
We highly recommended that a 10A (for PV7) or 20A (for PV14) fuse or DC circuit breaker be
installed in the orange wire between the solar panel(s) and the controller. This will offer a higher level
of protection against over charging current conditions and short circuit protection. In addition, it will
provide a convenient place to disconnect the solar panel(s) before disconnecting the battery.

1217 State St., Charlevoix, MI 49720 Ph: (231) 547-9430 sales@flexcharge.com
Come See us at http://www.flexcharge.com
Page6
PV7-PV14 manual.doc
Installation Tools
#6 or # 8 MOUNTING SCREWS - SCREWDRIVER - SOLDER & SOLDERING IRON
(NON GROUNDED MODEL) - TAPE or HEAT SHRINK TUBING –RTV SEALER - SMALL
CRESCENT WRENCH FOR BATTERY TERMINALS - HOOKUP WIRE
IMPORTANT
When installing the system wiring, make sure all wire connections are making good electrical and
mechanical connection. Splice connections should be soldered. The use of crimp connectors should
be avoided if possible. Connections that are not made with screw tightened terminals should have an
anti-oxygen / anti-corrosion coatings applied to the connections before inserting the wires.
Note: Step numbers correspond to the numbers in the installation schematics.
1. Choose a good mounting location no more than 10 wired feet from the battery you are
charging. Although these controllers have been designed for mounting in semi-harsh locations,
mounting them in a more protected environment will help to extend the operational life.
2. Splice a #14 too #10 AWG black wire to the BLACK BAT- WIRE on the controller, and connect
it to the BATTERY BANK’S negative (-) terminal and/or the system's negative battery bus. If
you are using a smart battery fuel meter that measurers total Input to Output Amp/Hours, it will
usually have a shunt in the (-) connection to the battery. Connect the (-) wire from the controller to
the same terminal as the other loads on the shunt as shown in the meter’s manual.
3. Splice a #14 too #10 AWG black wire to the BLACK PV- WIRE on the controller, to the SOLAR
PANEL’S negative (-) terminal(s).
4. Splice a #14 too #10 AWG red wire to the RED BAT+ WIRE on the controller, and connect it to
the BATTERY BANK’S positive (+) terminal and/or the system's Positive battery bus. In dual
bank systems the Red wire connects to the Primary House Battery bank. For single battery
banks systems, a fuse should be installed in the red positive wire. It should be located as
close to the battery as possible for the best protection. The Bat+ Fuse is rated at 8A for the
PV7 and 15A for the PV14.
5. Splice a #14 too #10 AWG orange wire to the ORANGE PV+ WIRE on the controller, and
connect it to the combined positive (+) output of all the SOLAR PANELS. For added protection
and ease of maintenance, we highly recommend that you install a fuse somewhere in the orange
PV+ wire. It will provide protection against its accidental connection to a high current source and
fully protect the controller. It also will serve as a convenient place to disconnect the charging source
from the controller when the battery is removed from the system while the charging source remains
active.
FlexchargeTM USA
INSTALLATION INSTRUCTIONS
PV7/24, PV7D & PV14 CHARGE CONTROLLERS

1217 State St., Charlevoix, MI 49720 Ph: (231) 547-9430 sales@flexcharge.com
Come See us at http://www.flexcharge.com
Page7
PV7-PV14 manual.doc
For Dual Battery Charging Models
6. If you will be using the PV7D’s dual battery charging feature, Splice a #14 too #10 AWG
yellow wire to the YELLOW BAT(2)+ WIRE on the controller, and connect it to the SECOND
BATTERY BANK’S positive (+) terminal and/or the second system's positive battery bus. If
you will not be using the dual battery charging feature simply tape or place a wire nut over
the end of the yellow wire to isolate it electrically and protect it from moisture.
Expanding to Charge Additonal Battery Banks (PV7 and PV7D Only)
7. To modify/expand the PV7 and PV7D controllers to charge multiple battery banks please
follow these additional steps.
a) Obtain the appropriate quantity of 8A 80SQ045 Schottky diodes required for your
application (One for each additional battery bank). The Diodes are available from
Flexcharge directly, or through our dealers.
b) Solder a piece of #16 to #14 AWG stranded wire to each lead on the diode. Excess heat,
mechanical stress and electrostatic discharge will damage these diodes. An acceptable
alternative to soldering is to connect the diode leads directly into a terminal block that will
accept #20 to #12 AWG solid or stranded wire. It must have screw tightened terminals to hold
the wires in place. Make sure the diode’s leads are insulated and cannot come in contact with
other wires, or the ground buss.
8. Additional steps to expand the PV14 for High Ampere charging.
A. Obtain the appropriate contactors (relays) from a Flexcharge dealer or Flexcharge directly.
B. After mounting the contactor(s) vertically within 50 feet of the PV14 Controller, connect a #20 to
#14 AWG wire at the splice where the controller’s RED BAT+ wire connects to the wire from the
battery’s positive terminal. Using the same size wire, connect the opposite end of the wire to the
top connection of the contactor(s)
9. Connect the controller’s Orange wire to the lower terminals of the contactor(s)
If the controller does not function as you think it should, first check the
troubleshooting guide in this manual, then call your dealer or Flexcharge USA at
the numbers shown below
HOOKUP WIRE SIZE CHART
This chart provides the minimum wire size to minimize power loss. Larger wires
would are always better for operating efficiency
Max Charging Capacity
WIRE SIZE FOR 1 TO
10FT LENGTHS
WIRE SIZE FOR 10 TO
20FT LENGTHS
OA TO 3A
#14 AWG
#12 AWG
3A TO 6A
#12 AWG
#12 AWG
6A TO 12A
#10 AWG
#10 AWG
12A TO 18A
#10 AWG
#8 AWG

1217 State St., Charlevoix, MI 49720 Ph: (231) 547-9430 sales@flexcharge.com
Come See us at http://www.flexcharge.com
Page8
PV7-PV14 manual.doc
Solar Panel Blocking Diode Selection Table
(One on each solar panel)
Ampere Rating
Voltage Rating
Part Number
Type
Manufacturer
1A
40V
1N5819
Schottky
Diodes Incorporated
3A
40V
1N5822
Schottky
International Rectifier
5A
100V
50SQ100
Schottky
International Rectifier
8A
45V
80SQ045
Schottky
International Rectifier
1A
400V
1N4004
Silicon
Diodes Incorporated
3A
400V
1N5404
Silicon
Diodes Incorporated
6A
1000V
6A10
Silicon
Diodes Incorporated
If you cannot find these parts locally, contact Flexcharge USA.
All the above diodes are in stock.
Controller Specifications
(12V)
(24V)
Parameter
MIN.
TYP.
MAX.
MIN.
TYP.
MAX.
INPUT VOLTAGE (BAT or PV)
0V
-
30V
0V
-
50V
PROGRAMMED OVERSHOOT VOLTAGE
(MICRO - EQUALIZATION)
-
-
15.9V
-
-
31.8V
CHARGING CURRENT
PV14
PV7
PV7D Must not exceed 8A total input current
4mA
4mA
-
-
15A
8A
4mA
4mA
-
-
15A
8A
CONTROLLER STANDBY CURRENT
(NIGHT)
2mA
2.6mA
3mA
2mA
2.6mA
3mA
CONTROLLER STANDBY CURRENT
(Charging)
4mA
5mA
6mA
4mA
5mA
6mA
CHARGE DISCONNECT VOLTAGE
(Regulation Voltage)
14.20V
14.25V
14.30V
28.40V
28.50V
28.60V
CHARGE RECONNECT VOLTAGE
13.50V
13.60V
13.70V
27.00V
27.20V
27.40V
VOLTAGE DROP ACROSS
CONTROLLER
0.2V
0.4V
0.56V
0.2V
0.4V
0.56V
TRANSIENT SURGE SUPPRESSION
-
-
600W
-
-
600W

1217 State St., Charlevoix, MI 49720 Ph: (231) 547-9430 sales@flexcharge.com
Come See us at http://www.flexcharge.com
Page9
PV7-PV14 manual.doc
HUMIDITY
5%
-
100%
5%
-
100%
OPERATING TEMPERATURE
-40°C
25°C
60°C
-40°C
25°C
60°C
MTBF (Mean Time Between Failures)
-
-
30 Years
-
-
30 Years
CASE SIZE
H=1.2” W=4.75” L=3.0”
NOTE: The PV7 is only sold in the 24 volt version
Figure 1:
Figure 2:

1217 State St., Charlevoix, MI 49720 Ph: (231) 547-9430 sales@flexcharge.com
Come See us at http://www.flexcharge.com
Page10
PV7-PV14 manual.doc
Figure 3:
Figure 4:

1217 State St., Charlevoix, MI 49720 Ph: (231) 547-9430 sales@flexcharge.com
Come See us at http://www.flexcharge.com
Page11
PV7-PV14 manual.doc
Figure 5:

1217 State St., Charlevoix, MI 49720 Ph: (231) 547-9430 sales@flexcharge.com
Come See us at http://www.flexcharge.com
Page12
PV7-PV14 manual.doc

1217 State St., Charlevoix, MI 49720 Ph: (231) 547-9430 sales@flexcharge.com
Come See us at http://www.flexcharge.com
Page13
PV7-PV14 manual.doc
The FlexchargeTM Energy State Taper Charge Process
Monitors the battery for the full charged resting voltage of the cells.
Discover the tremendous advantages with this charge method.
Zero overcharging
Exceptionally low gassing (Up to 90% less)
No RFI or EMI emissions to interfere with radio equipment.
Non-Destructive Micro-Equalization at each full charge
The chemical processes of the battery actually control the charging.
The need for temperature compensation is also greatly reduced because the plate voltage is not held
constantly at the critical plate saturation voltage. Voltage Tapering is controlled by the battery's level of charge
rather than with timers, or fixed voltages as in PWM and other constant voltage charge methods. The battery
takes exactly what it needs rather than being forced to take a set voltage. With the Flexcharge method, you
can charge your battery bank indefinitely without any possibility of overcharging. The batteries will last longer,
require less watering maintenance, and hold a better charge.
As charging begins the controller allows full charging current to pass directly to the battery. When the battery
voltage rises slightly above the plate saturation point, the controller opens the charging circuit. Much like a
sponge will continue to absorb water towards its center after it has taken it all into its surface, the chemical
charging process continues after the charging current has been removed. As the charge is absorbed, the
battery's voltage will fall. When the battery voltage has floated down to approximately 13.5V to 13.8V it is
ready to accept another charge pulse. This charge regulation method is actually controlled by the battery's
ability to accept and absorb energy. When the battery needs more energy indicated by plate voltage, the
controller applies it. Mid way in the charging process, the controller will cycle ON and then OFF sending full
charge current pulses into the plates. A process, which charges with very low gassing, and equalizes the
plates with each full charge. As the battery reaches a higher level of charge, the amount of time the controller
spends in charge is reduced, and the time in rest is increased. At full charge, the controller will apply short
duration pulses to maintain the battery at an average voltage of about 13.75 volts. This keeps gassing to a
minimum while effectively trickle charging, and equalizing at the same time.
There has been a great deal of discussion over which charge process is better, PWM, or this method. To add
fuel to the fire, each company making "ON-OFF" controllers has chosen different voltages to set the
disconnect and reconnect points. A number of PWM controller manufacturers have gone to great lengths to
discredit “Low Frequency PWM or ON-OFF regulators” by studying a controller that was not set up with the
proper connect/reconnect voltages. At Flexcharge we have analyzed controllers using a version of this
method where the reconnect voltage on a 12V system was set at 12.6V @ 70°F. On this system the batteries
would never see more than 80% charge, and likely much less. Obviously PWM type controllers will regulate
the charging of your batteries. With proper temperature compensation, heat sinks, and the correct Bulk-
Regulate-Float (3 stage) algorithm will do a pretty good job of it, but why settle for this when you can get so
much more in a charge regulator. Instead of three stages with PWM you get an infinitely variable charge
process which will supply the battery with exactly what it needs, only when it needs it. You will realize less
plate saturation gassing, non-destructive equalization and Zero EMI and RFI as well. Electrico-Magnetic-
Interference, and Radio Frequency Interference is electronic noise that can interfere with radio and navigation
equipment.
Charge Controllers using the Energy State Taper Charge are best suited for charging systems where the
charging current is less than 1/4 of the amp hour rating of the battery bank. If your charging system is
designed to charge at a rate higher than 1/4 the battery bank's capacity, then the power switching element
should be solid state to provide the longer term reliability. At Flexcharge we make use of both types of
switching elements in our controllers depending on the task. They are implemented in such a way as to
provide exceptional levels of dependability. To determine these ratings, first add up the total amp/hour
capacity of your battery bank then divide that number by 4. If the result is larger than the maximum current
your charging source can produce, then the Energy State Taper Charge Process is the best method for your
system.

1217 State St., Charlevoix, MI 49720 Ph: (231) 547-9430 sales@flexcharge.com
Come See us at http://www.flexcharge.com
Page14
PV7-PV14 manual.doc

1217 State St., Charlevoix, MI 49720 Ph: (231) 547-9430 sales@flexcharge.com
Come See us at http://www.flexcharge.com
Page15
PV7-PV14 manual.doc
Please Read!! IMPORTANT: USING or NOT USING
BLOCKING DIODES ON YOUR PV CHARGING SYSTEM?
There has been a great deal of discussion in the solar electric industry over the use of blocking diodes.
In an effort to clarify the topic FlexchargeTM USA has called, met with, or gathered information pertaining to the use of diodes from
several solar panel and equipment manufacturers to verify the following information.
The following is a condensed version of the information to assist you in designing a failure resistant system.
What is a blocking diode?
A blocking diode is a one-way valve for electricity. The band on the case of the diode is the output, which should be installed towards
the battery in the positive wire from each solar panel. There are two primary types of diodes, Schottky (sensitive to damage but low
loss type) and Silicon (tough, but higher loss type). They are rated by the amount of current that can pass through them in amps, and
the amount of voltage they can withstand backwards.
What is the function of blocking diodes in a solar system?
1 To prevent the flow of electricity into the panels when the panels are not making electricity, and to prevent voltage spikes in
the system from reaching the panels, They also prevent interaction between each solar panel in the system. Without diodes a
shaded panel and substantially reduce the output of the entire system.
2 To prevent a damaged panel which has shorted (a common type of failure) from draining the battery system, or drawing
power from the remaining good panels.
There are primarily three types of solar electric panel technologies being used today.
1) SINGLE CRYSTALLINE 2) POLY CRYSTALLINE 3) AMORPHOUS
How should blocking diodes be used with each type of panel?
SINGLE CRYSTALLINE panels are glass covered rigidly mounted panels. They have a low nighttime back flow of power from the
batteries. The loss at night is actually a little less than the amount of loss you get by adding a blocking diode to the panel. You will
get more out of your panel if you do not using blocking diodes on these type of panels, On multiple panel arrays, blocking diodes
should be used,especially on unattended remote systems, to guard against a failed panel. Because they are glass covered, a stray
falling branch, hailstones, a child with a rock, or bored hunter could bring the entire system down by damaging only one panel.
Diodes help protect the rest of the system from these hazards.
POLY CRYSTALLINE panels are also glass covered rigidly mounted panels. They have a slightly higher nighttime draw of power
from the batteries when compared to single crystalline panels. The loss at night is near equal to the loss you get by adding a blocking
diode to the panel. You may or may not get more out of your panel by using blocking diodes on these type of panels, On multiple
panel arrays, blocking diodes should be used,especially on unattended remote systems, to guard against a failed panel. Because
they are glass covered, a stray falling branch, hailstones, a child with a rock, or bored hunter could bring the entire system down by
damaging only one panel. Diodes help protect the rest of the system from these hazards.
AMORPHOUS panels are a very different when compared to the other types of panels. They have a fairly substantial nighttime draw
of power from the batteries when compared to single crystalline panels. The loss at night is higher than the loss you get by adding a
blocking diode to the panel; in addition, these type panels could actually draw enough power from the batteries at night to damage
themselves if diodes are not used. To compensate for the diode loss, most amorphous panels have a higher operating voltage, to
make up for the voltage drop losses of the diode.
Blocking diodes should be used on all systems when panels have been connected in series to charge 24V, or
higher voltage batteries, or when using an inverter on the system. Inverters can cause voltage spikes as high as
60 volts on the DC positive wires. This is enough voltage to damage most solar panels.
In conclusion; blocking diodes should be used on all systems except, one panel single crystalline 12V systems. If your
system is so marginal that using, or not using diodes will make the difference, consider adding another solar panel to
your system.

1217 State St., Charlevoix, MI 49720 Ph: (231) 547-9430 sales@flexcharge.com
Come See us at http://www.flexcharge.com
Page16
PV7-PV14 manual.doc
FlexchargeTM CHARGE CONTROLLER TROUBLESHOOTING GUIDE
IF YOU ARE USING CRIMP ELECTRICAL CONNECTORS IN YOUR SYSTEM WIRING, THEY SHOULD
HAVE BEEN SOLDERED, OR TREATED WITH AN ANTI-OXIDIZING COMPOUND. WITHOUT THESE
STEPS CRIMP CONNECTIONS WILL ONLY MAKE GOOD CONNECTION FOR A SORT PERIOD OF
TIME, ESPECIALLY IN A MARINE OR OUTDOOR ENVIRONMENT.
PROBLEM
SOLUTIONS
CONTROLLER IS NOT
CHARGING WHEN
THE PANEL IS
MAKING POWER
Or
CHARGE INDICATOR
IS PULSING EVERY
SECOND OR SO
1. Check the fuse. If necessary, replace it with an 8A fuse for the PV7, or a 15A fuse
for the PV14. Never install a fuse larger than these ratings. The controller could be
damaged.
2. Check the fuse and wire connections between the controller and the battery. A poor
connection here will cause this symptom.
3. If you connected the regulator to your battery selector switch, make sure the switch
is NEVER in the OFF position. Just as your engine alternator cannot be run when
the battery switch which is turned OFF, neither can most solar charge regulators.
THE CHARGING
LIGHT IS OFF WHEN
THE SOLAR PANEL IS
MAKING POWER
If the battery is being charged by another charging source (i.e. alternator, shore battery
charger or wind generator) the battery may be near its peak voltage. In these
circumstances the controller is sensing that battery does not need the charging current
from the solar panels and the light will be OFF. If however the battery voltage is below
13.6V (27.2V on 24V systems) and the solar panel is making power, the controller's
charge light should be ON. Check the wire connections between the solar panels and
the controller.
THE SOLAR PANEL'S
OUTPUT VOLTAGE
DROPS TO ALMOST
THE SAME AS THE
BATTERY VOLTAGE
WHEN IT IS
CHARGING
THIS IS NORMAL. Except for voltage differences caused by losses in the wiring, the
voltage in the charging system will always be the same no mater where you measure it.
When the panel’s positive wire is disconnected from the controller its voltage can then
rise to its natural open circuit voltage for solar panels of 16V to 22V (For 12V Systems).
NOTE: The battery voltage will not instantly come up to 14.3V when it is being charged
unless the charging source has enough charging current capacity (50 amps or so) to
push them there very quickly. You will usually see a slowly rising voltage dependent on
the amount of charging current generated by your solar panel(s).
THE SOLAR PANEL
VOLTAGE MEASURES
NEARLY ZERO VOLTS
WHEN IT SEEMS IT
SHOULD BE
CHARGING
THIS IS NORMAL IF THE CHARGE INDICATOR LED IS OFF, AND THE BATTERY
VOLTAGE IS ABOVE 13.6V, (27.2V on 24V systems) after the batteries have reached
the disconnect voltage.
The Solar Panel’s Voltage will cycle between near battery voltage and zero volts with the
charge indicator light. See "Energy State Charge Process" for and explanation of the
charge regulation process.
When the light is ON the Solar panel voltage will be about the same as the battery
voltage. When it's OFF it will be near zero volts.

1217 State St., Charlevoix, MI 49720 Ph: (231) 547-9430 sales@flexcharge.com
Come See us at http://www.flexcharge.com
Page17
PV7-PV14 manual.doc
THE CONTROLLER IS
GETTING VERY
WARM
1. Make sure the controller is connected to the battery by checking the wiring or fuse.
2. Measure your charging current to make sure it is less than 8A (PV7) or 15A (PV14)
on the PV+ side of the controller. To check charging current, remove the fuse and
insert the amp meter in its place. When the charging light is on, view the amp meter
It is a good idea to install a fuse in the orange wire (PV+) side of the controller.
THE CHARGE
INDICATOR NEVER
COMES ON
Remove the fuse when the panel is charging (in the sun) and first, view the charge
indicator. It should be pulsing every second or so. Next, install an amp meter with a
20A rating in place of the fuse to check if the controller is passing the current being
made by the panel, to the batteries.
If the light is not ON, the battery voltage is less than 13.4V, the wire connections are
good and current is not flowing the controller has probably failed.
THE BATTERY IS
BEING OVER-
CHARGED
Ensure that the batteries are not being charged by another source.
If the battery voltage is constantly over 14.4V, the charge light is ON and the batteries are not
being charged by another source then the controller may have failed.
Remove the fuse. While the solar panels are producing power the controller’s charge light
should be flashing every second or so. If the charge indicator is not flashing, it is likely that the
controller has failed.
FlexchargeTM USA PRODUCTS WARRANTY
Flexcharge USA products PV model controllers are warranted for a period of two years. Five years on NC series charge
controllers, and one year on lighting products,from the date of purchase, subject to the conditions set forth below. This
warranty to the original purchaser, warrants the products to be free from material and workmanship defects. During the
warranty period, the product will be repaired or replaced, at the option of Flexcharge USA, free of charge. Shipping not
included Products from other manufacturers that are incorporated into Flexcharge USA products such as solar panels and
batteries, are covered by warranties from those manufactures.
CONDITIONS
1. Proper delivery: The product must be packed to prevent damage and shipped to SES Flexcharge USA, 1217 State
St., Charlevoix, MI 49720 USA, freight prepaid and including:
a. Proof of purchase. ( invoice showing product and date )
b. Description of problem.
2. Abuse, misuse, negligence, unauthorized repairs: The warranty is void if any defects are caused by abuse, misuse,
negligence, or unauthorized repairs. Damage caused by lightning is considered an act of God and is not warranted.
3. All liability for incidental or consequential damages is specifically excluded. Some states do not allow the exclusion
or limitation of incidental or consequential damages so the above limitation or exclusion may not apply.
This manual suits for next models
3
Other Flexcharge Controllers manuals
Popular Controllers manuals by other brands
Faro Barcelona
Faro Barcelona 33974 installation guide
Delta Electronics
Delta Electronics Valve Temperature Controller DTV instruction sheet
Lefflerpost
Lefflerpost RMC2ATEM user guide
Honeywell
Honeywell UDC2800 product manual
Emerson
Emerson Fisher 912N Series installation guide

ROBO Cylinder
ROBO Cylinder RCP5-BA4 instruction manual
