Flexo-Technic FLEXO PLATE CUTTER User manual
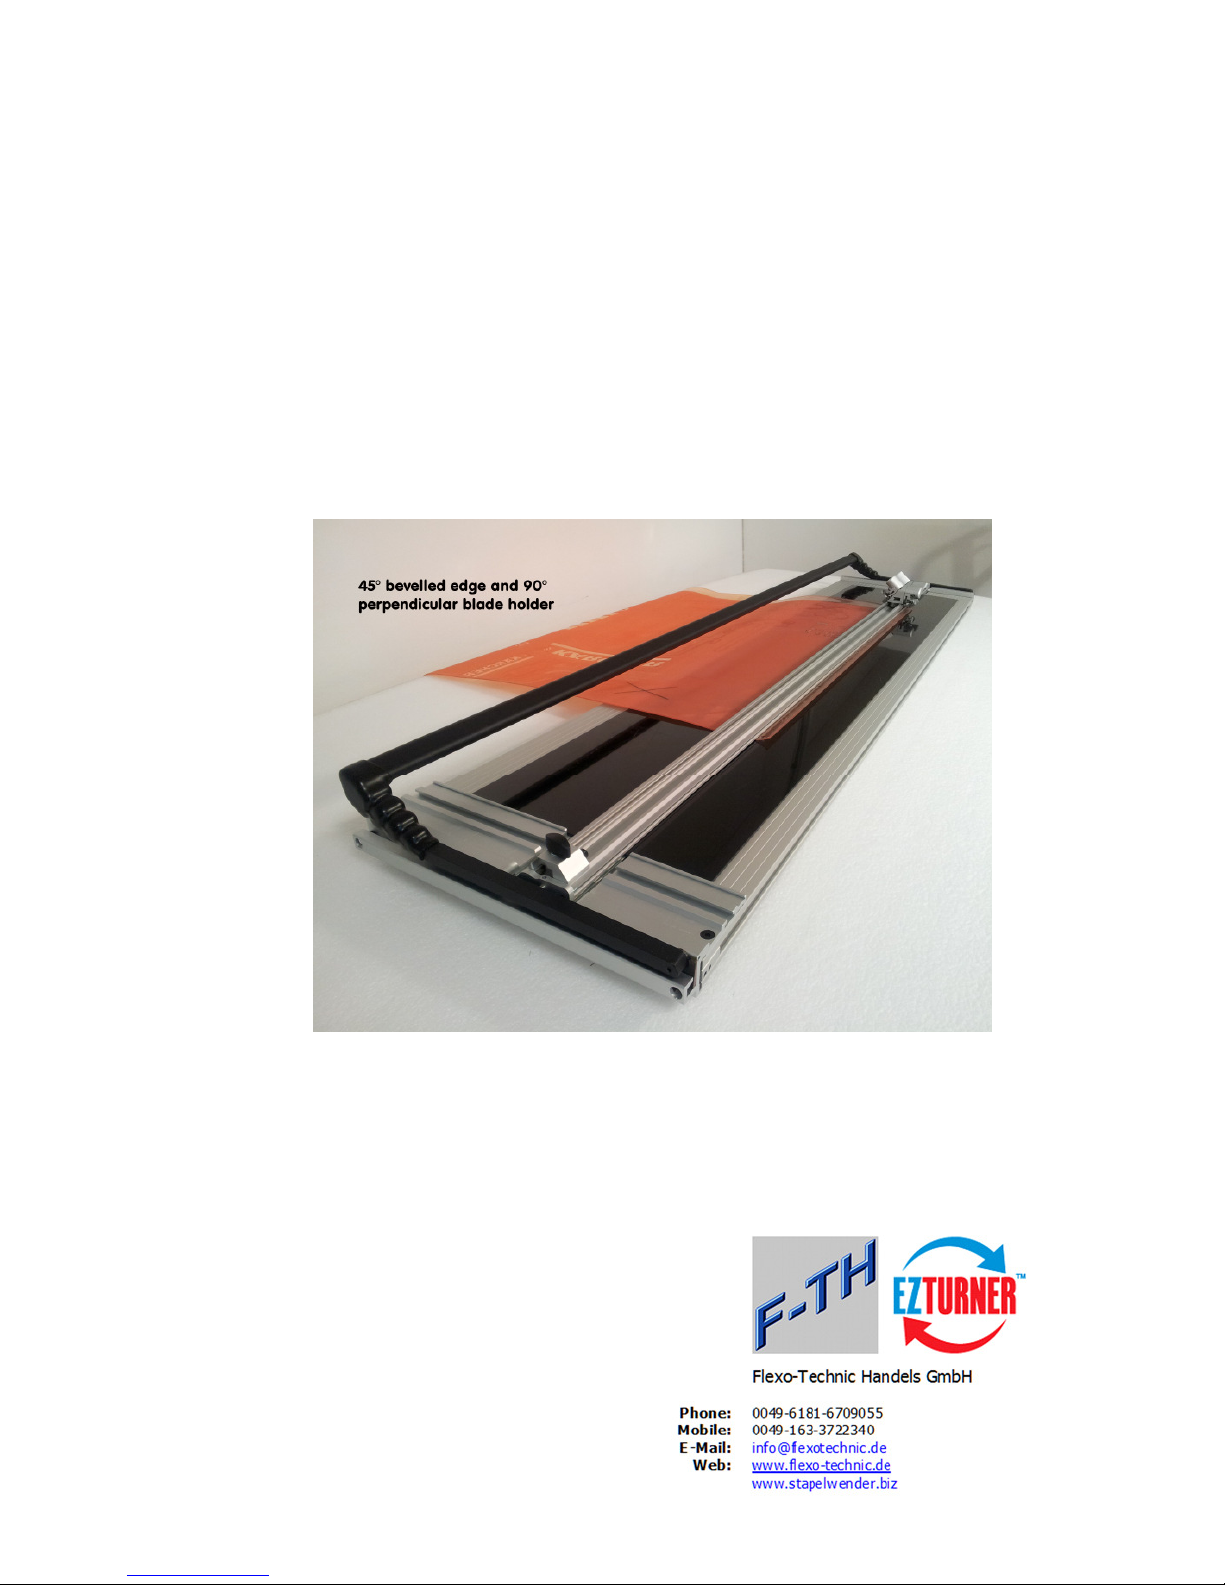
FLEXO PLATE CUTTER 90°+ 45°
Inspired Design - Precision Engineering
USER INSTRUCTIONS
Thank you for choosing the FLEXO PLATE CUTTER PLATE CUTTER Every effort has been
made to bring you a precision engineered product with the promise of many years of valuable
service. In order to obtain maximum benefit from your machine please read these instructions
carefully.

1 Contents 1
2 Identification
2.1 Know your FLEXO PLATE CUTTER
3 Operation
3.1 The Blade Cartridges
3.2 General Purpose Cutting 1
3.3 General Purpose Cutting 2
4 Maintenance
4.1 Maintenance/Cleaning and Lubrication
5 Specialist Uses
5.1 Cutting Flexo Plates

2.1 Your Flexo Plate Cutter 2.1
Know your FLEXO PLATE CUTTER
Cutterbar
Cutter - Available in four sizes:
■FLEX 100 101cm
■FLEX 120 122cm
■FLEX 150 157cm
■FLEX 220 218cm
40” cutting length
48” cutting length
62” cutting length
86” cutting length
(with 6 rubber feet*)
(with 6 rubber feet*)
(with 8 rubber feet*)
(with 10 rubber feet*)
FEET TO BE EQUALLY SPACED ALONG THE LEFT AND RIGHT EDGES OF THE BASE.
You should have:
Cutting Mat
Pack of 100 Medium Duty Blades
3mm Allen key
Manual
MEDIUMDUTY
Bevel Blade
Holder
Base
Vertical Blade Holder
End of Cut
Limit Stop
End Plate

3.1
Operation
The Blade Cartridges
3.1
BEVEL BLADE HOLDER
VERTICAL BLADE HOLDER
D
■Both the bevel and vertical blade holders are fitted with Blade Cartridges, to release the cartridge from either of the
blade holders slacken the blade clamping screw (B) and pull the cartridge out, gripping the black plastic pin (A).
The blade is held onto the cartridge by a strong magnet, place the blade between the two raised edges and slide it so
the back edge of the blade touches the depth adjustment screw. To adjust the blade depth turn the adjustment screw
(C) clockwise to extend the blade length and counter-clockwise to reduce it. Always check that the blade is properly
located in the cartridge before loading it into the blade holder.
Each cartridge has a different coloured label to help with identification and calibration if pre-set to suit different
thicknesses of material..
■The standard blade used with the Flexo Plate Cutter is the Medium Duty Utility blade (D).
3.2 Operation 3.2
General Purpose Cutting 1
The Flexo Plate Cutter is a general purpose machine that will cut a large range of materials up to 3 mm thick with the
standard medium duty blade.
■IMPORTANT: It is important that the table surface the cutter is used on is relatively flat. If not the base and cutter bar
may not clamp the material properly allowing it to move whilst being cut.
© The cutting head has two blade holders, a vertical cutter on the right hand side and a bevel cutter on the left.
© To load material into the machine raise the long black handle and place the material under the cutter bar. Should the cut
need to be perpendicular (90 degrees) to the edge of the material position it against the End Plate to align it.
© Alternatively place the material forward of the End Plate and align the blade with the desired cutting line. Lower the black
handle to clamp the material in place.
The Flexo Plate Cutter is normally operated from the end of the machine such that the cutter head is pulled towards
the operator when cutting,
3.3
Operation
General Purpose Cutting 2
3.3
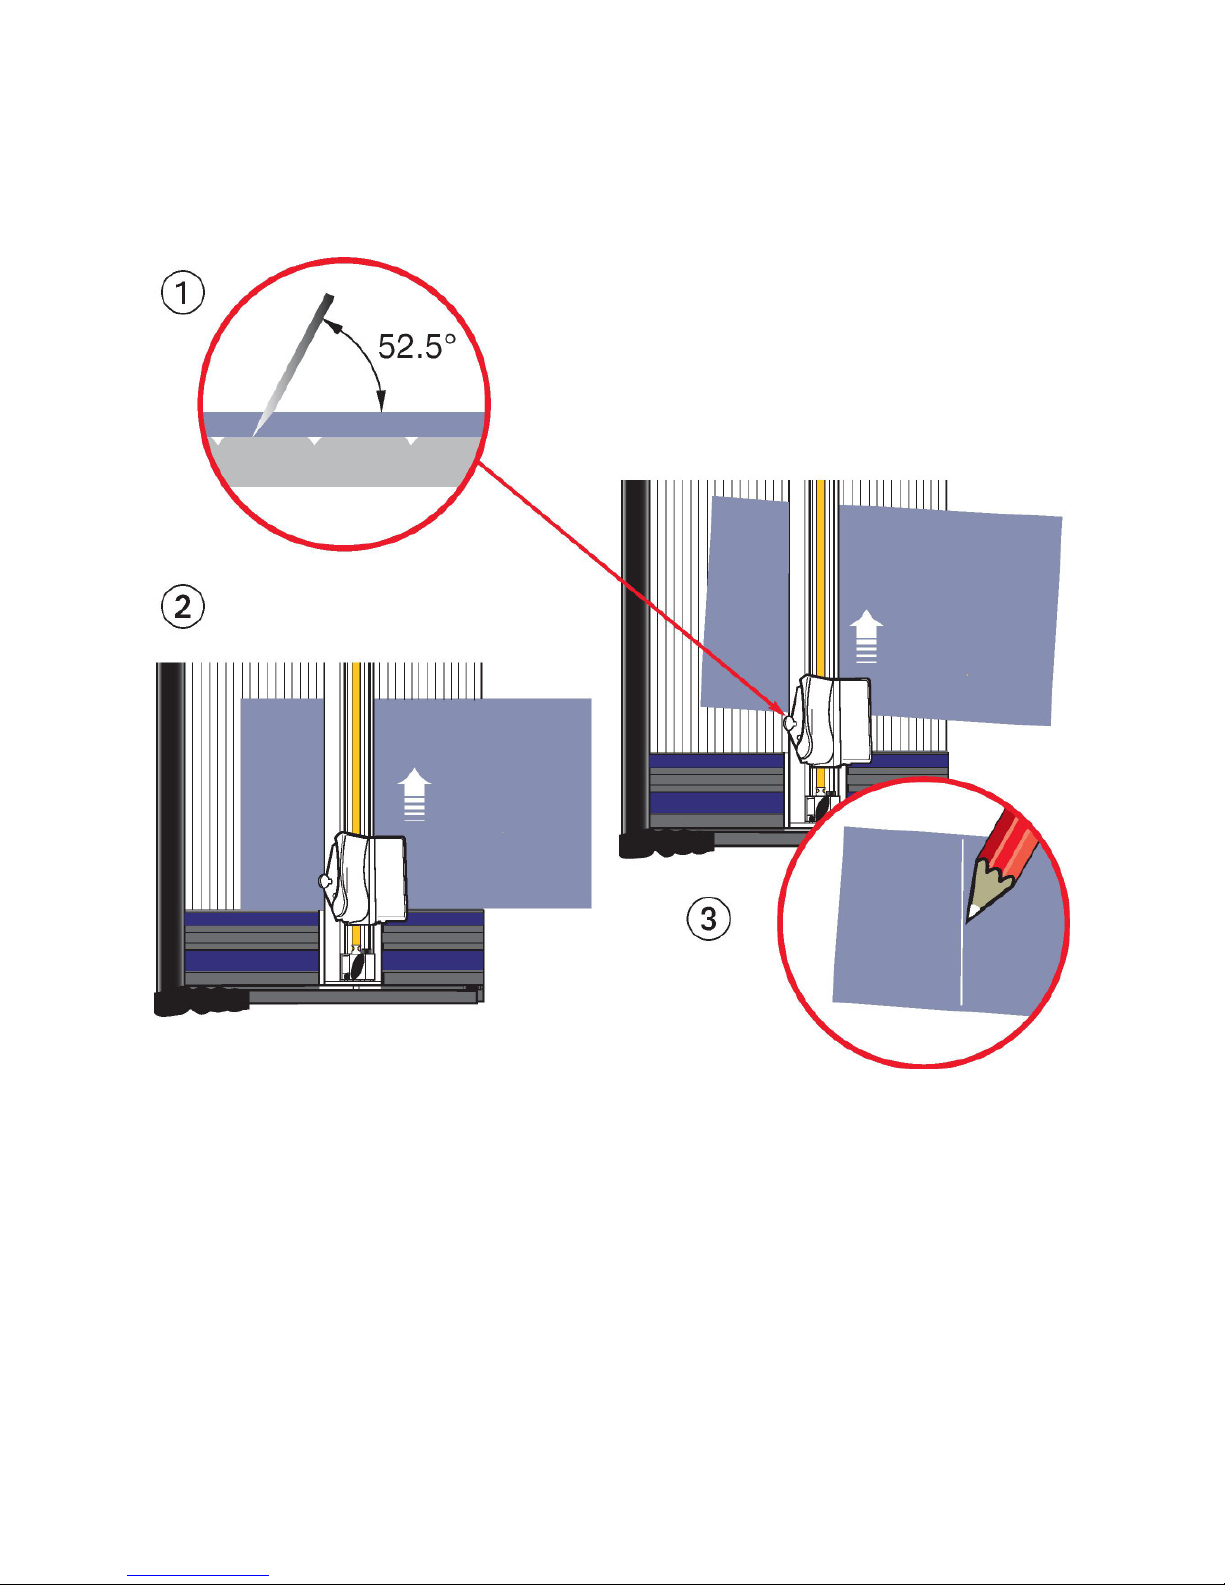
Bevel Cutting
Always adjust the blade depth so that the
smallest amount of blade is exposed to just cut
through the material, it will produce a better
quality cut and require less effort. There is a
groove along the base plate which
accommodates the tip of the blade when
cutting. Thin materials may need the cutting
mat to support them to avoid the material being
pressed into the groove which will produce
inconsistent and unsatisfactory results.
© A cutting mat must always be used when bevel cutting thick materials as the blade may run outside the groove and
damage the base plate.
DO NOT REST YOUR HAND ON THE LONG LIFTING HANDLE WHILST CUTTING
BECAUSE THE BLADE PENETRATION WILL BE REDUCED.
©
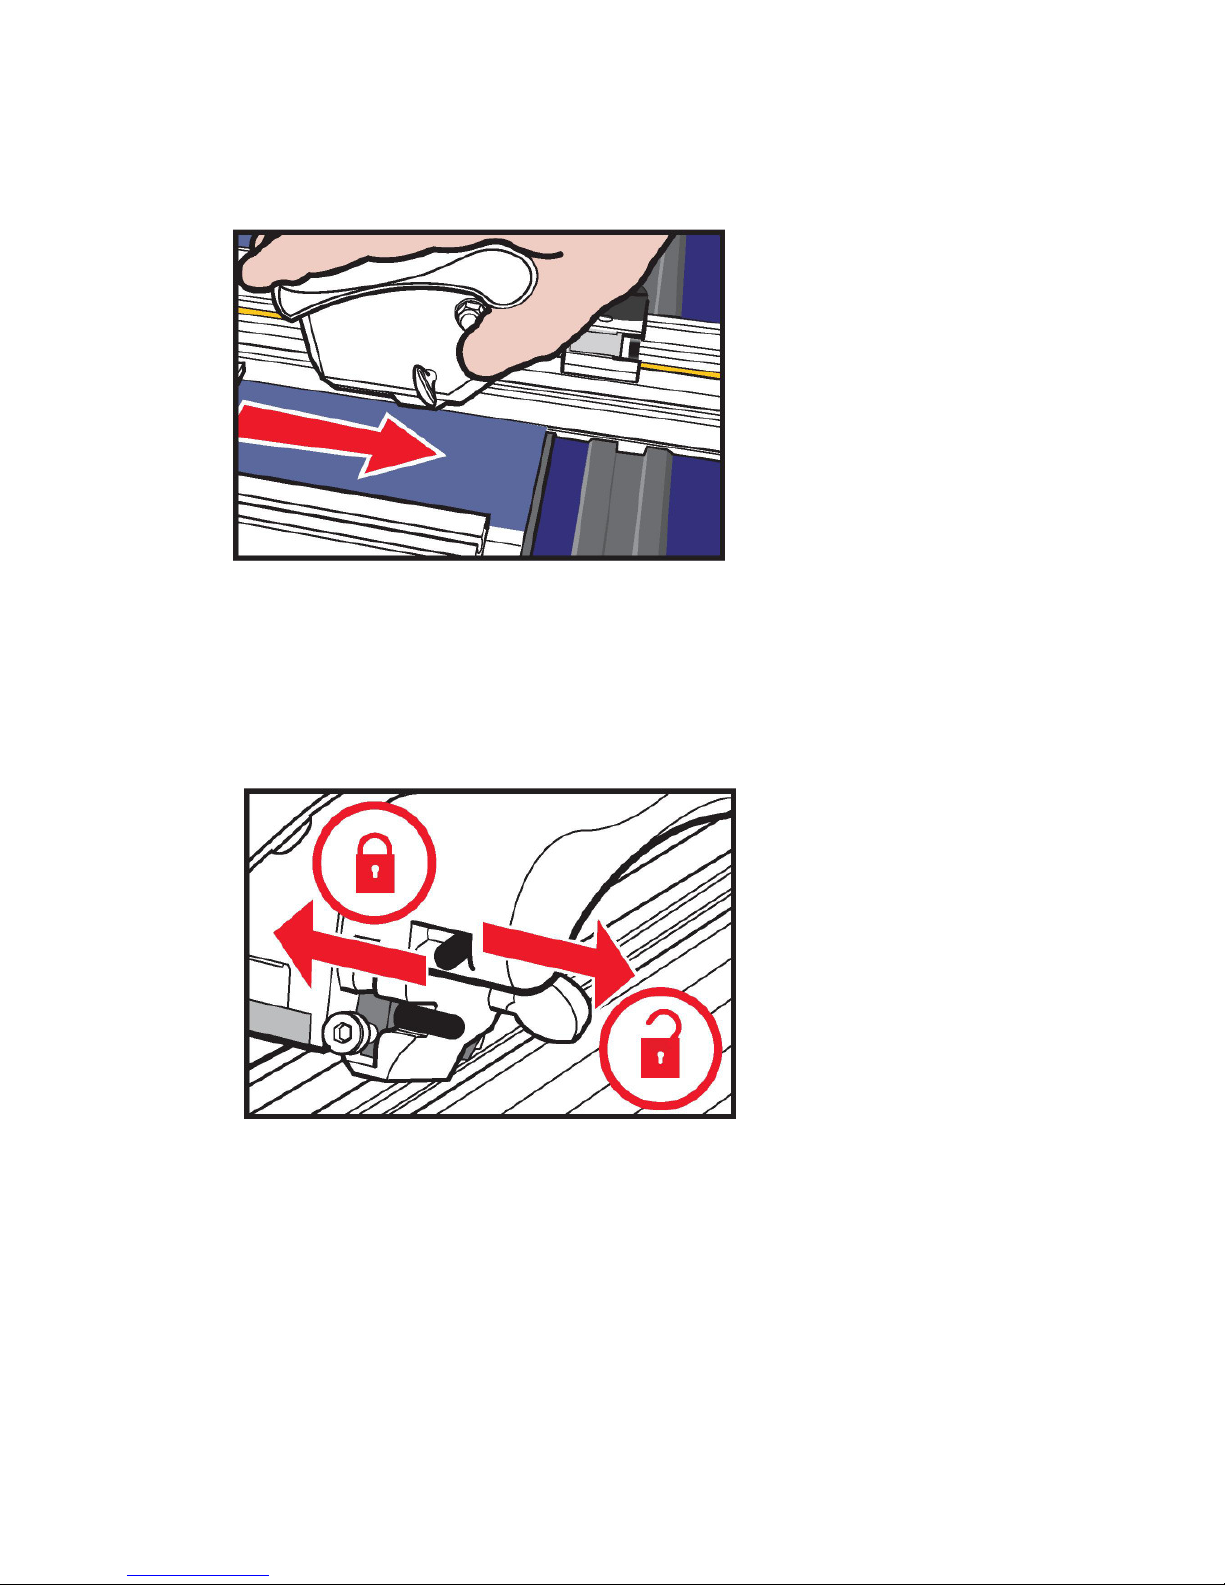
Vertical Cutting
The vertical cutter can also be used with or without a cutting mat, this will help to produce a better quality cut on most
materials. The blade depth should be set just long enough for the tip to penetrate the material being cut.
© The vertical cutter has a two way lock which can lock the blade in the down or up position. Slide the black pin to the left
to lock and to the right to release.
DO NOT REST YOUR HAND ON THE LONG LIFTING HANDLE WHILST CUTTING
BECAUSE THE BLADE PENETRATION WILL BE REDUCED.

4.1 Maintenance 4.1
■MAINTENANCE
Your cutter is a precision made machine and will give many years of accurate and reliable service if you follow
these few simple steps.
Keep all liquids ( including tea and coffee) away from the machine - spillages spoil the machines performance and
materials cut upon it.
Dust/vacuum daily, for stubborn stains use detergent/ water mix firstly applied to a cloth.
Cover the machine overnight with a plastic or fabric sheet.
If you need to move the machine away from the bench when it is not in use, store it either flat or if you have to stand it
on end fasten the end of cut stop and use a strong elastic band to fix the cutter head to it. Then stand it on its top end
leaning against a stable support.
Please note:- Standing the cutter on end should be avoided if possible but, providing it is done carefully no harm will
come to it.
In the event of heavy soiling on any part of the machine solvents can be used for cleaning but-
Apply the solvent to a cloth and not directly on the cutter.
Read and comply with the solvents safety instructions.
Do not allow solvent to come in contact with any printed or plastic parts of the machine.
■CLEANING AND LUBRICATION OF THE CUTTER BAR
As above, clean the two guide bars using solvent on a cloth being careful not to get solvent on the measuring scale.
Lubricate using petroleum jelly or a firm grease, again apply it to a cloth then wipe it along the guide bars. Do not apply
too much grease a thin smear is all that is required.
Oil can be used lightly on the lift and hold, pivot lift arm hinges and cutter bar pivots.
5.1 Specialist Uses 5.1
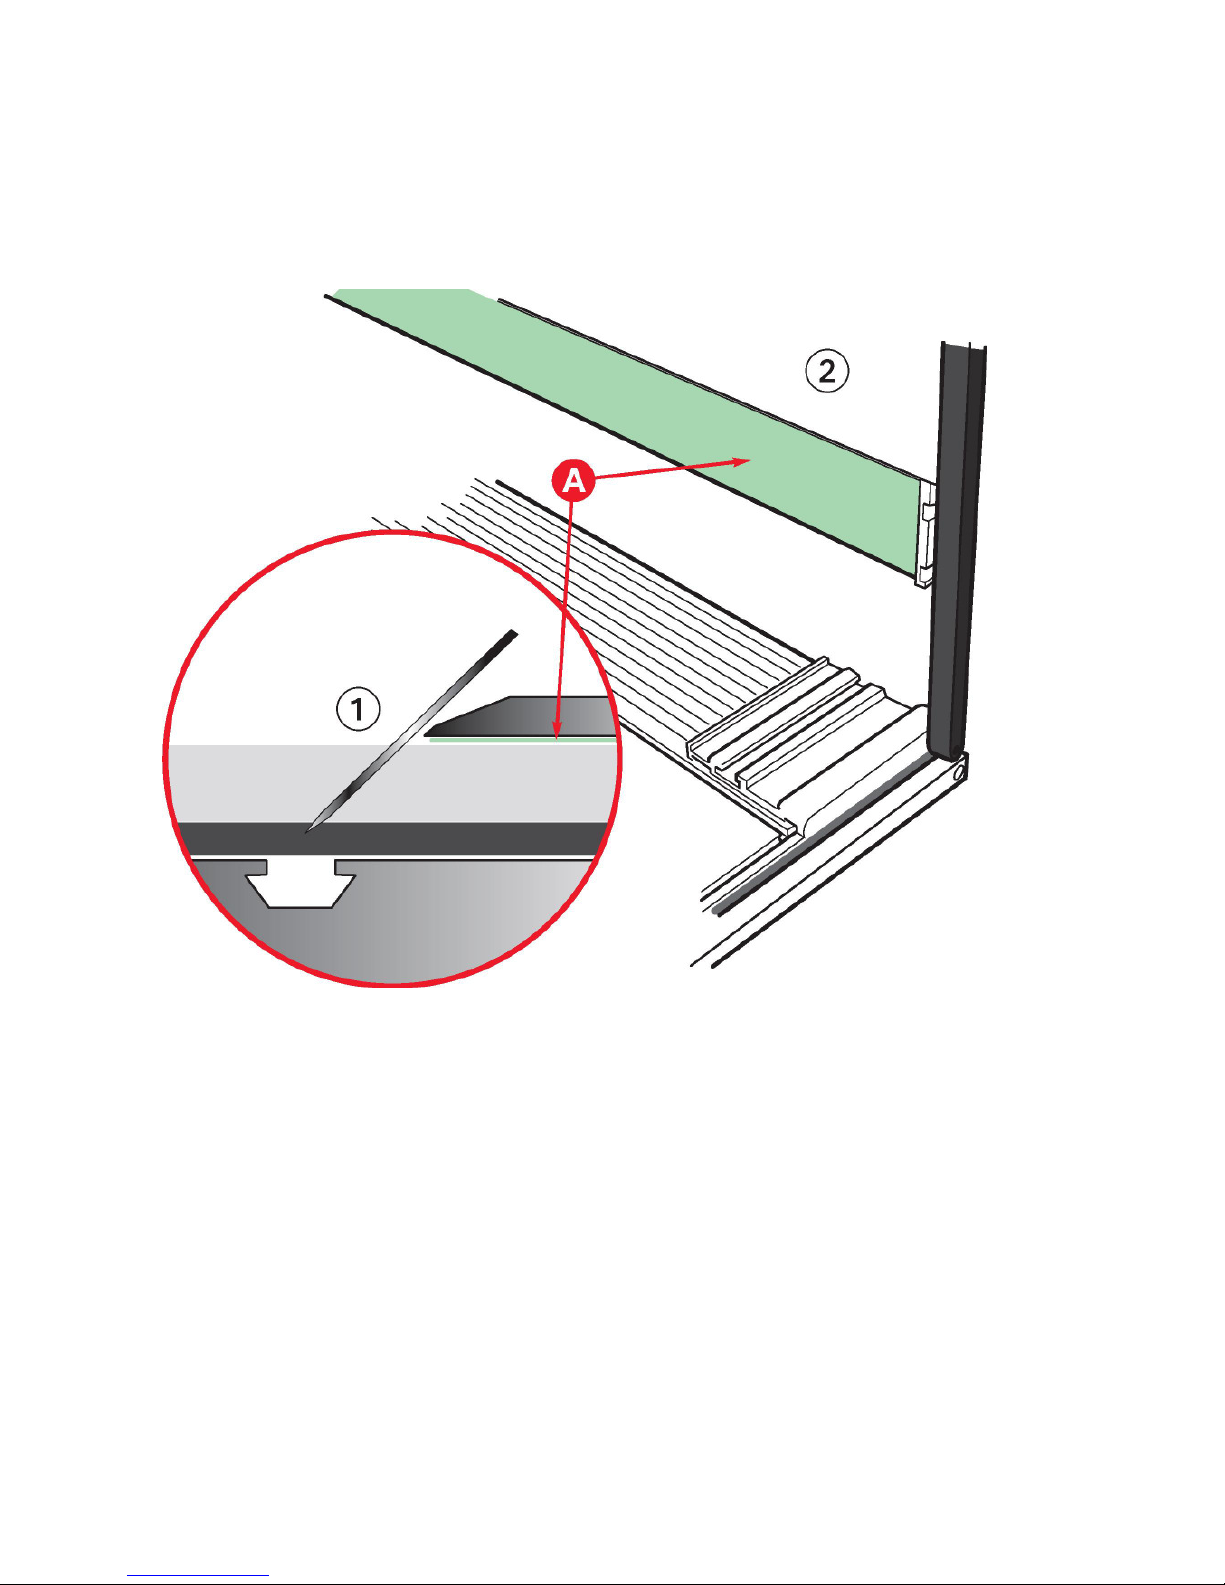
Cutting Flexo Plates
© When cutting Flexo Plate always use the cutting mat supplied to cut onto and ensure the blade depth is set to a
minimum to cut through the material thickness.
© It is important that the silicon grip tape (A) on the underside of the cutter bar is kept clean to hold the flexo in place. If it
becomes dirty through use clean it with a cloth moistened with diluted detergent.
Helpful hints:
■To eliminate entry and exit burrs, push the blade into the flexo, through the base, to start your cut.
■If you cut with the base side up place the foam protector sheet (used for shipping between each flexo plate), on the base
board, to protect the emulsion side from scratching.
■To stabilize the plate for ultra-fine trimming, try starting your cut 2cm (1”) in from the edge. Come back and complete the
cut from the edge.
■To obtain smooth clean edges and avoid fracturing (especially on thicker flexo plates) make multiple passes and
frequent blade changes.
Table of contents


