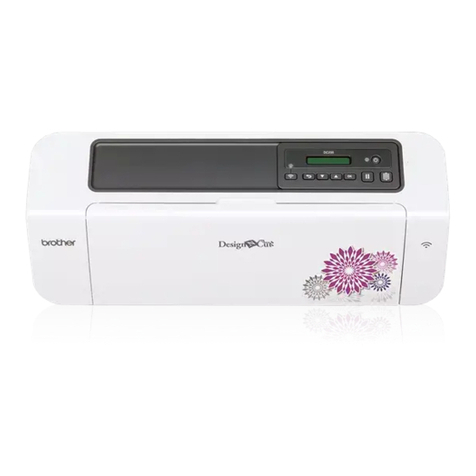
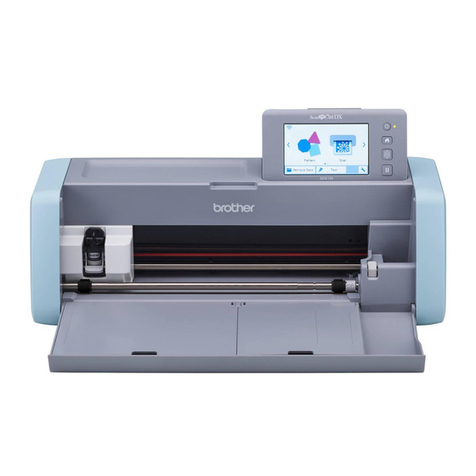
Brother 891-Z08 User manual

Be sure to read this document before using the machine.
Operation Manual
Cutting Machine
Product Code: 891-Z08

1
Thank you for purchasing this machine.
Before using this machine or attempting any maintenance, carefully read the “IMPORTANT SAFETY
INSTRUCTIONS” on the Product Safety Guide, and then study the Operation Manual for the correct operation
of the various functions. In addition, after you have finished reading this manual, store it where it can quickly be
accessed for future reference. Failure to follow these instructions may result in an increased risk of personal
injury or damage to property, including through fire, electrical shock, burns or suffocation.
●This machine is intended for household use.
●This machine is approved for use in the country of purchase only.
●Due to product quality improvements, the specifications or appearance of this machine may change without notice.
●The contents of this document are subject to change without notice.
●The actual operations and screens may differ, for example, after the application has been upgraded.
●The contents of this document may not be duplicated or reproduced, partially or in full, without permission.
●We assume no responsibility for damages arising from earthquakes, fire, other disasters, actions of third parties, the user’s
intentional or negligent operation, misuse or operation under other special conditions.
●For additional product information, visit our website at www.brother.com
Symbols Used in This Document
The following symbols are used in this document.
IBM is a registered trademark or a trademark of International Business Machines Corporation.
Microsoft and Windows are registered trademarks or trademarks of Microsoft Corporation.
Wi-Fi Protected Setup(WPS) is a trademark of Wi-Fi Alliance.
WPA™ and WPA2™ are trademarks of Wi-Fi Alliance®.
Mac, OSX, and Apple are trademarks of Apple Inc., registered in the United States and other countries.
App Store is a service mark of Apple Inc., registered in the United States and other countries.
Each company whose software title is mentioned in this manual has a Software License Agreement specific to its
proprietary programs.
All other brands and product names mentioned in this manual are registered trademarks of their respective
companies. However, the explanations for markings such as ® and ™ are not described within the text.
INTRODUCTION
IMPORTANT NOTICE
IMPORTANT SAFETY INSTRUCTIONS
CAUTION
Failure to observe instructions with this marking may result in serious
injuries.
TRADEMARKS

2
INTRODUCTION .......................................... 1
IMPORTANT NOTICE ................................... 1
IMPORTANT SAFETY INSTRUCTIONS ......... 1
Symbols Used in This Document........................... 1
TRADEMARKS ............................................... 1
MACHINE FEATURES .................................... 3
Devices That Can Connect to This Machine.......... 3
About This Manual ................................................. 3
1 GETTING STARTED............4
PARTS AND FUNCTIONS ............................. 4
Unit Descriptions - Front........................................ 4
Unit Descriptions - Rear......................................... 4
Unit Descriptions - Operation Panel ...................... 5
Included Accessories ............................................. 5
TURN ON THE MACHINE ............................ 6
Removing the Transport Packing Materials ........... 6
Turning On/Off the Machine................................... 6
DesignNCut Manager WINDOWS ................ 7
SETTINGS SCREENS ...................................... 9
Machine Settings.................................................... 9
Auto Shut Down ..................................................... 9
DesignNCut Manager Settings............................. 10
CONNECTING THE MACHINE AND
COMPUTER................................................. 12
Selecting the Connection Method........................ 12
Connecting to a Wireless Network....................... 12
Setting Up a Wireless Connection (Standard
Connection (Recommended)) .............................. 13
Setting Up a Wireless Connection (Custom
Connection).......................................................... 14
Connecting Using a USB Cable Without a Wireless
Network (Windows Only)...................................... 17
Resetting the Wireless Connection Setup ........... 17
Checking the Wireless LAN Settings/Connection
Status ................................................................... 18
Setting Up Manually............................................. 18
REGISTERING THE MACHINE WITH
ScanNCutCanvas ......................................... 20
FIRST STEPS................................................. 22
Mat and Material Combinations........................... 22
Attaching the material to the mat......................... 24
Adjusting the Blade Extension ............................. 30
Installing and Uninstalling the Holder................... 32
2 BASIC OPERATIONS........33
PATTERN CUTTING .................................... 33
Tutorial 1 - Cutting Patterns................................. 33
3 ADVANCED OPERATIONS
.........................................39
DRAWING FUNCTIONS............................. 39
Drawing ................................................................ 39
Using Drawing Functions to Fill Patterns/Make
Outlines Thicker ................................................... 41
Cutting Around Drawings..................................... 43
CaptureMat FUNCTION .............................. 46
Tutorial 2 - Cutting Photographed Material ......... 46
4 APPENDIX ....................... 49
CONSUMABLES...........................................49
Replacement Criteria............................................ 49
Replacing the Blade ............................................. 49
CARE AND MAINTENANCE ........................51
Cleaning ............................................................... 51
Adjusting the Mark Sensors ................................. 53
TROUBLESHOOTING ................................. 54
Finding the Wireless LAN Security Information (SSID
and Network Key)................................................. 54
If the Machine Stops Operating Correctly............ 54
ERROR MESSAGES....................................... 57
Cutting Machine Error .......................................... 57
DesignNCut Manager Error.................................. 59
UPDATING THE SOFTWARE.......................63
Update Procedure Using DesignNCut Manager
.... 63
Update Procedure Using Computer .................... 63
OPTIONAL ACCESSORIES...........................64
PRODUCT SPECIFICATIONS.......................64
INDEX..........................................................65
CONTENTS

3
With this machine, you can cut out or draw patterns created in ScanNCutCanvas and sent to it using
DesignNCut Manager (application for selecting cut settings). ScanNCutCanvas is an online service that allows
you to use a Web browser to download, edit and create cutting or drawing pattern data for the ScanNCut and
DesignNCut cutting machines.
1. Install DesignNCut Manager (application for selecting cut settings).
For details on the installation procedure, refer to the “Setup Guide”.
2. Machine network settings
Wireless network connection.....P. 12
USB cable connection.....P. 17
3. Register the cutting machine with ScanNCutCanvas......P. 20
* You must register with ScanNCutCanvas first.
4. Send patterns to the machine and cut them out......P. 33
ScanNCutCanvas website: http://ScanNCutCanvas.Brother.com/
Devices That Can Connect to This
Machine
■Computers
• Compatible operating systems:
Windows 7 SP1, Windows 8.1, Windows 10
* For additional operating system information, visit
our website (http://s.brother/cpqaa/).
• Compatible models:
IBM PC or compatible computer that is wireless
LAN-compatible or originally equipped with a USB
port
■Mobile Devices
Compatible operating systems:
iPhone, iPad : iOS 9 or later
Android : 5 or later
* For additional operating system information, visit our
website (http://s.brother/cpqaa/).
About This Manual
The icons at the beginning of each step indicate the
following operation information.
: Operation performed on the machine
: Operation performed in DesignNCut
Manager (application for selecting cut
settings)
: Operation performed in ScanNCutCanvas
: Message displayed on the machine
Memo
• The machine and screens shown in this manual
may differ from the actual ones.
• This manual provides descriptions for using the
computer version of the application.
MACHINE FEATURES

4
Chapter 1 GETTING STARTED
Unit Descriptions - Front
aOperation Panel
Allows you to view the current status of the machine
and the various menus. Press a button on the
operation panel to change the information displayed
in the LCD panel. In addition, if there are problems
with this machine, the error message relating to the
problem is displayed. For details on the error
messages, see “ERROR MESSAGES” on page 57.
bCarriage
Moves the installed holder for cutting or drawing.
1Holder
Installs in the carriage to cut or draw on craft paper
or fabric. Use the holder designed specifically for
cutting or drawing.
2Holder Guide
The guide secures the holder.
3Holder Lock Lever
Releases the holder when the lever is raised. Locks
the holder when the lever is lowered.
cGrips
Grasped when moving the machine.
dFeed Slot Roller
Feeds in or out a mat. The mat is fed by the feed
rollers on both sides.
eFront Tray Cover
Protects the feed rollers, carriage and holder. Open
the cover while the machine is operating.
Unit Descriptions - Rear
aUSB port (for PC Connectivity)
When a wireless network is not available, use a USB
cable to connect the machine to the computer. For
Computers and Operating Systems, see “Devices
That Can Connect to This Machine” on page 3.
bSlot
Allows a mat to be fed back and forth during an
operation. Do not place any objects near the slot that
would prevent the mat from being fed out.
cDC Power Jack
dAC Adapter
eAC Power Cord
PARTS AND FUNCTIONS
d
e
a
b
c
c
1
2
3
a
b
c
d
e

5
1
Unit Descriptions - Operation Panel
aLCD Panel
Displays the current settings, instructions for
performing operations and error messages.
Long messages scroll in the LCD.
bPower indicator
Lights up when the machine is turned on, and flashes
when the machine enters the sleep mode (power-
saving mode).
cPower Button
Turns the machine on/off.
dFeed Button
Feeds the loaded mat in to or out from the feed slot.
Be sure to press this button to feed the mat when
loading or unloading it.
ePause/Stop Button
Stops cutting, drawing and other operations.
fOK Button
Applies the displayed setting or finishes the operation.
gSelect Button
Display a menu or make a selection.
hBack Button
Cancels the changes made to a setting or returns to
the previous screen.
iWireless LAN Connect Button
Used to connect to a wireless network when using the
push button method.
jWireless LAN Connect Lamp
Lights up when connected to a wireless network.
Included Accessories
For details on the included accessories, refer to the
“Included Accessories” insertion.
2
a
3
4
56789
0

6
Removing the Transport Packing
Materials
Before turning on the machine, remove the shipping
tape and the cardboard shock-absorbing material.
aShipping tape
bCardboard shock-absorbing material
Note
• If the packing materials were removed after the
machine was turned on, turn the machine off,
then on again. Continuing to use the machine
without restarting it may result in incorrect
operation.
Turning On/Off the Machine
aConnect the power cord to the AC adapter, and
then connect the AC adapter to the machine.
aPower cord
bAC adapter
Memo
• When using the AC adapter, untie the bundled
cord.
bPlug the power cord into an electrical outlet.
cPress in the operation panel.
Note
• The carriage and mat move to their initial
positions. Be sure to keep your hands away
from the carriage.
dTo turn off the machine, press in the
operation panel.
eUnplug the power cord from the electrical
outlet.
fDisconnect the AC adapter from the machine,
and then disconnect the power cord from the
AC adapter.
Note
• Do not wind the AC adapter cable around the
adapter or bend the cable, otherwise the cable
may be damaged.
TURN ON THE MACHINE
a b
b
a

7
1
This section describes the windows of the dedicated
control application used to cut out or draw patterns.
■Main Window
Computer
Mobile device
1. No.
Displays the machine number of the connected
machine.
2. Search
Searches for connected machines.
* With the mobile device version, tap [No.] (1) to
search for a machine.
3. Login ID
Displays the ScanNCutCanvas user ID used for
connecting to ScanNCutCanvas.
4. ScanNCutCanvas
Displays the window for registering with
ScanNCutCanvas.
5. Load data
Selects the method for importing pattern data. Click
to display a window for selecting how to import the
data.
* With the mobile device version, a preview screen
for the pattern sent to ScanNCutCanvas appears.
6. CaptureMat
Using ScanNCutCanvas create pattern data from an
image taken with a camera.
DesignNCut Manager WINDOWS
1
3
2
4
5
6
5
1
5
3
6

8
■Preview Window
Computer
Mobile device
1. Load data
Imports cutting/drawing patterns from
ScanNCutCanvas or a computer.
2. Operation
Select [Cut] or [Draw] from the drop-down list.
* Other settings may appear in the drop-down list if
a separately sold accessory kit is detected.
* With the mobile device version, tap [Operation] to
display a screen for selecting [Cut] or [Draw].
3. Speed
With the slider, adjust the speed for cutting or
drawing.
* With the mobile device version, tap [Settings] to
display a settings screen.
4. Pressure
With the slider, adjust the pressure for cutting or
drawing.
* With the mobile device version, tap [Settings] to
display a settings screen.
5. Setting Reference
Displays a list of various settings. Refer to this table
before changing the settings.
6. Test Cut
Select [ON] or [OFF].
If [ON] is selected, [Test cut settings] will be available
and can be clicked to display a window allowing
detailed settings for trial cutting to be selected. For
details on displaying the window, see “Trial Cutting”
on page 35.
* With the mobile device version, tap [Test Cut] to
display a settings screen.
7. Apply
Applies the settings that were either selected or
changed.
8. Start
Starts cutting or drawing. To stop the operation, see
“Cutting the Pattern” on page 37.
9. min.
Displays the cutting/drawing time.
9
1
2
3
4
5
6
7
8
9
2
6
8
3,4
5
3
4

9
1
Settings for various functions can be selected or
changed.
Machine Settings
Press or in the operation panel to display
the settings screen. After changing the settings, press
to apply.
■1. Network
1. WLAN Enable
Select whether or not to connect to the wireless
network.
2. Setup Wizard
Uses a wizard for manually entering the network key
for the detected SSID to connect to the wireless
network from this machine.
3. WAW
Uses the dedicated application “WLAN Assistant
Wizard” to connect to the wireless network from a
computer.
4. WAW <USB>
Uses the dedicated application “WLAN Assistant
Wizard” to retrieve the wireless LAN settings file from
the computer connected by the USB cable, then
connect to the wireless network.
5. Others
Displays the following parameters for other wireless
network settings.
1. TCP/IP: TCP/IP settings can be manually entered.
2. MAC Address: Displays the MAC address.
3. SSID: Displays the network SSID when a wireless
network connection is established.
4. Network Reset: Resets all network settings to their
defaults. When the following message appears, press
to select [Yes], and then turn the machine off,
then on again.
■2. Machine Info
1. No.
Displays the machine number for this machine.
2. Ver.
Displays the version of this machine’s software.
3. Name
Displays the name that was specified for the machine
connected to DesignNCut Manager (application for
selecting cut settings).
■3.Basic Setup
1. Language
Select the machine’s display language.
2. Panel Contrast
Adjust the brightness of the LCD.
3. Mark Sensor
In CaptureMat function, the cutting position can be
manually adjusted if it has shifted.
Memo
• “*” appears to the right of the selected item.
■4. Machine No.
Displays the machine number for this machine.
Auto Shut Down
If the machine is not used for a specified length of
time, it will automatically turn off. The length of time
until the machine turns off can be specified in the
Settings dialog box of DesignNCut Manager
(application for selecting cut settings).
For details on specifying the settings, see
“DesignNCut Manager Settings” on page 10.
SETTINGS SCREENS
Reset Network?
▼Yes ▲No

10
DesignNCut Manager Settings
Click [Application] or [DesignNCut] in the main
window to display the corresponding menu.
■[Application] Menu
Settings for displaying DesignNCut Manager can be
specified.
Memo
• With the mobile device version, tap in the
upper-right corner of the screen to display the
menu.
1. Support Page
Displays the website for the Brother Solutions Center.
2. Guidance
Displays the setup procedures, from specifying
network settings to registering with ScanNCutCanvas.
3. How to use
Displays information on how to use DesignNCut
Manager and the machine.
4. Operation Manual (PC only)
Displays the Operation Manual.
5. Proxy Settings (PC only)
Manually specify the proxy settings.
6. About DesignNCut Manager (PC only)
Displays information on the control application.
7. Check version
Displays the version information.
8. Usage Information
Displays the usage information.
9. License
Displays information on the software license.
■[DesignNCut] Menu
Settings can be specified for the various operations
available when DesignNCut Manager and the machine
are connected.
Memo
• With the mobile device version, tap in the
upper-left corner of the screen to display the
menu.
1. Settings (General)
Click [Settings], then [General]. After specifying the
desired settings, click [OK] to apply the settings.
aYou can specify a name for the connected
machine.
bSelect the machine’s display language.
cSelect the measurement units displayed in the
windows.
dSelect whether or not an operation sound is
produced, for example, when a button on the
machine is pressed.
eSelect the length of time that the machine is not
used until it automatically turns off. If the
machine is not used for 20 minutes, regardless
of the specified length of time, it will enter the
sleep mode, and the power indicator flashes.
fSelect from 1/4, 2/4, 3/4 or all of the cutting
area to be used for blade adjustment.
Before cutting out a pattern, this machine
performs an automatic blade adjustment, which
adjusts the direction of the blade outside of the
adhesive area of the mat.
gDisplays the version of this machine’s software.
1
2
3
4
5
6
7
8
9
1
2
3
a
b
c
d
e
f
g

11
1
1. Settings (Operation)
Click [Settings], then [Operation].
After specifying the desired settings, click [OK] to
apply the settings.
aAdjust the speed and pressure for cutting. For
details on the appropriate cutting pressure, see
“Cutting Settings” on page 30.
bAdjust the speed and pressure for drawing. For
best results, adjust the drawing pressure to the
appropriate setting. Drawing with pressure that
is too strong may damage the pen tip.
cSelect the design that will be used to fill
patterns. For details, see “Using Drawing
Functions to Fill Patterns/Make Outlines
Thicker” on page 41.
dWith [Fill Line Spacing], adjust the spacing of
the lines filling the pattern. With [Fill Direction],
adjust the direction of the lines filling the
pattern.
eWith [Additional Line], specify the number of
lines to be added. With [Additional Line
Spacing], specify the spacing of the lines to be
added.
fWhen a separately sold accessory kit is used,
select this check box to enable its functions.
1. Settings (Network)
Click [Settings], then [Network].
After specifying the desired settings, click [OK] to
apply the settings. For details on the network settings,
see “Setting Up Manually” on page 18.
2. Check version
Displays the status of the machine’s software.
* This does not appear when the machine is
connected with a USB cable.
3. Network reset for DesignNCut
Initializes the wireless network settings. For details on
specifying the settings, see “Resetting the Wireless
Connection Setup” on page 17.
a
b
c
d
e
f

12
Selecting the Connection Method
■Step 1
Open DesignNCut Manager (application for
selecting cut settings), installed on the computer.
■Step 2
Connect the machine and the computer with the
DesignNCut Manager (application for selecting cut
settings).
When using a wireless connection
⇒Continue to p. 12.
When using a USB cable
⇒Continue to p. 17.
Memo
• With the mobile device version, follow the on-
screen instructions to specify the settings.
Connecting to a Wireless Network
■Checking the Machine’s Connection
Mode
Check that the machine is in wireless mode. If the
machine is in wireless mode, the following message
appears in the screen when the machine is turned
on.
■If the Machine Is Not in Wireless
Mode
If the following message appears in the screen when the
machine is turned on, set the machine to wireless mode.
aTurn off the machine, then, while holding down
on the operation panel, press to turn
on the machine, and continue holding down
until you see the Machine Mode choice on
screen.
bPress to select [WLAN] and enter wireless
mode.
cWhen the following message appears, turn the
machine off, then on again.
XWhen the setting is changed, the following
message appears.
dPress or to display the settings
screen, and then select [1.Network], then
[1.WLAN Enable].
ePress or to select [ON], then press
.
■Wireless Connection Conditions
The wireless network connection complies with IEEE
802.11 n/g/b standards and uses the 2.4 GHz frequency.
Memo
• A wireless network cannot be set up with WPA/
WPA2 Enterprise. For the authentication
methods that this machine is compatible with,
refer to “Err-03” on P. 58.
CONNECTING THE MACHINE AND COMPUTER
Standby (WLAN)
Standby (USB)
Turn the machine off, then on
again.
Standby (WLAN)

13
1
Setting Up a Wireless Connection
(Standard Connection
(Recommended))
There are multiple ways to set up the wireless
connection. We recommend the method that uses a
wizard from the dedicated application.
aSelect [Wireless LAN] in the window for
selecting the connection method, and then
click [Next].
bSelect [Guidance], and then click [Next].
Follow the on-screen instructions to complete
the setup.
• To perform a custom setup, see “Setting Up a
Wireless Connection (Custom Connection)” on
page 14.
cSelect the number for the machine that will be
connected, and then click [OK].
aNumber for detected machines
dWhen the following message appears, press
on the machine, and click [OK] in the
application.
XAfter a wireless network connection has been
established and the machine’s network settings
for communicating with DesignNCut Manager
have been specified, the wireless LAN
connection indicator lights up.
Connected to WLAN. Press [OK]
button.
a

14
Setting Up a Wireless Connection
(Custom Connection)
Select the connection method to the wireless
network.
aSelect [Wireless LAN] in the window for
selecting the connection method, and then
click [Next].
bSelect [Manual], and then click [Next].
cSelect the connection method, and then click
[Next].
For details on methods A through D, refer to the
following pages.
A: Connecting Using a Push Button.....15
B: Connecting Using the Machine’s Wizard.....15
C: Connecting Manually.....15
D: Connecting Using a USB Cable.....16
Memo
• Depending on the computer, some settings
may not appear.
dWhen the following message appears, press
on the machine, and click [OK] in the
application.
XAfter a wireless network connection has been
established and the machine's network setting in
DesignNCut Manager has been specified, the
wireless LAN connection indicator lights up.
Connected to WLAN. Press [OK]
button.
A
B
C
D

15
1
■A: Connecting Using a Push Button
Since this machine is compatible with WPS (push
button method) if your wireless LAN access point/router
is equipped with a WPS button, a connection can easily
be established by pressing on this machine and
the WPS button on the router.
Memo
• For details on the WPS button, refer to the
manual for your wireless LAN access point/
router.
aAfter pressing the WPS button on your wireless
LAN access point/router, press on this
machine.
aWPS button
Memo
• The location of the WPS button differs
depending on your device.
bSelect [Setting with WLAN auto-configuration],
and then click [Next].
cFollow the on-screen instructions to complete
the setup.
• After completing the setup, continue with step d
on p. 14.
■B: Connecting Using the Machine’s
Wizard
The wireless connection can be set up using the
dedicated application “WLAN Assistant Wizard”.
aSelect [Setting with WAW], and then click
[Next].
bWhen a screen appears, explaining how to use
the WLAN Assistant Wizard (WAW), click
[Next].
cThe WLAN Assistant Wizard starts up. Follow
the on-screen instructions to complete the
setup.
• After completing the setup, continue with step d
on p. 14.
■C: Connecting Manually
The SSID and network key can be manually entered
from the machine’s operation panel.
aIn order to connect the machine to a wireless
network, the security information (SSID and
network key) for your wireless LAN access
point/router will be required. The network key
may also be called a password, security key or
encryption key. First, find your security
information and note it below.
Memo
• The wireless connection cannot be set up if you
do not have the security information.
• Where to find the security information:
1) Check the manual for your wireless LAN
access point/router.
2) The default SSID may be the manufacturer’s
name or the model name.
3) If you cannot find the security information,
contact the manufacturer of the router, your
network administrator or your Internet
provider.
bSelect [Setting on DesignNCut], and then
click [Next].
cFrom the machine’s settings screen, select
[1.Network], and then select [2.Setup Wizard].
XA list of available SSIDs appears.
dSelect the SSID noted in step a, and then press
.
XThe screen for entering the network key
(password) appears.
a
SSID Network Key
(Password)

16
eEnter the network key (password) noted in step
a, and then press .
Repeatedly press or until the following
characters appear.
0123456789abcdefghijklmnopqrstuvwxyz
ABCDEFGHIJKLMNOPQRSTUVWXYZ
!"#$%&'()*+,-./:;<=>?@[]^_
When the desired character appears, press , and
then enter the next character. To erase an entered
character, press . After entering the entire
password press .
fWhen the following message appears, press
to select [Yes].
• After completing the setup, continue with step d
on p. 14.
Memo
• If a connection was not successfully
established:
• If the following message appears, an incorrect
network key (password) may have been
entered. Press , and then perform the
procedure again starting with step cof “C:
Connecting Manually” on page 15.
- For details on other causes, see “ERROR
MESSAGES” on page 57.
• Once a wireless connection has been set up, a
wireless network connection can be
established next time simply by turning on the
machine. However, the machine must be left in
wireless mode.
• After connecting to the machine, click
[DesignNCut] in the main window of
DesignNCut Manager, click [Settings], then
[Network], and then set [WLAN Enable] to [ON].
■D: Connecting Using a USB Cable
The wireless connection can be set up using the
dedicated application “WLAN Assistant Wizard” (WAW
<USB>) and connecting the machine and computer
with a USB cable.
Computers That Can Connect to This
Machine
For details on the computers that can connect to this
machine, see “Devices That Can Connect to This
Machine” on page 3.
USB cable (sold separately)
• We recommend using a USB 2.0 cable (Type A/B)
of 2.0 m or less.
Note
• The connectors on the USB cable can only be
inserted into a port in one direction. If it is
difficult to insert the cable connector, do not
insert it with force and check the orientation of
the connector.
aPlug the USB cable connectors into the
corresponding USB ports on the computer and
on the machine.
aUSB port for a computer
bUSB cable
bSelect [Setting with WAW(USB)], and then
click [Next].
cFollow the on-screen instructions to complete
the setup.
• After completing the setup, continue with step d
on p. 14.
Apply Settings?
▼Yes ▲No
Network key error (Err-04).
Press [OK] button.

17
1
Connecting Using a USB Cable
Without a Wireless Network (Windows
Only)
With a USB cable, directly connect the machine and
the computer with DesignNCut Manager
(application for selecting cut settings).
aTurn off the machine, then, while holding down
on the operation panel, press to turn
on the machine, and continue holding down
until you see the Machine Mode choice on
screen.
bPress to select [USB] and enter USB mode.
cWhen the following message appears, turn the
machine off, then on again.
XWhen the setting is changed, the following
message appears.
dPlug the USB cable connectors into the
corresponding USB ports on the computer and
on the machine.
eSelect [USB Cable] in the window for selecting
the connection method, and then click [Next].
XThe connection is finished.
Note
• When connecting the machine and computer
with a USB cable, the AutoPlay dialog box may
appear repeatedly. To not display the dialog
box, change the AutoPlay settings as described
below.
-Windows7
Click > [Control Panel] > [Hardware and
Sound] > [AutoPlay]. Uncheck [Use AutoPlay
for all media and devices], then click [Save]
to apply the settings.
- Windows 8.1
Move your mouse to the lower right corner
of your desktop. When the menu bar
appears, click [Settings] > [Control Panel] >
[Hardware and Sound] > [AutoPlay]. Select
[Take no action] from the [Removable drive]
drop-down list, then click [Save] to apply the
settings.
- Windows 10
Click > [Windows System] > [Control
Panel] > [Hardware and Sound] > [AutoPlay].
Select [Take no action] from the [Removable
drive] drop-down list, then click [Save] to
apply the settings.
Resetting the Wireless Connection
Setup
aFrom the [DesignNCut] menu, click [Network
reset for DesignNCut].
Memo
• With the mobile device version:
→[Network reset for DesignNCut].
bClick [OK] to begin initializing.
• Follow the on-screen instructions to complete the
operation.
• See “Selecting the Connection Method” on
page 12 to connect to a wireless network.
Turn the machine off, then on
again.
Standby (USB)

18
Checking the Wireless LAN Settings/
Connection Status
When a connection to the wireless network cannot
be established.
aClick [DesignNCut], then [Settings], and then
select [Network].
Memo
• With the mobile device version:
→[Settings]→[Network]
aSelect whether or not the machine will connect
to the wireless network.
bDisplays the connection status.
cDisplays the machine’s signal strength as one
of four levels.
The signal strength is indicated by a number.
0 : No connected (*When the USB cable
connected)
1 : Weak signal
2 : Medium signal
3 : Strong signal
dDisplays the SSID of the wireless router that the
machine is connected to.
Setting Up Manually
aClick [DesignNCut] in the main window of
DesignNCut Manager, click [Settings], and then
select [Network].
Memo
• With the mobile device version:
→[Settings]→[Network]
aIf [Static] is selected, TCP/IP settings can be
manually entered.
a
b
c
d
a

19
1
bUse when proxy settings are required.
cDisplays the MAC address.
bAfter specifying the settings, click [OK].
b
b
c
Table of contents
Other Brother Cutter manuals

Brother
Brother 891-Z05 User manual

Brother
Brother SDX230DX User manual

Brother
Brother CM100DM User manual

Brother
Brother SDX900 User manual

Brother
Brother ScanNCut DX Series User manual

Brother
Brother DesignNCut DC200 Dimensions

Brother
Brother 891-Z05 User manual

Brother
Brother ScanNCut2 User manual

Brother
Brother SDX325 User manual

Brother
Brother EF4-N11 User manual