FloEasy Trayless 19961 User manual

10 pc Painting Kit Owner’s Manual
Item #19961
1

INTRODUCTION
Please carefully read this manual and familiarize yourself with the 10 pc Painting Kit and all of its
parts and accessories before use. If you have any questions, please call our customer service hotline
at (800) 386-0191.
Unpacking and Inspection
Carefully remove all pieces from the box and inspect them to make sure nothing is missing or
damaged. You should have all of the items listed below:
1. Paint Container Assembly with Pump & Hose 6. Large Corner Brush
2. Paint Roller Assembly 7. Small Corner Brush
3. Accessory Handle 8. Funnel Cup
4. Large Paint Pad 9. Faucet Adaptor
5. Small Paint Pad 10. Cleaning Attachment
If any parts are missing or damaged, please call customer service immediately at (800) 386-0191
1
2
5 4 8
6 7 10 9
3
2 3
FLOEASY 10 PIECE TRAYLESS PAINT SYSTEM
The FloEasy pump supplies just the right amount of paint directly to the specially designed head from
the inside out. Drips are a thing of the past, along with messy trays and spatter. The paint roller or pad
is continuously supplied with an even ow of paint. Often one coat does the job.
Cleanup is easy – when you’re done, attach the pump to your faucet and its cleaned the same way –
from the inside out. Note: Use with water-based paints only.
Spatter Free Easy To Clean
Reusable Lightweight
You’ll love the FloEasy Results!
APPLYING PAINT WITH THE TRAYLESS PAINT SYSTEM
Squeeze the pump handle several times and watch to be sure you see paint owing through the hose
to the Paint Roller Assembly. (NOTE: If you don’t see paint owing after repeated pumping, check
all hose and attachment connections and be sure there are no kinks in hose.) As the paint begins
seeping out of the roller (or accessory attachment), begin applying to surface. Continue pumping as
needed to keep paint supplied to the roller (or accessory attachment).
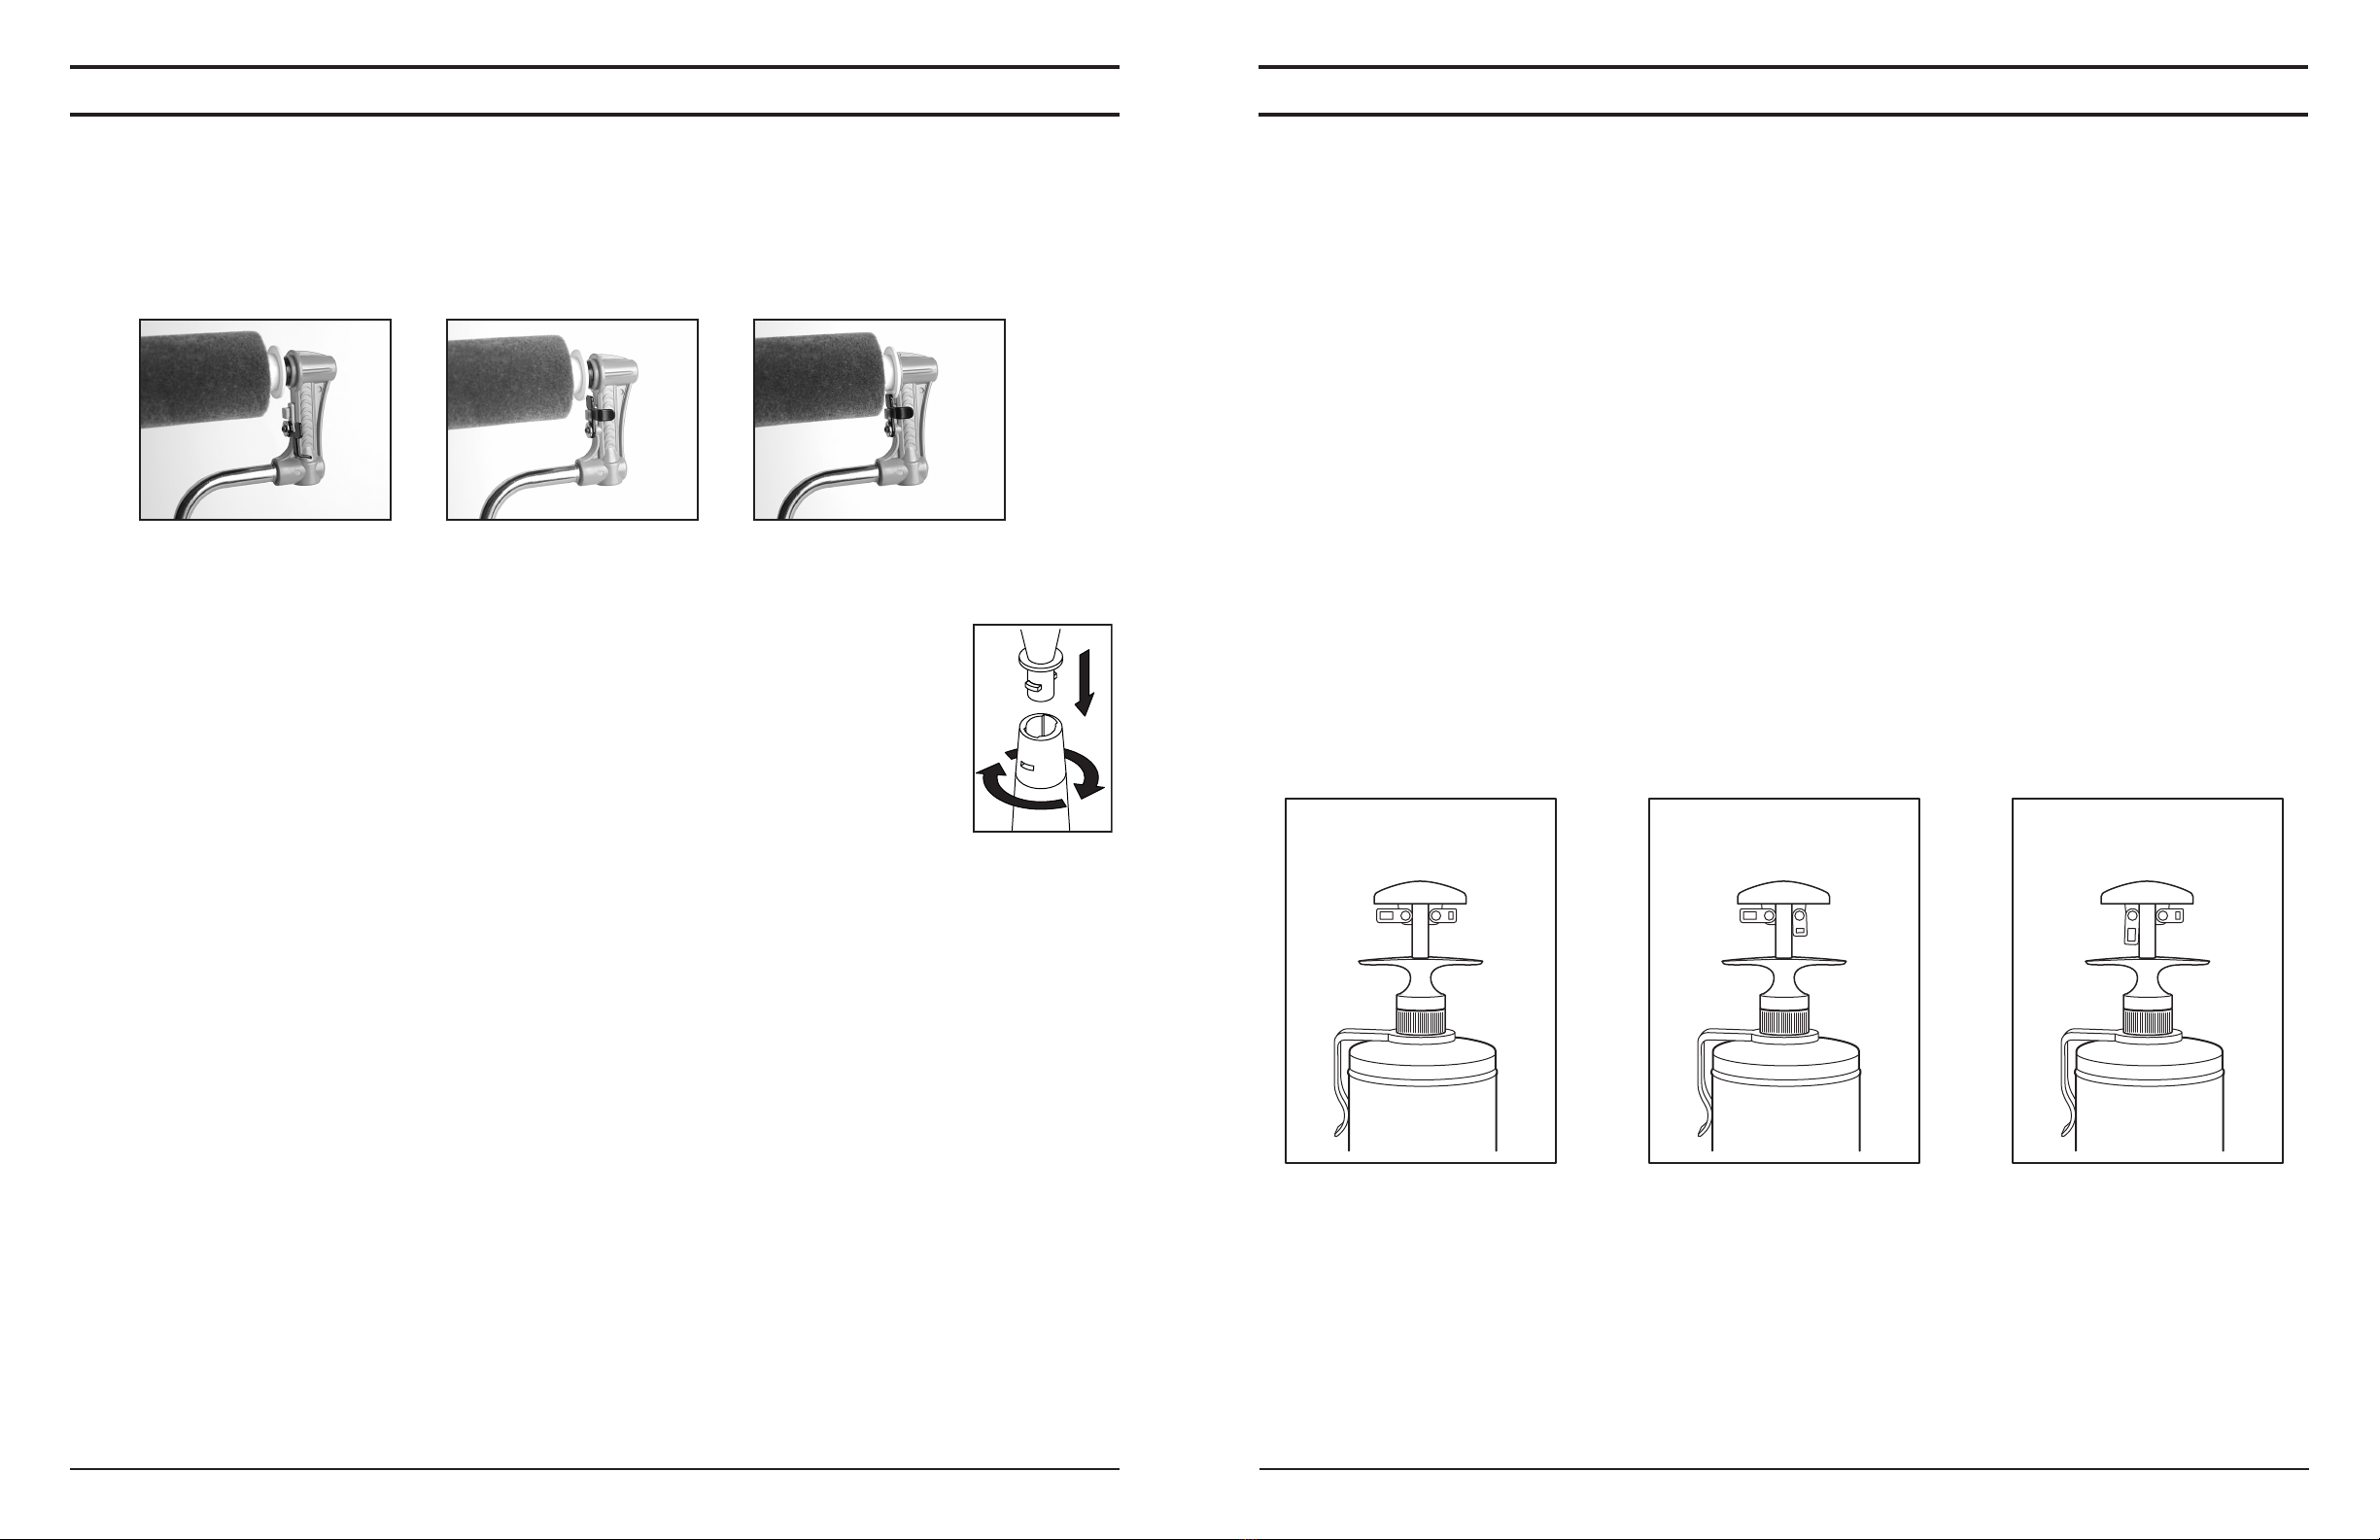
Note that the pump handle can be congured to operate at 3 different settings by adjusting the
position of the tabs located on the underside of the handle:
Full Stroke - With both tabs up (parallel with the handle), the pump will operate with a full
stroke and highest volume of paint delivered. This is the optimum setting for the Paint Roller.
1/2 Stroke - With the Small tab rotated to the down position (parallel with the pump shaft), the
pump will operate with a 1/2 stroke, delivering a medium volume of paint. This is the optimum
setting for the Large Paint Pad and Large Corner Brush
1/4 Stroke - With the Large tab rotated to the down position (parallel with the pump shaft), the
pump will operate with 1/4 stroke and the lowest volume of paint will be delivered. This setting
is suitable for the Small Paint Pad and Small Corner Brush.
4 5
PREPARATION FOR USE
Setting up the Paint Roller Assembly
The Paint Roller Assembly is suitable for painting larger areas. Check to make sure foam roller is
inserted fully onto the roller shaft of the Paint Roller Handle. Retainer Clip should be ipped up so the
tab holds the roller in place on the handle. See diagrams below:
Setting up the Accessory Attachments
For painting smaller areas such as trim and moulding, or for painting in conmed
areas, use the Small or Large Paint Pads. For painting into corners, use the Small
or Large Corner Brushes. Set up for all of these is the same.
Accessory attachments are used in conjunction with the Accessory Handle. Insert
desired attachment into end of Accssory Handle, making sure tabs on attachment
align correctly with notches in end of handle. Rotate 1/4 turn clockwise to lock in
place.
Connecting to Hose
Connect either the Paint Roller Assembly or the Accessory Handle to Hose by inserting it into the
hose end, making sure tabs on handle align correctly with notches in hose end. Rotate 1/4 turn
clockwise to lock in place.
Preparing the Paint Container
1. Remove pump assembly from Paint Container by unscrewing the retainer ring located just above
belt clip.
2. Attach Funnel Cup to paint container and ll with paint leaving some space at the top. NOTE: Do
not ll completely or paint will overow when you place the pump assembly back into container.
3. Place pump assembly back into container and secure in place with the retaining ring.
4. With hose fully uncoiled, hang the Paint Container Assembly on your belt. If you will be painting
with your right hand, place the container on your left side so you can pump with your left hand; if you
will be painting with your left hand, place the container on your right side.
Incorrect Incorrect Correct
1/41/2FULL

6 7
CLEANUP
Cleanup for Water-Based Paints
1. Remove Pump Handle Assembly from the Paint Container and pour any unused paint back into
can. Rinse with lukewarm water until all paint residue is gone.
2. Attach Faucet Adapter to Faucet.
3. Place end of Pump Tube fully into Faucet Adapter.
4. Attach Cleaning Attachment onto Pump Handle. Note: “U-Shaped” end of clip goes over hose; 2
“hook” ends of clip go over handle.
5. Hold painting attachment over drain and SLOWLY open tap to let water ow through hose to ush
paint out of system until water ows clear.
6. Disassemble all parts & attachments and rinse with lukewarm water to remove any paint on
exterior parts, pat dry with a cloth and let all foam parts air dry before storage.
STORAGE
When all parts are clean and dry, store in a clean, dry, dust-free environment. The Pump Handle
Assembly should be reattached to Paint Container to keep dust or other contaminates out.

8
FloEasy Trayless Paint System™ is a trademark of Star Asia USA, LLC
US PATENT #7,255,509
Other Patents Pending
Customer Service Line: 1-800-386-0191
©Copyright 2010 Star Asia USA, LLC
PO Box 58399, Renton, WA 98508
10 pc Painting Kit Owner’s Manual
Item #19961
Table of contents


