Fluid 8000511 User manual

User Manual
8000511
Please read this User Manual carefully to ensure proper use of this product and keep this manual for future reference.
with Touch Screen Controls
412 3 5 037 2 9
AC/DC
Adapters
SD/MMC/MS
memory card slot
LED

1
CONTENTS
FCC AND SAFETY INFORMATION .................................................. 2
IMPORTANT SAFETY INSTRUCTIONS........................................... .2
PACKAGE CONTENTS...................................................................... 3
PRODUCT OVERVIEW..................................................................... 3
MONITOR PANEL ILLUSTRATION.................................................... 4
CONNECTING TO THE MONITOR ................................................... 4
CONNECTING TO A TV SET............................................................. 4
CONNECTING TO USB ..................................................................... 5
USB Interface ................................................................................ 5
3-IN-1 Card Reader Function ........................................................ 5
USING IN THE CAR........................................................................... 5
Mounting in a Car .......................................................................... 5
Installation Guide........................................................................... 5
REMOTE CONTROL......................................................................... 6
Preparation of the Remote Ccontrol.............................................. 6
Using the Remote Control ............................................................. 6
Playing DVD Discs ........................................................................ 6
MP3 PLAYBACK ................................................................................ 7
PICTURE CD PLAYBACK.................................................................. 8
SYSTEM SETUP............................................................................. 8-9
Menu Operation............................................................................. 8
Language Setup ............................................................................ 8
DVD Menu..................................................................................... 9
Video Setup................................................................................... 9
Rating Setup.................................................................................. 9
Misc Setup..................................................................................... 9
TROUBLESHOOTING ..................................................................... 10
SPECIFICATIONS.............................................................................11
WARRANTY ......................................................................................11

2
CAUTION:
This unit employs a laser. Due to possible eye
injury, only qualified service personnel should
remove the cover or attempt to service this
device. Use of controls, adjustments, or the
performance of procedures other than those
specified herein may result in hazardous
radiation exposure.
THE FCC WANTS YOU TO KNOW
This equipment has been tested and found
to comply with the limits for a Class B digital
device, pursuant to Part 15 of the FCC
Rules. These limits are designed to provide
reasonable protection against harmful
interference in a residential installation.
This equipment generates, uses and can
radiate radio frequency energy and, if not
installed and used in accordance with the
instructions, may cause harmful interference
to radio communications. However, there is no
guarantee that interference will not occur in a
particular installation.
If this equipment does cause harmful
interference to radio or television reception,
which can be determined by turning the
equipment off and on, the user is encouraged
to try to correct the interference by one or
more of the following measures:
• Reorient or relocate the receiving antenna.
• Increase the separation between the
equipment and receiver.
• Connect the equipment into an outlet on
a circuit different from that to which the
receiver is connected.
• Consult the dealer or an experienced radio/
TV technician for additional suggestions.
Any changes or modifications not expressly
approved by the party responsible for
compliance could void the user’s authority
to operate the equipment. Where shielded
interface cables have been provided with the
product or specified additional components
or accessories elsewhere defined to be used
with the installation of the product, they must
be used in order to ensure compliance with
FCC regulation.
• WARNING: To reduce the risk of electric shock, do not remove the cover or back.
There are no user-serviceable parts inside. Refer servicing to qualied personnel.
• WARNING: To prevent re or electric shock hazard, do not expose the unit to rain or moisture.
• Do not expose the Adapter and product to water (dripping or splashing) and no objects lled
with liquids, such as vases, should be placed on the unit
• Keep the product away from direct sunlight and heat source such as radiators or stoves.
• Do not block the ventilation openings. Slots and openings on the unit are provided for
ventilation. The openings should never be blocked by placing your producton a cushion, sofa or
other similar surface.
• Do not place the product on an unstable cart, stand, tripod, bracket or table. The unit may fall,
resulting in possible damage or injury.
• Never place heavy or sharp objects on the LCD panel or frame.
• Only use the AC adapter included with product. Use of any other adapter will void the warranty.
• Unplug the power from the outlet when the unit is not in use.
• Attention should be drawn to the environmental aspects of battery disposal.
WARNING: The battery (battery or batteries or battery pack) shall not be exposed to excessive
heat such as sunshine, re or the like.
• WARNING: Excessive sound pressure from earphones or headphones can cause hearing loss.
• WARNING: Only use attachments/accessories specied provided by the manufacturer. The
product is supplied with an AC adapter, the AC adapter is used as a disconnect device, the
disconnect device shall remain readily operable.
• WARNING:The USB memory stick should be plugged into the unit directly. USB extension
cable should not be used to avoid failure of data transference and possible interference.
• In the event of an electrostatic discharge (ESD) turn the unit off then back on to resume normal
operation.
Important Battery Information
• Rechargeable batteries are only to be charged under adult supervision.
• The battery will only recharge when the battery temperature is below 40°C (104°F).
• Do not attempt to replace the battery without technical support.
• Danger of explosion if battery is incorrectly replaced.
• Replace only with the same or equivalent type.
• Do not dispose of the used batteries as domestic waste. Dispose of them in accordance with the
local regulations.
• To reduce the risk of electric shock, do not expose to rain, moisture, dripping or splashing.
• Battery shall not be exposed to excessive heat such as sunshine, re or the like.
• Do not install this equipment in a conned space such as book case or similar unit.
FCC AND SAFETY INFORMATION IMPORTANT SAFETY INSTRUCTIONS
This Class B digital apparatus complies
with Canadian ICES-003.
FOR DVD PLAYERS WITH
PROGRESSIVE SCAN OUTPUT:
Consumers should note that not all high
denition television sets are fully compatible
with this product and may cause artifacts to be
displayed in the picture. In case of progressive
scan picture problems, it is recommended that
the user switch the connection to the “Standard
Denition” output.
Since it is usual for DVD movies to be released
at different times in different regions of the
world, all players have region codes and
disc can have an optional region code. If you
load a disc of a different region code to your
player, you will see the region code notice on
the screen. The disc will not play, and should
be unloaded.
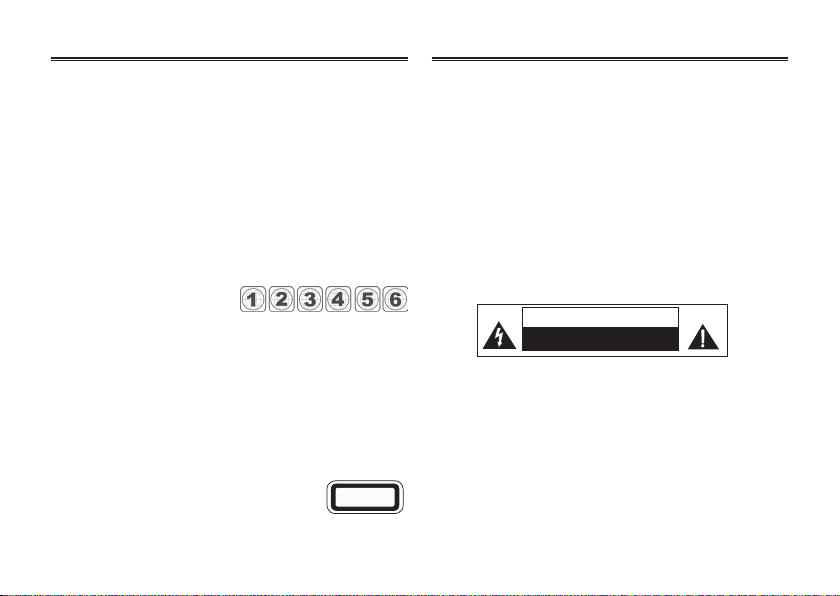
(Possible region codes:)
There are 6 regions (also called “locals”).
Each DVD player and disc will be played in
one region ONLY.
1.Canada, U.S., U.S. Territories
2.Japan, Europe, South Africa, Middle East
(including Egypt)
3. Southeast Asia, East Asia (including Hong
Kong)
4. Australia, New Zealand, Pacic Islands,
Central America, Mexico, South America,
Caribbean
5.Former Soviet Union, Indian Subcontinent,
Africa (also North Korea, Mongolia)
6.China
Never make or change connections with the
power switched on.
CAUTION
INVISIBLE LASER
RADIATION WHEN
OPEN AND INTERLOCKS DEFEATED.
AVOID EXPOSURE TO BEAM.
CAUTION
RISK OF ELECTRIC SHOCK
DO NOT OPEN
ClASS1
lASeR pRODUCT

3
PACKAGE CONTENTS PRODUCT OVERVIEW
• DVDPlayer
• Monitor
• RemoteControl
• CarAdapter
• PowerAdapter
• A/VCable
• LinkUpCable
• MountingStrapx2
• CarryBag
• UserManual
PRODUCT OVERVIEW
OK STOP
SOURCE
CARD
SLOT
POWER ON/OFF
DC 12V INPUT
(power supply)
HEADPHONE
AV OUTPUT
VOLUME
USB IN
TABLE STAND
LCD DISPLAY
REMOTE
CONTROL
SENSOR
MOVE ( , , , )

4
MONITOR PANEL ILLUSTRATION CONNECTING TO THE MONITOR
CONNECTING TO A TV SET
LCD DISPLAY
SPEAKER
MENU
LINK UP CABLE
AC ADAPTER
CAR ADAPTER
EARPHONE
Yellow
White
Red
CVBS
L
R
VIDEO IN
AUDIO IN
MOVE ( , , , )
POWER ON/OFF
DC 12V INPUT
(power supply)
HEADPHONE
AV INPUT
: Adjust the cursor position
: Adjust the volume
MENU : Sets monitor settings
(Ex: 4:3/16:9/PAL/NTSC)

5
Press SOURCE on the remote control to enter USB mode.
USB INTERFACE
This unit has a USB IN jack to play MP3 music or JPEG les.
Press the SOURCE button to choose USB IN mode.
All the functions are the same as used to play a disc.
Note: The USB IN port is only compatible with ash
memories.
3-IN-1 CARD READER FUNCTION
This unit has a 3-in-1 card slot compatible with MMC, SD and
MS memory cards.
Press the SOURCE button to choose CARD mode to play
MP3 music or JPEG les.
All the functions are the same as used to play a disc.
Note: This player can support a standard SD card of 4GB as
the maximum capacity.
Note: The USB and SD/MMC/MS card modes are only
available when the unit is in stop mode
MOUNTING IN A CAR
1. Thread both strap ends through the strap eyelets.
Note:
Ensure the buckles are properly assembled to avoid
accidental loosening.
2. Loop the straps around the head-rest, with the DVD Player
facing the rear seat, then fasten the straps with the clip.
Note:
Always remember to lock the clips and tighten the straps
to ensure the safety of your passengers.
INSTALLATION GUIDE
CONNECTING TO USB USING IN THE CAR
CARD SLOT
USB
DVD PLAYER MONITOR
CAR POWER
ADAPTER
REMOTE
CONTROL
LINK UP
CABLE

6
REMOTE CONTROL
PREPARATION OF THE REMOTE CONTROL
Place the remote control on an even surface and insert the
supplied button cell into the remote control as follows.
1. Push the button tab to the left.
2. Pull the battery loader out.
3. Insert the battery into the receptacle
Make sure the polarity matches the
marks on back of the remote control.
4. Insert the receptacle into the remote control.
Battery type: 1 x CR2025, 3 V
Service life: Approximately 1 year
USING THE REMOTE CONTROL
Point the remote control towards the main unit when
operating. The remote control works best at a distance less
than 5 m and at an angle of up to 30˚ to the front of the unit.
No obstacles should stand between the remote control and
infrared sensor. Do not place the remote control in direct
sunlight. If the remote control unit fails to work even when it is
operated near the player, replace the battery.
PLAYING DVD DISCS
Turn on the unit and insert the DVD disc. The disc will
automatically begin to play when the CD door is closed.
NOTES ON BATTERIES
If the remote control is not used for a long period of time,
remove the battery from the compartment.
Do not heat batteries or dispose of them in res.
Do not dismantle, deform or modify batteries.
1. RepeAT A-B
Press1x:setA;
Press2x:setB;
Press3x:disablethefunction.
2. pROg/RepeAT
Shortpress:Repeatmode
Longpress(2Sec.):DVDprogram
mode
3.0-9NumberKeys
4. SeTUp Open the setup menu
5. gOTOGotoaspecictimeindex
6. Fast Forward
7.Nextchapterorle
8. Previouschapterorle
9. SOURCe Input mode selection
10. DISplAy Displays detailed
informationofthecurrentle
or disc
11. ANgle/AUDIO
Shortpress:Changestheaudio
mode(ifdifferentmodesare
available)
Longpress(2Sec.):Changesthe
anglemode(ifdifferentmodesare
available)
12. TITle/SUBTITle
Shortpress:Changesubtitlemode
(ifsubtitlesareavailable)
Longpress(2Sec.):DVDTitle
menu
13. MeNU/ZOOM
Shortpress:Zoomin
Longpress(2Sec.):Menukeyfor
DVDMenu
14. STOp / SlOW
Shortpress:Stop
Longpress(2Sec.):Slowmotion
15.Directionkeys(,,,)
16. Fast Rewind
17. eNTeRToconrmandenter
optionsortoplayles.
18. plAy / pAUSe

7
MP3 PLAYBACK
The MP3 disc has a directory structure as shown in the
picture.
Press the Direction key to choose the root directory and then
press the ENTER button to enter into the sub directory.
Press the Direction key to choose the desired track and then
press ENTER or PLAY to enjoy the music or movie.
If you want to return to the upper menu, press the Direction
key to choose the icon and press the ENTER button.
With the picture in STOP mode, press the Fast Forward
button to access the following menus:
Filter: Allows selection of the categories of les displayed
in the browser list.
This selection is done among the 3 categories:
Audio, Photo and Video
Repeat: To switch to a different repeat playing mode
Mode: Select different playing mode
Normal: Shufe mode is cancelled by toggling to a different
Mode option.
Shufe: Shufe mode enabled. When playback reaches the
end of the current chapter/track, playback jumps
to a random chapter/track. When the end of each
chapter/track is reached, another random chapter/
track will be played until all tracks/chapters have
been played or the Shufe mode is cancelled by
toggling to a different Mode option.
Music Intro: In this mode, the media will play for 10 seconds
then skip to next media.
Edit Mode: To enable programmed playback mode. When
you select the mode, press LEFT Direction key
to directory and press ENTER to choose the
desired track and press Add to program to add in
programmed playback.
Program view: Display program track.
Browser view: Display track directory.
Add to program: Choose the track and press Add to program
to add the track of the program to the play directory.
Clear program: In the complete stop state (press the STOP
button twice), choose the track, then press Clear
program to delete the track from the program play
directory.

8
MENU OPERATION
Press the SETUP button on the remote control, the SETUP
MENU (main) will be displayed.
After accessing the setup menu, press the direction buttons to
select desired option, then press the ENTER button to conrm.
Press the LEFT direction button to return to the menu.
To exit setup, press the SETUP button again. In the SETUP
MENU, you may choose any of the following options as you like.
LANGUAGE SETUP
Select Language in the setup menu, and display the
Language submenu:
OSD Language
Select the language of the setup menu and screen display.
Subtitle
This option provides the preset subtitle language.
Follow the operating instructions stated in DVD MENU
SETUP to select the subtitle language.
Audio
Follow the operating instructions stated in DVD MENU
SETUP to select audio options.
This option provides built-in disc dubbing language options.
PICTURE CD PLAYBACK SYSTEM SETUP
The PICTURE CD disc has a directory structure as shown
below.
Press the Direction key to choose the root directory and
then press the ENTER button to enter into the sub directory.
Press the Direction key to choose the desired picture and
then press ENTER or PLAY to enjoy the picture.
To return to the upper menu, press the Direction key to
choose the icon and press the ENTER button.
Image Rotation
In picture play state, press the Direction key to rotate the
picture, press the ANGLE button to change the picture scan
mode.

9
RATING SETUP
Select Rating in the setup menu, and display the Rating submenu:
Note: Not all DVDs support ratings.
Parental Control
Selecting a Rating
allows the user to set the
parental control feature
of the player. Select
Parental Control, and
press ENTER to change the mode.
Note: Unlock the password before setting Parental Control.
Set Password
Use the 0-9 keys to input four digits (password), then press
ENTER to conrm.
Note: If you forget your password, please use the universal
password printed on the separate card enclosed.
MISC SETUP
Select MISC in the setup menu, and display the submenu:
* Use Default Settings
Reset setup data to factory default and re-load disc.
DVD MENU
This option provides the lms menu language options.
Follow the operating instructions stated in DVD MENU
SETUP to select language options.
VIDEO SETUP
Select Video in the setup menu, and display the Video submenu:
Aspect Ratio
The image display ratio
is related to the recorded
disc format. Some discs
cannot display images
in the aspect ratio you
choose. If you play a disc
recorded in 4:3 format on a widescreen TV, black bars will appear
on the left and right side of the screen. You must adjust the
screen setting depending on the type of the television you have.
TV System
This product supports output of various system, including NTSC,
PAL. If your TV set has only NTSC or PAL system, the screen
will blink and become blank when the wrong system is selected.
Note: For more information of output format, refer to the
instructions of your TV set.
Smart picture
Adjust display effect for video output:
Standard: default effect.
Bright: internal setting for bright view effect.
Soft: internal setting for soft view effect.
Dynamic: user adjust brightness, contrast, colour, etc.
SYSTEM SETUP

10
TROUBLESHOOTING
Carry out the problem-solving measures described in the
following section before contacting a repair technician.
Turn off the DVD player immediately as soon as you suspect a
malfunction. Unplug the power plug and check if DVD player is
unusually warm or if smoke is rising from it.
PROBLEM POSSIBLE CAUSE REMEDY
The DVD player
does not work Disc cover not closed Close disc cover
No disc inserted Insert disc
Disc inserted the wrong
way Insert disc with label
facing up
Disc dirty or deformed Clean disc, or insert
other disc
Regional code of the
player does not match the
regional code of the DVD
Purchase DVD with
corresponding regional
code
Moisture on lens Remove disc and turn off
DVD player for at least
two hours
No audio Device not properly
connected Check connections and
connect device in the
correct way
Headphones connected
(loudspeaker off) Pull out the headphones
DVD sound settings
incorrect Check sound settings and
set sound correctly
Disc dirty or deformed Clean disc, or insert
other disc
Other possible causes for problems:
Static discharges or other external interferences can cause
the DVD player to malfunction.
When this happens, disconnect the power plug from the
power outlet and plug it back in.
If the problem persists, disconnect the device from the power
supply again and contact a repair centre.
PROBLEM POSSIBLE CAUSE REMEDY
No video TV screen is off or in the
incorrect video mode Turn on LCD screen and/or
set correct video mode
Device not properly
connected Check connections and
connect device in the
correct way
Poor video and/
or audio quality Disc dirty or deformed Clean disc, or insert
other disc
Repeated
playback of a
section
Loop mode is switched on Exit the loop mode
Disc dirty or deformed Clean disc, or insert
other disc
Remote control
does not work Obstacle between remote
control and DVD player Remove obstacle
Remote control not
pointed at DVD player Point remote control
directly at DVD player
Remote control battery
inserted the wrong way Check the battery’s polarity
and, if necessary, insert
battery correctly
Battery too low or
completely discharged Insert new battery

11
SPECIFICATIONS
Play Mode NTSC/PAL
Disc Mode DVD,VCD,CD,MP3,CD-R,
CD-RW,JPEG,DVD+-R/W,AVI
(MPEG4/XVID)
VideoS/Nratio ≥65dB
AVoutresolution ≥500lines
Frequency Response fs96KHz:20Hz-20KHz:+/-1dB
AudioS/Nratio ≥90dB
Dynamicrange ≥80dB
Distortion < 0.01%
D/AConverter 96KHz/24bit
Display Device Colour TFT-LCD
ScreenSize 7 inches
VideoOutput 1Vp-p(75Ω)
AudioOutput 2CH
PowerVoltage DCIN12V
Power Consumption ≤12W
Battery 1800mAh
BatteryPlayTime 3 hours
Specicationsaresubjecttochangewithoutnotice.
Please Recycle
THe SOURCe WARRANTy
TheSource warrantsthatthisproductwill befreefrom defectsin
materials and workmanship for a period of one (1) year from the
date of purchase. Within this period, simply take the product and
your proof of purchase to any The Source store or dealer and the
product will be repaired without charge for parts and labour. The
Sourcereservestherighttochargefortransportation.Anyproduct
whichhasbeensubjecttomisuseoraccidentaldamageisexcluded
from this warranty.
ThiswarrantyisonlyapplicabletoaproductpurchasedthroughThe
Source company owned stores and dealers and to a product that
is presented for repair in a country where The Source offers the
productforsale.Whilethiswarrantydoesnotconferanylegalrights
otherthanthosesetoutabove,youmayhaveadditionalstatutory
rightswhichwillvaryunderthelawsofthevariouscountries,states,
province and other governmental entities in which The Source
operates. This warranty is subject to all statutory rights you may
have in the country of purchase.
Limited Warranty
© 2012 The Source.
All Rights Reserved.
Importedby:
TheSource,
Barrie,Ontario,Canada,L4M4W5
Manufactured in China
For product support please contact
www.thesource.ca
Table of contents
Other Fluid Portable DVD Player manuals