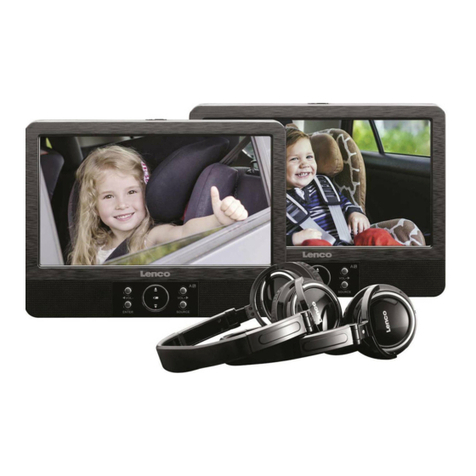
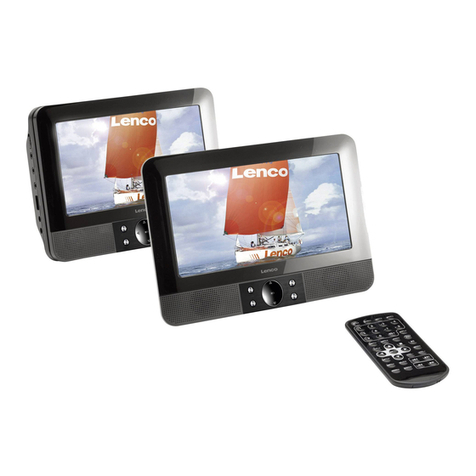
LENCO MES-216 User manual

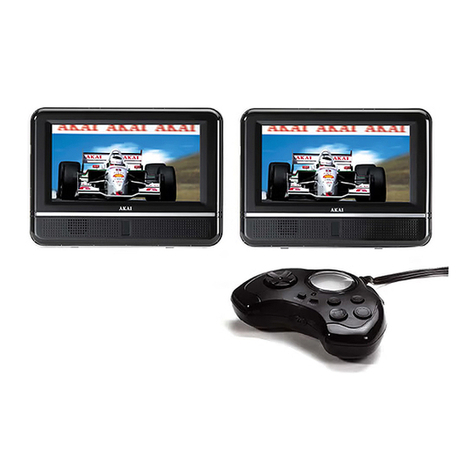
7” TWINS SCREEN
PORTABLE DVD PLAYER AND MONITOR
MES-216
USER MANUAL
Please read and keep these instructions
For information and support, www.lenco.eu

SAFETY INFORMATION
CAUTION:
DVD/VIDEO CD/CD PLAYER IS A CLASS 1 LASER PRODUCT. HOWEVER THIS DVD/
VIDEO, CD/CD PLAYER USES A VISIBLE LASER BEAM WHICH COULD CAUSE
HAZARDOUS RADIATION EXPO SURE IF DIRECTED. BE SURE TO OPERATE THE
DVD/VIDEO CD/CD PLAYER CORRECTLYAS INSTRUCTED.
WHEN THIS DVD/VIDEO CD/CD PLAYER IS PLUGGED TO THE WALL OUTLET, DO
NOT PLACE YOUR EYES CLOSE TO THE OPENING OF THE DISC TRAYAND
OTHER OPENINGS TO LOOK INTO THE INSIDE OF THIS PLAYER.
USE OF CONTROLS OR ADJUSTMENTS OR PERFORMANCE OF PROCEDURES OTHER
THAN THOSE SPECIFIED HEREIN MAY RESULT IN HAZARDOUS
RADIATION EXPOSURE.
DO NOT OPEN COVERS AND REPAIR YOURSELF. REFER SERVICING TO QUALIFIED
PERSONNEL
THIS DEVICE IS INTENDED FOR CONTINUOUS OPERATION!
TO REDUCE THE RISK OF FIRE OR ELECTRIC SHOCK, AND ANNOYING
INTERFERENCE, USE THE RECOMMENDED ACCESSORIES ONLY.
WARNING:
- TO PREVENT FIRE OR SHOCK HAZARD. DO NOT USE THIS PLUG WITH AN
EXTENSION CORD. RECEPTACLE OR OTHER OUTLET UNLESS THE BLADES
CAN BE FULLY INSERTED TO PREVENT BLADE EXPOSURE.
- TO PREVENT FIRE OR SHOCK HAZARD. DO NOT EXPOSE THISAPPLIANCE TO
RAIN OR MOISTURE.
CAUTION - LASER RADIATION WHEN OPEN, DO NOT STARE INTO BEAM.
VENTILATION WARNING - THE NORMAL VENTILATION OF THE PRODUCT SHALL
NOT BE IMPEDED FOR INTENDED USE.
The lighting flash and
arrow head within the
triangle is a warning sign
alerting you of
“dangerous voltage”
inside the product.
CAUTION: To reduce the risk of
electric shock. Do not remove cover
(or back). No user serviceable parts
inside. Refer servicing to qualified
service personnel.
The exclamation point
within the triangle is a
warning sign alerting you
of important instructions
accompanying the
product.
Always follow basic safety precautions when using electrical products, especially
when children are present.
WARNING: To avoid the risk of electrical shock, make sure the product is unplugged from
the electrical outlet before relocating, servicing, or cleaning it.
1

Read all instructions before using
•Do not use this product near water.
•Do not ceiling- or wall-mount the product.
•Install the product in accordance with the operating instructions.
•Do not set the product near heat sources, such as radiators, heat registers, stoves, or other
apparatus (including amplifiers) that produce heat.
•Protect the power cord from being walked on or pinched, particularly at plugs, convenience
receptacles, and the point where they exit the product.
•Unplug the product during lightning storms or when unused for long periods of time.
•Do not expose the product to dripping or splashing water. Do not place objects filled with liquid
(e.g., vases) on the product.
•Do not place in or expose the product to direct sunlight, extreme heat, humid or dusty locations.
•Do not attempt to examine or repair this product yourself; take the product to a service centre for
inspection and repair.
•Keep magnetic objects such as speakers,at a distance from the player.
LASER SAFETY
This set employs an optical laser beam system in the CD mechanism designed
with built-in safeguards. Do not attempt to disassemble. Exposure to this
invisible laser light beam may be harmful to the human eye. This is a Class-1
laser product. Use of controls, adjustments or procedures other than those
specified herein may result in hazardous laser light beam exposure. This
compact disc player should not be adjusted or repaired by anyone except
qualified service personnel. The laser mechanism in the set corresponds to the
stylus (needle) of a record player. Although this product uses a laser pick-up
lens, it is completely safe when operated according to directions.
NOTE: The manufacturer is not responsible for any radio or TV interference caused by unauthorized
modifications. Such modifications could void the user's authority to operate the equipment.
1) Operate turning controls and switches as instructed in the manual.
2) Before turning on the power for the first time,make sure that the power cord is properly installed.
3) Store your discs in a cool area to avoid damage from heat.
If at any time in the future you should need to dispose of this
product please note that: Waste electrical products should not be
disposed of with household waste. Please recycle where facilities
exist. Check with your Local Authority or retailer for recycling
advice. (Waste Electrical and Electronic Equipment Directive)
2

3
Table of contents
Getting Started:
Safety information ........................................................................................................................1-2
Features ..........................................................................................................................................4
Accessories ................................................................................................................................4
Control reference guide ............................................................................................................... 5-6
Basic connection ............................................................................................................................7-11
Remote control preparation ................................................................................................................12
Basic Operation:
Basic play ..........................................................................................................................................13
Stopping play ........................................................................................................................................14
Skipping ahead or back ......................................................................................................................14
Fast forward backward...........................................................................................................................14
Pause or play ........................................................................................................................................14
Slow-motion play [DVD/VCD]................................................................................................................15
MP3 playback ................................................................................................................................ 15
MP4 playback .......................................................................................................................................16
JPEG CD..........................................................................................................................................17-18
Enjoying Video CD with playback control …………………………………..............................................18
USB playback........................................................................................................................................19
CARD playback.....................................................................................................................................20
On screen display information…………………………………….............................................................21
Advanced Operation:
Program play ..................................................................................................................................21
Repeat play .................................................................................................................................22
A-B repeat play ..................................................................................................................................22
TFT MODE ........................................................................................................................................... 22
GO TO.................................................................................................................................................. 22
Changing subtitle language(DVD only) .................................................................................................23
ZOOM play.............................................................................................................................................23
Changing audio soundtrack language[DVD/VCD/CD disc] ................................................................23
Viewing from different angle(DVD only).................................................................................................24
Initial Settings:
Common procedure for initial settings ...................................................................................................24
General setup …………… …………………………………………………………………………………25
Audio setup …………… …………………………………………………..…………………………25-26
Password setup ……… ………………………………………… ……………………………………..… 26
For Reference:
Definition of terms .........................................................................................................................27
Specifications ..................................................................................................................................28
Troubleshooting .............................................................................................................................29-30
DISC handling and maintenance ......................................................................................................30
Region Code Setting .............................................................................................................................30

Features
7" TFT DISPLAY
This player has a built-in 7" TFT display window, to provide clear vision, and low radiation.
MULTI TV SYSTEM SUPPORT
The player can play discs with signal system of PAL and NTSC.
GRAPHICAL USER INTERFACE SCREEN
Simply by pressing the OSD button on the remote control unit, information on the player
and disc can be displayed on the TV screen for easy identification, The player's operations
and settings can be performed by operating the remote control while monitoring screen.
USB/ CARD READER FUNCTION
This player can play USB /SD /MMC card containing files in VCD/SVCD/DVD/MP3/WMA/MP4/JPEG
/CD format.
SLIDE SHOW IN 17 MODES
MULTI-AUDIO FUNCTION
The audio soundtrack can be heard in up to 8 languages. (The number of audio sound languages
depends on the software.)
MULTI-SUBTITLES FUNCTION
Subtitles may be displayed in one of a maximum of 32 languages depending on the software.
MULTI-ANGLE FUNCTION
This function allows you to choose the viewing angle of scenes which were shot from a number
of different angles. (Limited to DVD recorded with multiple camera angles.)
PARENTAL LOCK FUNCTION
This prevents play unsuitable for children.
DISC FORMATS SUPPORTED BY PLAYER
The player can play back discs bearing any of the following marks:
Accessories
All the pictures in the instruction manual are just for your reference, specification should refer to
the actual accessories.
4

Control reference guide
Main unit
1. TFT Display window - Displays all information about DVD work scene.
2. UP navigation button - Press this button to move up.
3. OK button - Press this button to confirm a selection.
4. Built-in Speakers.
5. PREV button - Press this button to move left or to skip to the previous chapter or title (for DVD) or
track (for VCD/ CD).
6. NEXT button - Press this button to move right or to skip to the next chapter or title (for DVD) or track
(for VCD/ CD).
7. Remote Control Sensor
8. LEFT navigation button - Press this button to move left.
9. DOWN navigation button - Press this button to move down.
10. JAG - Push the door upward from the jag of the door cover
11. RIGHT navigation button - Press this button to move right.
12. MENU button - Press this button to return to the root menu (for DVD) or to turn on/off the PBC
(for VCD)
13. STOP button - Press this button to halt playing.
14. PLAY/PAUSE button - Press this button to start or pause playing the disc.
15. DC In Jack - Power input jack.
16. Power Switch- Switch this knob to turn on/off the player.
17. AV Out Jack - Connect to TV or other external AV equipment to use the player as a signal source.
18. PHONE 2 - Connect headphone to this jack for private listening.
19. PHONE 1 - Connect headphone to this jack or private listening.
20. Volume - Rotate this knob to adjust the volume to a suitable level.
21. Power Indicator - It is green in working mode.
22. SD/MMC card slot
23. USB slot
24. Holder - Pull the back bracket out, you can support and place the player levelly on the stage.
5

Control reference guide
Remote control
1. TFT MODE button - Press this button to select
BRIGHTNESS, CONTRAST, SHARPNESS,
SATURATION, HUE or 16:9/4:3 screen mode
and then press left or right button to adjust as you like.
2. NUMERIC buttons - Press these buttons to input
numeric information, such as track number, chapter
number and so on.
3. FR button - Press this button to play the disc
backward at speeds : x2, x4, x8, x16, x32.
4. FF button - Press this button to play the disc
forward at speeds : x2, x4, x8, x16, x32.
5. ZOOM button - Press this button to enlarge picture
size, max. to X 4 or to shrink picture size, min. to X1/4.
6. SLOW button - Press this button to play the disc at
speeds:1/2,1/4,1/8,1/16.
7. PROGRAM button - Press this button to setup the
memory order of chapter or title (for DVD) or tracks
(for VCD/CD).
8. ANGLE button - Press this button to display the
angle number and change to different angles.
9. STEP button - Press this button to play the
file forward step by step.
10. L/R button - To change audio output mode:
Left Mono, Right Mono, Mix-mono and Stereo soundtrack.
11. TITLE button - Press this button to return to title menu (for DVD).
12. SUBTITLE button - Press this button to display and change subtitle language (for DVD only).
13. LANGUAGE button - To select the soundtrack language (DVD).
14. USB/CARD/DVD - Press this button continuously to switch the unit among USB/CARD/DVD mode.
15. N/P button - Press this button to select NTSC or PAL system (for DVD only).
16. OSD button - Press OSD button continuously during playback, the screen will display the
playing information, such as elapsed time, remaining time and so on.
17. GO TO button - Press this button to set the player to play disc starting at a certain point.
18. PLAY/PAUSE button - Press this button to start or pause playing the disc.
19. STOP button - Press this button to halt playing.
20. NEXT button - Press this button to play the next chapter (for DVD) or track (for VCD/CD).
21. PREV button - Press this button to play the previous chapter (for DVD) or track (for VCD/CD).
22. REPEAT button - Press this button to repeat playing one chapter or one title (for DVD) or
repeat playing the current track or the whole tracks (for VCD/CD).
23. A-B button - Press this button to repeat playing sections between two specific points (A-B).
24. SETUP button - Press this button to enter initial settings menu.
25. ENTER button - Press this button to confirm what you have selected.
26. Navigation buttons - Press this button to move up, down, left or right.
27. MENU button - Press this button to return to the root menu(for DVD) or to turn on/off the
PBC (for VCD).
28. VOLUME +button - Press this button to turn up the volume.
29. VOLUME –button - Press this button to turn down the volume.
30. MUTE button - Press this button to mute the sound.
6
Basic connection
zEnsure all the cables are disconnected from the main unit before connecting to AC power source
by AC power adaptor.
zRead through the instructions before connecting other equipment.
Connecting to AC power source
7

Connecting to monitor
IMPORTANT: The slave unit will only work with the main unit by using the car
adaptor. It will NOT work when you use the AC adaptor.
1. Monitor Unit
FRONT VIEW
1. STANDBY button - Press it to set the unit in
standby mode, press it again to enter work
mode.
2. MENU button - Press it to enter initial
settings menu. Press it again to move up or
down to select different OSD item.
3. REMOTE CONTROL SENSOR
4. LEFT button - Press it to move left to reduce
the level of different OSD item in OSD menu
mode.
5. RIGHT button - Press it to move right to
adjust the level of different OSD item higher in
OSD menu mode..
6. EXIT button - Press it to exit the menu.
7. BUILT-IN SPEAKER
8. TFT Display
SIDE VIEW
9. POWER SWITCH
10.12V DC IN JACK
11. AV IN JACK - Connect DVD or other external
AV equipment to this jack to use the monitor.
12. PHONE JACK - Connect headphone to this
jack for private listening.
13. VOLUME - Rotate this knob to adjust the
volume lower or louder.
14. POWER INDICATOR / STANDBY INDICATOR - It is green in working mode, it is red in standby
mode.
BACK VIEW
15. Stand Holder - Pull the back bracket out, you can support and place the player levelly on the stage.
8

REMOTE CONTROL FOR MONITOR UNIT
9
1. STANDBY button - Press it to set the monitor in standby
mode; press it again to set the unit in working mode.
2. MENU button - Press it to enter OSD menu control page.
3. LEFT button - Press it to move left to reduce the level
of different OSD item in OSD menu mode.
4. UP button - Press it to select up item in OSD menu page.
5. RIGHT button - Press it to move right to adjust the level
of different OSD item higher in OSD menu mode.
6. DOWN button - Press it to select down item in OSD
menu page.
NOTE: Point the remote control from no more
than 6 m from the monitor and within about 60°
of monitor.
2. Connecting to AC power source
3. Connecting to DVD player

NOTE: The remote control is also effective to the monitor during playing.
zIt is recommended to connect a multi-system TV.
zDisconnect the AC adaptor before commencing connection.
zDo not block ventilation holes of equipment and arrange them so that air can circulate freely.
zRead through the instructions before connecting other equipment.
zEnsure that you observe the color coding when connecting audio and video cables.
Note:
During DVD play, the TV volume may be at a lower level than during TV broadcasts, etc. If this is the
case, adjust the volume to the desired level. If the DVD/VCD/CD player is connected to the TV through
a video cassette recorder, the picture may not be played back normally with some DVDs. If this is the
case, do not connect the player via the VCR.
Connecting to TV set
10

Connecting to audio equipment
Connect Headphones
1. Connect the Headphones.
- Adjust the volume to minimize the volume.
- Connect the headphones to phone jack.
2. Adjust the Volume to the level that you want.
11

Remote control preparation
Battery installation
12
Insert the batteries while observing the correct
(+) and (-) polarities as illustrated at right.
Service life of batteries
zThe batteries normally last for about one
year although this depends on how often,
and for what operations, the remote
control is used.
zIf the remote control fails to work even
when it is operated near the player, replace
the batteries.
zUse one type CR2025 battery.
NOTE:
zDo not use rechargeable (Ni-Cd) battery.
zDo not attempt to recharge, short-circuit,
disassemble, heat or throw the batteries
into the fire.
zDo not drop, step on or otherwise impact
the remote control . This may damage the
parts or lead to malfunction.
zIf the remote control is not going to be
used for a long time, remove the battery
Remote control operation range
Point the remote control from no more than
about 6 m from the remote control sensor and
within about 60° of the front of the player.
zThe operating distance may vary according to
the brightness of the room.
NOTE:
zDo not point bright lights at remote control sensor.
zDo not place objects between the remote
control and the remote control sensor.
zDo not use this remote control unit while
simultaneously operating the remote control
of any other equipment.

Before enjoying DVD/Video CD/CD
The on-screen menu language of your player
has been factory pre-set to English. If you
want to change the menu language to other
language, please refer to "Initial settings /
General setup / OSD LANGUAGE". In the
explanation below it is assumed that English
has been selected as menu language.
Basic play
1. Switch on the POWER to the “ON” position
at the right side of the player to turn on the
player.
NOTE: 1).Make sure that all the connections
including connections to AC adapter, other
AV equipment etc. have been done before
switch the POWER switch to the "ON" position.
2).After switch the POWER switch to
the "OFF" position, if you want to switch it to the
"ON" position again, you should wait at least 2
seconds, otherwise some abnormal
phenomenon may appear, in this case, please
turn the unit off then turn it on, it will work
normally again.
2. Push the disc cover up to open it.
3. Place a disc onto the disc compartment. Hold the disc without touching either of its surfaces, position
it with the printed title side facing up, align it with the guides, and place It in its proper position.
4. After closing the disc cover, play begins. The player starts to read the disc immediately.
5. When a menu screen appears on the screen, move navigation buttons or press the numeric
buttons to select preferred chapter number, then press ENTER button to play the chapter.
6. Press PREV or NEXT button to play the previous or next chapter.
7. To stop play and return to the menu screen, press TITLE button or MENU button.
13

Stopping play
Press the STOP button to stop playing a disc.
NOTE: When player is stopped, the player
records the point where STOP was pressed
(RESUME function). Press the PLAY/PAUSE
button again, playback will resume from this
point . When the disc door is opened or the
STOP button is pressed again, the RESUME
function will be cleared.
Skipping ahead or back
Skipping ahead
Press NEXT button during play
A chapter (DVD) or a track (Video CD/CD) is
skipped each time the button is pressed.
Skipping back
Press PREV button during play
A chapter(DVD) or a track (Video CD/CD) is
skipped each time the button is pressed.
Fast forward or backward
During playback, press FF button or FR button to fast forward/rewind.
Press PLAY/PAUSE button to resume normal play.
Pause or play
During playback, press PLAY/PAUSE button, the play will be paused, To resume normal play,
press the PLAY/PAUSE button again.
14

Slow-motion play (DVD/VCD)
Press the SLOW button on the remote control
15
during playback.
1) Plays the disc at a 1/2 of normal speed at
first. Each time the button is pressed, the
play Speed becomes 1/2,1/4,1/8,1/16.
2) Press the PLAY/PAUSE button to resume
to normal play.
MP3 playback
1. Insert the disc containing the files in Mp3
format to be played and after a few seconds,
the screen of the monitor will show all the
folders on the disc:
2. Select the folder you want to play by the
navigation buttons and press the ENTER
button to confirm.
3. The files in this folder are displayed and
select the desired song by navigation buttons,
then press the PLAY button to start playback.
Current file type
4. Press the PREV or NEXT button to turn the current menu page to the previous or next menu page.
5. Press REPEAT button to change play mode.
- SHUFFLE: All the files will be randomly sorted and played by the order.
- RANDOM : randomly select any file to play.
- SINGLE: play one file only.
- REPEAT ONE: repeat one file.
- REPEAT FOLDER: all the files in the folder will be played repeatedly.
- FOLDER: all the files in the folder will be played

MP4 playback
1. Insert the disc containing the files in Mp4
format to be played and after a few seconds,
the screen of the monitor will show all the
folders on the disc:
2. Select the folder you want to play by the
navigation buttons and press the ENTER
button to confirm.
3. The files in this folder are displayed and
select the desired file by navigation buttons,
then press the PLAY/PAUSE button to start
playback.
4. Press the NEXT or PREV button play the next or previous file.
5. Press the GO TO button to play the disc from the certain point as you want to.
6. Press the DISP button to display the playing information, the time remain, the time elapsed
and so on.
7. Press REPEAT button to change play mode.
-SHUFFLE:All the files will be randomly sorted and played by the order.
-RANDOM : randomly select any file to play.
-SINGLE: play one file only.
-REPEAT ONE: repeat one file.
-REPEAT FOLDER: all the files in the folder will be played repeatedly.
-FOLDER: all the files in the folder will be played
16

JPEG CD
zFor JPEG picture CD, select the folder Flipping pictures
zPress UP navigation button to flip the
picture vertically.
zPress DOWN navigation button to flip
the picture horizontally.
Picture Shrink/Zoom
zPress ZOOM button to enter the zoom
mode
zPress FF button to enlarge picture to
100%, 125%, 150% and 200%
zPress FR button to shrink pictures to
50%, 75%, and 100%
If the picture is enlarged, you may press
navigation buttons to see other portions
of the picture.
you want to play by the navigation buttons
and press ENTER button to confirm.
zThe files in this folder are displayed and
select your pictures by using the up/down
navigation buttons and press ENTER button
to start playback. Thumbnail of picture will
be displayed while you scrolling across the
file name.
zOnce a folder and file is selected, the
picture is loaded onto the screen.
NOTE: The time to load and display picture
depends on the file size of the pictures.
zDuring playback, press MENU button to
return to folder selection or STOP button to
enter preview mode.
zPress REPEAT button to change play
mode:
- SHUFFLE: All the files will be randomly
sorted and play by the order.
- RANDOM: randomly select any file to play.
- SINGLE: play one file only.
- REPEAT ONE: repeat one file.
- REPEATALL: all the files in the folder
will be played repeatedly.
- FOLDER OFF: cancel repeat mode.
Skip to next/previous picture
zPress NEXT button to skip to the next picture
or PREV button to skip to the previous picture.
If no key is pressed for 5 seconds, it will skip
to next picture automatically.
Rotating pictures
zPress RIGHT navigation button to rotate
the picture clockwise.
zPress LEFT navigation button to rotate
the picture counter-clockwise.
17

JPEG CD
Slide show effects
Press PROGRAM button to select one of the effects
when changing from one picture to another :
1 Wipe Top
2 Wipe Bottom
3 Wipe Left
4 Wipe Right
5 Diagonal Wipe Left Top
6 Diagonal Wipe Right Top
7 Diagonal Wipe Left Bottom
8 Diagonal Wipe Right Bottom
9 Extend From Centre H
10 Extend From Centre V
11 Compress To Center H
12 Compress To Center V
13 Window H
14 Window V
15 Wipe From Edge To Centre
16 Move In Form Top
17 None
Enjoying Video CD with
playback control
1. When playing VCD 2.0 with PBC, the player
will show the VCD version and PBC status on
the screen.
2. After a few seconds, a menu will appear on
the screen.
3. Press numeric buttons to select corresponding track, if the track number is under 10, choose one of
the numeric buttons 0 ~ 9.If the track number is exceed 10, press 10+ button firstly, then press numeric
buttons 0 ~ 9.
4. Press NEXT or PREV button to play the next or previous track.
NOTE: When PBC is OFF, there will be no menu page on the screen, you can select any track to
play by using numeric buttons. When PBC is ON, there will be a menu page on the screen,
and you can select any track on the menu to play, however, when the selected track is being
played, you can not change the play order any more except pressing the MENU button to return
to the menu page again and select another track to play.
18

USB Playback
1. Insert USB containing the files in
VCD/SVCD/DVD/MP3/WMA/MP4/JPEG /CD
format to be played.
2.Press USB/CARD/DVD button to switch the
unit in USB reader mode. Then the screen will
display as following:
3. After several seconds, all the folders in the
USB will display on monitor screen:
4. Select a folder you want to play using the
navigation buttons and press the ENTER button to confirm.
5. The files in this folder are displayed and select the desired file by navigation buttons, then press the
ENTER button to start playback.
6. Press NEXT or PREV button to turn the current menu page to the next or previous menu page.
7. Press REPEAT button to set repeat playing mode.
- SHUFFLE:All the files will be randomly sorted and played by the order.
- RANDOM : randomly select any file to play.
- SINGLE: play one file only.
- REPEAT ONE: repeat one file.
- REPEAT FOLDER: all the files in the folder will be played repeatedly.
19
- FOLDER: all the files in the folder will be played
Table of contents
Other LENCO Portable DVD Player manuals

LENCO
LENCO MES-204 User manual

LENCO
LENCO DVP-840 User manual

LENCO
LENCO MES-212 User manual

LENCO
LENCO DVP-931 User manual

LENCO
LENCO DVP-734 User manual

LENCO
LENCO DVP-1040 User manual

LENCO
LENCO DVP-1034 User manual

LENCO
LENCO DVP-9413 User manual

LENCO
LENCO DVP-940 User manual

LENCO
LENCO DVP-846 User manual

LENCO
LENCO DVP-935 User manual

LENCO
LENCO DVP-928 User manual

LENCO
LENCO DVP-847 User manual

LENCO
LENCO DVP-1045 User manual

LENCO
LENCO DVP-937 User manual

LENCO
LENCO MES-224 User manual

LENCO
LENCO TFT-726 User manual

LENCO
LENCO MES-202 User manual

LENCO
LENCO DVR-70 User manual

LENCO
LENCO DVP-1040 User manual