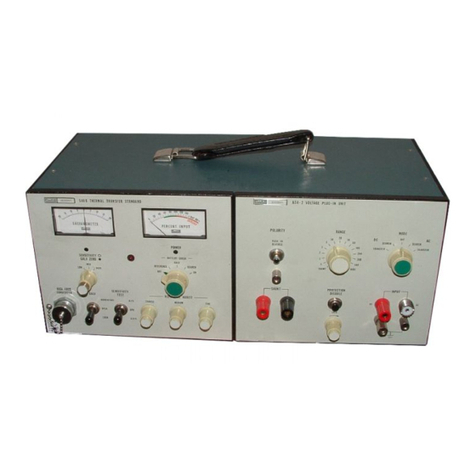
Fluke 7038 User manual

7037/ 7038/ 7040/7041
Calibration Bath
User's Guide
PN 3720842
October 2014
© 2014 Fluke Corporation. All rights reserved. Specifications are subject to change without
notice. All product names are trademarks of their respective companies.

Rev11/99
LIMITED WARRANTY AND LIMITATION OF LIABILITY
Each Fluke product is warranted to be free from defects in material and workmanship under normal use and
service. The warranty period is one year and begins on the date of shipment. Parts, product repairs, and
services are warranted for 90 days. This warranty extends only to the original buyer or end-user customer of
a Fluke authorized reseller, and does not apply to fuses, disposable batteries, or to any product which, in
Fluke's opinion, has been misused, altered, neglected, contaminated, or damaged by accident or abnormal
conditions of operation or handling. Fluke warrants that software will operate substantially in accordance
with its functional specifications for 90 days and that it has been properly recorded on non-defective media.
Fluke does not warrant that software will be error free or operate without interruption.
Fluke authorized resellers shall extend this warranty on new and unused products to end-user customers
only but have no authority to extend a greater or different warranty on behalf of Fluke. Warranty support is
available only if product is purchased through a Fluke authorized sales outlet or Buyer has paid the
applicable international price. Fluke reserves the right to invoice Buyer for importation costs of
repair/replacement parts when product purchased in one country is submitted for repair in another country.
Fluke's warranty obligation is limited, at Fluke's option, to refund of the purchase price, free of charge repair,
or replacement of a defective product which is returned to a Fluke authorized service center within the
warranty period.
To obtain warranty service, contact your nearest Fluke authorized service center to obtain return
authorization information, then send the product to that service center, with a description of the difficulty,
postage and insurance prepaid (FOB Destination). Fluke assumes no risk for damage in transit. Following
warranty repair, the product will be returned to Buyer, transportation prepaid (FOB Destination). If Fluke
determines that failure was caused by neglect, misuse, contamination, alteration, accident, or abnormal
condition of operation or handling, including overvoltage failures caused by use outside the product’s
specified rating, or normal wear and tear of mechanical components, Fluke will provide an estimate of repair
costs and obtain authorization before commencing the work. Following repair, the product will be returned to
the Buyer transportation prepaid and the Buyer will be billed for the repair and return transportation charges
(FOB Shipping Point).
THIS WARRANTY IS BUYER'S SOLE AND EXCLUSIVE REMEDY AND IS IN LIEU OF ALL OTHER
WARRANTIES, EXPRESS OR IMPLIED, INCLUDING BUT NOT LIMITED TO ANY IMPLIED WARRANTY
OF MERCHANTABILITY OR FITNESS FOR A PARTICULAR PURPOSE. FLUKE SHALL NOT BE LIABLE
FOR ANY SPECIAL, INDIRECT, INCIDENTAL, OR CONSEQUENTIAL DAMAGES OR LOSSES,
INCLUDING LOSS OF DATA, ARISING FROM ANY CAUSE OR THEORY.
Since some countries or states do not allow limitation of the term of an implied warranty, or exclusion or
limitation of incidental or consequential damages, the limitations and exclusions of this warranty may not
apply to every buyer. If any provision of this Warranty is held invalid or unenforceable by a court or other
decision-maker of competent jurisdiction, such holding will not affect the validity or enforceability of any other
provision.
Fluke Corporation
P.O. Box 9090
Everett, WA 98206-9090
U.S.A.
Fluke Europe B.V.
P.O. Box 1186
5602 BD Eindhoven
The Netherlands
11/99
To register your product online, visit register.fluke.com

Table of Contents
1 Before You Start . . . . . . . . . . . . . . . . . . . . . . . . . . 1
1.1 Symbols Used . . . . . . . . . . . . . . . . . . . . . . . . . . . . 1
1.2 Safety Information . . . . . . . . . . . . . . . . . . . . . . . . . . 2
1.2.1 WARNINGS . . . . . . . . . . . . . . . . . . . . . . . . . . . . . . . . . . . 2
1.2.2 CAUTIONS . . . . . . . . . . . . . . . . . . . . . . . . . . . . . . . . . . . 4
1.3 Authorized Service Centers. . . . . . . . . . . . . . . . . . . . . . 5
2 Introduction . . . . . . . . . . . . . . . . . . . . . . . . . . . . 9
3 Specifications and Warranty. . . . . . . . . . . . . . . . . . . 11
3.1 Specifications . . . . . . . . . . . . . . . . . . . . . . . . . . . . 11
3.2 Environmental Conditions. . . . . . . . . . . . . . . . . . . . . . 12
4 Quick Start . . . . . . . . . . . . . . . . . . . . . . . . . . . . 13
4.1 Unpacking . . . . . . . . . . . . . . . . . . . . . . . . . . . . . . 13
4.2 Set Up . . . . . . . . . . . . . . . . . . . . . . . . . . . . . . . . 13
4.3 Power . . . . . . . . . . . . . . . . . . . . . . . . . . . . . . . . 14
4.4 Setting the Temperature . . . . . . . . . . . . . . . . . . . . . . . 14
5 Installation . . . . . . . . . . . . . . . . . . . . . . . . . . . . 17
5.1 Bath Environment . . . . . . . . . . . . . . . . . . . . . . . . . . 17
5.2 “Dry-out” Period . . . . . . . . . . . . . . . . . . . . . . . . . . 17
5.3 Bath Preparation and Filling . . . . . . . . . . . . . . . . . . . . 17
5.4 Probe . . . . . . . . . . . . . . . . . . . . . . . . . . . . . . . . 18
5.5 Power . . . . . . . . . . . . . . . . . . . . . . . . . . . . . . . . 18
6 Bath Use . . . . . . . . . . . . . . . . . . . . . . . . . . . . . 19
6.1 General . . . . . . . . . . . . . . . . . . . . . . . . . . . . . . . 19
6.2 Comparison Calibration . . . . . . . . . . . . . . . . . . . . . . . 19
6.3 Calibration of Multiple Probes . . . . . . . . . . . . . . . . . . . 20
7 Parts and Controls . . . . . . . . . . . . . . . . . . . . . . . . 21
7.1 Front Control Panel . . . . . . . . . . . . . . . . . . . . . . . . . 21
7.2 Side Panel . . . . . . . . . . . . . . . . . . . . . . . . . . . . . . 22
7.3 Back Panel. . . . . . . . . . . . . . . . . . . . . . . . . . . . . . 23
7.4 Bath Tank and Lid . . . . . . . . . . . . . . . . . . . . . . . . . . 25
i

8 General Operation . . . . . . . . . . . . . . . . . . . . . . . . 27
8.1 Bath Fluid . . . . . . . . . . . . . . . . . . . . . . . . . . . . . . 27
8.1.1 Temperature Range . . . . . . . . . . . . . . . . . . . . . . . . . . . . . . . 27
8.1.2 Viscosity. . . . . . . . . . . . . . . . . . . . . . . . . . . . . . . . . . . . . 27
8.1.3 Specific Heat . . . . . . . . . . . . . . . . . . . . . . . . . . . . . . . . . . 27
8.1.4 Thermal Conductivity . . . . . . . . . . . . . . . . . . . . . . . . . . . . . . 28
8.1.5 Thermal Expansion . . . . . . . . . . . . . . . . . . . . . . . . . . . . . . . 28
8.1.6 Electrical Resistivity . . . . . . . . . . . . . . . . . . . . . . . . . . . . . . 28
8.1.7 Fluid Lifetime . . . . . . . . . . . . . . . . . . . . . . . . . . . . . . . . . . 28
8.1.8 Safety . . . . . . . . . . . . . . . . . . . . . . . . . . . . . . . . . . . . . . 28
8.1.9 Cost . . . . . . . . . . . . . . . . . . . . . . . . . . . . . . . . . . . . . . . 29
8.1.10 Commonly Used Fluids. . . . . . . . . . . . . . . . . . . . . . . . . . . . . 29
8.1.10.1 Water . . . . . . . . . . . . . . . . . . . . . . . . . . . . . . . . . . . . . . . . . . 29
8.1.10.2 Ethylene Glycol . . . . . . . . . . . . . . . . . . . . . . . . . . . . . . . . . . . . . 29
8.1.10.3 Methanol . . . . . . . . . . . . . . . . . . . . . . . . . . . . . . . . . . . . . . . . 29
8.1.10.4 Mineral Oil . . . . . . . . . . . . . . . . . . . . . . . . . . . . . . . . . . . . . . . 29
8.1.10.5 Silicone Oil . . . . . . . . . . . . . . . . . . . . . . . . . . . . . . . . . . . . . . . 30
8.1.11 Fluid Characteristics Charts. . . . . . . . . . . . . . . . . . . . . . . . . . . 30
8.1.11.1 Limitations and Disclaimer . . . . . . . . . . . . . . . . . . . . . . . . . . . . . . . 30
8.1.11.2 About the Graph . . . . . . . . . . . . . . . . . . . . . . . . . . . . . . . . . . . .30
8.2 Stirring . . . . . . . . . . . . . . . . . . . . . . . . . . . . . . . 33
8.3 Power . . . . . . . . . . . . . . . . . . . . . . . . . . . . . . . . 33
8.4 Heater . . . . . . . . . . . . . . . . . . . . . . . . . . . . . . . . 33
8.5 Cooling . . . . . . . . . . . . . . . . . . . . . . . . . . . . . . . 34
8.6 Temperature Controller . . . . . . . . . . . . . . . . . . . . . . . 34
9 Controller Operation . . . . . . . . . . . . . . . . . . . . . . . 37
9.1 Bath Temperature . . . . . . . . . . . . . . . . . . . . . . . . . . 37
9.2 Reset cutout . . . . . . . . . . . . . . . . . . . . . . . . . . . . . 37
9.3 Temperature Set-point . . . . . . . . . . . . . . . . . . . . . . . . 39
9.3.1 Programmable Set-points . . . . . . . . . . . . . . . . . . . . . . . . . . . . 39
9.3.2 Set-point Value . . . . . . . . . . . . . . . . . . . . . . . . . . . . . . . . . 40
9.3.3 Set-point Vernier . . . . . . . . . . . . . . . . . . . . . . . . . . . . . . . . 40
9.4 Temperature Scale Units . . . . . . . . . . . . . . . . . . . . . . 41
9.5 Secondary Menu. . . . . . . . . . . . . . . . . . . . . . . . . . . 41
9.6 Heater Power . . . . . . . . . . . . . . . . . . . . . . . . . . . . 42
9.7 Proportional Band . . . . . . . . . . . . . . . . . . . . . . . . . . 42
9.8 Cutout . . . . . . . . . . . . . . . . . . . . . . . . . . . . . . . . 44
9.9 Controller Configuration . . . . . . . . . . . . . . . . . . . . . . 45
9.10 Probe Parameters . . . . . . . . . . . . . . . . . . . . . . . . . . 45
9.10.1 R0 . . . . . . . . . . . . . . . . . . . . . . . . . . . . . . . . . . . . . . . . 46
9.10.2 ALPHA . . . . . . . . . . . . . . . . . . . . . . . . . . . . . . . . . . . . . 46
9.11 Operating Parameters . . . . . . . . . . . . . . . . . . . . . . . . 46
9.11.1 Cutout Reset Mode . . . . . . . . . . . . . . . . . . . . . . . . . . . . . . . 46
9.12 Serial Interface Parameters . . . . . . . . . . . . . . . . . . . . . 47
ii

9.12.1 Baud Rate . . . . . . . . . . . . . . . . . . . . . . . . . . . . . . . . . . . . 47
9.12.2 Sample Period. . . . . . . . . . . . . . . . . . . . . . . . . . . . . . . . . . 47
9.12.3 Duplex Mode . . . . . . . . . . . . . . . . . . . . . . . . . . . . . . . . . . 48
9.12.4 Linefeed . . . . . . . . . . . . . . . . . . . . . . . . . . . . . . . . . . . . . 48
9.13 IEEE-488 Parameters . . . . . . . . . . . . . . . . . . . . . . . . 49
9.13.1 IEEE-488 Address . . . . . . . . . . . . . . . . . . . . . . . . . . . . . . . 49
9.14 Calibration Parameters . . . . . . . . . . . . . . . . . . . . . . . 49
9.14.1 CTO . . . . . . . . . . . . . . . . . . . . . . . . . . . . . . . . . . . . . . . 50
9.14.2 BO and BG . . . . . . . . . . . . . . . . . . . . . . . . . . . . . . . . . . . 50
9.14.3 H and L . . . . . . . . . . . . . . . . . . . . . . . . . . . . . . . . . . . . . 50
10 Digital Communication Interface . . . . . . . . . . . . . . . . 51
10.1 Serial Communications . . . . . . . . . . . . . . . . . . . . . . . 51
10.1.1 Wiring . . . . . . . . . . . . . . . . . . . . . . . . . . . . . . . . . . . . . . 51
10.1.2 Setup . . . . . . . . . . . . . . . . . . . . . . . . . . . . . . . . . . . . . . 51
10.1.2.1 Baud Rate . . . . . . . . . . . . . . . . . . . . . . . . . . . . . . . . . . . . . . . . 52
10.1.2.2 Sample Period. . . . . . . . . . . . . . . . . . . . . . . . . . . . . . . . . . . . . . 52
10.1.2.3 Duplex Mode . . . . . . . . . . . . . . . . . . . . . . . . . . . . . . . . . . . . . . 52
10.1.2.4 Linefeed . . . . . . . . . . . . . . . . . . . . . . . . . . . . . . . . . . . . . . . . . 52
10.1.3 Serial Operation . . . . . . . . . . . . . . . . . . . . . . . . . . . . . . . . . 52
10.2 IEEE-488 Communication (optional) . . . . . . . . . . . . . . . . 53
10.2.1 Setup . . . . . . . . . . . . . . . . . . . . . . . . . . . . . . . . . . . . . . 53
10.2.1.1 IEEE-488 Interface Address . . . . . . . . . . . . . . . . . . . . . . . . . . . . . . 53
10.2.2 IEEE-488 Operation . . . . . . . . . . . . . . . . . . . . . . . . . . . . . . 53
10.3 Interface Commands . . . . . . . . . . . . . . . . . . . . . . . . 53
10.4 Power Control Functions . . . . . . . . . . . . . . . . . . . . . . 56
10.4.1 Heater Control . . . . . . . . . . . . . . . . . . . . . . . . . . . . . . . . . 57
10.4.2 Cooling Control . . . . . . . . . . . . . . . . . . . . . . . . . . . . . . . . . 57
10.4.3 Full Remote Operation . . . . . . . . . . . . . . . . . . . . . . . . . . . . . 58
11 Calibration Procedure . . . . . . . . . . . . . . . . . . . . . . 59
11.1 Calibration Points . . . . . . . . . . . . . . . . . . . . . . . . . . 59
11.2 Measuring the Set-point Error. . . . . . . . . . . . . . . . . . . . 59
11.3 Computing R0and ALPHA . . . . . . . . . . . . . . . . . . . . . 59
11.4 Calibration Example. . . . . . . . . . . . . . . . . . . . . . . . . 60
12 Maintenance . . . . . . . . . . . . . . . . . . . . . . . . . . . 63
13 Troubleshooting. . . . . . . . . . . . . . . . . . . . . . . . . . 65
13.1 Troubleshooting . . . . . . . . . . . . . . . . . . . . . . . . . . . 65
13.2 Comments . . . . . . . . . . . . . . . . . . . . . . . . . . . . . . 67
13.2.1 EMC Directive . . . . . . . . . . . . . . . . . . . . . . . . . . . . . . . . . 67
13.2.2 Low Voltage Directive (Safety) . . . . . . . . . . . . . . . . . . . . . . . . . 68
iii

iv
Figures and Tables
Figure 1 Bath Assembly . . . . . . . . . . . . . . . . . . . . . . . . . . . . . . 9
Figure 2 Front Panel . . . . . . . . . . . . . . . . . . . . . . . . . . . . . . . . 21
Figure 3 Refrigeration Side Panel Controls . . . . . . . . . . . . . . . . . . . . 22
Figure 4 Back Panel . . . . . . . . . . . . . . . . . . . . . . . . . . . . . . . . 24
Figure 5 Drain Location and Lid Options . . . . . . . . . . . . . . . . . . . . . 26
Table 2 Table of various bath fluids and their properties . . . . . . . . . . . . . 31
Figure 6 Chart of various bath fluids and their properties . . . . . . . . . . . . . 32
Figure 7 Controller Operation Flow Chart. . . . . . . . . . . . . . . . . . . . . 38
Figure 8 Bath temperature fluctuation at various proportional band settings . . . 43
Table 3 Proportional Band — Fluid Table . . . . . . . . . . . . . . . . . . . . 43
Figure 9 Serial Cable Wiring . . . . . . . . . . . . . . . . . . . . . . . . . . . 51
Table 4 Interface Command Summary . . . . . . . . . . . . . . . . . . . . . . 54
Table 4 Interface Command Summary continued . . . . . . . . . . . . . . . . 55
Table 4 Interface Command Summary continued . . . . . . . . . . . . . . . . 56
Table 5 Serial Power Control Functions . . . . . . . . . . . . . . . . . . . . . 57
Table 6 Remote Operation Ranges and Settings . . . . . . . . . . . . . . . . . 58
Figure 10 Calibration Example . . . . . . . . . . . . . . . . . . . . . . . . . . . 61

1 Before You Start
1.1 Symbols Used
Table 1 lists the International Electrical Symbols. Some or all of these symbols
may be used on the instrument or in this manual.
Symbol Description
AC (Alternating Current)
AC-DC
Battery
CE Complies with European Union Directives
DC
Double Insulated
Electric Shock
Fuse
PE Ground
Hot Surface (Burn Hazard)
Read the User’s Manual (Important Information)
Off
On
1
1 Before You Start
Symbols Used
Table 1 International Electrical Symbols

Symbol Description
Canadian Standards Association
OVERVOLTAGE (Installation) CATEGORY II, Pollution Degree 2 per IEC1010-1 re-
fers to the level of Impulse Withstand Voltage protection provided. Equipment of
OVERVOLTAGE CATEGORY II is energy-consuming equipment to be supplied from
the fixed installation. Examples include household, office, and laboratory appliances.
C-TIC Australian EMC Mark
The European Waste Electrical and Electronic Equipment (WEEE) Directive
(2002/96/EC) mark.
1.2 Safety Information
Use this instrument only as specified in this manual. Otherwise, the protection
provided by the instrument may be impaired. Refer to the safety information in
Table 2.
The following definitions apply to the terms “Warning” and “Caution”.
•“WARNING” identifies conditions and actions that may pose hazards to
the user.
•“CAUTION” identifies conditions and actions that may damage the in-
strument being used.
1.2.1 WARNINGS
To avoid possible electrical shock or personal injury, follow these guidelines.
GENERAL
DO NOT use the instrument for any application other than calibration work.
The instrument was designed for temperature calibration. Any other use of the
instrument may cause unknown hazards to the user.
DO NOT use the instrument in environments other than those listed in the
user’s guide.
DO NOT overfill the bath. Overflowing extremely cold or hot fluid may be
harmful to the operator. See section 5.3, Bath Preparation and Filling, for spe-
cific instructions.
Follow all safety guidelines listed in the user’s manual.
Calibration Equipment should only be used by Trained Personnel.
If this equipment is used in a manner not specified by the manufacturer, the
protection provided by the equipment may be impaired.
7037/7038/7040/7041 Calibration Bath
User’s Guide
2

Before initial use, or after transport, or after storage in humid or semi-humid
environments, or anytime the instrument has not been energized for more than
10 days, the instrument needs to be energized for a “dry-out” period of 2 hours
before it can be assumed to meet all of the safety requirements of the IEC
61010-1. If the product is wet or has been in a wet environment, take necessary
measures to remove moisture prior to applying power such as storage in a low
humidity temperature chamber operating at 50°C for 4 hours or more.
DO NOT operate high temperature baths (500°C) near flammable materials.
Extreme temperatures could ignite the flammable material.
Overhead clearance is required. Do not place the instrument under a cabinet or
other structure. Always leave enough clearance to allow for safe and easy inser-
tion and removal of probes.
The instrument is intended for indoor use only.
The bath is a precision instrument. Although it has been designed for optimum
durability and trouble free operation, it must be handled with care. This bath is
not designed to be portable. Therefore, moving the bath once it has been in-
stalled should be kept to a minimum. Position the bath before the tank is filled
with fluid. DO NOT attempt to lift the bath. Due to the weight of the compres-
sor, it may require four people to safely move the bath. The area containing the
compressor will be heavier than the rest of the bath.
DO NOT move a bath filled with fluid. This action could be extremely danger-
ous and could result in personal injury to the person moving the bath. The fluid
can splash causing injury or if the bath and cart tip, the fluid could cause dam-
age to the surrounding area and personal injury to personnel.
BURN HAZARD
Extremely cold temperatures may be present in this equipment. Freezer burns
and frostbite may result if personnel fail to observe safety precautions.
High temperatures may be present in this equipment. Fires and severe burns
may result if personnel fail to observe safety precautions.
ELECTRICAL HAZARD
These guidelines must be followed to ensure that the safety mechanisms in this
instrument will operate properly. This mains supply for the instrument must be
capable of the power requirements for the instrument as listed in Section 3.1,
Specifications. The power cord of the instrument is equipped with a
three-pronged grounding plug for your protection against electrical shock haz-
ards. It must be plugged directly into a properly grounded three-prong recepta-
cle. The receptacle must be installed in accordance with local codes and
ordinances. Consult a qualified electrician.
DO NOT use an extension cord or adapter plug.
3
1 Before You Start
Safety Information

DO use a ground fault interrupt device. This instrument contains a fluid. A
ground fault device is advised in case fluid is present in the electrical system
and could cause an electrical shock.
Always replace the power cord with an approved cord of the correct rating and
type. If you have questions, contact a Authorized Service Center (see section
1.3).
High voltage is used in the operation of this equipment. Severe injury or death
may result if personnel fail to observe the safety precautions. Before working
inside the equipment, turn off the power and disconnect the power cord.
BATH FLUIDS
Fluids used in this bath may produce noxious or toxic fumes under certain cir-
cumstances. Consult the fluid manufacturer’s MSDS (Material Safety Data
Sheet). Proper ventilation and safety precautions must be observed.
The instrument is equipped with a soft cutout (user settable firmware) and a
hard cutout (set at the factory). Check the flash point, boiling point, or other
fluid characteristic applicable to the circumstances of the bath operation. En-
sure that the soft cutout is adjusted to the fluid characteristics of the applica-
tion. As a guideline, the soft cutout should be set 10°C to 15°C below the flash
point of the bath fluid. See section 8.1, Bath Fluid, for specific information on
bath fluids and section 9.8, Cutout.
1.2.2 CAUTIONS
Always operate the instrument in room temperatures listed in section 3.2, En-
vironmental Conditions. Allow sufficient air circulation by leaving at least 15
cm (6 inches) of clearance around the instrument.
DO NOT overfill the bath. Overflowing fluid may damage the electrical sys-
tem. See section 5.3, Bath Preparation and Filling, for specific instructions.
Read section 6, Bath Use, before placing the bath into service.
DO NOT turn the bath on without fluid in the tank.
DO NOT change the values of the bath calibration constants from the factory
set values. The correct setting of these parameters is important to the safety and
proper operation of the bath.
The refrigeration may be damaged or the lifetime shortened if the set-point
temperature is set above 60°C for more than one hour with the refrigeration
manually on. Ensure that the refrigeration is off when the bath is used above
60°C.
The Factory Reset Sequence should be performed only by authorized person-
nel if no other action is successful in correcting a malfunction. You must have a
copy of the most recent Report of Test to restore the test parameters.
DO NOT operate this instrument in an excessively wet, oily, dusty, or dirty
environment.
7037/7038/7040/7041 Calibration Bath
User’s Guide
4

Most probes have handle temperature limits. Be sure that the probe handle tem-
perature limit is not exceeded in the air above the instrument.
The instrument and any thermometer probes used with it are sensitive instru-
ments that can be easily damaged. Always handle these devices with care. Do
not allow them to be dropped, struck, stressed, or overheated.
COLD BATHS
Refrigerated baths require that the condensing coil be cleaned periodically. Ac-
cumulation of dust and dirt on the condenser will result in premature failure of
the compressor.
This bath has been equipped with a brownout and over voltage protection de-
vice as a safety feature to protect the system components.
Mode of Operation: This bath needs to be plugged into the line voltage for at
least 2 minutes before operation. This is only necessary for the first time the
bath is energized or when it is moved from one location to another. Turning the
bath ON or OFF does not trigger the delay.
If a High/Low voltage condition exists for longer than 5 seconds, the bath
de-energizes. An amber indicator on the back panel lights when this condition
exists.
Re-energization is automatic upon correction of the fault condition and after a
delay cycle of about 2 minutes. If a fault condition exists upon application of
power, the bath will not energize.
•Under and Over Voltage Protection at 115 VAC
♦Voltage Cutout: ±12.5% (101 - 129 VAC)
♦Voltage Cut In: ±7.5% (106 - 124 VAC)
•Under and Over Voltage Protection at 230 VAC
♦Voltage Cutout: ±12.5% (203 - 257 VAC)
♦Voltage Cut In: ±7.5% (213 - 247 VAC)
1.3 Authorized Service Centers
Please contact one of the following authorized Service Centers to coordinate
service on your Hart product:
Fluke Corporation, Hart Scientific Division
799 E. Utah Valley Drive
American Fork, UT 84003-9775
USA
Phone: +1.801.763.1600
5
1 Before You Start
Authorized Service Centers

Telefax: +1.801.763.1010
E-mail: [email protected]
Fluke Nederland B.V.
Customer Support Services
Science Park Eindhoven 5108
5692 EC Son
NETHERLANDS
Phone: +31-402-675300
Telefax: +31-402-675321
E-mail: [email protected]
Fluke Int'l Corporation
Service Center - Instrimpex
Room 2301 Sciteck Tower
22 Jianguomenwai Dajie
Chao Yang District
Beijing 100004, PRC
CHINA
Phone: +86-10-6-512-3436
Telefax: +86-10-6-512-3437
E-mail: [email protected]
Fluke South East Asia Pte Ltd.
Fluke ASEAN Regional Office
Service Center
60 Alexandra Terrace #03-16
The Comtech (Lobby D)
118502
SINGAPORE
Phone: +65 6799-5588
Telefax: +65 6799-5588
E-mail: [email protected]
When contacting these Service Centers for support, please have the following
information available:
7037/7038/7040/7041 Calibration Bath
User’s Guide
6

•Model Number
•Serial Number
•Voltage
•Complete description of the problem
7
1 Before You Start
Authorized Service Centers

2 Introduction
TheHartScientific Model7037/7038/7040/7041are verypreciseconstant tem-
peraturebaths. An innovative state of theartsolid-statetemperaturecontroller
hasbeenincorporated which maintains the bath temperature with extremesta-
bility. The controlleruses a microcontroller to executethe many operating
functions.
Userinterface is providedbythe 8-digit LEDdisplayand four key-switches.
Digital remote communications is optionally available with a RS-232 or
IEEE-488interface.
Thereare two lids available for the7037and7040baths; the standardlidwith a
rectangularaccessholeandanoptionallidwith a recirculationpump(seeFig-
ure5).
9
2 Introduction
Figure 1 Bath Assembly

3 Specifications and Warranty
3.1 Specifications
Specifications 7037 7038 7040 7041
Operating Range –40°C to 110°C –10°C to 110°C –40°C to 110°C
Stability ±0.002°C at –-40°C (ethanol)
±0.0015°C at 25°C (water)
±0.003°C at 100°C (oil 5012)
Uniformity ±0.004°C at –40°C (ethanol)
±0.002°C at 25°C (water)
±0.004°C at 100°C (oil 5012)
Temperature Setting Digital display with push-button data entry
Set-Point Resolution 0.01°C; high-resolution mode, 0.00007°C
Display Resolution 0.01°C
Digital Setting
Accuracy
±1.0°C
Digital Setting
Repeatability
±0.01°C
Heater Power 500 and 1000 Watts
Power 115 VAC (±10%), 60 Hz, 2000 W
230 VAC (±10%), 60 Hz, 2000 W
230 VAC (±10%), 50 Hz, 2000 W
Note: If voltage is outside ±10% VAC, the compressor may be damaged. Check the back panel label for
the correct voltage and frequency prior to energizing the instrument.
System Fuse 115 VAC: 20 A 250 V slow blow
230 VAC: 10 A 250 V slow blow
Heater Fuse 115 VAC: 10 A 250 V fast blow
230 VAC: 6 A 250 V fast blow
Work Area
(HxWxD)
45.7 x 29.2 x 16.2 cm
(18 x 11.5 x 6.375
inches)
45.7 x 25.4 x 12.7 cm
(18 x 10 x 5 inches)
30.5 x 25.4 x 12.7 cm
(12 x 10 x 5 inches)
33 x 32.4 x 18.4 cm
(13 x 12.75 x 7.25
inches)
Tank Capacity 41.6 liters (11 gal) 56.6 liters (14.9 gal) 26.5 liters (7 gal) 39.3 liters (10.4 gal)
Wetted Parts 304 stainless steel
Exterior Dimensions
(HxWxD)
77.5 x 76.8 x 48.3 cm
(30.5 x 30.25 x 19 inches)
62.2 x 76.8 x 48.3 cm
(24.5 x 30.25 x 19 inches)
Weight 68 kg (150 lbs) 63.5 kg (140 lbs)
Safety OVERVOLTAGE (Installation) CATEGORY II, Pollution Degree 2 per IEC61010-1
11
3 Specifications and Warranty
Specifications

3.2 Environmental Conditions
Although the instrument has been designed for optimum durability and trou-
ble-free operation, it must be handled with care. The instrument should not be
operated in an excessively dusty or dirty environment. Maintenance and clean-
ing recommendations can be found in the Maintenance Section of this manual.
The instrument operates safely under the following conditions:
•ambient temperature range: 5 - 50°C (41 - 122°F)
•ambient relative humidity: maximum 80% for temperature <31°C, de-
creasing linearly to 50% at 40°C
•pressure: 75kPa - 106kPa
•mains voltage within ± 10% of nominal
•vibrations in the calibration environment should be minimized
•altitude less than 2,000 meters
•indoor use only
7037/7038/7040/7041 Calibration Bath
User’s Guide
12

4 Quick Start
CAUTION: READ SECTION 6 ENTITLED “BATH USE” before placing
the bath in service. Incorrect handling can damage the bath and void the
warranty.
This section gives a brief summary of the steps required to set up and operate
the bath. This should be used as a general overview and reference and not as a
substitute for the remainder of the manual. Please read Sections 5 through 8
carefully before operating the bath.
4.1 Unpacking
Unpack the bath carefully and inspect it for any damage that may have oc-
curred during shipment. If there is shipping damage, notify the carrier
immediately.
Verify that all components are present:
•7037/7038/7040/7041 Bath
•Controller Probe
•Access Hole Cover
•User’s Guide
•Report of Test
•Drain Elbow
If you are missing any item, please contact an Authorized Service Center.
4.2 Set Up
Set up of the bath requires careful unpacking and placement of the bath, filling
the bath with fluid, installing the probe and connecting power. Consult Section
5 for detailed instructions for proper installation of the bath. Be sure to place
the bath in a safe, clean and level location.
Fill the bath tank with an appropriate liquid. For operation at moderate bath
temperatures, clean distilled water works well. Carefully pour the fluid into the
bath tank through the large rectangular access hole above the tank avoiding
spilling any fluid. The fluid must not exceed a height of 1/2 inch below the bath
lid.
The control probe must be inserted through the lid into the bath and plugged
into the socket at the back of the bath.
13
4 Quick Start
Unpacking

4.3 Power
Plug the bath power cord into a mains outlet of the proper voltage, frequency,
and current capability (see Section 3.1, Specifications). Refer to and read the
CAUTION at the front of the manual concerning brownout and over voltage
protection.
CAUTION: Check the back panel label for the correct voltage and fre-
quency prior to energizing the unit.
Set the “HEATER” switch on the front panel to position “LOW” and turn the
bath on using the front panel “POWER” switch. The bath will turn on and be-
gin to heat or cool to reach the previously programmed temperature set-point.
The front panel LED display will indicate the actual bath temperature.
4.4 Setting the Temperature
In the following discussion a solid box around the word SET, UP, EXIT or
DOWN indicates the panel button while the dotted box indicates the display
reading. Explanation of the button or display reading are to the right of each
button or display value.
To view or set the bath temperature set-point proceed as follows. The front
panel LED display normally shows the actual bath temperature.
24.68 C Bath temperature display
When “SET” is pressed the display shows the set-point memory that is cur-
rently being used and its value. Eight set-point memories are available.
SAccess set-point selection
1. 25.0 Set-point 1, 25.0°C currently used
Press “SET” to select this memory and access the set-point value.
SAccess set-point value
C 25.00 Current value of set-point 1, 25.00°C
Press “UP” or “DOWN” to change the set-point value.
UIncrement display
C 30.00 New set-point value
7037/7038/7040/7041 Calibration Bath
User’s Guide
14

Press “SET” to accept the new value and display the vernier value. The bath be-
gins heating or cooling to the new set-point.
SStore new set-point, access vernier
0.00000 Current vernier value
Press “EXIT” and the bath temperature will be displayed again.
EReturn to the temperature display
24.73 C Bath temperature display
The bath heats or cools until it reaches the new set-point temperature. Set the
heater switch to position “HIGH” to allow the bath to more quickly reach a
higher temperature. The “HIGH” setting may be necessary to reach higher tem-
peratures and control at high temperatures.
When setting the set-point temperature be careful not to exceed the temperature
limit of the bath fluid. The over-temperature cut-out should be correctly set to
prevent this from happening. See Section 9.8.
If operating the bath below 45°C set the COOLING power switch to ON. The
cooling temperature may require adjustment to provide the proper amount of
cooling. See Section 8.5.
To obtain optimum control stability adjust the proportional band as discussed in
Section 9.7.
15
4 Quick Start
Setting the Temperature

5 Installation
CAUTION: READ SECTION 6 ENTITLED “BATH USE” before placing
the bath in service. Incorrect handling can damage the bath and void the
warranty.
This bath is not designed to be portable. Therefore, moving the bath once it has
been installed should be kept to a minimum.
WARNING: Never move a bath that is full of fluid. This action could be
extremely dangerous and could result in personal injury to the person
moving the bath.
If the bath is going to be placed in an area where it will need to be moved fre-
quently, a special cart can be designed to accommodate the bath making the
bath much more portable. Hart sells carts designed for these baths. However,
even with a cart the bath should not be moved full of fluid. The fluid can
splash causing injury or if the bath and cart tip, the fluid could cause damage to
the surrounding area and personal injury to personnel.
If the bath must be moved, be sure to drain the fluid to prevent any injury. The
side of the bath with the compressor is heavier than the tank side. To safely
move the bath, two people are required.
5.1 Bath Environment
The bath is a precision instrument which should be located in an appropriate
environment. The location should be free of drafts, extreme temperatures and
temperature changes, dirt, etc. The surface where the bath is placed must be
level.
If used at higher temperatures where fluid vaporization is significant, a fume
hood should be used.
5.2 “Dry-out” Period
Before initial use, after transport, and any time the instrument has not been en-
ergized for more than 10 days, the bath will need to be energized for a
“dry-out” period of 1-2 hours before it can be assumed to meet all of the safety
requirements of the IEC 1010-1.
5.3 Bath Preparation and Filling
The bath is not provided with a fluid. Various fluids are available from Hart
Scientific and other sources. Depending on the desired temperature range, any
of the following fluids, as well as others, may be used in the bath:
17
5 Installation
Bath Environment
This manual suits for next models
3
Table of contents
Other Fluke Industrial Electrical manuals
Popular Industrial Electrical manuals by other brands

GE
GE THQ Series Homeowner & Installer Information

Murata
Murata GRM0225C1E820GA02 Series Reference sheet

Synergy
Synergy SwitchPak SPAK 4S/2D installation instructions

Murata
Murata GRM188R61C105MA93 Series Reference sheet

Eaton
Eaton XTCS250L Series Instruction leaflet

Murata
Murata GRT188R61H105ME13 Series Reference sheet