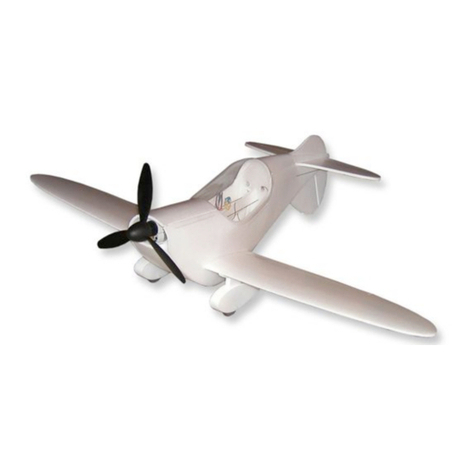
FoamFly FAT P-47 User manual

TM
c^q mJQT
Instruction Manual
Electric Foam Slowflyer with “Fat and Flat©” construction.
Designed By: Dan Schwartz
Available Exclusively from:
www.FoamFly.com
4077 WoodCreek Dr.
Ypsilanti MI. 48197
USA
© 2006 FoamFly.com
!


©2006 FoamFly.com 2
Thank You for purchasing the Fat P-47! Welcome to the world of
simple, durable foam flying machines. The Fat P-47 is sure to thrill, with its sleek
styling, and old-timer flair. This plane is suitable for beginners, but it is
recommended that new pilots get the help of an instructor to trim their plane, and
help with the first flights.
Almost anybody can fly the Fat P-47. It’s as easy to build, and more
durable than pre-fab planes that you might find at the hobby shop. But you build
this yourself. In addition to the well-earned pride, you’ll have a complete
understanding of the structure, and if it should ever need repair, you’ll be able to
do it yourself without costly replacement parts.
The “Fat and Flat©” Construction makes the plane quick and easy to
assemble. All the pieces are specially designed to interlock, and are computer
cut so that they fit perfectly every time.
Fat P-47 Specs:
•Wingspan: 30”
•Ready To Fly Weight 7-9 Oz.
•Motor: GWS EPS-300c (or CD-Rom, or Brushless)
•Propeller: 7”-9” (9x7 Recommended)
•Batteries: 2-cell 1200mAh Lithium Polymer, or 7 cell
450mAh NiMHs. Basically any 1.5 – 2.5 Oz
battery.
•Receiver: GWS R4P (4 Channel)
•Servos: GWS Pico BB (or Hitec HS-50)
•ESC: GWS ICS-300 (15-Amp Speed Control for
brushed setups)
Introduction:
FoamFly.com is more than just a hobby company. It’s a community too!
With pilots and designers from all over. Please take pictures of your P-47, and I’ll
put them in the photo gallery. Feel free to drop by and see what all the other
foam junkies have been building. There are free plans, and lots of tips and ideas
as well as unique new planes that you won’t find anywhere else.
NEW!! FoamFly kits are now easier to assemble. New techniques make all the
most tedious steps unnecessary.
Okay, you’ve got your P-47 kit in front of you, and you’re ready to cruise the
skies. Only problem: the plane is lying in pieces in front of you. Well we can
take care of that too. There are some techniques you’ll need to be familiar with
to make the most of your kit. I’ll refer to them as they’re needed, but the details
of those techniques will be in the Appendix at the end of this manual.
Let’s begin. Don’t let all the text in this manual scare you. Take each
step one at time, and you’ll find that everything is within your capabilities. Here
we go.

3
Identify all the parts:
You’ll need to know which part is which, unless you want to end up with the
flying equivalent of Frankenstein’s Monster. So, let’s start by taking a look at
what you’ve got here.
a) Foam Airplane Parts:
(1) Fuselage halves (Left and Right)
(2) Fuselage Center
(3) Horizontal Stabilizer
(4) Elevator
(5) Rudder
(6) Wings (2)
(7) Wing Support Ribs (6)
And of course even a foam plane needs a few odds and ends to tie
everything together. Take a few moments to inspect what you’ve got here.
As the items are called for you’ll get more info on their intended uses.
b) Non-Foam Parts:
i) Plastic Control Horns (Included)
ii) .032 Wire for Pushrods
iii) Wood for Motor Mounting (Depends on which motor type)
Let’s Begin:
1) Note: It is much easier to decorate the pieces BEFORE assembling them,
so think about your color scheme now. Also, if you’re thinking of adding
landing gear, it will be much simpler to do it during the assembly process
than afterwards. (See Appendix Section, “Landing Gear”)

©2006 FoamFly.com 4
2) Fuselage:
a) Lets start with the main
piece. It’s made up of 3
pieces. Now’s the time
to color in the windows.
Again, if you’re installing
landing gear, or want to
tuck the radio gear inside
the fuse, do it now. Don’t
attempt to line up the wing slots, they are deliberately offset. Line up
the outer edges instead. Glue the 3 layers together, contact cement is
preferred.
b) Motor Cutout:
i) This will vary greatly depending on what type of motor you’re
planning to use. But the two most basic types are geared motors
(brushless or not) and outrunners (always brushless).
ii) You may need to modify the mounting setup depending on your
setup, but templates for the most common mounts are included in
the appendix. Look everything over before cutting to ensure that
your motor will fit.
iii) Line up the motor mount template with the fuselage (A little
gluestick helps hold it in place while you’re working.) Cut the foam
along the marked line.
iv) For outrunner motors, you might also need to make a support for
the motor mount. If so, cut 4 small triangles from the scrap foam
and glue them in place alongside the motor cutout. Usually a circle
of plywood, or a couple of popsicle sticks makes a good mount.
Then mount your motor with a few tiny woodscrews.
v) The geared motors most often mount on a stick. 10mm square is
the usual size, but 3/8” will work just as well. The geared motor
template includes the outline for positioning just such a stick.
3) Wings:
a) Form the airfoil:
i) Make sure you end up with BOTH LEFT and RIGHT WINGS!!!
This is EXTREMELY important. The wing pieces are essentially
identical until you form the airfoil into them. So watch out, a plane
with two left wings doesn’t fly too well.

5
ii) Roll the wings into shape: (See the Appendix Section, “Rolling the
Foam”)
b) After the wing panels are formed, test fit the pieces. The airfoil should
be a good fit in the slot on the fuselage pod without forcing it. You can
bend the leading edge with finger and thumb if necessary.
c) Run strapping tape (the kind with the strings in it) along the leading and
trailing edge of the wing on the bottom.
4) Assembly:
a) Tape hinge the elevator in the center of the horizontal stabilizer, then
tape the rudder in place on the fuselage.

©2006 FoamFly.com 6
b) Put the horizontal stabilizer into the slot in the tail. Hot Glue Weld the
horizontal stabilizer into place. (See Appendix Section, “Hot Glue
Welding”)
c) Fit the wings into the fuselage. Put one wing into the slot until it is
halfway through. Get it positioned right, and hot glue weld it in place.
d) Get ready. Squeeze some hot glue into the wing slot from the other
side, and then put the opposite wing in place quickly. Align the two
wings to be even, and with the correct dihedral as shown, then Weld
them in place along the seam where they meet the fuse.
e) Install the servos.
i) Position the servos where they will have the easiest path to the
receiver and control surfaces. Cut a hole through the plane, insert
the servo and wire, and use the hot glue gun to “rivet” them in
place.

7
f) Glue the Control Horns into the Surfaces.
i) The Rudder Control Horn goes on the side of the rudders angled so
that it will point at the servo location.
ii) The Elevator Control Horn goes on the underside of the Elevator,
on the same side as the rudder horn. Make small cuts with your X-
Acto knife where the control horns will line up with the pushrods,
and press fit the control horns in place. Make sure the holes are
lined up directly over the hinge line, and hot glue weld them in
place.
iii) Run the pushrods as straight as you can. A small piece of tubing
(Like a cocktail straw) works great as a support.
g) Mount the motor on the stick.
h)

©2006 FoamFly.com 8
i) Mount the receiver and speed control under one wing.
ii) Mount the battery to one side of the fuselage with Velcro. Position
battery as necessary for best balance. The CG of the Fat P-47 is
about 1.75” back from the leading edge of the wing.
i) You can decorate the plane with either foam safe paint, or my favorite,
Sharpie markers. Get creative. I’m sure you can find pictures online of
the markings on your favorite warbird.
You’re Done!
You’re still reading? Go fly already. ;)
P.S. This manual was completed at 1:18am, so if it doesn’t make sense, email

9
APPENDIX:
The Tools: (and things you’ll need)
1) Knives: a Razor knife, and an X-Acto would both be useful.
2) Glue: UHU Creativ` contact cement, or White glue, or Epoxy. AND, you’ll
definitely want a hot glue gun and glue sticks.
3) Tape: You’ll want 2” wide clear packing tape, or some “crystal clear” Scotch
Tape if you can find it.
4) Pliers: Something suitable for wire bending.
5) .032 wire for pushrods
6) .047 wire to connect the rudders.
7) .055” wire & 1/32” plywood for landing gear (optional)
The Techniques: You’ll probably want to practice these on a piece of the scrap
foam.
1) Gluing:
a) Contact Cement:
The contact cement will test your patience. I know you’ll be
tempted to stick the pieces together immediately, but don’t give in. The
UHU Creativ’ will form the strongest bond, if you allow it to dry for AT
LEAST 5 minutes before putting the pieces together, and probably
much longer. Put the glue on BOTH surfaces to be joined. If you’re not
used to contact cement, remember you really only get ONE CHANCE at
putting the pieces together. It really is instant gluing! (except for the
waiting, but that’s already over at that point.)
The UHU Creativ’ has a long working time. After application, the
glue can sit for half an hour and still make a full-strength bond. If you
plan ahead a little, you can apply the glue to all the fuselage surfaces in
the order that you’ll be assembling them, and the first ones will be ready
to press together by the time that you’re done applying glue to the last.
Then proceed in order, for an exceptionally quick build.
b) Hot Glue Welding:
Although the hot glue gun can be used to attach flat sections, it
dries too quickly to give you much time. The glue gun works best when
the parts are already assembled, and you simply need to make the fit
permanent.
Rather than continually pulling back the gun, leaving a glob of glue
behind, move the gun forward, keeping just enough glue flowing that the
tip slides easily, and leaves a seam of glue pressed deep into the corner
of the joint. This takes a little practice, but leaves an unobtrusive glue
joint that is incredibly strong. Quick and easy too!
2) “Rolling the Foam”
a) You’ll be bending the foam to form the airfoil for the wings. Find
yourself a section of 2” PVC pipe, (Or a Baseball Bat, Rolling Pin,
Kitchen Counter, Bathtub edge, etc…) and press the wings firmly and
evenly down onto it to form the airfoil shape. It doesn’t take too much
pressure. The airfoil curves more sharply right near the leading edge,
so you can use smaller diameter pipe (or a Broom handle etc.) to add a
little more curvature there if you feel it’s necessary. It’s also acceptable
to just use your thumb, and the side of your index finger to work the
leading edge bend a little.

©2006 FoamFly.com 10
3) “Landing Gear” or So that’s what the ribs are for!
a) Bend landing gear supports with an extra loop on top. Tie the loop to a
piece of 1/32” plywood with thread or dental floss, then glue everything
in place.
b) Glue the plywood/gear combo in between the layers of foam ribs. The
plywood helps distribute the force of the wire, and keep the gear in
place. Then, contact cement the ribs in place, and hot glue weld around
them.
c) The P-47 should have two large wheels, one under each wing just
under the leading edge, and a small one in the tail.
4) Motor Mount Templates:
StickMotor Mount
Cut out
Glue 3/8” wood
as shown.

11
Outrunner Motor Mount
Cut out
use cutout foam
to make “gussets”
for outrunner style
motor mount.
Other FoamFly Toy manuals
