FOODY F12 User manual
1
Assembly of an F12 Hydroponic Tower
Congratulations on your purchase! Your Foody tower will provide years of fresh produce and healthy eating. But
first it must be assembled:) Following these assembly instructions is important for the proper operation of your
tower. We therefore recommend reading through all of the directions before actually beginning. If placing your
tower indoors set it near a large window or glass door so that it can receive good sunlight. Make sure it is on a
level surface.
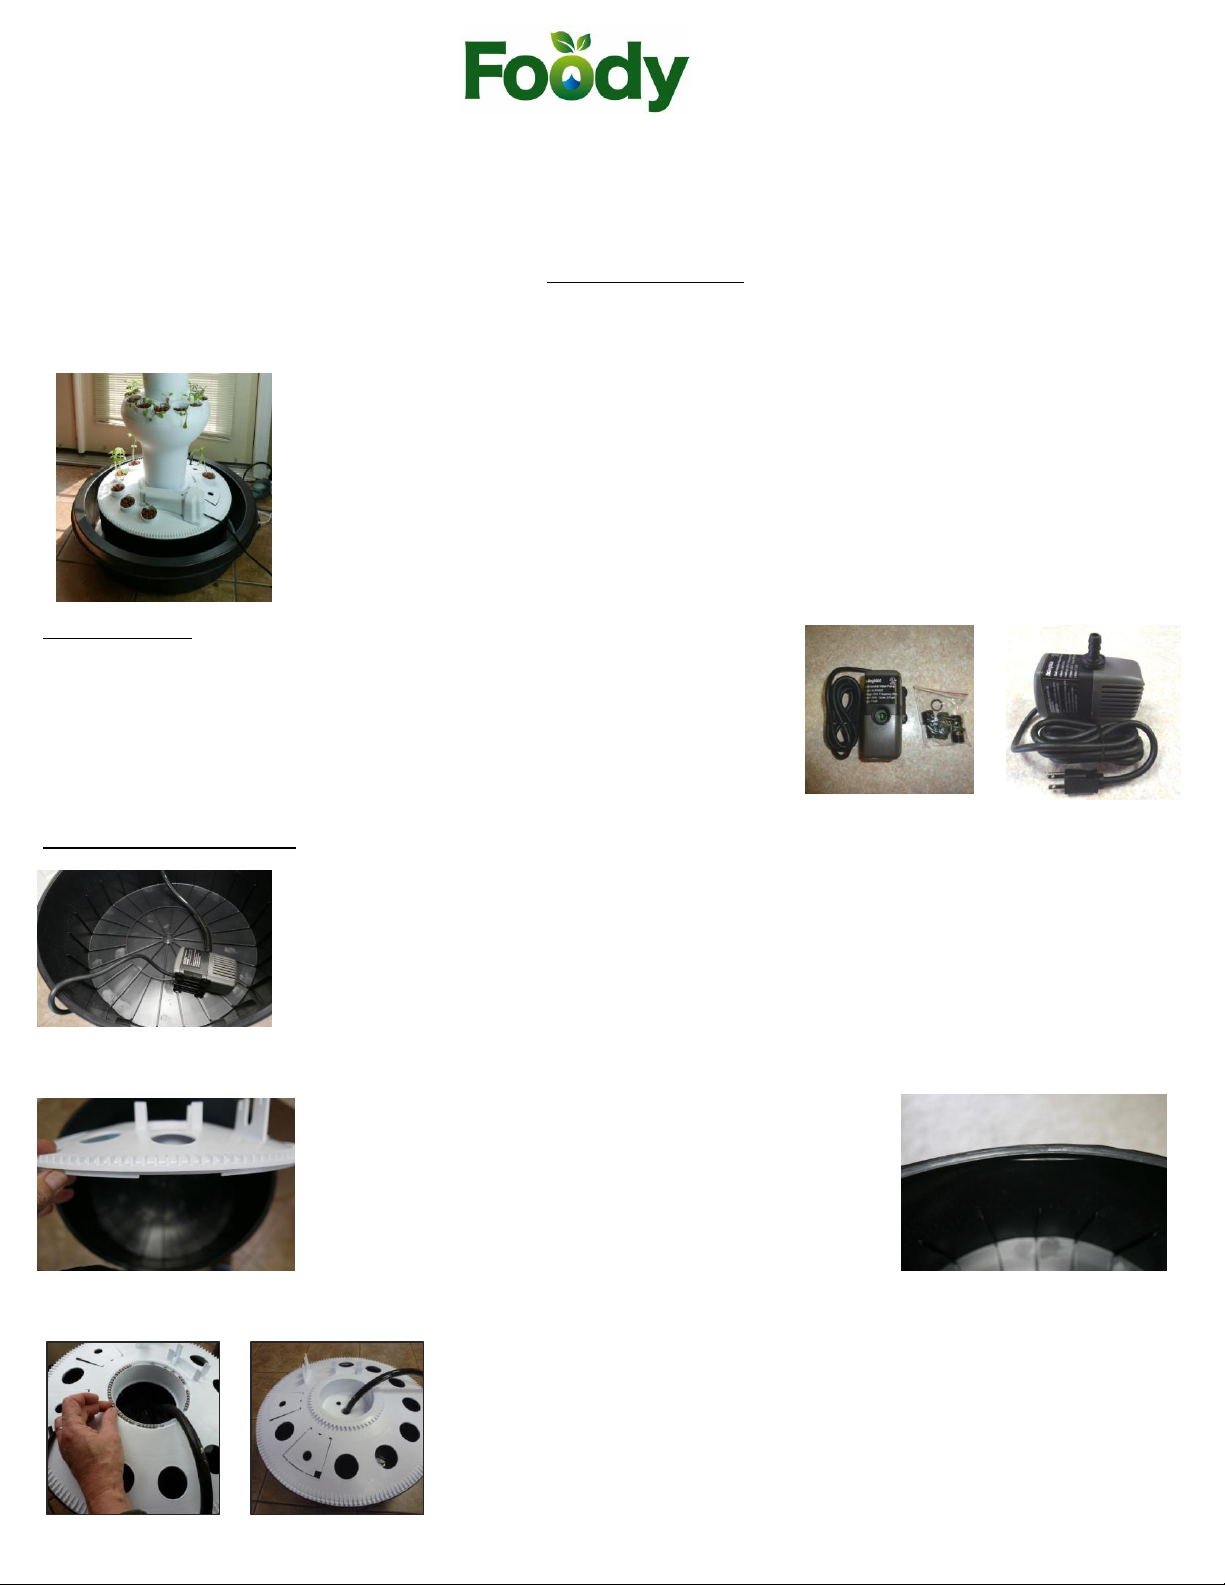
Before you begin: Pictured at left is a tower that has been set up inside of a 26”
diameter pond liner. Doing this will help ensure that spilled water, leaves, etc. won’t get on
your floor. We found these at Lowes for around $12.00 each. They may be available at
your local garden store as well. Anyway, here’s a link: http://www.lowes.com/pd_93171-
1569-PP2607___?productId=1112805&pl=1&Ntt=pond+liner
Pump Setup:
Unpack the submersible pump (shown on right). Screw the smallest of the
3 fittings onto the top of the pump (far right photo). Make sure that the
Flow Control Valve at one end of the pump is open at least half way or
more. Turn it counterclockwise to open further if needed. (Note: The small
Aeration Kit that comes with the pump is not needed.)
Base Reservoir Setup:
Push one end of the black water hose onto the adapter on the pump then lay it on its side
on the bottom of the reservoir. Laying it on its side allows the pump to be moved easily
after water is in the reservoir. Placing it near an outside edge of the reservoir tank (as
shown) will help keep the hose from kinking.
Placing the lid onto the Base Reservoir: Be sure to align
the notch on the bottom side of the reservoir lid (photo
on left) with the inside slightly protruding edge of the
base reservoir (photo on right). This will correctly
position the lid and help it to fit more securely on the
reservoir.
Next, pull the water hose up through the large middle hole of the reservoir
lid. Open the access door that has a square corner and pull the pump cord
up through it. Carefully place the ball bearings (from the plastic dispenser
bottle) in the raceway around the center hole. (There are usually a few
extra left over.) Slide the white Rotational Wheel (has teeth around its
2
outside edge) over the water hose so that it rests on top of the ball bearings (photo on left above). If your tower has
the optional rotational motor installed just align the wheel’s notches with the gear and it will then snap down into
place. You may add about 6 gallons of water to the base reservoir now if desired. Never fill the reservoir to more
than 2" from its top.
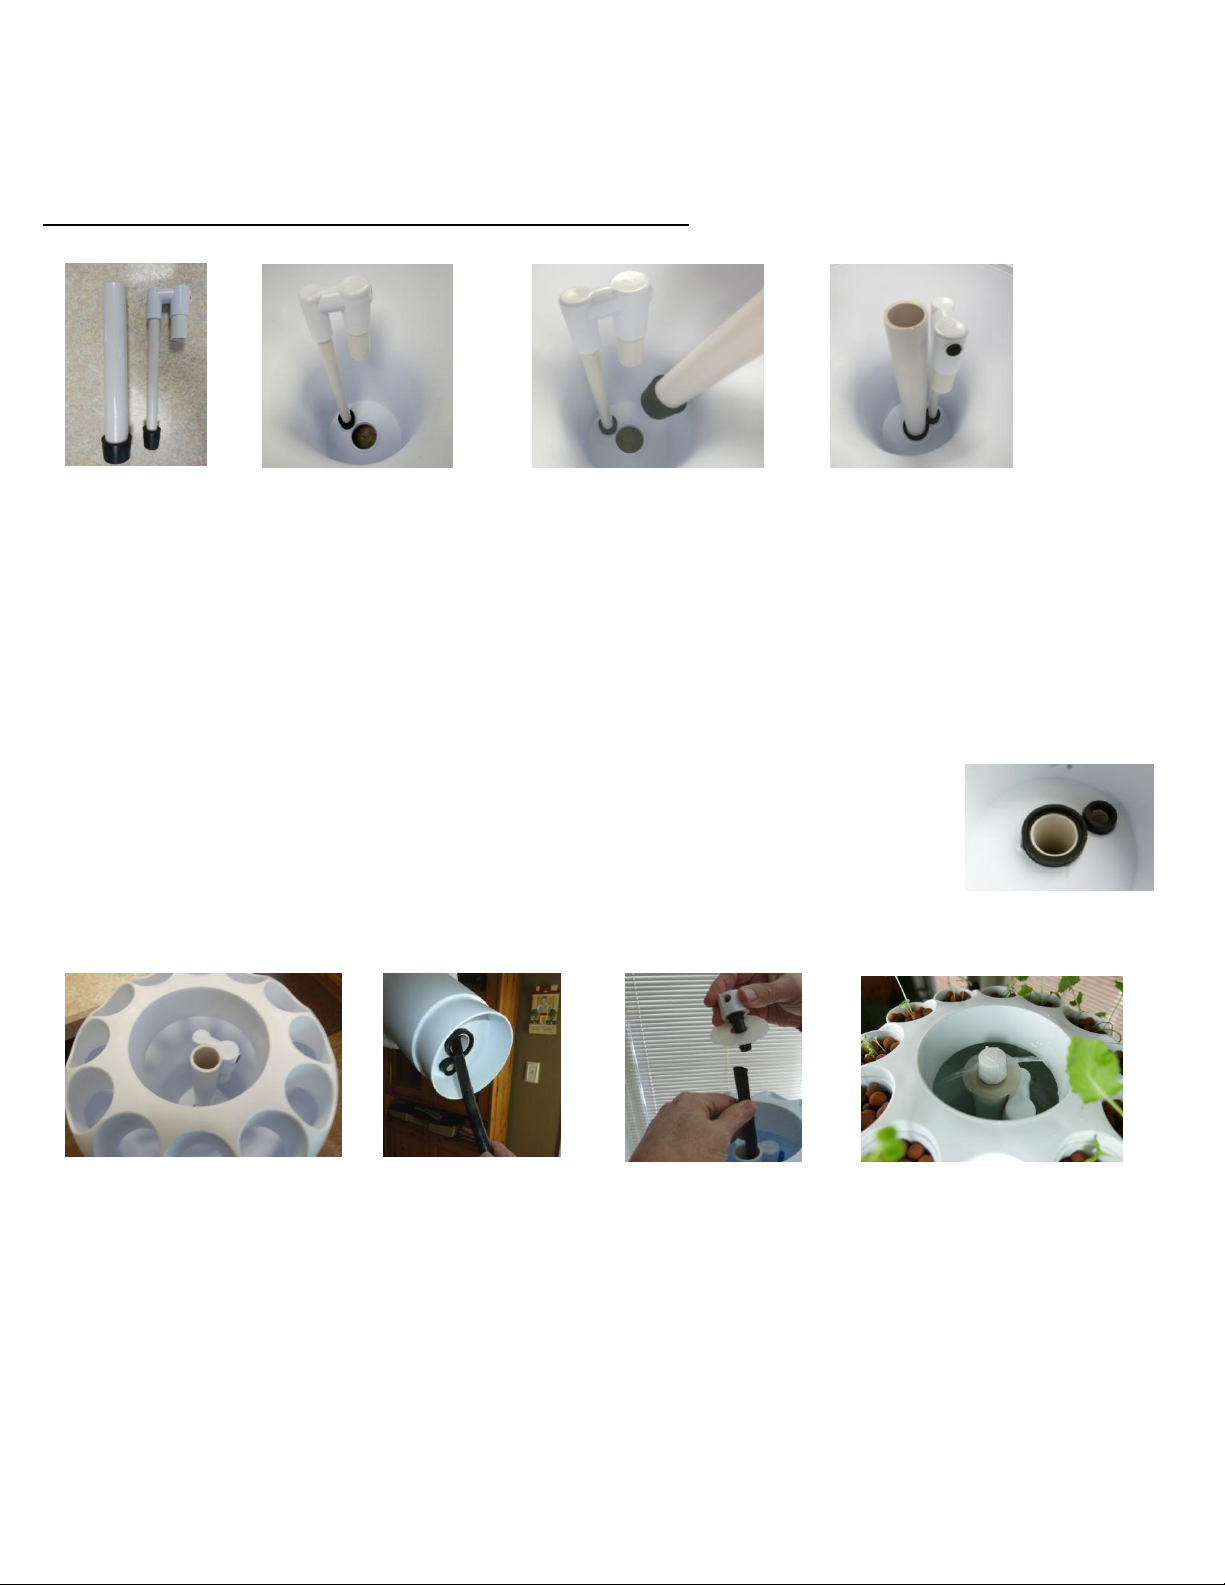
Assembling the Growing Pods and water piping system:
One set of parts, as shown in figure 1, needs to be placed into each Growing Pod. (Note: during transit some of the
plastic tubes may have slipped out of their fittings as they are not glued. Just press them firmly back together.) With
each Growing Pod on a firm surface insert the smaller pipe (figure 2) and press the end with the grommet on it down
into the smaller hole. Push down with your fingers on the silicone grommet to seat it well. Then press the larger size
pipe down into the center hole (figure 3). Rotate or turn the section of pipe with the short section of pvc to position
it closely to the center pipe (figure 4).
IMPORTANT: After inserting the PVC pipes into each Growing Pod take a moment to
turn each Growing Pod upside down. Visually check to ensure that the siphon PVC
pipe has not been pushed so far down that it comes out through the bottom of the
grommet.
Snap a lid onto each Growing Pod by simply pressing it down firmly around the edges. Each completed Growing Pod
should look as shown in the figure on the left above. Note how the siphon pipe is close to the large center PVC. Now
the Growing Pods may be stacked. Simply slide the water hose from the base reservoir up through the center hole of
each successive Growing Pod as they are stacked. After each of the Growing Pods are stacked, insert the emitter &
washer, as shown in figure above, into the topmost end of the water supply hose. Push the hose and emitter down so
that the washer rests against the top of the PVC as shown in photo above right. If the hose won't push back down
enough just open one of the access doors in the Base Reservoir and slide the water pump to the side a bit more. That
will take up the slack in the water hose and allow the emitter to sit down on top of the upper PVC section.
1.
2.
3.
4.

3
There is a 6” solid white plastic cover that is to be placed into or over the large center hole of
the topmost growing pod. This cover keeps sunlight from hitting the inside of the tower which
helps to reduce the chances of algae formation. (See photo on right.) It may be removed at
any time as needed for checking the emitter.
Unless already done, open one of the access doors to the Base Reservoir and fill the reservoir with about 6 gallons of
water. Do not fill the Base Reservoir any higher than 2" from its top edge. Plug in the pump and water will begin to
fill the top Growing Pod, then the next lower, then the lowest Growing Pod. You will need to add more water to the
Base Reservoir during this initial filling of the Growing Pods. Remember to leave at least 2”of free space in the
reservoir so that water siphoned from the lowest growing pod won’t overfill the reservoir.
Important: Remember that water always needs to be covering the pump so that it won't suck air. (Note: The
total capacity of the Base Reservoir is 7.0 gallons but never fill it with more than 6 gallons.) Each Growing Pod
holds about 1 3/4 gallons so total tower capacity is just over 12 gallons. Be careful NOT to overfill the Base
Reservoir.
The siphon system in your tower will fill each growing pod with water up to the bottom of each net pot and then
siphon down about 3" before refilling. Each "cycle" takes about 2 minutes. This process ensures that plants have both
adequate water and oxygen.
The water pump on Foody 12 Towers is designed to run constantly. However, after the plants are stabilized and
growing well it may be plugged into a timer and run in cycles of 15 or 30 min “on”and 30 min “off”. Always
monitor your plants condition...if they show signs of wilting then go back to running the pump constantly.
Now that your system is setup and running it's time to check pH and add the liquid nutrients.
Liquid Nutrients:
The liquid nutrients, necessary for feeding the plants, may now be added to the water. We recommend Bontanicare
Pro Grow and Pro Bloom or Flora Duo A and B by General Hydroponics. These work well, are easy to use, and are
reasonably priced. One quart normally will last 9 months or more. There are many other types of liquid nutrient
product options that may be used and which can be purchased from your local hydroponics store. It is very
important that you use a Total Dissolvable Salts meter (sample shown at right) to monitor the salt levels of your
water solution. This meter is available on our website (www.foodyverticalgarden.com) or at your local hydroponic
store.
A good range for salt ppm (parts per million) for plants is between 700 ppm and 1000 ppm and a good starting level
is 750-850 ppm. Liquid nutrients may be added according to their directions however we recommend starting out
conservatively at 1/2 to 2/3rds the rates specified. (The total tower water capacity is 12 gallons of water (41.6 –
45.4 liters)). After adding nutrients stir thoroughly prior to testing the levels with your TDS meter (as mentioned
above). We advise being very conservative and adding nutrients incrementally, gradually adding more until the
proper level is obtained. After each addition it takes about 5 minutes for the nutrients to be thoroughly dispersed in
the tower. It is best to use a small cup or glass to remove a small amount of water from the reservoir for testing
purposes. You’ll only need about 2” of water in the glass. Doing this will ensure more accurate readings for both pH
and salt levels. Generally, it is good to check the salt levels once per week and the water level every 2-3 days; more
frequently when plants are growing rapidly.
pH:
The ideal pH for obtaining proper nutrient availability for hydroponic plant growth is between 5.2 and 6.2. General
Hydroponics makes a pH Control Kit that comes with a liquid testing system as well as pH Down and pH Up solutions
4
for adjusting the pH. A digital pH meter is another way to measure pH. Either one may be purchased on our
website or at your local nursery or hydroponic retail store. Measure the ph after the nutrients have been added and
make any needed adjustments at that time.
Inserting the 2" Net Pots:
With hydroponic systems small plants that have been grown from seed, or purchased and had
the soil washed off, may be inserted into each of the 2" net pots. It's advisable to use rooting
plugs such as Rapid Rooter or Rockwool to sprout seeds. Once the roots have grown through the
base of the plug the plant and its plug may be placed into one of the tower's net pots. The
Hydroton clay pellets (bag included) are for placing on top of and around the rooting plugs or
plant roots inside of the net pots. Rinse all of the dust off of the clay pellets prior to placing
them into the net pots. The clay pellets help to secure the plant plug and to prevent excess water loss. Note: place
those plants that will be the largest in the lowest positions on the tower. This will keep the tower from becoming
overly top-heavy.
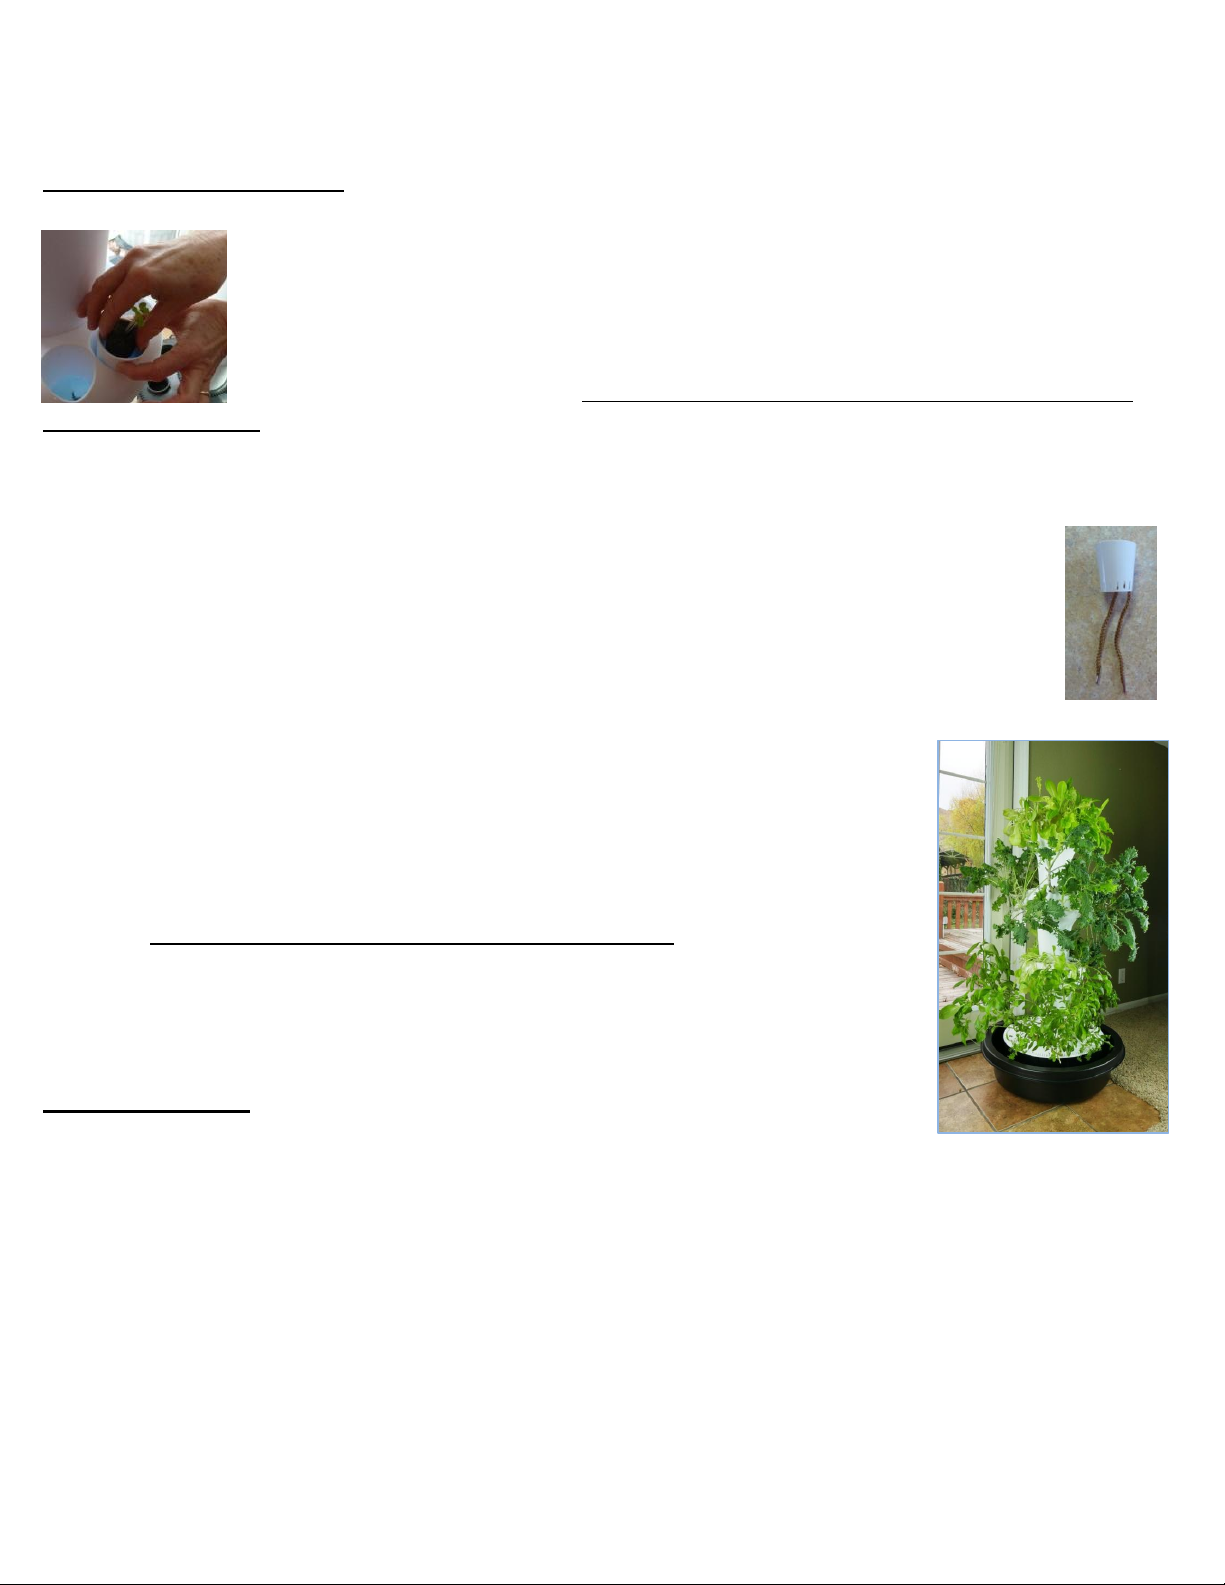
Only the eight net pots that are to be placed into the Base Reservoir need a rope wick inserted into
their base (photo on right). Simply pull one end of brown rope up and through the base of the net pot
and then back down through another hole. The tails of the rope will then hang down into the water
after being placed into the Reservoir.
Auto-rotation motor option: (only for indoor use if desired) The optional auto-
rotation unit rotates the growing pods ensuring that all plants receive light when the
tower is placed near a large south facing window, glass door, or artificial grow lights. It
turns very slowly at only 8 rotations per hour. At first glance it may not appear to be
turning but keep looking. It may be set on a timer to run 3-4 times per day to rotate
the towers for 15 or 30 minutes each “on” time. It does not need to run constantly and
should be timed to shut off at the end of each day or unplugged. As plants grow larger
the leaves of plants in the reservoir lid may become entangled with leaves on the plants
in the lowest growing pod. If this is the case, we advise discontinuing use of the rotation
motor or cutting leaves back to ensure that they do not become entangled.
Troubleshooting:
Insufficient water is coming out of the emitter:
-Check to make sure that there is not a kink in the water supply hose in the lower reservoir. Lift the access door lids
and check with your hands running along the hose. Reposition the hose and/or pump slightly to remove the kink.
-If the nutrient solution being used has a high sediment content it may plug the filter on the pump. Turn the pump
off. Reach into the reservoir with both hands and pull the cover off of the foam filter on the end of the pump.
Clean the filter, re-install, and snap the plastic cover back over it.
-The pump may be removed from the base reservoir through either of the access doors if needed. Turn the pump
off, insert both hands through the two access doors on the top of the reservoir and pull the water hose off of the
adapter on the pump and unscrew the hose adapter. (Or unscrew the adapter with the hose still attached which
can also be done.) Then lift the pump out through one of the access doors...it will be a bit tight but it does come
out:)

5
-Lastly, you may want to check to insure that nothing such as a piece of Hydroton or growing medium has
accidentally gotten into the water hose.
Siphoning doesn't cycle correctly:
> If the water level in the Growing Pods doesn't re-fill after reaching the low point of the siphon cycle you may need
to reduce the setting on the flow control valve on the submersible pump slightly. Simply turn the valve on one end of
the pump clockwise slightly to reduce the flow.
> If the water level in the growing pods stays high and doesn’t siphon down every few minutes turn the control valve
on the pump counterclockwise to increase the output of the pump.
> As plants get large there may be times when some of the roots in the lower reservoir may partially block the intake
of the pump. This will cause the siphons to not work properly due to insufficient water flow. Simply reach in through
the reservoir access doors and slide the pump to an area where roots will not block its intake. It may be necessary to
trim some roots if plants have remained in the reservoir too long.
> If excessive roots are allowed to grow up and into the siphon pvc in the growing pods this may cause the siphons
to not work properly. Turn the pump off, inspect, and remove any roots that have grown up into the siphon pvc.
The top piece of the siphon may be removed by using one hand to hold the siphon pvc pipe in place and the other
hand to lift the top piece up and off. (Nothing is glued so the pvc parts will come apart easily.)
Total Soluble Salt level is too high: Too high of a salt level concentration is detrimental to plants. If the salt level gets
too high (such as above 1300 ppm for most plants) you may need to remove several gallons of the solution in the
tower and add more clean water. This will help lower the salt concentration level in the system. Removing water
from the tower may be done as follows:
1.) Shut the pump off and pull the emitter out of the end of the poly hose on the top Growing Pod
2.) Slide the top growing pod up and off of the poly tubing and set it aside temporarily.
3.) Place an empty gallon jug or other container under the upper end of the poly tubing and turn the pump back on
just long enough to fill it. Dump that water and repeat the process until you've removed one third to one half of the
total water in the base reservoir.
4.) Replace the topmost Growing Pod and re-insert the emitter into the water supply hose.
5.) Fill the Base Reservoir up to within 2-3 inches of the top and then turn the pump back on.
6.) After the water has had time to circulate re-check the salt and water levels and adjust as desired.
Algae Control:
Keeping direct sunlight or artificial light from reaching the inside of the growing pods is also important. Use the
small, 6" diameter lid on the topmost Growing Pod and keep all of the 2" net pots in the Growing Pod holes even if
some have no plants in them. A small amount of growing medium in the bottoms of each empty net pot will help
keep light from reaching the water.
Additional Hydroponic Information:
Hydroponics gives you the ability, and responsibility, to meticulously control the variables that affect how well your
plants grow. Done right a hydroponic system can easily surpass a soil-based system in plant quality and amount of
produce yielded. Granted it all may seem intimidating at first but keep at it. Below are a few websites that offer
excellent additional Hydroponic information:
Welcome to the family! Please email or call us if you’ve any questions.
Foody Vertical Gardens LLC takes no responsibility for improper setup, operation, or maintenance of your tower.
Copyright Foody Vertical Gardens LLC March. 2016
Table of contents
Popular Lawn And Garden Equipment manuals by other brands

Sunforce
Sunforce SOLAR user manual

GARDEN OF EDEN
GARDEN OF EDEN 55627 user manual

Goizper Group
Goizper Group MATABI POLMINOR instruction manual

Rain Bird
Rain Bird 11000 Series Operation & maintenance manual

Cub Cadet
Cub Cadet BB 230 brochure

EXTOL PREMIUM
EXTOL PREMIUM 8891590 Translation of the original user manual


Vertex
Vertex 1/3 HP Maintenance instructions

GHE
GHE AeroFlo 80 manual

Land Pride
Land Pride Post Hole Diggers HD25 Operator's manual

Yazoo/Kees
Yazoo/Kees Z9 Commercial Collection System Z9A Operator's & parts manual

Premier designs
Premier designs WindGarden 26829 Assembly instructions

Snapper
Snapper 1691351 installation instructions