FORELIBRA MA Series User manual

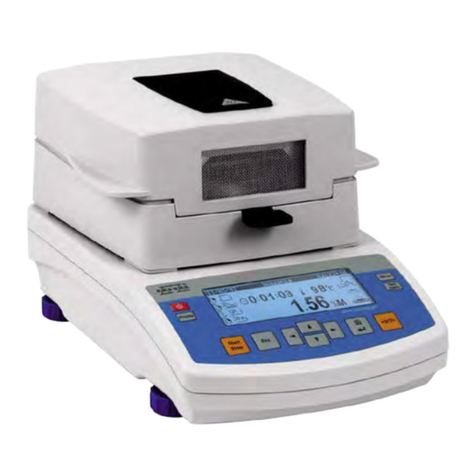
MA series Moisture Analyzer
User’s Manual


Contents
1 Safety notes.............................................................................................................3
2 Specifications..........................................................................................................4
2.1
Technical specifications...............................................................................................................4
2.2
Delivery content...........................................................................................................................4
2.3
Optional Accessories...................................................................................................................4
3 System description.................................................................................................5
3.1
Device..........................................................................................................................................5
3.2
Display.........................................................................................................................................6
3.3
Function key ................................................................................................................................6
4 Preparation..............................................................................................................7
4.1
Preparation of sample .................................................................................................................7
4.2
Tools for sample preparation.......................................................................................................7
4.3
Disposable aluminium sample pan..............................................................................................7
4.4
Spreading of the sample..............................................................................................................7
4.5
Glass fibre filter circle ................................................................................................................. 8
4.6
Practical advice........................................................................................................................... 8
5 Operation.................................................................................................................9
5.1
Turn on ....................................................................................................................................... 9
5.2
Drying modes.............................................................................................................................. 9
5.2.1
Auto dry....................................................................................................................................... 9
5.2.2
Time dry .................................................................................................................................... 10
5.2.3
Stop mode................................................................................................................................. 10
5.3
Adjustment / calibration ............................................................................................................ 11
5.3.1 Span CAL.................................................................................................................................. 11
5.3.2 Muti-point CAL........................................................................................................................... 12
5.3.2 ClockCAL................................................................................................................................... 12
5.4
Print out results (optional)......................................................................................................... 12
6 Troubleshooting....................................................................................................13
7 Warranty.................................................................................................................13
8 Disposal.................................................................................................................13
9 Maintence...............................................................................................................14
2

3
Thank you for purchasing a moisture balance from our company.
1. Safety notes
Please read this manual carefully and completely before you use the device for the first
time. The device may only be used by qualified personnel and repaired by our company.
Damage or injuries caused by non-observance of the manual are excluded from our
liability and not covered by our warranty.
•
The device must only be used as describes in this instruction manual. If used
otherwise, this can cause dangerous situations for the user and damage to the
meter.
•
The instrument may only be used if the environmental conditions (temperature, relative
humidity,
…) are within the ranges stated in the technical specifications. Do not expose
the device to extreme temperatures, direct sunlight, extreme humidity or
moisture.
•
The case should only be opened by qualified our company personnel.
•
Never use the instrument when your hands are wet.
•
You must not make any technical changes to the device.
•
The appliance should only be cleaned with a damp cloth. Use only pH-
neutral cleaner, no abrasives or solvents.
•
The device must only be used with accessories from our company.
•
Before each use, inspect the case for visible damage. If any damage is visible,
do not use the device.
•
Do not use the instrument in explosive atmospheres.
•
The limit values for the measuring variables as stated in the specifications
must under no circumstances be exceeded.
•
If possible, the device should be transported horizontally, bottom down and
well-cushioned. Remove the loose attachment parts from the measuring
chamber to avoid damage. We recommend to use the original packaging
for transport.
•
Do not touch the halogen lamps or the cover during the measurement as this
can cause severe burns.
•
After the measurement, let the sample cool down before touching it.
•
Never operate the device when the cover is open.
This instruction manual is published by our company without any guarantee.
We expressly point to our general guarantee terms which can be found in our general
terms of business. If you have any questions please contact our company.
Safety symbols
Safety-related instructions the non-observance of which can cause damage to the
device or personal injury carry a safety symbol.
Symbol
Designation / description
General safety symbol
Non-observance can cause personal injury and/or damage to the device.
Warning of hot surface
Non-observance can cause burns.

4
2. Specifications
2.1 Technical specifications
Model
MA110
Weighing range
110 g
Readability
0.001 g
Heating element
Halogen lamp / round / approx. Ø 90 mm
Drying temperature adjustable
+40…+199 °C
Drying time (time mode)
1…99 min adjustable
Measurement range moisture
0…100 %
Readability moisture
0.01 %
Memory
12 drying programmes (parameters)
Interface
RS-232
Display
5 inch Touch screen
Power supply
100-120V
Dimensions
370 x 215 x 195 mm
Weight
Approx. 4.5 kg
Carton size
475 x 365 x 475 mm
2.2 Delivery content
1 x moisture balance -MA
series
10 x sample
pan 1 x mains
cable
1 x sample pan holder /
handle 1 x 20g or 50g or
100g weight
in plastic box
1 x instruction manual
2.3 Optional Accessories
T58Z thermal printer

5
3. System description
3.1 Device
1. Heat protection
plate
2. Wind shield
3. Insertion aid
4.
Wind shield
5. Sample pan
Assemble the parts as illustrated above.
1.
Start with the heat protection plate (1).
2.
The notch in the side wall of the wind shield (2) must be placed in a way that it faces the
user.
3.
The handle of the insertion aid (3) is placed to rest in this notch.
4.
Place the sample pan retainer (4) in the middle of the measuring chamber.
Make sure that the cone of the sample pan retainer rests in the guide properly
5.
The sample pan (5) is the last part you need to install.

6
3.2 Display
3.3 Function keys
Time: Time dry
Auto: Auto dry
Latest: the last test recoard
History: recoard
CAL: do the calibration

7
4. Preparation
4.1 Preparation of sample
You should always prepare only one sample for measurement to avoid that it loses
moisture to the environment or absorbs air humidity. In case several samples have
to be taken at the same time, they should be put into airtight containers to make sure
their characteristics do not change when stored.
Spread the sample on the sample pan evenly and in a thin layer to get reproducible results.
Uneven application of the sample causes inhomogeneous heat distribution in the
sample to be dried. This means that the sample is dried incompletely or that the drying
time is increased. Due to piling material, the upper layers will heat up more strongly,
which will cause combustion or incrustation. An excessively high thickness of the layer
or possible incrustations prevents the moisture from leaving the sample. The residual
moisture makes the measurement results non-verifiable and non-reproducible.
4.2 Tools for sample preparation
The tools and instruments used for sample preparation have a huge effect on the
accuracy and reliability of the measurement. You should avoid tools with heat-
conducting properties, i. e. which are able to transfer heat to the sample. Improper
handling and preparation of the sample will falsify the end result of the measurement.
4.3 Disposable aluminium sample pan
To be able to measure the moisture content of the sample, the sample should be
spread on the sample pan evenly and then be placed in the drying chamber of the
moisture balance. Re-using a sample pan can falsify the end result of the
measurement because of the adhering residues.
4.4 Spreading of the sample
ATTENTION:
The samples should not exceed a thickness of 8 mm and a diameter of 90 mm.
If the max. height of the sample is exceeded, this can lead to combustion or
incrustation of the sample.
The sample should be spread on the sample pan evenly, ideally in layers of 2 … 5
mm.
Make sure that the temperature probe, which is located in the cover of the moisture
balance, does not touch the sample as this will falsify the result.

8
Solids:
Spread powdery and grained samples evenly on the sample pan.
Crush coarse-grained samples using a mortar or similar device. Avoid any heat
supply when crushing the sample as this will cause moisture loss.
Liquids:
For liquids, pastes or melting samples, it is recommended to use the glass fibre filt
4.5 Glass fibre filter circle
Glass fibre filter circles ensure that liquid samples are evenly spread on the sample pan
and prevent the combustion of solids.
The glass fibre filter circle has the following advantages:
4.5.1 even spreading due to capillary action
4.5.2 no formation of drops
4.5.3 quick evaporation due to larger surface
4.6 Practical advice
Before starting the measurement, place the sample pan and, if appropriate, the glass
fibre filter on the pan retainer and tare it to make sure that only the weight of your
sample is assessed.
If you carry out several consecutive measurements, keep in mind that the temperature
from the previous measurement still obtains in the measuring chamber and that
evaporation already takes place when the cover is closed. This might affect the
measuring results.
Therefore, you must either allow some time for the drying chamber to cool down or
accept the deviations and start the next measurement as soon as possible

9
5. Operation
5.1 Turn on
The moisture balance saves the drying parameters last used after switching off and
back on. These are shown in the display.
5.2 Drying modes
5.2.1 Auto dry
Touch the Auto dry button, then enter function, chose the dry temperature, the touch
start.

10
5.2.2 Time dry
Touch the Time dry button, then enter function, chose the dry temperature and the
drying time, the touch start.
ATTENTION: The maximum measuring / drying time you can set is 99 minutes.
5.2.3 stop mode
When drying, if you need stop the device heat. You can touch the stop button.
ATTENTION: Depending on the temperature, combustion of the sample can easily
occur in this measurement / stop ,mode. This mode should only be used if constant
monitoring can be guaranteed. The advantage of this mode is that the sample can be
dried for a long time to allow moisture to escape which is located very deep in the
sample.

11
5.3 Adjustment / calibration
The moisture analyser consists of a weighing unit and a drying chamber. The moisture
measurement is carried out on the basis of the weight loss. This can be easily
reproduced by a rule of three.
ATTENTION: The moisture analysers of the MA series have a higher weighing
resolution than the one indicated. The moisture balance uses the higher resolution
which is invisible to the user for calculation. This can result in deviations after the
decimal point when trying to reproduce the result.
5.3.1 Span CAL
After touch span cal button, then it will display the capacity of mass weight, then put
on the same weight to do calibration.

12
5.3.2 Muti-point CAL
When the other capacity accurate is not correct, then do the muti-point CAL, when
the screen display each capacity, then put on same mass weight on the pan.
5.3.3 Clock CAL
When the clock is not correct, then do clock CAL.
5.4 Print out results (optional)
You can print out the measurement results by using the optional T58Z printer.
1.Make sure that the printer is set up properly and both devices are connected to
each other.
2.9600 baud rates
3.nine core pin connection mode: 5 feet grounded 3 feet after sending.
4.Touch the print button, then can print the data

13
Print-out:
6 Troubleshooting
7 Warranty
You can read our warranty terms in our General Business Terms which
you can get from our comapny.
8 Disposal
For the disposal of batteries, the 2006/66/EC directive of the European Parliament
applies. Due to the contained pollutants, batteries must not be disposed of as
household waste. They must be given to collection points designed for that purpose.
In order to comply with the EU directive 2012/19/EU we take our devices back. We
either re-use them or give them to a recycling company which disposes of the devices
in line with law.
If you have any questions, please contact with our company or distributor.
Error
message
Error cause
Possible solution
-Err 1-
Sample weight below 1 g
Put more than 1 g of the sample on
the scales and start the measurement.
-Err 2-
Temperature setting below
+40°C
Restart the scales.
-Err 3-
Measuring time setting
below 30 seconds.
Restart the scales.
-Err 4-
Halogen lamp problem
Please contact our technical support.
-Err 5-
Time setting for slow
heat-up mode below 3
minutes
Restart the scales.
-Err 6-
Temperature sensor broken
Please contact our technical support.

14
9 Maintenance
9.1 often use moisture meter, moisture analyzer should be brought electricity to reduce
the preheating time in a row. The moisture analyzer in a relatively stable state, if the
moisture analyzer long without the electricity should be closed.
9.2 the moisture analyzer should be kept clean, watch the dust content across the
moisture meter, such as scale and shell often with gentle detergent and soft cloth to
wipe clean, must not with alcohol, gasoline strong dissolution agent such as scrub.
moisture analyzer in the environment of corrosive gas.
9.3 according to the degree of the use of the moisture analyzer periodically check the
calibration should be do

15
This manual suits for next models
1
Table of contents

