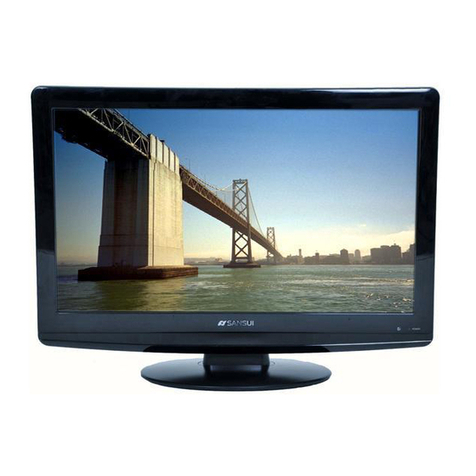
Foresee FC2154TV/DVD User manual

21 ColourTV/DVDCombo
Instruction Manual
ModelFC2154TV/DVD
Pleasereadtheseinstructionscarefullyand retainforfuturereference.

1
SYMBOLS
Thegraphicsymbolsusedinthismanual orontheback coverofthesetmeanthe
following:
Read thismanualinfullbeforeuse.
Thisisaclass IIdoubleinsulatedappliance
The lightning flashsymbolisintended toalertthe usertotheenclosuresthat
containhazardousvoltages.
The exclamation symbolisintended toalert theusertothe presenceof
important operating and maintenance(servicing)instructionsinthe literature
accompanying the appliance.
Importantnote:DelayedPicture/ Sound.
Thistelevisionhas anautomaticinternal checkingfunction. Eachtimethepower
isturned ON’usingthemainpowerswitchorbypressingthe POWER’button
ontheremotecontrol itwill use thisfeatureduringstart-up, thisprocesstakes
5~7secondsbeforethereceiverwill display apictureonthescreen.

2
IMPORTANTSAFEGUARDS
Whenusinganyelectricalapparatusalwaysobservesafetyregulationsanduse
basicsafetyprecautionstoreduce therisk offire,electricshock and personal
injury, includingthefollowing
Read, Keepand Followtheseinstructions, heeding all Warnings.
CAUTION! ThisisaClass-1laserproduct. Thisplayerusesavisiblelaserbeamthatcouldcausehazardous
radiation exposure.Besuretooperatethe equipmentasdirected.Do notplaceeyesclosetoanyopenings
whenthe set isconnected tothe mainssupply.
WARNING! Do notremoveanycovers.
WARNING! No objectsfilledwithliquid,suchasvases,shallbe placedon thisequipmentorinanyposition
whereliquidmayfallintothisequipmentoranyotherelectricalapparatus.
WARNING! Donotinsertforeign objectsintoopeningsofthisappliance. Do notblockopeningsorvents.
WARNING! Do notusethisapparatusnearwater.Toavoidtheriskoffireorelectricshock,do notexpose
thisapparatustorainormoisture.Theapparatusshallnotbe exposed todrippingorsplashesand isstrictly
forindooruseonly.
WARNING! Not foruseinTropical humidclimates.
WARNING! Do notimmerseinanyliquidwhilstinuseorcleaning.Clean onlywithadampcloth,dry witha
dry towel. Do notuseharshabrasivesasthesemaydamage the plasticparts.
WARNING! DONOTblock anyventilation openings.Keep awayfromcurtains,newspapersandrestricted
areas.Install inaccordancewithanyspecificmanufacturer sinstructions.Alwaysallowasufficientgap
around the apparatustoavoidoverheating.
WARNING! Do notinstallnearanyheatsourcessuchasradiators,gasheaters,stovesorotherapparatus
(including amplifiers)that produceheat. Do notleaveindirect sunlight.
WARNING! Do notplaceanynaked flamesource, suchaslighted candleson anyelectrical apparatus.
WARNING! Connecttoasuitable230-240V~50 Hzpowersupplyonly.
WARNING! Keep outofreachofyoung children.Thisapparatusisnotsuitableforusebyyoung children or
infirmpersonswithoutsupervision.Young children mustbe supervised toensurethattheydo notplaywith
the apparatus.Ensureyoung children haveenough knowledge tooperatethe equipmentsafelyiftheydo
haveaccess tothisequipment.
WARNING! Donotabuseordamage apowercord.Ifanypowercordisdamaged,itmustbe replaced by
the manufacturer,itsserviceagentorasimilarlyqualified person inordertoavoidahazard.Areplaceable
cordmust be replaced withan authorised replacement froman authorised serviceagent only.
WARNING! Onlyuseattachments/accessoriesassupplied orspecified bythe manufacturer.
WARNING! Unplug thisapparatuscompletelyfromthe powersourceduring lightning stormsorwhen
unused forlong periodsof time.
WARNING! Attention isdrawntothe environmental aspectsof disposing of the supplied battery.
WARNING!Referall servicing toqualified personnel.Servicing isrequired when the apparatushasbeen
damaged inanyway,suchaswhenthe powersupplycordorplugisdamaged,liquidhasbeen spilled onto
orobjectshavefallen intothe apparatus,ifthe apparatushasbeen exposedtorainormoisture,doesnot
operatenormally,orhasbeen dropped.
WARNING! Forhouseholduseonly,thisapparatusisnot intended forcommercialuse.
WARNING! If thisapparatusistobe used byathirdparty, pleasesupplytheseinstructionswithit.
WARNING! Noliabilitywillbeacceptedforanypersonalinjuryordamagecausedbyfailuretofollow
these instructions.

3
Thisproductincorporatescopyrightprotection technologythatisprotectedbyUSpatent
rights.Useofthiscopyrightprotection technologymustbeauthorisedbytheMacrovision,
and isintendedforhomeand otherlimitedviewing useonlyunlessotherwiseauthorisedby
Macrovision. Reverseengineering ordisassemblyisprohibited.
ManufacturedunderlicencefromDolbyLaboratories. Dolbyand thedouble-Dsymbolare
trademarksofDolbyLaboratories.
ConfidentialUnpublishedWorks, 1992-1997DolbyLaboratories. Inc.Allrightsreserved.
CLEANING
WARNING! Beforeyouattempttocleanthetelevisionscreenorcabinet,always disconnectthe
appliancefromthemainspowerandremovetheplug fromthe mainpoweroutlet.
Cleanthe television withasoftdryclothonly.Neveruseanyharshchemicalcleaning
agent orwaterasthismaydamage the television.
WARNING! Neverallowwatersplashestoenterthe appliance. Donotimmerseinwater.
WARNING!Neverremovetherearcover. Donotattempttoservice thisequipment.

4
CONTENTS
Safetyprecautions4
Installation 5
Frontof the machine 6
RemoteControlUnit8
Antenna connectionmethod11
TVOperation12
Picturemenu13
DVDplayeroperation16
GeneralSetup16
DVDoperations19
ProgramMode 23
Troubleshooting25
Specification 26

5
Safetyand Precautions
1.SAFETYPRECAUTIONS
CAUTION:TO REDUCETHERISKOFELECTRICSHOCK. DO NOTREMOVE
COVER(ORBACK).
NO USERSERVICEABLEPARTSINSIDE.REFERSERVICING TO QUALIFIED
SERVICEPERSONNEL.
LOCATEthe receiverinthe roomwheredirect light doesnot strikethe screen.Total
darkness orareflection on thepicturescreencan causeeyestrain.Soft and indirect
lightingisrecommended forcomfortableviewing.
ALLOWenough spacebetween the receiverand the walltopermit proper
ventilation.
AVOIDexcessivelywarmlocationstoprevent possibledamage tothe cabinet or
component failure.
POWERCONNECTION
ThisTVreceivercanbe connectedto230V-240VAC50Hz, NEVERconnect toDC
supplyoranyotherpower.
AUTOMATICDEGAUSSING
Allcolourtelevision receiversaresensitivetomagneticinfluences,usuallycaused
byeithermoving the receiverfromone placetoanotherorusing certainelectrical
appliancesnearthereceiver.Thisresidualmagnetismasit iscalled, sometimes
causesdistortion whichgivesriseto"blotchy"areasof colourinthe picture.To
avoidtheseeffectsthe receiverincorporatesanautomaticdegaussing circuit which
operatesforashortwhileimmediatelyeachtimethe receiverisswitched onusing
the mainsswitch. Thiscircuit removesanyresidualmagnetisminthe metalpartsof
the picturetube and thereforeensuresthat eachtimethe receiverisswitched"ON"
usingthe Mainsswitch, the purityof the coloursdisplayed on the screenremain
true andlifelike. If the setismoved orfaced inadifferent direction , the mains
switchmust be switched off foratleast20 minutesinordertomakesurethat the
automaticdegaussingcircuitoperatesproperly.
2.INSTALLATION
Pleaseread and followthe instructionscarefullybeforeyou operatethisTVsetin
ordertoavoidthe setfromanydamage due towrong operation.
Anyadjustment orrepairtotheTVset shouldonlybe donebyaqualified service
engineer.

6
LocatetheTVsetinthe roomwheredirectlightdoesnot strikethe screen and
causereflection on the picturescreen. Reflection willreducecontrast and colorof
pictures.
Totaldarkness orareflection on thepicturescreen cancauseeyestraineasily.
Soft and indirectlightingisrecommended forcomfortableviewing.
Avoidexcessivewarmlocationstopreventpossibledamage tothe plasticcabinet
orcomponents. Keep thisTVset awayfromradiatorsand otherheat sources.
Avoidusingthe TVset nearstrong magneticfields.
Giveenoughspacebetween the TVset andthe walltopermit properventilation.
Donot block orcoverthe ventilation slotsand openingsonthe set. Avoidplacing
the TVsetinclosespacesunless thereisadequateventilation.
Usethe TVsetinahorizontal(flat)position only.
Avoiddroppingthe TVset tothe ground andvibrating the set violently.
CAUTIONS:
Donot pushobjectsof anykindintothecabinetslotsastheymaytouchcurrent-
carrying partsorshort-circuit parts, resulting infire, electricshock ordamage tothe
TVset.
Becarefulnot tospillliquidof anykindon thisTVset. If itoccurs,disconnectthe
ACpowersupplycordimmediately.And if thereareanyfaults, consultaqualified
serviceengineer.
Donot placeheavy objectson the TVset whichmaydamage the cabinet or
causetrouble.
Unplugthe TVset fromthe ACoutlet when it willnotbe usedforaprospective
longperiodof time.
During thunderingand lightning,do unplug the powercordand antenna cordto
prevent the TVset and nevertouchthe antenna cordduringlightning.
You mayexperiencestaticdischarge when touching theTVset. If thishappens
and the TVset failstobe operated, turnoff thepowerand disconnect theplug from
the walloutlet.
Donot openthe cabinet. Thereareno partsinsideyou canservicebyyourself.
Referallservicing toqualified servicepersonnel.
Nevertamperwithanycomponentsinside yourset oranyotheradjustment not
mentioned inthismanual. AllTVsetsarehighvoltage instruments. The picturetube
ishighlyvacuum, If broken,glass fragmentsmaycausehurt. Scratching, chipping
orunduepressureisdangerousand shouldbeavoided. All “insidework”on your
TVset shouldbe performed onlybut qualified servicepersonnel!
TO AVOIDTHERISK OFFIREORELECTRICSHOCK, DO NOTEXPOSE THIS
APPLIANCETO RAINORMOISTURE.

7
3.NAMESAND FUNCTIONSOFCONTROLS
FRONTOFTHEMACHINE
1. Speaker
2. Remotecontrolreceiving window
3. Indicator
4. MENU button
5. TV/AV/DVDbutton
Pressing thisbutton canswitchoverasfollows:
TV→AV1→AV2 →DVD
7. SKIP+button
8. ChannelButton(P+)
9. ChannelButton(P-)
10. VolumeButton(V-)
11. VolumeButton(V+)
12. PLAY/PAUSE button
13. OPEN/CLOSE button
14. Mainpowerswitchbutton
15. 75ohmAntenna Socket
16. RearAV in
17. AV out
18. Front AV
interfacedescription:
1.Front AV: AV2signalinputinVIDEO2mode.
2.RearAV: AV1signalinputinVIDEO1mode.
Note: BecausetheAudioinputsof DVDand rearAV areparallel, sowhen using
DVD, pleasedon'tinput signaltorearAV at thesametime.
4. CONNECTORS
RearPanelconnectors
1. VideoIN1: video terminalforDVD, VCR or
otherdevice. Used asthe videoinputfor
AV1.
2. AudioIN1: audioterminalforDVD, VCR or
other. Usedastheaudioinput forAV1.
3. AudioOUT: Audiooutputterminal.
4. VideoOUT: Video output terminal.
5. RFInput: terminalforantenna orCATV
coaxialcable.

8
Side connectors
VideoIN2:
Video terminalforDVD, VCR orotherdevice.
Used asthe video input forAV2.
AudioIN2:
AudioterminalforDVD, VCR orotherdevice.
Used asthe audioinput forAV2.
5.REMOTECONTROLLER
WiththisremotecontroltheTVset canbe operated fromacertaindistance. Please
takecareof thefollowing:
1.The remotecontrolhandset must be pointedtothe infraredremotesensorwhile
operatinganyremotefunctions.
2.Allthe remotecontrolshavealimited effectiverange. If theTVset cannot be
operatedbytheRemoteController, check the distanceandthe effectiverange to
the TVset.
3.Keep the transmitting windowof the RemoteControllerand the remotesensorof
the TVset clean.
4.Pleasefollowthe maintenanceadvicefortheremotecontrolhandset.
6. MAINTENANCEOFTHEREMOTECONTROLLER
1. When the RemoteControllerno longeroperatesproperlyat normalviewing
distances, thebatteriesmust be replaced.
2. If theRemoteControllerisnot used foralongerperiod of time, itis
recommended toremovethe batteriesinordertoavoidleakage.
3. Donotdropthe RemoteControllerhandset.
4. Donotexposethe remotecontrolhandset tohigh temperatureandmoisture!
5. Donotdisassemblethe remotecontrolhandset!
6. Thebattery'slifetimenormallyisapprox. 1year.
7. Weakbatteriesmust be replaced toavoidleakage.
8. Always replacethe fullset ofthe batteries.
9. The removed batteriesmust be eliminatedaccordingtothevalidregulations.
REMOTE CONTROLLER
1.MAINTENANCEOFTHEREMOTECONTROLLER
• Whenthe remotecontrollernolongeroperatesproperlyat normalviewing
distances, thebatteriesmust be replaced.
• If the remotecontrollerisnottobeused fora
longerperiod of time, recommended toremove
the batteriestoavoidelectrolyteleaking.
• Donot mixnewbatterieswitholdones,
differentbrands, ordifferent type.

9
• Whenthe batteryistobe exhausted, electrolyteleaking mayoccurand
damage maybe caused totheremotecontroller.
2.BATTERYINSTALLATION
• Removethe batterycover.
• Insert thetwo “AAA”1.5Vbatterieswiththe polaritymatching withthe mark
inside the batterycompartment.
• Closethe batterycover.
Use ofremotecontrol
Point theremotecontroltowardthe infra-red remotesensoron the mainunit. If
thereisanobstaclebetween the mainunitandremotecontrol, theremotecontrol
maynot operateproperly.
3.DESCRIPTIONOFREMOTECONTROLKEYS
R2 (DVDbutton):Theremotecontrol button inDVDmode: Press the button, allbuttonsare
functionalinDVDremotecontrol buttonsarea. InTVremotecontrolbuttonsarea, thereareonlysix
buttonsarefunctional:
R1 (),R13 (),R21 (V+)and R7 (V-),the otherTVarea areallnon-functional.
R1():Stand-By Button
R2:(DVD)Theblue buttonson the bottomofthe remotecontrollerarethe remotecontrolbuttons
area intheDVDmode.
R3 Digit button:TVchannelsselect button ordigitinputbutton dvddigit input button
R4():TVprogramsinterchange button.
R5(-/--/---):TV2-digitalor3-digitalchannel numberswitchbutton
R6(CALENDAR):Calendarbutton
R7(V-)/R21(V+):Volumeincrease/decreasebutton
R8(PS):Sound mode button (Non-function inthismodel)
R9: (LED): When the LEDsendstwinkling red light,theremotecontrollerisinTVcontrolmode;
Whenthe LEDsendsgreen light, theremotecontrollerisinDVDcontrolmode.
R10:(AV/DVD):Press thisbutton you can selectAVmode orDVDmode.
R11(TVbutton):The remotecontrol button inTVmode:Press the button, all buttonsarefunctional in
TVremotecontrolbuttonsarea. InDVDremotecontrol buttonsarea, allbuttonsarenon-functional.
R13(MUTE):Mutebutton
R14(DISPLAY ):Displaybutton
R15(FAV):Favbutton
R17(SLEEP):Sleep button
R18(PP): PPbutton

10
R19FAV.SET): Fav.setbutton
R20(P+)/R23(P-):Programdecrease/increasebutton
R22(MENU):Tvmainmenu button
R24(GAME):Gamebutton
R25( : ):DVDsearchforwardbutton
R26(9):DVDskipbackwardbutton
R27( r):DVDup direction button
R28(OK):DVDconfirmbottom
R29(SETUP):DVDmenu setup button
R30( v):DVDleft direction button
R31(TITLE):DVDtitlebutton
R32( ):DVDopen/closebutton
R33(;/4):DVDpause/playbutton
R34():DVDstop playbutton
R35(REPEAT): DVDrepeat button
R36(A-B ):DVDA-Bbutton
R37(CLEAR): DVDclearbutton isused to
deletethe itemsinprogramofDVD
R38(ZOOM) :DVDzoombutton
R39(GOTO):DVDtimechapterplayback
buttons
R40(+10 ):Exceed 10 digitalinput button of
DVD
R41(7):DVDsearchbackwardbutton.
R42( 8):DVDsearchforwardbutton
(
R43(MENU): DVDmenu bottom
R44(w):DVDrightdirection button
R45(PROGRAM): DVDprogrammesbutton
R46( s): DVDdowndirectionbutton
R47(DISPLAY):DVDdisplaybutton
R48(SLOW): DVDslowbutton
R49(ANGLE): DVDangleswitchbutton
R50(SUB-T):DVDsubtitleswitchbutton

11
R51(AUDIO):DVDsound switchoverbutton
R52(PBC): DVDPBCswitchbutton
BASICCONNECTION
1.ANTENNACONNECTION
Toconnect the 75 OHMcoaxialcablefromthe antennatotheRFsocket on the
rearpanel, asshownabove.
• Forbetterreception,especiallyinoutlyingareasorwhereghostingor
interferenceoccurs, anexternalroof-mounted antennaisrecommended.
• ForUHFchannelreception, usethe specified UHFantenna.
• When using 300Ωflatcable,a300Ω–75Ωadaptershouldbe used fora
properconnection toRFsocket.The 300Ω–75Ωadapterisnot supplied.
2.POWERCONNECTION
• Plug thepowercordintoan ACoutlet (AC230 –240V~50Hz)
• Press POWERbuttontoturnonthe television, press POWERbutton again
toturnoff thetelevision.
Importantnote:Delayedpicture/ Sound.
Thistelevisionhas anautomaticinternalcheckingfunction.Eachtimepoweris
turned ON’usingthemainpowerswitchorpressingthePOWERbuttononthe
remotecontrol, itwill activatethisautomaticcheckingfunction,whichtakes 5~7
secondsbeforethereceiverdisplaysanypictureandsound.
PRESETTINGTHE TV CHANNEL
1.AUTO SEARCH
Whenthetelevisionisturned on forthe firsttimethe TV
programsneed tobe set. Toautotunethe programs,press
MENU button repeatedly(on the frontpaneloron the remote
control)untilthe searchmenu isdisplayed on the screen:
Use “P+”or “P-“buttontoselectthe AUTOSEARCH option.
Press “V+”buttontostart theautosearchfunction.
SEARCH →
AUTO SEARCH
PROGRAM1
SORTTOPRO.6
CONFIRM
VHFL

12
Autosearchfeatures:
• During autosearching,allTVchannelfoundwill be automaticallystored starting
fromthe current ProgramNumber.
• If thenumberofTVchannelsfound exceedsthe maximumnumberofthememory
locationsthe autosearchwillstopautomatically.
• At the end ofautosearch,the first TVchannelfound willbe displayed.
2.MANUALSEARCH
The useof manualsearchisrecommended when:
• The automaticsearchfunction cannotfind thedesired channel.
• TostoreTVChannelsunderparticularProgramnumbers, one byone.
Followthesestepstomanuallyfind andstoretelevisionchannels.
1.Press MENU button 5timesuntilthe manualsearch
menu isdisplayed, andthenpress V+button intothe
ManualSearchsubmenu.
2.Select theoptionPROGRAMusing P+and P-buttons
and select the programnumberusing V+and V-.
3.HighlightSEARCH and press V+forascending
frequencysearch, orV-tosearchforlowerfrequency TV
channels. Repeat thisstep untilthe desired channelis
found.
4.The TVwillstoreautomaticallythe channelfound undertheselected program
number. Press MENU button toexit thismenu.
TV OPERATIONAND FUNCTIONMENU
MAINMENU OPERATION
Press the MENU button repeatedlyon thetelevision oron the remotecontroltoselect
PICTUREmenu, SOUND menu, TIMERmenu, SETUPmenu and SEARCH menu on the
screen.
Picturemenu
Searchmenu
Setup menu
Timermenu
Soundmenu
BACK ←
PROGRAM1
SKIPOFF
BAND VHFH
FINETUNE
SEARCH
BRIGHTNESS50
CONTRAST75
COLOUR 50
SHARPNESS 50
VOLUME50
CLOCK18:28
OFFTIME--:--
ON TIME--:--
ON PROG 1
REMINDTIME--:--
REMINDPROG1
LANGUAGEENGLISH
COLOURSYS AUTO
SOUNDSYSBG
BLUEBACKON
BLACK STRETCH OFF
SEARCH →
AUTO SEARCH
PROGRAM1
SORTTOPRO.6
CONFIRM
VHFL

13
1.PICTUREmenu
Press MENU oncetodisplaythe picturemenuon the
screen.
• Select theitemthat you want toadjust using P+orP-.
Thatisbrightness, contrast, colour, orsharpness.
• Adjust the itemvalue usingV+orV-.
• Press MENU repeatedlytoexit thismenu.
Brightness, contrast, colourand sharpnesscanbe
adjusted between 0and 100.
2.SOUND menu
Press the MENU button twicetodisplaythesound
menu on the screen.
• Adjust the itemvalue usingV+orV-.
• Allthe finaladjusted valueswillbe automaticallysaved.
• Press MENU repeatedlytoexit thismenu.
3.TIMERmenu
Press the MENU button 3times, sothat thescreen will
displaythe timermenu (asshown).
UsingTIMERmenu operation,youcanstartautomatically
the TVtowatchacertainprogramataparticulartime.Also
you can placethe TVsetinstandbymode ataset time.
Read thisexampletolearnhowtooperatetiming
functions.Forexample,itisnow18:28 and you wanta
remindertowatchProgram6at19:00 and turnthe TVoff
at22:30 (standby);then turniton at7:30 thenextmorning toshowProgram12.
The timercan be programmed asfollows:
• InTVmode pressMENU 3timesorpress TIMEonceto
entertheTIMEmenu.
• Selectthe CLOCKoption and enterthe currenttime.Use
P+,P-and V+,V-tonavigatethe menu optionsand to
changevalues.Theselected optionswillchangecolour
fromblue towhite.
• Selectthe OFF TIMEoption and entertheending time
22:30
• Selectthe ONTIMEoptionand enterthestarting timeas
7:30.
• Select theONPROG optionand enterthe programnumber12.
• Select theREMIND TIMEoption and entertheremind time19:00.
• Select theREMIND PROG optionand enterthe programnumber6.
• Press MENU button toexit thismenu.
BRIGHTNESS50
CONTRAST75
COLOUR 50
SHARPNESS 50
VOLUME50
CLOCK18:28
OFFTIME--:--
ON TIME--:--
ON PROG 1
REMINDTIME--:--
REMINDPROG1
CLOCK18:28
OFFTIME22:30
ON TIME7:30
ON PROG 12
REMINDTIME19:00
REMINDPROG6

14
4.SETUPmenu
Press the MENU button 4times, sothat thescreen willdisplaythe set-up menu (as
shown).
• Thistelevision set displaylanguageisENGLISHonly.
• If the colourorsound ofachannelisnotnormal,the
problemmaybe wrong settingsforcolourorsound
systems. Inthissituationproceed asdescribedbelow:
If the colourof the pictureisnot normal
Press P+orP-toselectthe COLOUR SYS menu option(it
turnsfromblue towhite), andthen press V+orV-toselect
the correct coloursystem. The following selectionsequencewillbe displayed:
AUTO→PAL→NTSC4.43→NTSC3.58
If the sound isnotnormal
Press P+orP-toselectthe SOUND SYS option, and then useV+orV-toselect a
correct sound systemwithinthe followingselectionsequence:
BG →DK →I
Note: If you areusing the television forthe first time, pleasefirst followthe automatic
searchproceduretostorethe programsasdescribed abovein Preset TVChannel”.
• SETTING BLUEBACK
Setting the Blue Background option to ‘ON willdisplayauniformblue colour
instead of the typicalblack and whitedots “snow”when thereisno reception.
SelecttheBLUEBACKoption and change itsstatus
toON.UseP+,P-selectoptionsandV+,V-to
change values.Theselectedoptionswillchange
colourfromblue towhite.
Press MENU button repeatedlytoexit thismenu
The blueback isdisabled during searchmode.
If the blueback issetasOFF,the screenwillshow
smoothdarkgreypatternunderAV statusandshow
black and whitedotsunderTVstatuswhen thereisno signal.
• SETTING THEBLACKSTRETCH
Setting the Black Stretchon willincreasethe
gradationof pictures.
SelecttheBLACKSTRETCH optionandchange its
statustoON.UseP+,P-selectoptionsand V+,V-to
change values.Theselectedoptionswillchange
colourfromblue towhite.
LANGUAGEENGLISH
COLOURSYS AUTO
SOUNDSYSBG
BLUE BACKON
BLACK STRETCH OFF
LANGUAGEENGLISH
COLOURSYS AUTO
SOUNDSYSBG
BLUEBACKON
BLACKSTRETCHOFF
LANGUAGEENGLISH
COLOURSYS AUTO
SOUNDSYSBG
BLUEBACKON
BLACK STRETCH OFF

15
Press MENU button repeatedlytoexit thismenu.
5.SEARCH menu
Press the MENU button 5times, sothat thescreen will
displaythe searchmenu (asshown).
The SearchMenu isnotavailableinAV mode.
• AUTO Search
Use “P+”or “P-“button toselectthe AUTOSEARCH
option.Press “V+”buttontostarttheautosearch
function.
• ProgramSort function
You can usethe programsortfunctiontorearrange the position ofchannelsin
memory.Forexampleafterperforming an automaticsearchfortuning inprograms,
theremaybe somerepeatedprogramsand someblankprograms.If you wantto
arrangethe desiredprograms, you can makethe following operation:
1.UseP+orP-toselectPROGRAMoption andV+orV-toselecttheprogram
numberyou want tosort. That programwillbedisplayed onthe screen.
2.UseP+orP-toselectSORTTOPROoption andV+orV-toselectthe
destination fortheprogramnumberyou want tomoveto.
3.UseP+orP-toselect CONFIRMoption and press V+tomakethe change.
4.Press MENU toexit thismenu.
• ManualSearchsubmenu
Press MENU button 5times, and then press V+button
intothe ManualSearchsubmenu.
Selectthe option PROGRAMusing P+and P-buttons
and select the programnumberusing V+and V-.
Selectthe optionSKIPusing P+and P-buttonsand
usingV+and V-toskipthe current program.
SelecttheoptionBAND usingP+and P-buttonsand using V+and V-toselectthe
band fromVHFL, VHFHand UHF.
Selectthe optionFINETUNEusing P+and P-buttonsand using V+and V-totune
and storethe current program.
Selectthe optionSKIPusing P+and P-buttonsand usingV+and V-tosearchand
storethecurrent program.
Press MENU toexit thismenu.
SEARCH →
AUTO SEARCH
PROGRAM1
SORTTOPRO.6
CONFIRM
VHFL
BACK ←
PROGRAM1
SKIPOFF
BAND VHFH
FINETUNE
SEARCH

16
DVDOPERATION
1. BASICPLAYDVDOPERATION
1.Press TV/DVDbuttonontheremotecontrollerorDVDbutton on the TVsetto
turnon (oroff)DVD.
2. Press OPEN/ CLOSE button toload disc intodisc tray.
Holdthe disc withouttouching eitherofitssurfaces,position itwiththe printedtitle
side facing up, align it withthe guides, andplaceitinitsproperposition.
3. Press OPEN/ CLOSE button toclosethetray.
2. DVDSETUPMODE
Setup Mode providesthemenu fortheconfiguration ofGeneralSetupPage,
SpeakerSetup Page,DolbyDigitalSetup,Video Setup Page andPreferencePage.
Itemselection inthe Setup Menu isdone byusing the Navigation Arrows,SETUP
button and the OK
button.
·Press the SETUPbuttonfirst,enterintoSETUPmenu,then press the
DIRECTIONRIGHTbutton,
you can enterintothenext Sub-menu.
·Press the SETUPbuttonagaintoexit the Setup Menu.
1. General Setup
TVDisplay
PS
Thisisselected when the DVDplayerisconnected toa
normal
TV.Wide-screenimagesareshownon thescreen,but
withsomeparts
cut automatically.
LB
Thisisselectedwhen the playerisconnectedtoanormalTV.
Wide-screenimagesareshownon the screen, withblack belt
on the top andbottom.
Wide
Thisisselectedwhen the player
isconnected toawide-screenTV.
AngleMark
Thisonlyworks when thereisananglemarkon thedisc.
SelectON,the screenshowsthemarkwhen playing
DVD.
ON
OFF
OSDLanguage
Thisisused toselect the OSDlanguage.

17
ScreenSaver
Startthescreensaver,thescreensaverimage will
appearwhen the
playerstopsorthepictureisfrozenforafewminutes.
Thissavercan
keep the screen frombeing damaged.
On(Start the screen saver)
Off (Turnoff the screen saver).
2. AudioSetupPage
Downmix
LT/RT
Adisc recordedmultichannelsoundtrack,
the output signalwillbe incorporatedtoleft
and rightchannel.
Stereo
Adisc recordedmultichannelsoundtrack,
The output signalwillbeincorporated tostereo.
3. DolbyDigital Setup
Dual Mono
Thisisused toselect the Stereo,L-MONO
R-MONO and MIX-MONO.
Dynamic
Thisoption isused tosetthe compression ratioinorder
tocontrolthe sound (volume)contrast.
4.VideoSetup
Sharpness
Thisoptionisused toset thesharpness
levelof the sharpness of the video output
High
Medium
Low
Brightness
Usercansetthelevelofbrightnessforthe image
displayed.
It israngedfrom-20 to20.

18
Contrast
Usercan set the levelof contrast fortheimage displayed.
It israngedfrom-16 to16.
5.Preference Setup
You must press STOPtwicetoenterPreferencePage
TVType
·PAL-Thisisselectedwhen the playeris
connected toaPALSystemTV.
·MULTI -The playerwillset theTVsystem
according tothe discinthe tray.
·NTSC-Thisisselectedwhen the playeris
connected toaNTSCSystemTV.
Audio
Tochange the audiolanguage.
Note: Not alldiscs willhavethisfunction.
Subtitle
Toturnthe subtitleon /offand selectthelanguage you
require.
Note: Not alldiscs willhavethisfunction.
Disc Menu
Tochange the disc menu you require.
Note: Not alldiscs willhavethisfunction.
Parental
Whenplaying discwithparentallockfunction,you may
selectanAge ControlGradeaccordingtograde ofdisc
and yourownpreference.
Forexample,ifPGisselected,DVDVideodisc rated
higherthan the
PG grade cannot beplayed.
·KIDSAFE
·G
·PG
·PG 13

19
·PGR
·R
·NC 17
·ADULT
Password
Usercanchangethepasswordthatisrequired when
the userwantstochange the Age ControlGrade inthe
ParentalLock function.
NOTE: (Presetpasswordis3308)
Default
Usercan loadthe factorydefault setting bychoose
RESETand press OKbutton.
DVDOPERATIONS
PlayDiscs
1.Press the OPEN/CLOSE Button ()onthefrontpanelandload the Disc on
the tray.
The labelside shouldbe facing upwards.ForaDouble-sided DVDDisc,putthe
disc withlabelA/1up.
2.PresstheOPEN/CLOSE ()button againtoclosethetrayandthediscwill
be loaded.
3. The Disc willbe played automatically.
ForaDVDdisc,it willshowthe Menu/TitlePage on thescreen.
ForaCD,itwillplaythe first track directly.
4.PresstheSTOPButton( )ifyouwanttostop theDisc playbackYou can
continue
playback bypressingtheOKbutton(onthefrontpanel)orthe OKbutton (on the
remotecontroller) and it willstart at
the location whereyou havepressed stopped (ResumePlay).
5. Press the STOPButton twicetohavethe Disc reallystopped.
Table of contents
