Forma Scientific ThermoQuest 4535 User manual

Forma Scientific Division
Millcreek Road, P.O. Box 649
Marietta, Ohio 45750
U.S.A.
Telephone: (740) 373-4763
Telefax: (740) 373-4189
________________________________________
Models: 4535 and 4536
Console Incubator Orbital
Shaker*
Operating Manual
Manual No. 7014535 Rev. 6
*Triple counter-balanced, single eccentric drive mechanism (U.S. Patent #5,558,437)
* Horizontal HEPA-filtered airflow design (U.S. Patent #5,577,837)
* Test tube rack (u.s. Patent #5,632,388)
R
ead This Instruction Manual
Failure to read, understand and follow the instructions in this manual may result in
damage to the unit, injury to operating personnel and poor equipment performance.
Refer to the serial tag on the
rear cover of this manual

Forma®Model 4535/4536 ____________________________________________________
ii
Models 4535/4536 must be used to process non-flammable
materials only.
Grounding circuit continuity is vital for the safe operation
of this shaker. Never operate this unit with the grounding
conductor disconnected.
The material in this manual is for information purposes only. The contents and the
product it describes are subject to change without notice. ThermoQuest makes no
representations or warranties with respect to this manual. In no event shall ThermoQuest
or Forma Scientific Division be held liable for any damages, direct or incidental, arising
out of or related to the use of this manual. When contacting the factory regarding this unit,
have the model, serial number and date of purchase available.
MANUAL NO. 7014535
6 18028/OS-177 12/28/99 No modified base cover for recorder, artwork change ccs
5 18544/OS-202 10/21/99 Add power fail time delay, chg’d check belt message clear ccs
4 18236/SI-7572
18404
7/20/99 Added microplate racks 600089, 600090
Removed drive mechanism bracket ccp
-- 17928/SI-7405 6/7/99 Added universal test tube holder 600088 ccp
3 SI-7348 2/5/99 Updated parts list and schematics ie. board chgs R. Bruker ccp
REV ECR/ECN DATE DESCRIPTION

Forma®Model 4535/4536 ______________________________________________Service
iii
Do You Need Information or Assistance on Forma
Products?
®
do, please contact us 8:00 a.m. to 7:00 p.m. (Eastern Time) at:
1-740-373-4763 Direct
1-888-213-1790 Toll Free, U.S. and Canada
1-740-373-4189 FAX
http://www.forma.com Internet Worldwide Web Home Page
If you
Our staff can provide information on pricing and give you quotations. We
can take your order and provide delivery information on major equipment items or make
arrangements to have your local sales representative contact you. Our products are listed on the
Internet and we can be contacted through our Internet home page.
Our staff can supply technical information about proper setup,
operation or troubleshooting of your equipment. We can fill your needs for spare or replacement
parts or provide you with on-site service. We can also provide you with a quotation on our
Extended Warranty for your Forma products.
Whatever Forma products you need or use, we will be happy to discuss your
applications. If you are experiencing technical problems, working together, we will help you
locate the problem and, chances are, correct it yourself...over the telephone without a service
call.
When more extensive service is necessary, we will assist you with direct factory trained
technicians or a qualified service organization for on-the-spot repair. If your service need is
covered by the warranty, we will arrange for the unit to be repaired at our expense and to your
satisfaction.
Regardless of your needs, our professional telephone technicians are available to assist
you Monday through Friday from 8:00 a.m. to 7:00 p.m. Eastern Time. Please contact us by
telephone or fax. If you wish to write, our mailing address is:
ThermoQuest
Forma Scientific Division
Millcreek Road, PO Box 649
Marietta, OH 45750
International customers please contact your local ThermoQuest, Forma Scientific
Division distributor.
Sales Support
Service Support
®

Forma®Model 4535/4536 _______________________________________________Safety
iv
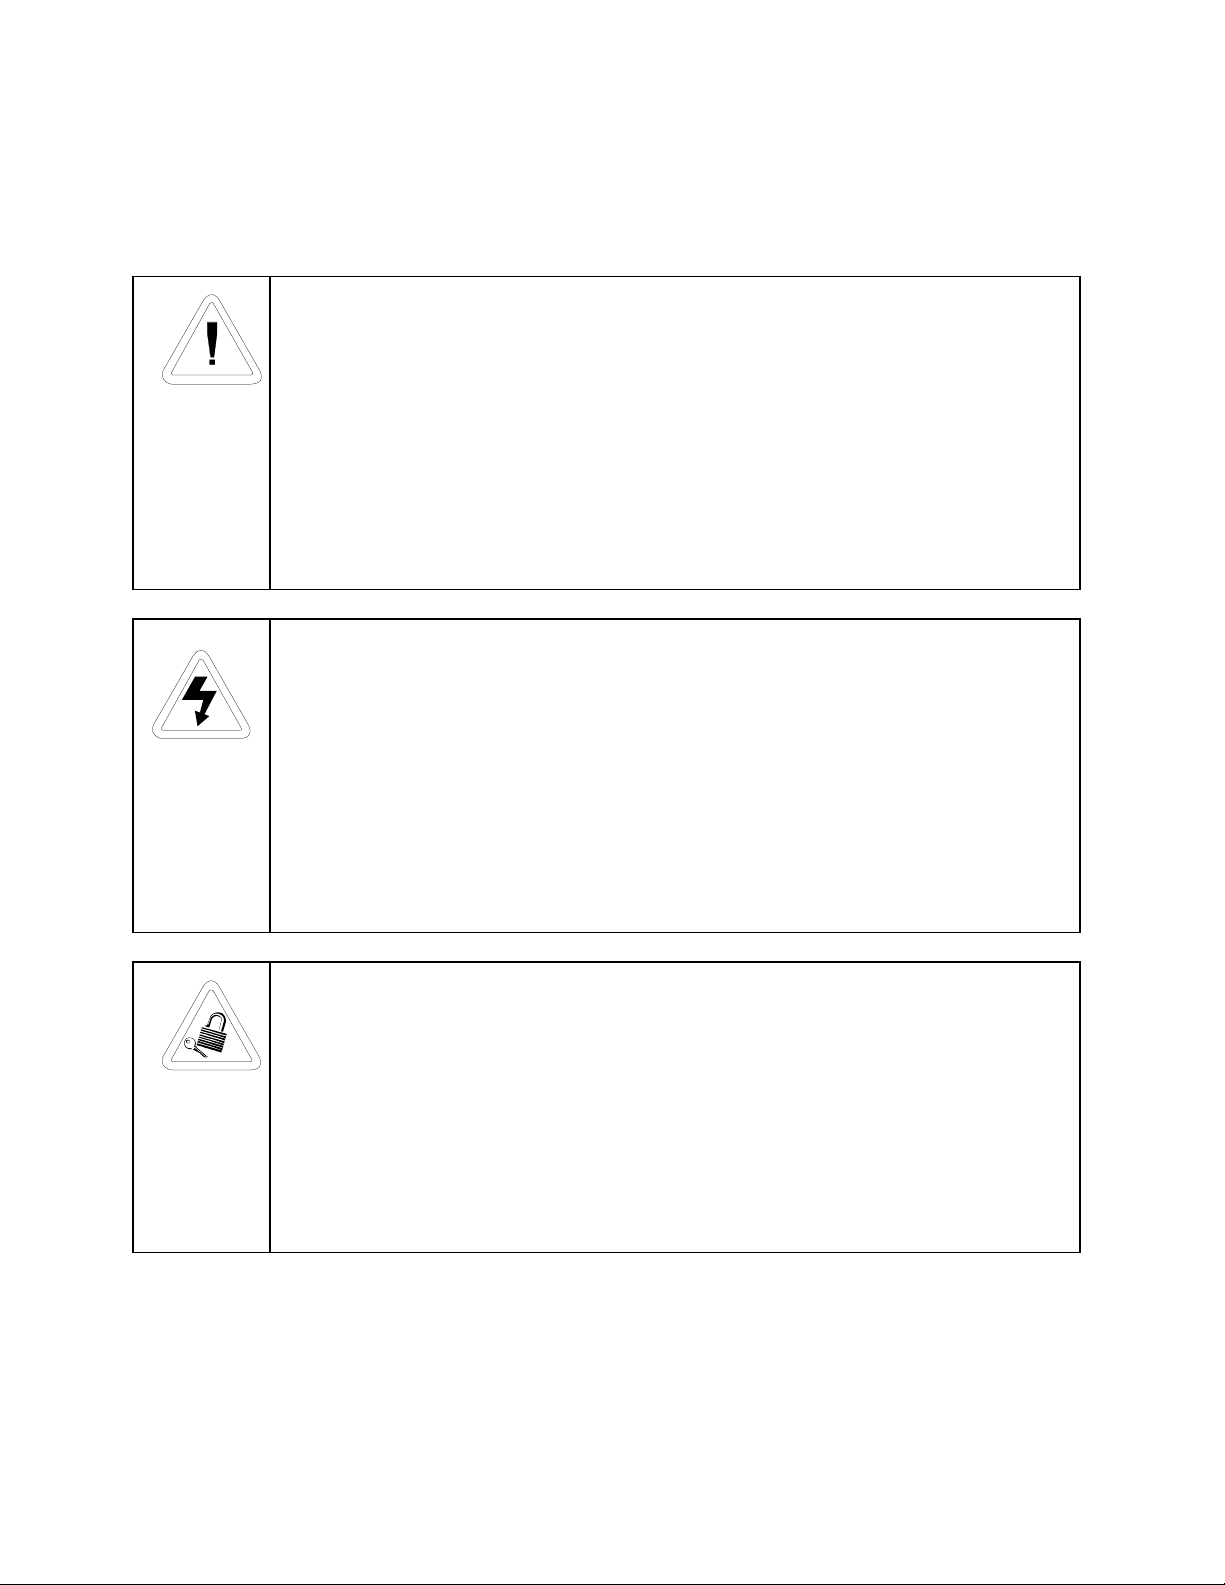
General Safety Notes used in this Manual
Important operating and/or maintenance instructions. Read the
accompanying text carefully.
Ce symbole attire l’attention de l’utilisateur sur des instructions importantes de
fonctionnement et/ou d’entretien. Il peut être utilisé seul ou avec d’autres symboles
de sécurité. Lire attentivement le texte d’accompagnement.
Wichtige Betriebs- und/oder Wartungshinweise. Lesen Sie den nachfolgenden
Text sorgfältig.
Importante instruccions de operacion y/o mantenimiento. Lea el texto
acompanante cuidadosamente.
Potential electrical hazards. Only qualified persons should perform
procedures associated with this symbol.
Ce symbole attire l’attention de l’utilisateur sur des risques électriques potentiels.
Seules des personnes qualifiées doivent appliquer les instructions et les procédures
associées à ce symbole.
Gefahr von Stromschlägen. Nur qualifizierte Personen sollten die Tätigkeiten
ausführen, die mit diesem Symbol bezeichnet sind.
Potencial de riesgos electricos. Solo personas das capacitadadas deben ejecutar
los procedimientos asociadas con este simbulo.
Equipment being maintained or serviced must be turned off and locked off to
prevent possible injury.
Risques potentiels liés à l’énergie. L’équipement en entretien ou en maintenance
doit être éteint et mis sous clé pour éviter des blessures possibles.
Geräte, an denen Wartungs- oder Servicearbeiten durchgeführt werden, müssen
abgeschaltet und abgeschlossen werden, um Verletzungen zu vermeiden.
El equipo recibiendo servicio o mantenimiento debe ser apagado y segurado para
prevenir danos.

Forma®Model 4535/4536 _______________________________________________Safety
v
Hot surface(s) present which may cause burns to unprotected skin or to
materials which may be damaged by elevated temperatures.
Présence de surface(s) chaude(s) pouvant causer des brûlures sur la peau non
protégée, ou sur des matières pouvant être endommagées par des températures
élevées.
Heiße Oberfläche(n) können ungeschützter Haut Verbrennungen zufügen oder
Schäden an Materialien verursachen, die nicht hitzebeständig sind.
Superficias calientes que pueden causar quemaduras a piel sin proteccion o a
materiales que pueden estar danados por elevadas temperaturas.
√Always use the proper protective equipment (clothing, gloves, goggles etc.).
√Always dissipate extreme cold or heat and wear protective clothing.
√Always follow good hygiene practices.
√Each individual is responsible for his or her own safety.

Forma®Model 4535/4536 _______________________________________Contents
vi
Table of Contents
Page
Section 1 – Receiving
1.1 Packing List..................................................................................... 1-1
1.2 Pallet Hold-Down Shipping Brackets............................................... 1-1
Section 2 - Installation
2.1 Location........................................................................................... 2-1
2.2 Installing the Cabinet Stand-off bolts............................................... 2-1
2.3 Chamber Drain ................................................................................ 2-2
a. Condensate Drain ......................................................................... 2-2
2.4 Foot Pedal........................................................................................ 2-2
2.5 Assembling the Flask Clips.............................................................. 2-2
2.6 Installing the Flask Clips ................................................................. 2-3
2.7 Installing the Test Tube Holders ...................................................... 2-4
2.8 The RS-232 Interface Connector...................................................... 2-6
2.9 Connecting the Remote Alarm ......................................................... 2-7
2.10 Lid Security Lock .......................................................................... 2-8
2.11 Connecting the Unit to Electrical Power ........................................ 2-9
2.12 Quick Reference Guide .................................................................. 2-9

Forma®Model 4535/4536 _______________________________________Contents
vii
Section 3 – Operation
3.1 Introduction ..................................................................................... 3-1
3.2 Factory Settings ............................................................................... 3-2
a. At Initial Start-Up ....................................................................... 3-2
b. Pre-Set Programs ........................................................................ 3-2
c. Other Factory Default Settings .................................................... 3-3
3.3 Operating the Control Panel............................................................. 3-3
3.4 Quick Start Up................................................................................. 3-4
3.5 Changing the Shaker Time, Speed and Temperature ........................ 3-5
a. Changing the Time Setting.......................................................... 3-5
1. Hold ...................................................................................... 3-5
2. Countdown ............................................................................ 3-5
b. Changing the RPM Setting ......................................................... 3-5
c. Changing the Temperature Settings ............................................. 3-6
3.6 Operating the Shaker Using Pre-set Programs.................................. 3-6
3.7 Making or Editing the Pre-set Programs........................................... 3-6
3.8 Changing/Setting the Access Code................................................... 3-6
3.9 Setting the Remote Alarms .............................................................. 3-7
3.10 Turning the Audible Alarm Function On and Off........................... 3-7
3.11 Viewing the Accumulated Run Time ............................................. 3-7
3.12 Audible and Visual Alarms ............................................................ 3-7
a. Silencing the Audible Alarm .................................................... 3-8
b. Clearing the Alarm Display...................................................... 3-8
c. Over Temp Alarm and Over Temp Shutdown........................... 3-8
d. Raising and Lowering the Temp Alarm Setpoint ...................... 3-9
3.13 Temperature Calibration ................................................................ 3-9
3.14 Setting the Temperature Tracking Limit......................................... 3-10
3.15 Setting the RPM Tracking Limit .................................................... 3-10
3.16 Reading the Over Temperature Probe............................................. 3-10

Forma®Model 4535/4536 _______________________________________Contents
viii
Charts: Quick Reference Guide
3-1 Changing the Operating Time, RPM or Temperature Settings
3-2 Setting the Hold Time to Zero
3-3 Loading a Pre-Set Program
3-4 Editing the Pre-Set Programs
3-5 Setting or Changing the Access Code, Remote Alarms,
or Unit Configuration
3-6 Reading the Accumulated Run Time
3-7 Setting the RPM Tracking Limit
Section 4 - Maintenance
4.1 General Cleaning and Lubrication.................................................... 4-1
a. Shaker Platform and Cabinet ....................................................... 4-1
b. Control Panel .............................................................................. 4-1
c. Cleaning or Replacing the Cabinet Air Filter............................... 4-1
4.2 Servicing the Drive Belt................................................................... 4-2
Section 5 - Service
5.1 Alarms and Alarm Conditions.......................................................... 5-1
5.2 Changing the HEPA Filter ............................................................... 5-1
5.3 If the Shaker Will Not Operate ........................................................ 5-2
5.4 Spare Fuses and Fuse Locations ...................................................... 5-2
5.5 Circuit Boards.................................................................................. 5-4
5.6 Temperature Sensors........................................................................ 5-5
5.7 Blower Fan Motors and Heating Elements ....................................... 5-5
5.8 Heater Element Circuit Breaker ....................................................... 5-6
5.9 Tuning the Cabinet .......................................................................... 5-7
Section 6 - Specifications
Section 7 - Parts Lists
Section 8 - Electrical Schematic
Section 9 - Supplements and Warranty Information

Forma®Model 4535/4536 ______________________________________Receiving
1-1
Section 1 - Receiving
1.1 Packing List
The Model 4535 Orbital Incubator Console Shaker is supplied with the
following materials:
2 - Keys for the lid lock (packaged and attached to the outside of the unit)
1 - T-handle 5/32" hex socket wrench
2 - Platform alignment studs 1/4-20
1 - Shaker Platform
6 - Grade 8, 5/32" hex socket flat head screws (provided with platform)
1 - 3/4” open end wrench (for cabinet level)
2 - 1/4-20 x 7” stnd-off bolts with rubber caps
1 - Screwdriver for flask clip installation and removal
1 - Instruction manual
1.2 Pallet Hold-Down Shipping Brackets
To secure the console shaker to the shipping pallet, hold-down brackets are
attached to slots in both sides of the cabinet. The brackets are fastened to the
wood pallet with lag screws. (Figure 1-1)
Figure 1-1

Forma®Model 4535/4536________________________________________Installation
2-1
Section 2 - Installation
2.1 Location
Locate the shaker on a firm, level surface in an area free of dust and dirt. To allow
for lid opening, the top of the shaker must be at least 4-1/2 inches from the back wall or
other obstruction.
2.2 Installing the Cabinet Stand-off Bolts
The 4535 and 4536 console shakers feature front-to-back air circulation for lower
operating temperatures and increased performance. Therefore, the grille area on the back of the
cabinet must be at least 4 inches from the back wall or other obstruction. To maintain this
distance, two 1/4-20 x 7” bolts are included in the parts bag.
Screw the bolts in the threaded holes
on the back of the shaker cabinet (Figure 2-2
at left). The bolts should be screwed in by
hand to the limit of the threads. Further
tightening is unnecessary. Put the protective
rubber caps also supplied in the parts bag over
the heads of the bolts.
Figure 2-2
Figure 2-1
Forma Model 4535 Console
Incubator/Shaker
Forma Scientific
Orbital Shaker

Forma®Model 4535/4536________________________________________Installation
2-2
2.3 Chamber Drain
A drain is provided in the bottom of the chamber for convenience when cleaning
or removing spills. A clear vinyl hose and plastic valve is connected to the drain and is
accessed by removing the front grille assembly and the lower front panel.
The grille is removed by gently pulling it off. It is held in place by six push-in
style retainers.
To remove the front panel underneath the grille, remove six Phillips screws, three
on the top and three on the bottom. It may also be necessary to loosen the two left Phillips
screws which hold the foot pedal assembly to the shaker frame.
Figure 2-3
Front of cabinet with grille and
inner cover removed.
Chamber Drain Hose and Valve shown.
a. Condensate Drain
A 3/8” stainless steel condensate drain is located on the back of the shaker to
remove any water which may collect in the air ductwork. Refer to Figure 2-10. This drain
is plugged at the factory. When unplugged, the drain should lead to a suitable catch
container.
2.4 Foot Pedal
The lid of the console shaker is counterbalanced for ease of opening and closing.
A foot pedal on the lower right of the front of the cabinet is also provided for operator
convenience and ready access to the chamber
2.5 Assembling the Flask Clips
Each Flask Clip up to 6.0 liters in size comes with a metal spring which must be
installed onto the clip. For flask clips through 500 ml, insert the end of each spring into
the holes on the top of the clip leg as shown in Figure 2-4.

Forma®Model 4535/4536________________________________________Installation
2-3
The 2 liter, 2.8 liter, 4 liter, 5 liter and 6 liter flask clips use two metal springs and
rubber spring tubes. On these larger clips, the springs are installed by hooking their ends
together as illustrated in Figure 2-5. The upper spring and spring tubes should be installed
prior to mounting the clip to the platform. The lower spring and spring tubes, however,
are placed around the bottom of the clip legs after the flask clip is fastened to the
platform.
2.6 Installing the Flask Clips
The Model 4535 will accommodate glassware in numbers and sizes from ninety-
one 25 ml flasks to four 6 liter flasks. All Forma platforms have mounting holes for flask
clips and test tube racks made by other manufacturers.
Table 2-1 lists the flask clip assemblies and kits available for Forma Shakers.
Flask clips can be attached anywhere on the shaker counter-balanced platform.
Clips are supplied with the proper screws and are attached to the platform with a standard
Phillips screwdriver or with the screwdriver provided with the unit.
Table 2-1
Forma Model 4535 Dedicated Shaker Platform Flask Clip Capacity
Dedicated Platform
Number
No. of
Clips
Flask Size Springs per Clip Screws per
Clip
238017 91 25 ml 1 1
238018 91 50 ml 1 1
238019 40 125 ml 1 1
238020 40 250/300 ml 1 (w/1 large pad) 1
238021 24 500 ml 1 1
238022 15 1 L 1 5
238023 12 2 L 1 5
238024 6 4 L 2 (w/10 tubes) 5
238025 4 6 L 2 (w/12 tubes) 5
238026 6 2.8 L 1 5
Figures 2-4 and 2-5 illustrate the installation of the flask clips. Note that 1 liter
and 2 liter flask clips use five screws. The 250/300 flask clip has an adhesive-backed
flask cushion pad which is installed on the flat base of the clip body. A hole is provided
in the pad for the mounting screw.

Forma®Model 4535/4536________________________________________Installation
2-4
Figure 2-4
Installing the flask clip assembly
with a single screw. 250/300 ml flask
shown with cushion pad installed.
2.7 Installing the Test Tube Holders
Forma Accessory Test Tube Racks and Test Tube Rack Holders are available in
four sizes and are listed in Table 2-2. All of the Forma Test Tube Rack Holders are
adjustable in seven positions, swinging and locking at 15°, 30° and 45° in either
direction. Figure 2-6 illustrates the Test Tube Rack Holder with the rack in place.
To remove the rack, spread the metal tabs on either end of the holder and lift out
the plastic Test Tube Rack.
To install the Test Tube Rack Holder onto the shaker platform, remove the rack
and rotate the swing-bed of the holder 90° by pulling out the locking pins on either end of
the holder. The pins are locked outward by turning the knob 1/4-turn. (Figure 2-6)
Figure 2-5
Installing assembled flask clips
for flask sizes 2 liter and larger.
The 2L, 2.8L, 4, 5L, and 6L clips
are supplied with two sets of
springs and rubber tubes.

Forma®Model 4535/4536________________________________________Installation
2-5
Figure 2-6
Forma Test Tube Rack
showing the swing/tilt
mechanism.
Figure 2-7
Forma test tube rack holder with the test
tube rack removed
Table 2-2
Accessory Test Tube Racks and Adjustable Test Tube Rack Holder
Part Number Description
950040 Test Tube Rack, 10-13 mm size
950060 Test Tube Rack, 16-20 mm size
600074 Test Tube Rack, 21-25 mm size
600075 Test Tube Rack, 26-30 mm size
600076 Adjustable-Angle Test Tube Holder with Rack, 10-13 mm
600077 Adjustable-Angle Test Tube Holder with Rack, 16-20 mm
600078 Adjustable-Angle Test Tube Holder with Rack, 21-25 mm
600079 Adjustable-Angle Test Tube Holder with Rack, 26-30 mm
600088 Universal Adjustable-Angle Test Tube Holder, 10-25 mm
600089 2-tier Micro-Plate Rack
600090 3-tier Micro-Plate Rack
194024 #10-24 pan head Phillips screws for mounting test tube holders
to Forma Orbital Shaker platforms
185062 Pan head Phillips screws, washers and nuts for mounting test
tube holders to the Forma 2568 and 2569 Shaker Baths

Forma®Model 4535/4536________________________________________Installation
2-6
2.8 The RS-232 Interface Connector
The Model 4535 Orbital Shaker is equipped with an RS-232 Serial
Communication Interface for the remote transmission of data. An RJ-11 telephone style
connector is located on the rear of the incubator. A cable with RJ-11 plugs, and an RJ-11
to DB-25 adapter are required. Refer to Figure 2-9 for connector locations on the shaker
back panel. Figure 2-8 identifies the pin connections as seen from the back of the shaker
cabinet.
The data is "dumb terminal" formatted, which permits interfacing with either a
computer or a serial printer.
Three wires are used for the RS-232 interface:
1. Transmit data (/TXD) - pin 2 DB-25 connections
2. Receive data (/RXD) - pin 3 DB-25 connections
3. Signal ground (GND) - pin 7 DB-25 connections
The data format is:
Baud 1200 (9600 baud with jumper at J2
on the Main Control Board)
Data bits 8 (7 bit ASCII with leading zero)
Start bits 1
Stop bits 1
Parity none
Figure 2-8
RS-232 and Remote
Alarm Connectors

Forma®Model 4535/4536________________________________________Installation
2-7
The data transfer sequence is transmitted in the following format. X refers to the
numerical time, RPM and temperature.
(NUL)XX.XX(H)(SP)(SP)XXXRPM(SP)(SP)XX.XC(SP)(LF)(CR)(EOT)
NUL - Null character (0)
SP - Space
LF - Line feed
CR - Carriage return
EOT - End of text (4)
H - Hold Mode
The Model 4535 transmits time, RPM and temperature information one minute
after power is first applied to the unit and then every 60 minutes.
The shaker's microprocessor responds to two ASCII commands from the remote:
DC1 (XON), and DC3 (XOFF)
a. DC1 (17, 11 Hexadecimal)
The shaker will transmit Time, Temperature and RPM data upon receiving "DC1"
(XON) and will restart 60 minute interval transmissions unless they have been inhibited
by a "DC3" (XOFF).
b. DC3 (19, 13 Hexadecimal)
Receiving a "DC3" (XOFF) from the remote inhibits the shaker from sending
serial data indefinitely until a "DC1" (XON) is received.
2.9 Connecting the Remote Alarm
An internal, remote alarm SPDT
relay is provided to monitor alarms and
is connected by a RJ-11 (telephone
style) jack located on the rear of the
cabinet. The relay provides NO
(normally open) and NC (normally
closed) output and may be wired to a
central remote alarm location or to an
independent alarm system.

Forma®Model 4535/4536________________________________________Installation
2-8
Figure 2-7 identifies the pin contacts. Figure 2-10 shows the location of the
Remote Alarm Connector.
A modular to modular cable, Forma Stock No. 190388 and a RJ-11 telephone
style terminal converter, Forma Stock No. 190392 or equivalent may be used to convert
to a screw terminal connection. Refer to Figures 2-9 and 2-10.
2.10 Lid Security Lock
To protect the contents of the shaker or prevent tampering or unauthorized access,
a security lock is located on the right side of the lid. Two keys for this lock are in the
parts package attached to the outside of this unit when shipped.
Figure 2-9
Figure 2-10

Forma®Model 4535/4536________________________________________Installation
2-9
Figure 2-11
Rear and Side Panels of the Model 4535 Shaker/Incubator
2.11 Connecting the Unit to Electrical Power
See the serial tag on the side of the unit for electrical specifications or refer to the
electrical schematics at the end of this manual.
Connect the orbital shaker to a grounded, dedicated circuit.
The power cord connector is the mains disconnect device for the shaker.
Position the shaker so the unit can be easily disconnected.
2.12 Quick Reference Guide
A Quick Reference Guide and a vinyl self-adhering pouch is included in the
manual bag. Adhere the vinyl pouch in a convenient location on or near the shaker and
insert the Quick Reference Guide for easy user reference.

Forma®Model 4535/4536 ______________________________________Operation
3-1
Section 3 - Operation
Forma Scientific
Orbital Shake r
3.1 Introduction
The Forma Model 4535/36 is a microprocessor controlled console orbital
shaker designed to accommodate a wide variety of flasks, test tubes and other
glassware. The control system is easily programmed and stores up to three user-
defined time and speed combinations. These pre-set programs remain in memory
even when the shaker is turned off and unplugged.
The computer-based speed controller continuously adjusts for line voltage
fluctuations and provides smooth start-ups and consistent RPM control. The circuitry
is designed to slowly bring the platform up to speed and down to a stop to prevent
liquid splashing from flasks or test tubes. A convenience interlock requires that the
lid be closed for the drive motor, circulating fans and heating elements to operate.
• The microprocessor speed control system may take up to one minute to
bring the platform up to speed.
• Never leave the shaker unattended when starting it.
• Make sure all flasks and test tube racks are firmly seated in the clips and
check the security of the flask clip and platform attachment screws monthly.
• Air circulating fans will only operate with the lid closed.
• Do not operate the shaker at maximum RPM without a load.
Figure 3-1
Incubator Console Shaker

Forma®Model 4535/4536 ______________________________________Operation
3-2
3.2 Factory Settings
a. At Initial Start-Up
The Model 4535 has been shipped from the factory with the following settings
which will appear on the display screen when the shaker is powered up for the first
time. These are also the default settings of pre-set program P3.
1. Time: The display will show 00:00H. Any changes in the Time settings
will be made in increments of 5 minutes.
2. RPM: Display will show 100. Changes in the RPM are made in
increments of 1 RPM. However, if the Up or Down buttons are held for two seconds,
the display will scroll in that direction.
3. Temperature: Display will show 35.0°C. Changes to the Temperature
setting are made in increments of 0.1° C.
4. Access Code: Although not shown on the Start-Up screen, the Access
Code from the factory is 0 0 0 0. The Access Code may be changed to any four digit
combination of numbers 0-9. When the Access Code is set at 0000, the system will
not pause for entry of the Access Code when programming or changing any setting.
(Refer to Chart 3-5 for setting or changing the Access Code.)
b. Pre-set Programs
Three pre-set programs are stored into the shaker’s computer memory and may
be used or edited at the operator’s discretion. The operating parameters of Pre-set
program P3 (above) are active when the unit is turned on for the first time “out of the
box.” The values set by the factory for the pre-set programs are:
1. P1 Time: 720 minutes (12 hours) Countdown Mode
RPM: 250
Temp:35°C
2. P2 Time: 1200 minutes (20 hours) Countdown Mode
RPM: 300
Temp:28°C
3. P3 Time: 00:00H Hold Time (accumulated) Mode
RPM: 100
Temp:35°C
This manual suits for next models
1
Table of contents
Popular Paint Sprayer manuals by other brands

Chapin
Chapin 61800 use and care manual

Craftsman
Craftsman 919.150020 owner's manual

KIRKLAND
KIRKLAND Orvin Mounted Single Sprayer Use and maintenance manual

Campbell Hausfeld
Campbell Hausfeld AL2130 Operating instructions and replacement parts list

Benchmark
Benchmark 1282-113 manual

Binks
Binks 2100 gw user guide