Forno FRHRE5312-44 User manual

Range Hood Instruction Manual
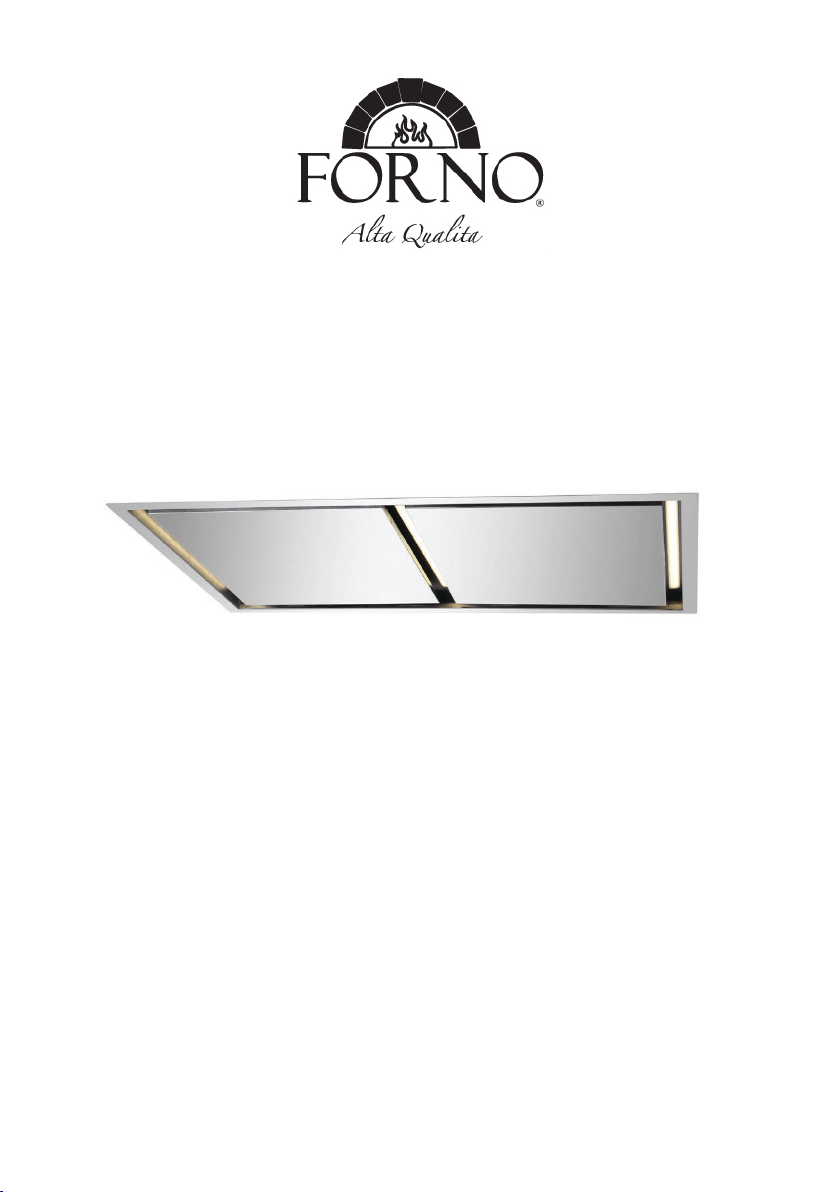
MODEL: FRHRE5312-44
IMPORTANT:
Read and save these instructions
NOTICE:
Installer: Leave this guide with the homeowner Homeowner: Keep this guide for future reference.

Index:
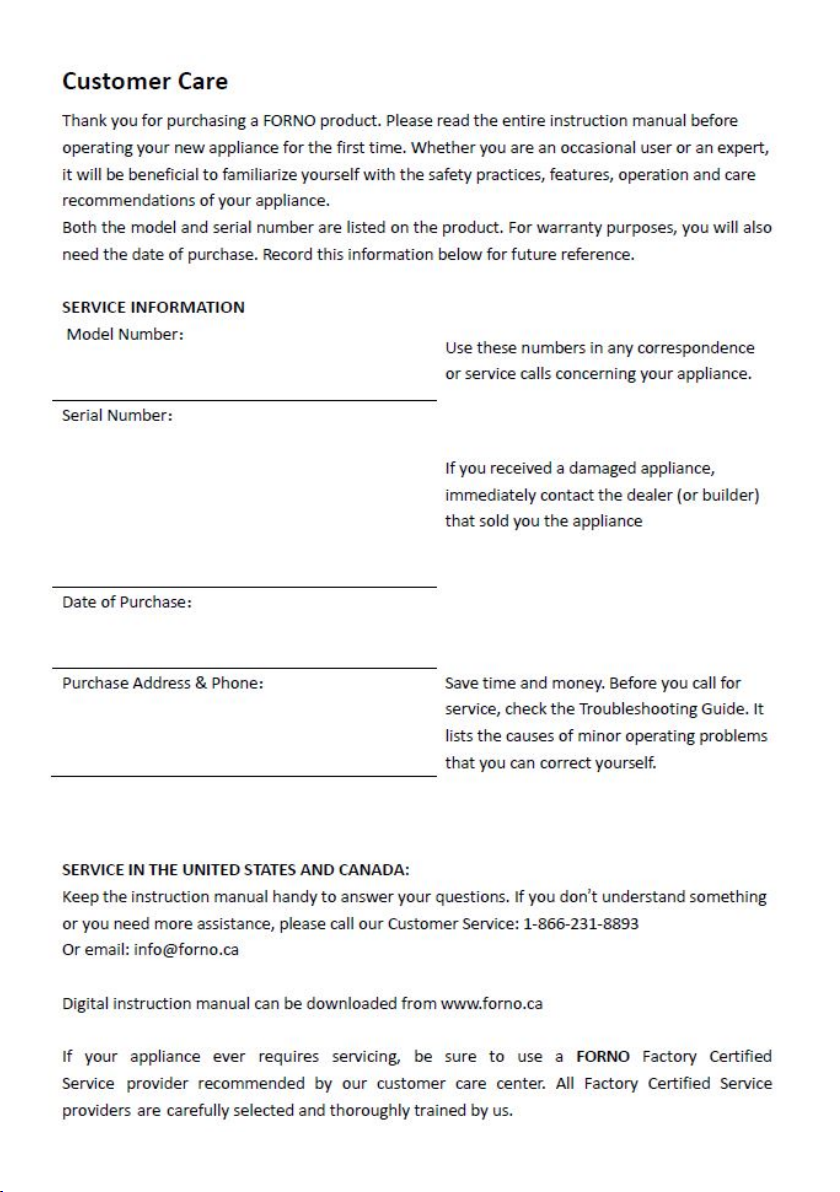
Customer care: ......................................................................... 1
Warnings: ................................................................................ 2-3
Characteristics/Installation and use: ................................... 3
Location preparation: ............................................................
Electrical connection: ............................................................
Operation: ................................................................................
Maintenance and cleaning: ....................................................
4-10
10
11
12-13

1

RECOMMENDATIONS AND SUGGESTIONS
CAUTION
TO REDUCE THE RISK OF FIRE, ELECTRIC SHOCK OR INJURYTO PERSONS, PLEASE OBSERVE THE FOLLOWING:
RECOMMENDATIONS AND SUGGESTIONS
1. Before servicing or cleaning unit, unplug or disconnect the rangehood from the power supply.
2. TO REDUCE THE RISK OF A RANGE TOP GREASE FIRE:
A. Never leave surface units unattended at high settings. Boilovers cause smoking and greasy
spillovers that may ignite. Heat oils slowly on low or medium settings.
B. Always turn hood ON when cooking at high heat or when flambeing food (i.e. Crepes
Suzette, Cherries Jubilee, Peppercorn Beef Flambe’).
C. Clean ventilating fans frequently. Grease should not be allowed to accumulate on fan or filter.
D. Use proper pan size. Always use cookware appropriate for the size of the surface element.
3. TO REDUCE THE RISK OF INJURY TO PERSONS IN THE EVENT OF A RANGE TOP
GREASE FIRE, OBSERVE THE FOLLOWING:
A. SMOTHER FLAMES with a close-fitting lid, cookie sheet, or metal tray, then turn off the
burner. BE CAREFUL TO PREVENT BURNS. If the flames do not go out immediately,
EVACUATE AND CALL THE FIRE DEPARTMENT.
B. NEVER PICK UP A FLAMING PAN – You may be burned.
C. DO NOT USE WATER, including wet dishcloths or towels – a violent steam explosion will result.
D. Use an extinguisher ONLY if:
1) You know you have a Class ABC extinguisher, and you already know how to operate it.
2) The fire is small and contained in the area where it started.
3) The fire department is being called.
4) You can fight the fire with your back to an exit.
4. To Reduce The Risk Of Fire Or Electric Shock, Do Not Use This Fan With Any Solid-State Speed
Control Device.
5. To provide protection against electric shock, connect to properly grounded outlets only.
CAUTION: For General Ventilating Use Only. Do Not Use To Exhaust Hazardous Or Explosive
Materials and Vapors.
WARNING
WARNING
Chemical Burn Hazard. Keep batteries away from children. This product contains a lithium button/coin cell battery. If a
new or used lithium button/coin cell battery is swallowed or enters the body, it can cause severe internal burns and can
lead to death in as little as 2 hours.
Always completely secure the battery compartment. If the battery compartment does not close securely, stop using the
product, remove the batteries, and keep it away from children. If you think batteries might have been swallowed or
placed inside any part of the body,
seek immediate medical attention. The cells shall be disposed of properly, including keeping them away from children.
Even used cells may cause injury.
2

CHARACTERISTICS
The range hood is designed for a designer kitchen with the range hood installed directly above cooking
appliances against a wall. This hood is a focus point and showpiece in your kitchen and at the same
time, it provides you with the benefit of extracting the grease and smoke from your cooking.
Please refer to the instructions below.
INSTALLATION & USE
NOTE: remove protective film (if any) from the exterior surfaces of the hood carefully prior to final
installation.
DESCRIPTION / CONNECTION
This range hood should be mounted directly to the support frame mounting, where the support frame
flue is secured to the ceiling joist or framework.
WARNING
1.1. TO REDUCE THE RISK OF FIRE, USE ONLY METAL DUCTWORK
2.2. GROUNDING INSTRUCTION
This appliance must be grounded. In the event of an electrical short circuit, grounding
reduces the risk of electric shock by providing an escape wire for the electric current. This
appliance is equipped with a cord having a grounding wire with a grounding plug. The plug
must be plugged into an outlet that is properly installed and grounded.
WARNING – Improper grounding can result in a risk of electric shock.
Consult a qualified electrician if the grounding instructions are not completely understood,
or if doubt exists as to whether the appliance is properly grounded.
Do not use an extension cord. If the power supply cord is too short, have a qualified
electrician install an outlet near the appliance.
CAUTION:
- To reduce risk of fire and to properly exhaust air, be sure to duct air outside
- Do not vent exhaust air into spaces within walls or ceilings or into attics, crawl spaces,
or garages.
3

LOCATION PREPARATION
The installation in this manual is intended for qualified installers, service technicians or persons with a similar
qualified background. DO NOT attempt to install this appliance yourself. Injury could result from installing the unit
due tolack of appropriate electrical and technical background.
All electrical wiring must be properly installed, insulated and grounded. Accumulated excess grease in old duct
work should be cleaned out or duct work should be replaced if necessary to avoid the possibility of a grease fire.
Check all joints on duct work to ensure proper connection, and all joints should be properly taped.
Note 1:Onstainless steel hoods, carefully remove the protective plastic film from all exterior surfaces of the
hood and chimney prior tofinal installation.
Note 2:At least two people will be required to mount the hood.
MOUNT HEIGHTS &CLEARANCE
Ductwork can be installed vertically orhorizontally.
Duct runs should be as short as possible.
Avoid the use of elbows.
Use duct tape at all joints.
Do not use duct smaller than the discharge on the hood.
Minimum mounting height between range top to hood
bottom should be no less than 25”
Maximum mounting height should be no higher than
30”
It is important to install the hood at the proper
mounting height. Hoods mounted too low could result
in heat damage and fire hazard; while hoods
mounted too high will be hard to reach and will loose
its performance and efficiency.
If available, also refer to the range manufacturer’s
height clearance requirements and recommended
hood mounting height above range.
*Maximum ceiling clearance 106.5” at 27.5” hood
mounting height from stove (different models may
vary)
** For higher ceiling, extension of the chimney
extension and the decorative cover are available to
purchase, if required.
Ductwork
4

NEVER exhaust air or terminate duct work into spaces between walls, crawl spaces, ceiling, attics or garages.
All exhausts must be ducted to the outside.
Use metal ductwork only.
Fasten all connections with sheet metal screws and tape all joints with certified Silver Tape or Duct
Tape.
Duct Run Calculation:
Maximum run 6” or 3-1/4 x 10” duct 100FT
Deduct:
each 90 Elbow used 15FT
each 45 Elbow used 9FT
each 6” to 3-1/4 x 10” 1FT
transition used
each 3-1/4 x 10” to 6” 5FT
transition used
Side Wall Cap w/ damper 30FT
Roof Cap 30FT
e.g. – 1 roof cap, 2x90 elbows, 1x45 elbow
= 30’ + 30’ + 9’=69’ used,
31’ available for straight duct runs
DUCT SIZE
A minimum of 6” round duct must be used to
maintain maximum airflow efficiency.
Flexible ducts are provided for convenience, always
use rigid type metal ducts if available to maximize
airflow.
Also use calculation (on left) to calculate total
available duct run when using elbows, transitions
and caps.
ALWAYS, when possible, reduce the number of
transitions and turns. If required for a long duct,
increase duct size from 6” to 7 or 8”.
If a reducer is used, install a long reducer instead of
pancake reducer. Reduce duct size as far away from
opening as possible.
If turns or transitions are required: Install as far away
from opening and as far apart between pieces as
possible.
5

INSTALLATION PREPARATION
* Please plug in and check that all functions are working
TOOLS AND MATERIALS REQUIRED (Not supplied)
Pencil and tape measure Duct tape
Wire cutter/stripper
Wrench
Hammer Keyhole Saw
Level Safety glasses
Step ladder
Electric or battery-operated
drill and 1/8", 3/8" bits
Wire nuts
10" round metal duct,
length to suit installation
Pliers
Metal Snips
Saber saw or Sawzall Flashlight
Screwdrivers
Strain relief for joint cover.
120V 60Hz. 15 or 20 Amp, 2-wire with ground.
Properly grounded branch circuit.
6

ACCESSORIES PROVIDED
6’’ round outlet adapter
with damper(2x)
6’’ round pipe(2x)
SCREWS PROVIDED
M4x25mm self-tapping screws (8x)
M6x60mm expansion screw(6x)
7

PREPARE THE CEILING OPENING
The hood should always be centered over the cooktop. Make sure there is adequate space in the ceiling
structure to install the hood and ductwork. The hood should be mounted 36” to 72” above the cook top to
ensure the best removal of cooking impurities. Use joist-size lumber to frame around the range hood
opening. The ceiling structure must be able to support the weight of the hood. (110 pounds)
PREPARE THE HOOD SUPPORT
Construct a wood framing system as shown
in the drawing below
The structure must be capable of supporting
its own weight, plus the weight of the hood.
(110 pounds)
8

PREPARE THE HOOD
NOTE: Please plug in range hood and check that all functions are working
1. Open the perimeter panels and remove the grease filters.
2. Remove the (2) interior panels by unscrewing the screws (8+8 screws)
Install 6’’ round outlet adapters(2x) to the hood with mounting screws
Note: Outlet adapter may vary
INSTALL THE HOOD
CAUTION: At least two installers are
recommended because of the large size
and weight of this range hood.
1. Lift range hood into the ceiling opening.
2. Secure each support frame to the wooden
hood support frame using lag bolts and
washers provided.
4. Adjust height of the telescoping support
frame to ensure a tight fit between the hood
and finished ceiling.
5. Connect ductwork; Duct tape all joints to
ensure an airtight seal.
9

COMPLETE THE INSTALLATION
1. Reassemble the (2) interiors panels with screws. (8+8 screws)
2. Install the grease filters
Electrical Connection
* Electrical wiring must be done by a qualified person(s) in accordance with all applicable codes and
standards.
Turn off electrical power at service entrance before wiring.
*If the supply cord is damaged, it must be replaced by the manufacturer, its service agent or similarly
qualified persons in order to avoid a hazard.
* Do not use the plug and anextension cord other than the ones initially supplied with the
hood.
*This hood must be grounded.Do not remove ground prong from the plug.
To a risk of fire, electric shock, or injury to persons, for cleaning and user-maintenance,
such as lubrication
To unplug or disconnect the appliance from the power supply before servicing.
10

OPERATIONS
K4 K3 K5 K2 K1
K1: Power button
When the range hood is on, press the K1 button to enter Power-Off Delay Timer. The Timer working
time is 15 minutes, the range hood will turn off when the time reaches 0. If you press the K1 button
again, the range hood will turn off.
When the range hood is off, press and hold the K1 button for 3 seconds to enter the clock adjustment
mode, press the K4 increase button and K3 decrease button to adjust the hour. You can press the K1
button again to adjust the minutes, and also press K4 increase button and K3 decrease button to adjust
minutes.
K2: Light button
Press this button to turn on the light, and once again to turn off the light.
K3, K4: Decrease button and Increase button
Press these two buttons to adjust the speed when the range hood is on, to adjust the time when the
range hood is in clock mode.
K5 is for remote control. Remote control sensor receives infrared (IR) signal from remote control.
11

MAINTENANCE & CLEANING
Surface Maintenance:
Clean periodically with hot soapy water and clean cotton cloth. Do not use corrosive or abrasive detergent (e.g. comet
powder scrub, EZ-Off oven cleaner), or steel wool/scoring pads which will scratch and damage surface.
For heavier soil use liquid degreaser such as ‘Formula 409’ or ‘Fantastic’ brand cleaner.
After cleaning, you may use non-abrasive stainless-steel polish/cleaners such as 3M or ZEP, to polish and buff out the
stainless luster and grain. Always scrub lightly, with clean cotton cloth, and with the grain
Filters:
The Filters fitted by the factory are intended to filter out residue and grease from cooking. They do not need to be
replaced on a regular basis but must be kept clean.
Filters should be cleaned after every 30 hours of use.
Remove and clean by hand in a container of hot soapy water. The filter is also dishwasher safe.
If heavily soiled, spray ‘Formula 409’ or equivalent degreasing detergent and leave to soak.
Dry and re-install filters before using hood.
Hood Cleaning
The saturation of greasy residue in the blower and filters may cause increased flammability. always
Keep unit clean and free of grease and residue build-up to prevent possible fires.
Filters must be cleaned periodically and kept free from accumulation of cooking residue (see cleaning
instructions inside). Old and worn filters must be replaced immediately. Do not operate blowers when
filters are removed. Never disassemble parts to clean without proper instructions. It is recommended
that disassembly be performed by qualified personnel only. Call our service center for removal
instructions.
Stainless steel is one of the easiest materials to keep clean. Occasional care will help preserve its fine
appearance.
Cleaning tips:
* Hot water with soap or detergent is all that is usually needed.
* Rinse with clean water. Wipe dry with a clean, soft cloth to avoid water marks.
* For persistent discoloration or deposits that persist, use a non-abrasive household cleanser or
stainless-steel polishing powder with a little amount of water and a soft cloth.
* For stubborn stains, use a plastic scouring pad or soft bristle brush with a cleanser and water. Rub
lightly in the direction of the polishing lines or the “grain” of the stainless finish. Avoid using too much
pressure as this may mark the surface.
* Do not allow deposits to remain on the surface for long periods of time.
* Do not use ordinary steel wool or steel brushes. Small bits of steel may adhere to the surface causing
rust.
* Do not allow salt solutions, disinfectants, bleaches, or cleaning compounds to remain in contact with
stainless steel for extended periods. Many of these compounds contain chemicals that may be
12

harmful. Rinse with water after exposure and wipe dry with a clean cloth.
* Painted surfaces should be cleaned with warm water and mild detergent only.
LIGHT bulbs
WARNING: Please ensure lights have been switched off for some time and the power source has been
disconnected before replacing any bulbs. Please be aware that the light will retain hear for a
short period of time after being switched off.
Step 1: Using the appropriate tools, remove the LED light from its slot.
Note: Please take extra care and make sure that you do not damage the range hood
Step 2: Take out the LED light from its connector and replace.
When reinserting the LED light, gently clip it back into place
13
This manual suits for next models
1
Table of contents
Other Forno Ventilation Hood manuals

Forno
Forno FRHRE5346-30 User manual

Forno
Forno FRHWM5010-30 User manual

Forno
Forno FRHUC5227-30 User manual

Forno
Forno FRHWM5074-22 User manual

Forno
Forno FRHWM5029-36 User manual

Forno
Forno FRHWM5029-36HB User manual

Forno
Forno FRHWM5029-30HB User manual

Forno
Forno FRHRE5337-30 Assembly instructions

Forno
Forno FRHWM5084-36 User manual

Forno
Forno FRHWM5002-30 User manual