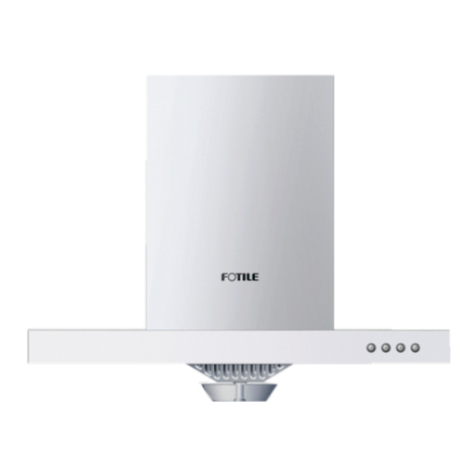
FOTILE JQG7505 User manual

- 20 -
User Manual
RANGE HOOD
Please read the following safety information carefully before installing and/or using this appliance.
We recommend that you keep this manual for future use and/or in case of transfer of ownership
of the range hood
JQG7505/JQG7505-W/JQG9006/JQG9006-W

- 23 -
Thank you!
Dear User, thank you for purchasing the Fotile
Range Hood. At Fotile, we manufacture exquisite
appliances that are expertly crafted with the finest
materials. Before using the Fotile Range Hood,
please take some time to read through this Product
Manual (manual). It will familiarize you with important
safety, operation and maintenance instructions, as
well as help maximize your culinary experience.
Before using the Fotile Range Hood, you must
follow the instructions, as specified in this manual.
Any damage resulting from the improper operation
and/or maintenance of the appliance may result
in the loss of warranty. The warranty will become
invalid, and your warranty application, whether direct
or indirect, will not be accepted by authorized service
center of Fotile. If you require warranty or post-
warranty after-sale service, please contact the local
authorized service center of Fotile nearest you.
Your satisfaction with the Fotile brand is
important to us. Our after-sales service centers
provide assistance in resolving issues with Fotile
appliances.
Product model and serial number on the plaque
are required if you need services.
Position of plaque can be referred to in figure
A as follows(The following diagrams are those of
basic models(JQG7505), for those derivative models
please refer to these diagrams of basic models.)
Contents
1 Safety Information .................................. 24
2 Operation .............................................. 27
2.1 Product Information ......................... 27
2.2 Operation ........................................ 28
3 Cleaning and Maintenance ................... 29
4 FAQ ....................................................... 32
5 Service Information ............................... 32
6 Installation .............................................. 32
6.1 Installation Instructions ................... 33
6.2 Product dimensions ......................... 34
6.3 List of Accessories .......................... 34
6.4 Installation Tools............................... 36
6.5 Installation Procedure ...................... 36
6.6 Test Run After Installation ................ 43
In order to ensure the safe and efficient use of
Fotile appliances, please take note of the following
types of highlighted information that will be outlined
throughout this manual:
IMPORTANT NOTE highlights information that is
particularly important.
CAUTION signals a situation where minor injury or
product damage may occur if instructions are not followed.
WARNING states a specic hazard that may cause
serious injury or death if precautions are not followed.
Product features and specifications are subject to
change, at any time, without notice and may be
different from those in this material. Please visit our
website for the most up-to-date information.
FOTILE YouTube
FOTILE America LLC
FOTILE Toronto Flagship Store
* Address:6 Campus Dr, Suite 210, Parsippany, NJ 07054
* Toll Free:888-315-0366
* Website:us.fotileglobal.com
* Address:8365 Woodbine Ave,Markham, L3R2P4
* Toll Free:844-315-0315
* Website:ca.fotileglobal.com
US WeChat Service
Canada WeChat Service
Canada Wechat
Ofcial Account

- 24 - - 25 -
will prevail, and installation personnel must
conform to these requirements.
• The operating temperature of the range hood
should not exceed 104 ℉(40℃).
• Please do not place anything on top of the
product. Anything placed on top may fall off or
incline. For example, if you place seasoning
bottles on top, the inclination may cause
liquid to flow inside the product, resulting in
damaged electrified components and therefore
unnecessary risks. Our company will not bear
the responsibility for free repair in case of
product damage due to the above reason.
• Clean the Grease Cup frequently to prevent
overow. The resulting grease is inedible! Please
do not place ammable materials in the oil cup,
such as plastic wrap, paper towels, etc.
• When cutting or drilling into the wall or ceiling,
be careful not to damage electrical wiring,
water pipes, gas lines, or other hidden utilities.
• Adhere to the heating equipment manufacturer’s
guidelines and safety standards, such as
those published by the National Fire Protection
Association (NFPA), the American Society for
Heating, Refrigeration and Air Conditioning
Engineers (ASHRAE) and the local code
authorities. Meanwhile, conform to the safety
standards issued by such administrative
departments as re department.
• When gas burners are in operation without any
cookware placed on them, they can build up
a lot of heat. A ventilation appliance installed
above the cooker may become damaged or
catch re. Only operate the gas burners with
cookware on them.
• Adhere to the voltage and frequency settings
listed in this manual to avoid possible
damages to the range hood.
• Please use standard accessories provided by
our company to prevent the range hood from
falling down accidentally. The hole drilled in
the wall should precisely match the size of the
expansion pipe, otherwise, the range hood
may loose and fall down.
• Tampered glass is applied to the products of
the company and the tampering treatment
of the glass determines the extremely little
possibility of spontaneous explosion. If the
occurrence of spontaneous explosion is not
due to improper use, our company promises
free replacement of the accessories. The
possibility of tempered glass breaking can
be significantly increased in the following
situations, which should be avoided: For
instance, hitting the glass, especially the
corners of the glass, with cooking utensils
or other hard objects; The glass is impacted
when you open a cabinet door around the
Range Hood; Put the glass in an extremely hot
or cold environment or an environment where
heat and cold are excessively alternated.
• Unauthorized modication of this product can
lead to risks.
Warning:
Risk of Electric Shock
A defective appliance may cause electric shock.
Never switch on a defective appliance. Unplug the
appliance from the mains or switch off the circuit
breaker in the fuse box in case of problems, and
contact our authorized service center.
• The range hood should be connected to a
standard power socket with safe grounding.
Midway connection, prolonged electric line or
multi-socket wiring may cause electric shock,
overheating and, in some cases, result in
a fire. Installation of the range hood should
be performed by professional electricians in
strict accordance with electricity standards
and regulations of the local area. Before
connecting the rod, turn off the power source
and take appropriate measures to prevent
auto closing of the power switch.
• In order to prevent electric shock and/or other
bodily injuries to persons, do not exceed 120V
AC input.
• Do not install the range hood in a bathroom
and/or a humid area, as this will significantly
increase the risk of electric shock.
• If a wire is damaged or defective, contact an
authorized service provider or a qualied technician
(provided by Fotile) to replace the wire.
• Do not change, stretch, knot, pressure or
squeeze the wire as any resulting damage can
In order to prevent accidental damage to the
Fotile Range Hood and/or bodily injuries as a
result of its operation, please read the following
safety informationinstalling and/or using this
appliance. Following the instructions carefully
will significantly reduce the risk of fire, electric
shock and/or bodily injuries to persons. We
recommend that you keep this manual for future
use and/or in case of transfer of ownership of
the range hood.
Important Note:
• This appliance is intended for indoor home
cooking only; it cannot be used for outdoor
cooking. Please use this product only
according to the manufacturer’s instructions.
Fotile assumes no responsibility if you use
it in special environment. Please contact
a Fotile authorized service center if you
encounter any problem.
• Check the appliance for damage after
unpacking it. If you detect any obvious
damage to the product, do not proceed with
the installation. Please contact our authorized
service center immediately.
• Avoid placing gypsum powder, construction dust,
etc. within close proximity of the range hood.
• Operate the range hood only in the manner
outlined in this product manual.
• When operating the range hood, do not leave
the appliance unattended. If you have any
questions and/or concerns, please contact our
authorized service center.
• Operate, clean and maintain the range hood in
accordance to the instructions outlined in this manual.
• Clean the metal grease lter according to the
instructions.
• The range hood’s motor has a thermal overload
function, which automatically turns off the motor
when it overheats. Once the motor cools down,
the range hood will automatically restart. If the
motor, continually turns off and restarts, please
contact our authorized service center.
• If the range hood has not been in operation for an
extended period of time, unplug the appliance.
• Please make sure correct installation and
maintenance of the appliance. Installation
work and electrical wiring must be done by
qualified person(s), in accordance with all
applicable codes and standards, including re-
rated construction codes and standards. The
installation personnel should be responsible
for normal operation of the appliance at the
installed position.
• When operating the range hood in exhaust
mode, ensure to install the damper along with
the hood.
• For general exhausting only. Do not use this
range hood to exhaust hazardous and /or
explosive materials or gas.
• The product itself is nonammable.
• In order to reduce the risk of fire, all
exhaust pipes, flues and devices should be
nonammable. Use only metal duct cover and
metal duct pipes. Never cover the hood with
ammable plastic lm or paper.
• Services guaranteed under warranty must be
performed by Fotile certified service provider
or personnel.The warranty is not effective
for products removed for repair without
authorization.
• Please read the specication label on the range
hood for further information and requirements.
• Please install a supplementary air device if
you install the high-power Range Hood in an
airtight room. Due to the configuration of the
Fotile Range Hood, it is recommended for
users with an airtight new house to install a
supplementary air device. Please comply with
relevant regulations to install corresponding
supplementary air device if there are relevant
regulations in your state or region.
• This product is only used in USA and Canada.
• This product is for use in the U.S. and Canada
only.
Caution:
• When applicable local regulations comprise
more restrictive installation and/or certification
requirements, the aforementioned requirements
SAFETY INFORMATION


- 26 - - 27 -
where it started.
• The re department is being called.
• You can ght the re with your back to an exit
Risk of Injury
• This appliance is not intended for use by
persons (including children) with reduced
physical, sensory or mental capabilities, or
lack of experience and knowledge, unless they
have been given supervision or instruction
concerning use of the appliance by a person
responsible for their safety. Children should be
supervised to ensure that they do not play with
the appliance.
• The range hood may have sharp edges. Be
careful to avoid cuts and abrasions during
installation and cleaning. Do wear qualified
protective gloves.
• The accessible parts become very hot when
in operation. Never touch hot parts. Keep
children at a safe distance.
• Do not touch lamps during or soon after
operation. Burns may occur.
• Do not insert your limbs and/or foreign objects
into the impeller while the range hood is in
operation, as that action might cause injury.
• This appliance is not intended for operation with
an external clock timer or a remote control.
• Incorrect repairs are dangerous. Repairs
may only be carried out and damaged power
cables replaced by one of our trained after-
sales technicians..
• If any abnormalities and/or defects occur while
operating the range hood, immediately turn off
the appliance and unplug the appliance from
the mains or switch off the circuit breaker in
the fuse box. Then, contact our authorized
service center. Abnormal operation and
defects may cause hazardous situations, such
as electric shocks and res.
• This product contains chemicals known to the
State of California to cause cancer, and birth
defects or other reproductive harm. For more
information, please go to: www.P65Warnings.
ca.gov
Risk of Suffocation:
• Packaging material is dangerous to children.
Never allow children to play with packaging
material, which may cause suffocation.
Keep all packing material out of proximity to
children. Please remember that packaging
materials should not be treated as toys.
Risk of Death:
• Risk of poisoning from ue gases that are drawn
back in.
• Always ensure adequate fresh air in the room if
the appliance is being operated in exhaust air
mode at the same time as room air-dependent
heat-producing appliance is being operated.
Exhaust gases through the flue (chimney) of
fuel burning equipment to prevent back drafting.
• Fotile is not responsible for injuries caused by
improper and/or incorrect operation of the range hood.
OPERATION
Warning
1. Do not use excessive force to press buttons
on the control panel.
2. Turn off gas burners without any cookware
placed on them.
3. Do not disassemble the appliance with power
on and/or without complying with instructions.
4. Clean the Grease Cup frequently to prevent
overow and a potential re.
5. Disassembly and/or servicing of the range hood
must be performed by qualied technicians.
6. Do not let the stove re burn the range hood directly.
Product Information
Model JQG7505/JQG7505-W
Produce size
L*D*H 29 7/8 × 18 7/16 × 17 7/16 "
(758 × 467 × 442 mm)
Net weight 63.9 lbs(29Kg)
Voltage/Frequency 120V/60Hz
Rated power input
of the range hood 210 W (light power included 3W × 2 )
CFM(HVI)
Super-high-setting
600
High-setting 540
Medium-setting 420
Low-setting 230
Noise
Super-high-setting
56dB(A)(7.2Sones)
High-setting 53dB(A)(6.2Sones)
Medium-setting 48dB(A)(3.9Sones)
Low-setting 38.5dB(A)(1.2Sones)
result in electrical and/or re hazards.
• Prevent water from coming into contact with
the range hood’s electrical components, such
as the motor, switch and connector. Do not
wash the appliance with water. Do not use the
appliance if it is wet, as electric leakage and/
or electric shock may occur.
• Do not attempt to change the range hood’s
internal wiring system. Improper modications
and/or repairs to the internal wiring can result
in bodily injuries to persons, electric shock
and/or a re.
• In order to avoid electric shock, remember to
turn off the appliance’s power source before
installation, cleaning and/or maintenance
service.
• Avoid using high-pressure detergents and/or
steam cleaners on the appliance, as they may
result in electric shock.
• Do not touch the plug or switch with wet hands,
as an electric shock may occur.
Grounding Instructions
• This appliance must be grounded. In the event
of an electrical short circuit, grounding reduces
the risk of electric shock by providing an escape
wire for the electric current. This appliance is
equipped with a cord having a grounding wire with
a grounding plug. The plug must be plugged into
an outlet that is properly installed and grounded.
• Improper grounding can result in electric shock.
• Consult a qualified electrician if the grounding
instructions are not completely understood, or if
doubt exists as to whether the appliance is properly
grounded.
• Do not use an extension cord. If the power supply
cord is too short, have a qualied electrician install
an outlet near the appliance.
Risk of Fire
• In order to reduce the risk of fire and to
properly exhaust air, always duct the air
outside. Do not vent exhaust air into spaces
within walls, ceilings, attics, crawl spaces and/
or garages.
• In order to prevent the risk of fire, the range
hood should be operated and maintained in
accordance to the instructions.
• Hot oils may ignite and burn quickly. Never
leave hot oils unattended.
• Clean the hood’s Grease Cup at regular
intervals, as leftover grease deposits may ignite.
• Never operate the range hood without the
Grease Cup lter attachment.
• Never work with naked flames close to the
appliance (e.g. flambéing). Do not install the
appliance near a heat-producing appliance for
solid fuel (e.g. wood or coal) .There must be
no ying sparks.
• Avoid cooking with food products that produce
ames under the range hood.
To Reduce Risk of Cooktop Grease Fire:
A) Never leave surface units unattended at high
settings. Boilovers cause smoking and greasy
spillovers that may ignite. Heat oils slowly on
low or medium settings.
B) Always turn the hood on during cooking.
C) Clean ventilating fans . Grease should not
be allowed to accumulate on fan, filter or in
exhaust ducts.
D) Use proper pan size. Always use cookware
appropriate for the size of the surface element.
To Reduce the Risk of Injury to Persons in the Event
of a Range Top Grease Fire, Observe the Following:
• Smother flames with close-fitting lid, cookie
sheet, or metal tray, then turn off the burner.
Be careful to prevent burns. If the flames do
not go out immediately, evacuate and call the
re department.
• When the cooking utensil catches re, switch
off the range hood immediately. Effective
extinguishing measures must be taken at
once, such as covering the open flame with
metal cover, turning off the master gas valve
and keeping flammable substance from the
open ame etc.)
• Never pick up a aming pan—you may be burned.
• Do not use water, including wet dishcloths or
towels—a violent steam explosion will result.
Use an Extinguisher Only If:
• You know you have a class ABC extinguisher
and you already know how to operate it.
• The fire is small and contained in the area

- 28 - - 29 -
range hood is operated on high-setting and
the lights will be turned on; wave hands
quickly through the sensor windows at two
sides again, all functions of range hood will
be turned off, the button indicator will be
turned off, the smoke baffle plate will be
closed automatically and the range hood is
off.When switching off, press Lighting and
Medium-setting Fan at the same time for 5
seconds to turn on/off the GESTURE function.
(2) POWER button: Once you press the
POWER button, the range hood will be
activated, the button will fully illuminate and the
other buttons on the control panel will display
low illumination. Lightly press the POWER
button again to turn off the range hood in the
working conditions. Once the range hood is
off, all functions are off, all buttons will cease
to illuminate, and the smoke bafe plate will be
closed automatically.
With the exception of the LOCK SCREEN
button, the other buttons will only work when
the POWER button is active.
(3) HIGH-SETTING/SUPER-HIGH-SETTING
FAN: Lightly press the button, the smoke bafe
plate will open automatically, and the fan will
start up, while the HIGH-SETTING/SUPER-
HIGH-SETTING indicator will fully illuminate
and the range hood will be operated on high-
setting; press the HIGH-SETTING/SUPER-
HIGH-SETTING FAN lightly again, the
motor will stop, and the HIGH-SETTING/
SUPER-HIGH-SETTING FAN indicator will
return to low illumination; press the HIGH-
SETTING/SUPER-HIGH-SETTING FAN and
hold for 2s, the HIGH-SETTING/SUPER-
HIGH-SETTING indicator will fully illuminate
in green, and the range hood is operated on
Operation
1. Fotile Range Hood Control Panel
(1)GESTURE function: Wave hands quickly
through the sensor windows at two sides, the
smoke bafe plate will automatically open, the
2. Operation Procedure
Power
Sensor
Window
Lock
Screen
Delay
Lighting
High-setting/
Super-high-
setting Fan
Medium-
setting
Fan
Low-
setting
Fan
Sensor
Window
Max static pressure 560 Pa
Caution:
1. dB noise in the above table complies with the IEC60704
standard, it is the sound pressure level, the corresponding
sound power level is: 68dB(A) for supper-high-setting,
65dB(A) for high-setting, 60dB(A) for medium-setting
and 52.5dB(A) for low-setting.
2. The noise --Sones -- in the above table is tested in accordance
with HVI-915-2015 in HVI-accredited laboratories in
American.
3. Such parameters as noise may have a deviation of less
than 10%.
HVI-2100 CERTIFIED RATINGS comply with
new testing technologies and procedures prescribed
by the Home Ventilating Institute, for off-the-shelf
products, as they are available to consumers.Product
performance is rated at 0.1 in. static pressure, based
on tests conducted in a state-of-the-art test laboratory.
Sones are a measure of humanly-perceived loudness,
based on laboratory measurements.
Max static pressure 560 Pa
Caution:
1. dB noise in the above table complies with the IEC60704
standard, it is the sound pressure level, the corresponding
sound power level is: 68dB(A) for supper-high-setting,
66dB(A) for high-setting, 60dB(A) for medium-setting and
52.5dB(A) for low-setting.
2. Such parameters as noise may have a deviation of less
than 10%.
Model JQG9006/JQG9006-W
Produce size
L*D*H 35 7/8 × 18 7/16 × 17 7/16 "
(910 × 467 × 442 mm)
Net weight 70.1 lbs(31.8Kg)
Voltage/Frequency 120V/60Hz
Rated power input
of the range hood 210 W (light power included 3W × 2 )
Noise
Super-high-setting
56dB(A)
High-setting 53dB(A)
Medium-setting 48dB(A)
Low-setting 38.5dB(A)
SUPER-HIGH-SETTING;Press the HIGH-
SETTING/SUPER-HIGH-SETTING FAN
again and hold for 2s, the range hood can be
operated on the HIGH-SETTING and the
HIGH-SETTING/SUPER-HIGH-SETTING
indicator will fully illuminate; lightly press the
HIGH-SETTING/SUPER-HIGH-SETTING FAN
again, the motor will stop, and the HIGH-
SETTING/SUPER-HIGH-SETTING indicator
will return to low illumination.
(4) MEDIUM-SETTING FAN: Press the
MEDIUM-SETTING FAN lightly, the smoke
bafe plate will open automatically and the fan
will start up; while the MEDIUM-SETTING
indicator will fully illuminate, the range hood
is operated on medium-setting;press the
MEDIUM-SETTING FAN lightly again, the
motor will stop, and the MEDIUM-SETTING
indicator will return to low illumination.
(5) LOW-SETTING FAN: Press the button
lightly, the smoke baffle plate will open
automatically, the fan will start up, the LOW-
SETTING indicator will fully illuminate, and the
range hood will be operated on low-setting;
press the LOW-SETTING FAN lightly again,
the motor will stop, and the LOW-SETTING
indicator will return to low illumination.
(6) LIGHTING: The LIGHTING button opens
the smoke baffle plate and turns on the
lights. Once pressed, the button will fully
illuminate. Press the button again and the light
will turn off and the LIGHTING indicator will
return to low illumination.
(7) DELAY: Press the key lightly while the
range hood motor is working, the delay
indicator will fully illumination, and a two-minute
delay is activated; 2 minutes later, all functions
will turn off, the smoke baffle plate will be
closed automatically, and the range hood will
turn off.
During the delay, if you press the DELAY
button lightly once, the delay will be
stopped, the delay indicator will return to low
illumination, and the range hood will remain the
current working state.
Lightly press the any control panel button other
than the DELAY button once during the delay
to exit the delay, the DELAY indicator will
return to low illumination, and the function of
the pressed button operates.
When the range hood is not working, the
DELAY button is not working, and if the
button is pressed, an alarm sound will engage.
(8) LOCK SCREEN button: Once pressed and
held for 2 seconds when the range hood
fan is not operating, you will hear a “beep”
sound, the LOCK SCREEN button will
fully illuminate, all buttons will be locked, and
any pressing will be invalid; in order to unlock
the control panel, you must press and hold
the LOCK SCREEN button for another
2 seconds. When the range hood fan is in
operation, the LOCK SCREEN button is not
working, if the button is pressed, an alarm
sound will engage.
Hints:
1. The range hood will be turned off automatically
if it is not operated for 2 minutes in the standby
state;
2. It’s suggested that the range hood be turned
on during steaming to keep the kitchen air
fresh, otherwise, too much steam passing by
the Sensor Window may trigger the GESTURE
function.
Important Note:
• Reattach the grease filter after cleaning and
maintenance of the range hood. Do not
operate the appliance without the grease lter,
as it may cause safety hazards.
• The following diagrams are those of basic
models(JQG7505), for those derivative
models please refer to these diagrams of
basic models.
Caution:
Risk of demager due to corrosion.
• Always switch on the appliance while cooking
to avoid condensation. Condensate can
produce corrosion damage.
CLEANING AND MAINTENANCE

- 30 - - 31 -
• Surface damage due to incorrect cleaning.
Clean stainless steel surfaces in the direction
of the grain only. Do not use any stainless
steel cleaners for operator controls.
• Surface damage due to strong or abrasive
cleaning agents.
• Replace faulty LED lights to prevent the
remaining lights form overloading.
Warning:
• The range hood should only be cleaned as
instructed; otherwise, it may ignite.
• Please remember not to wet the motor and/or
the control panel, as it may result in damaging
the electric circuits or potential hazards.
• Do not clean the appliance with chemical
agents, such as gasoline, acids, benzene and
solvents.
Risk of Electric Shock:
• Penetrating moisture may result in an electric
shock. Prior to cleaning and maintenance,
pull out the mains plug or switch off the circuit
breaker in the fuse box.
• Do not use any high-pressure cleaners or
steam cleaners, which can result in an electric
shock.
Risk of Fire:
• Grease deposits in the grease filter and
Grease Cup may catch re.
•
Please do not place ammable materials in the
oil cup, such as plastic wrap, paper towels, etc.
• Please avoid excessive accumulation of
oil and regularly clean oil cup and other
components which can accumulate oil.
Risk of Injury:
• Unplug the appliance from the mains or switch
off the circuit breaker in the fuse box before
installation, cleaning, maintenance and repair
in order to avoid electric shock.
• The range hood may have sharp edges. Be
careful to avoid cuts and abrasions during
installation and cleaning. Do wear qualified
protective gloves.
• While the range hood is in operation, do not
insert your hand into the area housing the fan.
• The appliance will become hot during
operation, especially near LED lights. Allow
the appliance to cool down before cleaning.
Do not touch lamps during or soon after
operation. Burns may occur.
• If you would like to schedule a deep cleaning
for your appliance, please contact our
authorized service center.
• Fotile suggests that you clean the surface of
the appliance for better use.
1) Neutral detergent may be used to clean
stains on the range hood. However, avoid
touching the control panel. Wipe some
detergent on the stains and let the detergent
sit. Do not let the detergent sit for an extended
period of time, as it can cause damages to the
appliance’s surface. Then, wipe off the stain
with a soft cloth and the left detergent with a
slightly wet cloth. Next, use another cloth to
dry the appliance.
2) Stains on the range hood should be cleaned
within a short time period, as to prevent the
stains from becoming permanent.
3) Abrasive detergents, such as a salt solution,
disinfectant or bleach powder cannot be used
to clean the appliance. Wipe off the detergent
with a wet, soft cloth. Next, use another cloth
to dry the appliance.
Warning: Do not clean the appliance with
abrasive tools, such as steel wool, brushes,
and coarse cloths, as these materials will
permanently scratch the surface of the hood.
Preparations before Cleaning:
1.Unplug the range hood or turn off the power
socket.
2. Clear the cookware on the burners.
3. Prepare a neutral detergent and a soft cloth
(or soft brush) for stain removal and cleaning.
Washing and cleaning the surface, Grease
Cup, and grease lter: (The cleaning can be
done by the user)
1.Clean the surface of the range hood.
2. Take out the oil cup horizontally and wash it.
Warning: For the safety of you and your family,
please regularly clean out the oil in the oil cup and
sediment on the external surface of the oil cup
to avoid fire risk. Please operate with protective
gloves.
3.Lightly press the POWER button. Then,
lightly press the LIGHTING button. After the
LIGHTING button is pressed, the smoke bafe
plate will open.
4. Hold the two sides of the grease filter and
pull sideward to unlock it.
★Suggestion: In order to protect the health of
you and your family, the lter should be cleaned
regularly and it is dishwasher safe for your
convenience.
Warning: Please wear the qualified protective
gloves in operation.
Replacing LED Lights:
1.Lightly press the POWER button; then, press
the LIGHTING button. After the LIGHTING button
is pressed, the smoke bafe plate will open.
2. Unplug the range hood or turn off the power
socket.
3. Use a small flat-head screwdriver to gently
pry the LED assembly out.
4. Disconnect the wires and then replace the
LED lights.
Use type lamp is self-ballasted fluorescent
reector lamp - Integral induction type ballast.

- 32 - - 33 -
FAQ
Warning: Risk of Electric Shock
•Incorrect repairs are dangerous. Repairs
may only be carried out and damaged power
cables replaced by our authorized service
center, or certied electricians.
•
If there is a defect in the product, please
disconnect the power plug or shut off the power
supply of the range-hood socket in order to
avoid electric shock. Please contact the service
center authorized by FOTILE.
•To avoid electric shock, please disconnect the
power plug or shut off the power supply of the
range-hood socket before replacing the LED
light.
• If an abnormal condition occurs during
use, immediately stop using the product and
disconnect the power plug or shut off the power
supply of the range-hood socket in order to
check the following:
Problem/Issue Possible Cause
After the POWER button
is pressed, the range hood
remains off and the button
does not illuminate.
The appliance may
be unplugged
The motor works, but the
control panel buttons do
not illuminate.
LED lights have
been damaged
If the problem/issue with the appliance still
persists after ruling out the possible cause(s),
please contact our authorized service center for
assistance.
SERVICE INFORMATION
Warning
• In the event of an abnormal condition during
the use of the range hood, please stop using it,
disconnect the power plug or shut off the power
supply of the range-hood socket. Please contact
the service center authorized by FOTILE.
• The appliance must only be repaired by
professionally trained and certified technician;
otherwise, severe injuries may occur.The ventilator
shall be not allowed to be repaired by any
party other than Fotile’s appointed technicians.
Otherwise it may cause serious consequences
and exempt the product from warranty.
• Please do not repair or replace any part of the
Range Hood unless it is specically suggested
in the manual. All other maintenance work
should be carried out by qualied technicians.
• The following circumstances do not fall into
the scope of free warranty, and a fee will be
charged for repair.
1) Damage resulting from improper handling,
installation, use, maintenance and
safekeeping conducted by customer.
2) Failure and damage caused by using
the product beyond the normal operating
conditions (damage caused in the case that
the voltage is higher than 132V or lower than
104V).
3) The product installed, dismantled or repaired
by customer or any party other than Fotile’s
appointed service staff or agency.
4) Discrepancy between the information on the
purchase voucher and the warranty card and
the product.
5) Product damage caused by force majeure
(such as natural disaster and war, etc.).
6) Product failure or damage arising from use
not in conformity with the “instructions”.
INSTALLATION
6.1 Installation Instructions
Important Note:
-Max wattage: 3W
-Voltage range: 8.5~12V
-Dimensions: width 2 13/16
"
(70 mm)/depth
7/8
"
(21 mm)/height 3/4
"
(19mm)
Risk of Electric Shock:
To avoid electric shock, please disconnect the
power plug or shut off the power supply of the
range-hood socket before replacing the LED light.
installation, please turn off the main gas valve rst.
3. Do not connect the range hood duct to a duct
used to exhaust hot air or fumes from another
appliance.
4. Two installers are recommended due to
the large size and heavy weight of the range
hood. Since the installation is complex and
the appliance is heavy, professional installers
are required to install the appliance as
outlined in this manual.
5. After the appliance fixed, the plug should
be accessible.
6. Make sure to keep the appliance
horizontally.
7. Ensure that the appliance functions
normally after the installation is complete.
Warning:
• In order to reduce the risk of fire, electric
shock, or injury to persons, please carefully
read the following:
1. The installation and wiring of the appliance
should only be carried out by a professional
electrician in accordance with current national
or local electric safety regulations, including
fire-rated construction. Non-professional
personnel should not conduct installation.
Proper installation is the responsibility of the
installer.
Product failure due to improper installation is
not covered under the Fotile warranty.
2. Please use standard installation equipment
and tools provided by Fotile to ensure safe
installation. Make sure to use the expansion
tube and expansion bolt provided by our
company, in case the range hood falls
down accidentally. The hole drilled into the
wall should precisely match the size of the
expansion tube, otherwise the range hood will
not be properly secured to the wall and may
fall down.
3. The range hood should be connected to a
standard power socket with safe grounding.
The midway connection, prolonged electric
line or multi-socket wiring may cause electric
shock, overheating and even re.
Power off before wiring and make sure
proper measures have been taken to avoid
unexpected connection.
• Prior to installation, please read the Fotile
Range Hood Installation carefully and save it
for the local inspector’s future reference.
• This appliance must be installed in accordance
with National Electrical Codes, as well as all
state, municipal and local codes.
• The appliance must be equipped with safe circuit
breaker and installed with safe grounding.
• The correct voltage, frequency and amperage
must be supplied to the appliance according to
the proper voltage, frequency and amperage
ratings listed on the product rating plate.
• This installation must be completed by Fotile
authorized service center, or certied installers.
• Please record the model and serial number
before installing the range hood. Position
of plaque can be referred to in figure A as
follows.
• The following diagrams are those of basic
models(JQG7505), for those derivative
models please refer to these diagrams of
basic models:
Caution:
•Please carefully read all instructions prior to
installation. Please give special consideration
to the following items:
1.If you are renovating your kitchen, be careful
to not expose the exterior of the range hood.
Building materials, dust, paint, coating, and
gases will corrode and tarnish the surface of
the range hood. It is recommended that you
install the range hood after all renovations are
completed.
2. If you need to remove your gas burner before

- 34 - - 35 -
4. During installation, switch off the circuit
breaker in the fuse box during installation.
If the supply cord is damaged, it must be
replaced by a special cord or assembly
available from the manufacturer or its service
agent.
5. The appliance should only be installed,
removed and maintained by qualified
technicians to prevent risks like electric
shocks, falling or res from occurring.
Risk of Injury:
• Unplug the appliance from the mains or switch
off the circuit breaker in the fuse box before
installation, cleaning, maintenance and repair
in order to avoid electric shock.
• The range hood may have sharp edges. Be
careful to avoid cuts and abrasions during
installation and cleaning. Do wear qualified
protective gloves.
Warning Before Installation
• Prior to installation, ensure that the exhaust
outlet is free of debris, as they may damage
the range hood.
• A straight and short ducting run will ensure a
high performance of the range hood.
• A curving and long ducting run should be
avoided, as it will lower the performance of
the range hood.
• Strictly seal the connection between the duct
and duct hole with duct tape. Ensure that the
connection between the duct and the duct cover
is secure, and seal it with aluminum tape.
• A small duct hole will lower the performance
of the range hood. Therefore, it is highly
recommended that you cut a duct hole equal
to or larger than 6"(152.4mm) of the size.
• The bolts used in this product are metric-size
bolts, please do not apply any unqualified
bolts.
6.2 Product Dimensions
187/16"
(467mm) 297/8"(758mm)
(JQG7505/JQG7505-W)
357/8"(910mm)
(JQG9006/JQG9006-W)
Wall Preparation
The wall should be strong enough to support the
range hood. As for hollow wall or hollow plate, The
minimum thickness of the lumber should be 13/16"
(30mm). As for concrete wall, the installation can be
directly operated. The range hood should be rmly
xed on the wall.
Ductwork Installation
Risk of Injury:
• Unplug the appliance from the mains or switch
off the circuit breaker in the fuse box before
installation, cleaning, maintenance and repair
in order to avoid electric shock.
• The range hood may have sharp edges. Be
careful to avoid cuts and abrasions during
installation and cleaning. Do wear qualified
protective gloves.
• When cutting or drilling into walls or ceilings,
do not damage electrical wiring and other
hidden utilities.
• Ducted fans must always be vented to the
outdoors.
• To reduce the risk of fire and to properly
exhaust air, always duct air outside. Do not
vent exhaust air into spaces within walls,
ceilings, into attics, crawl spaces or garages.
6.3 List of Accessories:
Packing List
Standard Conguration
Product
1
Duct Cover
1
Gasket
1
Grease Cup
(JQG7505/JQG7505-W) 1
Grease Cup
(JQG9006/JQG9006-W)2
Product Manual
1
Installation Paper Template 1
Warranty Card
1
Duct Bracket
1
Hook Screw
#8×1 7/16"(ST4.2×36mm) 4
Expansion Tubes for Tiles
φ1/4"×1 5/16"(φ5.3×32mm) 4
Expansion Tubes for Plasterboards
φ3/16"×1 5/8"(φ4×40mm) 4
Duct Cover Screws
#8×3/4"(M4×18mm)
4
Upper Plate Fastening Screws
#10×2 13/16"(M5×70mm) 4
(One of them is
for standby)
Set Screw Gasket for Upper
Cabinet Boards
φ1 5/16"(φ32mm) 4
(1 for standby)
Housing Assembly Accessories (optional)
Blower Housing
1
Decorative Cover
1
Decorative Cover Bracket
1
Safety Buffer Bafe
1
Duct Cover Screws
#8×7/16"(M4×10mm)
4
Hook Screw
#8×1 7/16"(ST4.2×36mm) 3
Expansion Tubes for Tiles
φ1/4"×1 5/16"(φ5.3×32mm) 3
Expansion Tubes for Plasterboards
φ3/16"×1 5/8"(φ4×40mm) 3
Screws
#4×3/4"(ST2.9×19mm)
3
Decorative Plate Assembly Accessories (with upper
cabinet)
6"(152.4mm) or 4"(101.6mm)
Decorative Plate
1
Fixed Decorative Plate Screws
#6×1 7/16"(ST3.5×35mm)
4
The following accessories must be purchased
separately (please contact the authorized Fotile
branch
Wood Screws
#10×2 9/16"(ST5×65mm) 4

- 36 - - 37 -
6.4 Installation Tools:
6.5 Installation Procedure:
In order to secure the safe use of the range
hood and maximize its ability to ventilate cooking
fumes, the installation height is suggested as
follows: The distance from the countertop of the
gas stove to the top board of the range hood
shall not be less than 29 9/16"(750mm) and
shall not be more than 32 1/2"(825mm). This
installation height is only applicable to electric
ranges. If the range hood is installed above a
gas range, the minimum distance between the
supporting surface of the cooking appliance
on the range and the lowest part of the range
hood should be at least 24”(610mm)(in USA)/25
5/8”(650mm)(in Canada). If the installation
instructions for the gas range specify a larger
installation distance, this should be considered.
The installation height of the range hood is the
recommended value, and the cupboard and the
range hood shown in the gure is for reference
only. When the installation height of this product
(i.e. the distance between the supporting
surface of the cooking appliance on the range
and the lowest part of the range hood) is lower
than 24”(610mm)(in USA)/25 5/8”(650mm)
(in Canada), all parts below 24”(610mm)(in
USA)/25 5/8”(650mm)(in Canada) are non-
flammable parts of the range hood or parts
working under safe and ultra-low voltage, and
the deformation of these parts will not affect the
protection against the touch of live parts.
Where there are relevant laws stipulating the
mounting height of range hood in the state
or region, the laws shall prevail ( Included
but not limited to architecture and firefighting
regulations and standards). However, the effect
of cooking fumes ventilation might be affected.
The range hood can be installed in three ways,
either with or without the upper cabinet.
Caution:
1. One of the wood screws(#10×2 9/16"(ST5×65mm))
for duct bracket must be fastened to the wooden beam.
2. If it is necessary to drill the duct outlet at the back
wall, the distance from the top plane of the range
hood to the center of the hole should be at least 8"
(203mm).
Warning: Excessively low installation height can
cause overheating of the glass panel, increasing the
possibility of breaking.
Installation of the Fotile Range Hood with
an Upper Cabinet:
Diameter of smoke
tube Φ6" (152.5mm)
Diameter of hole digging
Φ
6 1/2" (165mm)
Warning: Do wear qualied protective gloves.
1. Unpack the appliance and check the List of
Accessories.
2. Locate the wooden beam and mark the location
with a pencil.
Framing Stud
3. Locate the duct bracket. Determine the
central point and mark the centerline on the
wall where the hood will be installed. Also, mark
the point where the central line and the lowest
point on the bottom board of the top cabinet
meet. This is the location, in which to secure
the bracket. Mark screw hole locations on the
wall. The distance between the lowest point on
bottom board of the top cabinet and the center
of the bracket should be 16" (405mm).
Caution: One of the wood screws(#10×2
9/16"(ST5×65mm)) for main engine must be
fastened to the beam.Screws must be fixed
at Hole A and B in the drawing; also wood
screws(#10×2 9/16"(ST5×65mm)) must be xed
at bracket bores with corresponding wooden
stakes in Area C.
4.Fixing hooks:
1) Punch marks are on tiles (marble): Punch holes
(φ3/8"(φ8mm)) with an electric drill at the marks,
and embed expansion tube for tiles(φ1/4"×1
5/16"(φ5.3×32mm)); fix hook with hook
screws(#8×1 7/16"(ST4.2×36mm)), and keep the
hook level with a level ruler.
2) Punch marks are on plasterboards: Screw
the expansion tube for plasterboards(φ3/16"×1
5/8"(φ4×40mm)) into walls with screwdrivers
at the marks; fix hooks with hook screws(#8×1
7/16"(ST4.2×36mm)), and keep the hook
horizontal with a level ruler.
5 .Place the hole-drilling template with the side
of the hole-drilling dimension drawing facing
down on the bottom of the upper cabinet, and
then drill the holes as indicated on the hole-

- 38 - - 39 -
Installation Instructions for the Decorative
Plate with Upper Cabinet :
Caution: Please confirm the height of the top
cabinet. If the upper cabinet is over 32 1/2" es
(825mm) high, 6"(152.4mm) or 4"(101.6mm)
decorative plate is preferred.
Diameter of smoke
tube Φ6" (152.5mm)
Diameter of hole digging
Φ
6 1/2" (165mm)
7 11/16"(194.4mm)
or
5 11/16"(143.6mm)
6"(152.4mm)
or
4"(101.6mm)
1.Unpack the appliance and check the List of
Accessories.
drilling template.
Caution: Wear safety goggles when drilling.
In case of batten at the wall facing the bottom
plate, the rear wall side of the paper template shall
be cut as per the thickness of the batten.
If it is necessary to x the hook on the tile, the “Rear
Wall” side of the hole-drilling template should be
attached to the bottom of the upper cabinet, using
the tile surface as a reference.
6. Remove the protective film of the stainless
steel surface and Grease Cup at both sides of
the range hood.
7. Lift and position the hood onto the brackets
at the bottom of the backside while keeping an
angle between the wall and the hood, and then
push the hood against the wall tightly.
Caution: Two installers are required to ensure
safe installation.
8.Use three sets of screws (#10×2
13/16"(M5×70mm)) for upper cabinet boards
and supporting gaskets (φ1 5/16"(φ32mm))
to fix the main body, and secure at least two
screws before releasing.
the bottom
board of the
top cabinet
Range hood shel
If there is a big gap between the bottom board
of the top cabinet and the top of the range hood,
please add wood pads based on the gap size near
the three #10×2 13/16"(M5×70mm) screws to
avoid range hood shell deformation caused by the
tightening of screws, which will affect the use of
the range hood.
Range hood shel
the bottom
board of the
top cabinet
Wooden plate
9. Place the seal (notch downward) at the air
outlet of the machine and fix the outlet housing
with 4 outlet-housing bolts of #8×3/4"(M4×18mm).
Then, secure the duct to the duct cover and seal
the connection with aluminum tape.
10. Make sure the hood is leveled. Install the
Grease Cup, and plug in the appliance for a test
run.
Warning: Please wear the qualified protective
gloves in operation.
Caution: Please run the machine and test if
the smoke pipe leaks air after it is sealed with
aluminum foil tape. The smoke pipe should be
able to be straightened as much as possible.
2. Locate the wooden beam and mark the
location with a pencil.
Framing Stud
3. Locate the duct bracket. Determine the
central point and mark the centerline on the
wall where the hood will be installed. Also, mark
the point where the central line and the top
cabinet meet. This is the location, in which to
secure the bracket. Mark screw hole locations
on the wall. The upper edge (the xed surface
between the decorative sheet and the board
of the top cabinet) of the bottom board of the
top cabinet shall be deemed as the location
datum. And the distance between the upper
edge and the center of the bracket shall be 7
11/16"(194.4mm)for 6"(152.4mm) decorative
sheet and 5 11/16"(143.6mm) for 4"(101.6mm)
decorative sheet.
The upper edge (the fixed
surface between the decorative
sheet and the board of the top
cabinet) of the bottom board of
the top cabinet shall be deemed
as the location datum.
5 11/16"
(143.6mm)
or
7 11/16"
(194.4mm)
Caution: One of the wood screws(#10×2
9/16"(ST5×65mm)) for main engine must be
fastened to the beam.Screws must be fixed
at Hole A and B in the drawing; also wood
screws(#10×2 9/16"(ST5×65mm)) must be xed
at bracket bores with corresponding wooden
stakes in Area C.

- 40 - - 41 -
4.Fixing hooks:
1) Punch marks are on tiles (marble): Punch
holes (φ3/8"(φ8mm)) with an electric drill at
the marks, and embed expansion tube for
tiles(φ1/4"×1 5/16"(φ5.3×32mm)); x hook with
hook screws(#8×1 7/16"(ST4.2×36mm)), and
keep the hook level with a level ruler.
2) Punch marks are on plasterboards: Screw
the expansion tube for plasterboards(φ3/16"×1
5/8"(φ4×40mm)) into walls with screwdrivers
at the marks; x hooks with hook screws(#8×1
7/16"(ST4.2×36mm)), and keep the hook
horizontal with a level ruler.
5.
Place the hole-drilling template with the side
of the hole-drilling dimension drawing facing
down on the bottom of the upper cabinet, and
then drill the holes as indicated on the hole-
drilling template.
Caution: Wear safety goggles when drilling.
In case of batten at the wall facing the bottom
plate, the rear wall side of the paper template
shall be cut as per the thickness of the batten.
If it is necessary to x the hook on the tile, the
“Rear Wall” side of the hole-drilling template
should be attached to the bottom of the upper
cabinet, using the tile surface as a reference.
6. Remove the protective film of the stainless
steel surface and Grease Cup at both sides of
the range hood.
7. Place the seal (notch downward) at the
air outlet of the machine and fix the outlet
housing with 4 outlet-housing bolts of
#8×3/4"(M4×18mm).
8. Lift and position the hood onto the brackets at
the top of the backside while keeping an angle
between the wall and the hood, and then push
the hood against the wall tightly. Secure the
duct to the duct cover and seal the connection
with aluminum tape.
Caution: Two installers are required to ensure
safe installation.
9. Install the decorative plate.
Fix the decorative panel in place with 4 #6 × 1
7/16" (ST3.5×35mm) wood screws and fix the
decorative panel on the upper cabinet plate (the
wood screws are provided in the accessory bag
in the packing box of the decorative panel).
10. Make sure the hood is leveled. Install the
Grease Cup, and plug the appliance for a test run.
Warning: Please wear the qualified protective
gloves in operation.
Caution: Please run the machine and test if
the smoke pipe leaks air after it is sealed with
aluminum foil tape. The smoke pipe should be
able to be straightened as much as possible.
Installation Instructions for the Decorative
Cover Without Upper Cabinet
Diameter of smoke
tube Φ6" (152.5mm)
Diameter of hole digging
Φ
6 1/2" (165mm)
1. Unpack the appliance and check the List of
Accessories.
2. Locate the wooden beam and mark the
location with a pencil.
Framing Stud
3. Locate the duct bracket, safety buffer bafe
and decorative cover bracket:
safety stop
mounting hole
2
5/16"(58.5mm)
4
9/16"(115.5mm)
Max 29 15/16"(760mm)
Max 30 7/8"(783mm)
Min 27 7/8"(708mm)
4
9/16"(115.5mm)
Hole A Area C Hole B
Caution: one of the wood screws(#10×2
9/16"(ST5×65mm)) for main engine must be
fastened to the beam.Screws must be fixed

- 42 - - 43 -
at hole A and B in the drawing; also wood
screws(#10×2 9/16"(ST5×65mm)) must be xed
at bracket bores with corresponding wooden
stakes in area C.
Firstly determine the installation central point of
the range hood according to the central point
of the cooker, determine the bracket installation
location based on cooker table and mark the
place for drilling. The cooker table is about 27
7/8" (708 mm) to 30 7/8" (783 mm) away from
the central point of bracket;
The location to install the safety buffer baffle
should be 4 9/16" (115.5 mm) to the left of the
duct bracket and 2 5/16" (58.5 mm) straight up.
The location to install the decorative cover
bracket should generally be 29 15/16 " (760
mm) above the central point of the duct bracket.
If the distance between the ceiling and duct
bracket equals to or is less than the value,
secure the decorative cover bracket on the wall
right under the ceiling. If the distance is more
than the value, taller decorative covers (27
9/16" (700 mm) and 35 7/16" (900 mm) in height
respectively) need to be bought separately.
Embed the expansion tube in the punch marks:
1) Punch marks are on tiles (marble): Punch
holes (φ3/8"(φ8mm)) with an electric drill at
the marks, and embed expansion tube for
tiles(φ1/4"×1 5/16"(φ5.3×32mm)).
2) Punch marks are on plasterboards: Screw
the expansion tube for plasterboards(φ3/16"×1
5/8"(φ4×40mm)) into walls with screwdrivers at
the marks.
4. Secure the duct bracket and decorative cover
bracket to the wall with corresponding screws
and tighten the screws. Make sure the bracket
is leveled.
Caution: One of the wood screws(#10×2
9/16"(ST5×65mm)) for duct bracket must be
fastened to the wooden beam.
5. Place the seal (notch downward) at the
air outlet of the machine and fix the outlet
housing with 4 outlet-housing bolts of
#8×3/4"(M4×18mm). Fix four outer cover bolts
of #8×7/16" (M4×10mm) at the corresponding
positions (The cover screws is provided in
the accessory bag in the packing box of the
decorative cover assembly.).
6. Remove the protective film of the stainless
steel surface and Grease Cup at both sides of
the range hood.
7. Lift and position the hood onto the mounting
screws. Make sure the hood is stable and
leveled by using a spirit level. Install the safety
buffer baffle above the hood(The safety block
is provided in the accessory bag in the packing
box of the decorative cover assembly.).
Caution: Two installers are required to ensure
safe installation. Please install the safety stop
as required. The main function of the safety stop
is to prevent the range hood from being lifted up
accidentally, which will cause it to unhook and
potentially fall.
8. Secure the duct to the duct cover and seal the
connection with aluminum tape.
Make sure the hood is leveled. Install the Grease
Cup, and plug the appliance for a test run.
Caution: Please run the machine and test if
the smoke pipe leaks air after it is sealed with
aluminum foil tape. The smoke pipe should be
able to be straightened as much as possible.
9. First, tear off the protective lm on the decorative
cover and fan cover, and put the decorative cover
into the fan cover. Then take up the decorative
cover and fan cover, hang the decorative cover
on the decorative cover hook, lower the fan cover
slowly, and push the decorative cover and fan
cover inward until the fan cover is fastened to the
corresponding cover screws.
10. Install the Grease Cup.
Warning: Please wear the qualified protective
gloves in operation.
6.6 Test Run After Installation:
1. Lightly press the POWER button. Next,
lightly press the LIGHTING button. At this time,
the smoke baffle plate and lights should work
normally.
2. Lightly press the fan buttons to check the motor.
If any of the following malfunctions occurs, unplug
the hood immediately and re-check the installation
process. (If the malfunction continues, contact our
authorized service center as soon as possible.)
(1) The hood vibrates violently.
(2) The impeller does not work.
(3) The impeller grates while rotating.
(4) The motor makes strange sounds.
3. Lightly press the POWER button again to turn
off the fan and close the smoke bafe plate.

- 44 - - 45 -
Explosive ViewJQG7505/JQG7505-W
JQG9006/JQG9006-W
Power Cable
Duct Cover
Gasket
Lid of Electrical Box
Electrical Box Support Block
Power Panel
Electrical Box
Volute
Motor (Right)
Motor (Left)
Grease Guide Board
Impeller (Right)
Impeller (Left)
Tightfisted Nut (Right)
Tightfisted Nut (Left)
Air Intake Ring
Control Pressure Plate
Control Plate Component
Upper Glass
Grease Cup
Lower Glass
Glass for Smoke Baffle Plate
Grease Filter
LED
Connector Component
Push Rod Bracket
Electric Push Rod
Box
Duct Bracket
Power Cable
Duct Cover
Gasket
Lid of Electrical Box
Electrical Box Support Block
Power Panel
Electrical Box
Volute
Motor (Right)
Motor (Left)
Grease Guide Board
Impeller (Right)
Impeller (Left)
Tightfisted Nut (Right)
Tightfisted Nut (Left)
Air Intake Ring
Control Pressure Plate
Control Plate Component
Upper Glass
Grease Cup
Lower Glass
Glass for Smoke Baffle Plate
Grease Filter (Right)
Grease Filter (Left)
LED
Connector Component
Push Rod Bracket
Push Rod Cover
Electric Push Rod
Box
Duct Bracket
Other manuals for JQG7505
2
Table of contents
Other FOTILE Ventilation Hood manuals

FOTILE
FOTILE EMS9016 User manual

FOTILE
FOTILE JQG7502 User manual

FOTILE
FOTILE JQG7522 User manual

FOTILE
FOTILE EH17A Instruction Manual

FOTILE
FOTILE JQG9001 User manual

FOTILE
FOTILE JQG7501 User manual

FOTILE
FOTILE JQG7505 User manual

FOTILE
FOTILE EMS6008 Specification sheet

FOTILE
FOTILE EMG9030 User manual

FOTILE
FOTILE JQG7502 User manual

FOTILE
FOTILE UQS3001 User manual

FOTILE
FOTILE EMS9026 User manual

FOTILE
FOTILE Classic Series User manual

FOTILE
FOTILE EMG9030 User manual

FOTILE
FOTILE JQG7505 User manual

FOTILE
FOTILE UPA9001 Instruction Manual

FOTILE
FOTILE JQG9009 User manual

FOTILE
FOTILE JQG7501 User manual

FOTILE
FOTILE EMS9016 User manual

FOTILE
FOTILE JQG9006 User manual