Important Safety Instructions
WARNING: TO REDUCE THE RISK OF INJURY OR DAMAGE, READ THE FOLLOWING SAFETY PRECAUTIONS WHEN SETTING UP, USING AND MAINTAINING YOUR ROBOT.
1
• CAUTION
or in any commercial or industrial environment.
This product is designed for indoor floor cleaning only, do not use it outdoors(such as on an open-ended terrace), on any surface other than the ground(such as a sofa),
Do not use this product on elevated surfaces without barriers such as the floor of a loft, an open-ended terrace, or on top of furniture.
Do not use the product when the ambient temperature is higher than 104°F(40°C), lower than 39°F(4°C), or if there are liquids or tacky substances on the floor.
Before using the product, move wires off the ground or place them to the side to prevent them being pulled on by the cleaner.
To prevent blocking the product and to avoid damage to valuables, remove light-weight items(such as plastic bags)and fragile objects(such as vases)from the
floor before cleaning.
Children should be supervised to ensure that they do not play with the appliance.
This product is not intended for use by persons(including children)with reduced physical, sensory or mental capabilities, or lack of experience and knowledge, unless they have
been given supervision or instruction concerning use of the product by a person responsible for their safety.
This product can be used by children aged from 8 years and above and persons with reduced physical, sensory or mental capabilities or lack of experience and knowledge
if they have been given supervision or instruction concerning use of the product in a safe way and understand the hazards involved. Children shall not play with the product.
Cleaning and user maintenance shall not be made by children without supervision(EU).
Keep the main brush cleaning tools out of reach of children.
Do not place any object(including children and pets)on the product, whether it is in operation or not.
Keep hair, loose clothing, fingers, and all parts of the body away from openings and moving parts.
Do not use the product on burning objects(such as cigarette butts).
Do not use the product on high pile carpets(product effectiveness may also be reduced on dark carpets).
Do not use the product to clean hard or sharp objects(such as decoration wastes, glass and nails).
Do not carry the product by using the main unit cover, or collision buffer.
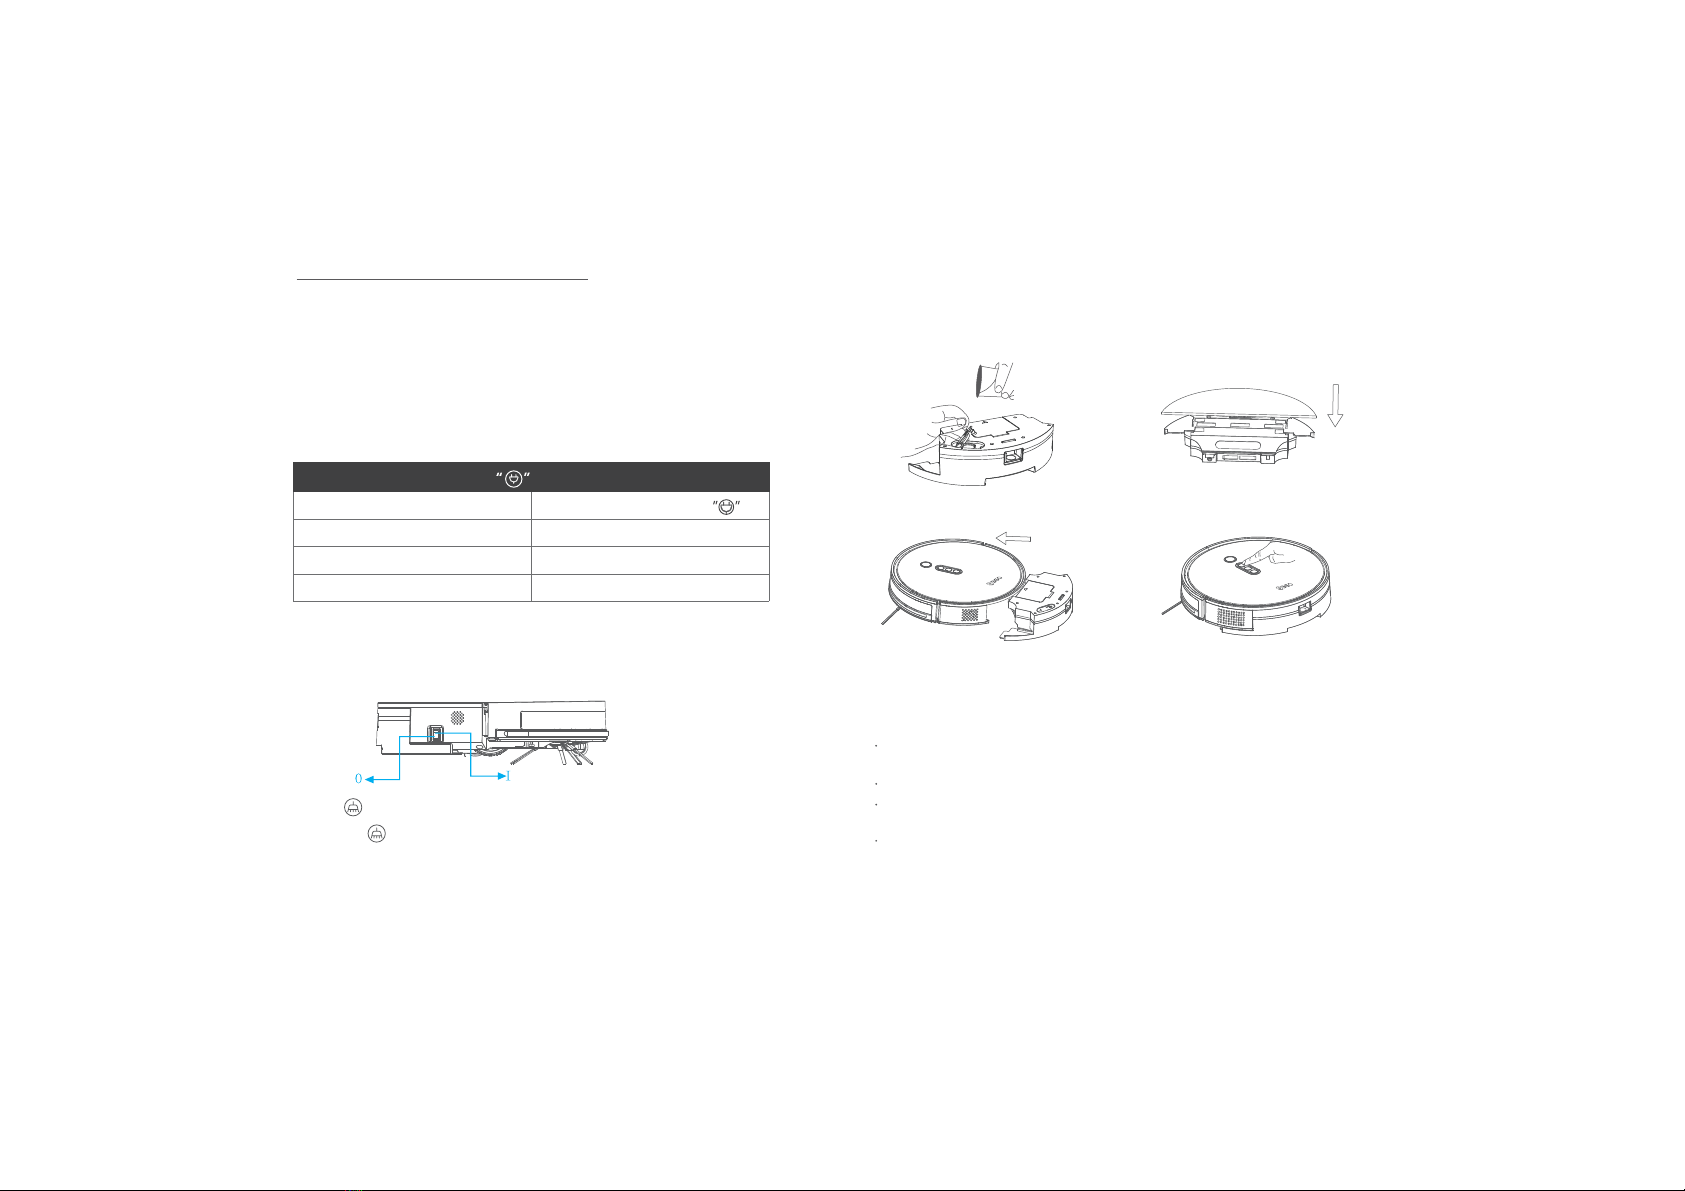
The product must be switched Rand the plug must be removed from socket-outlet before cleaning or maintaining the product.
Do not use wet cloth or liquids for cleaning the product.
Do not use the mopping module on carpets.
Use the product according to the manual, any loss or damage caused from improper use will be borne by the user.
This product contains batteries that are only replaceable by skilled persons.
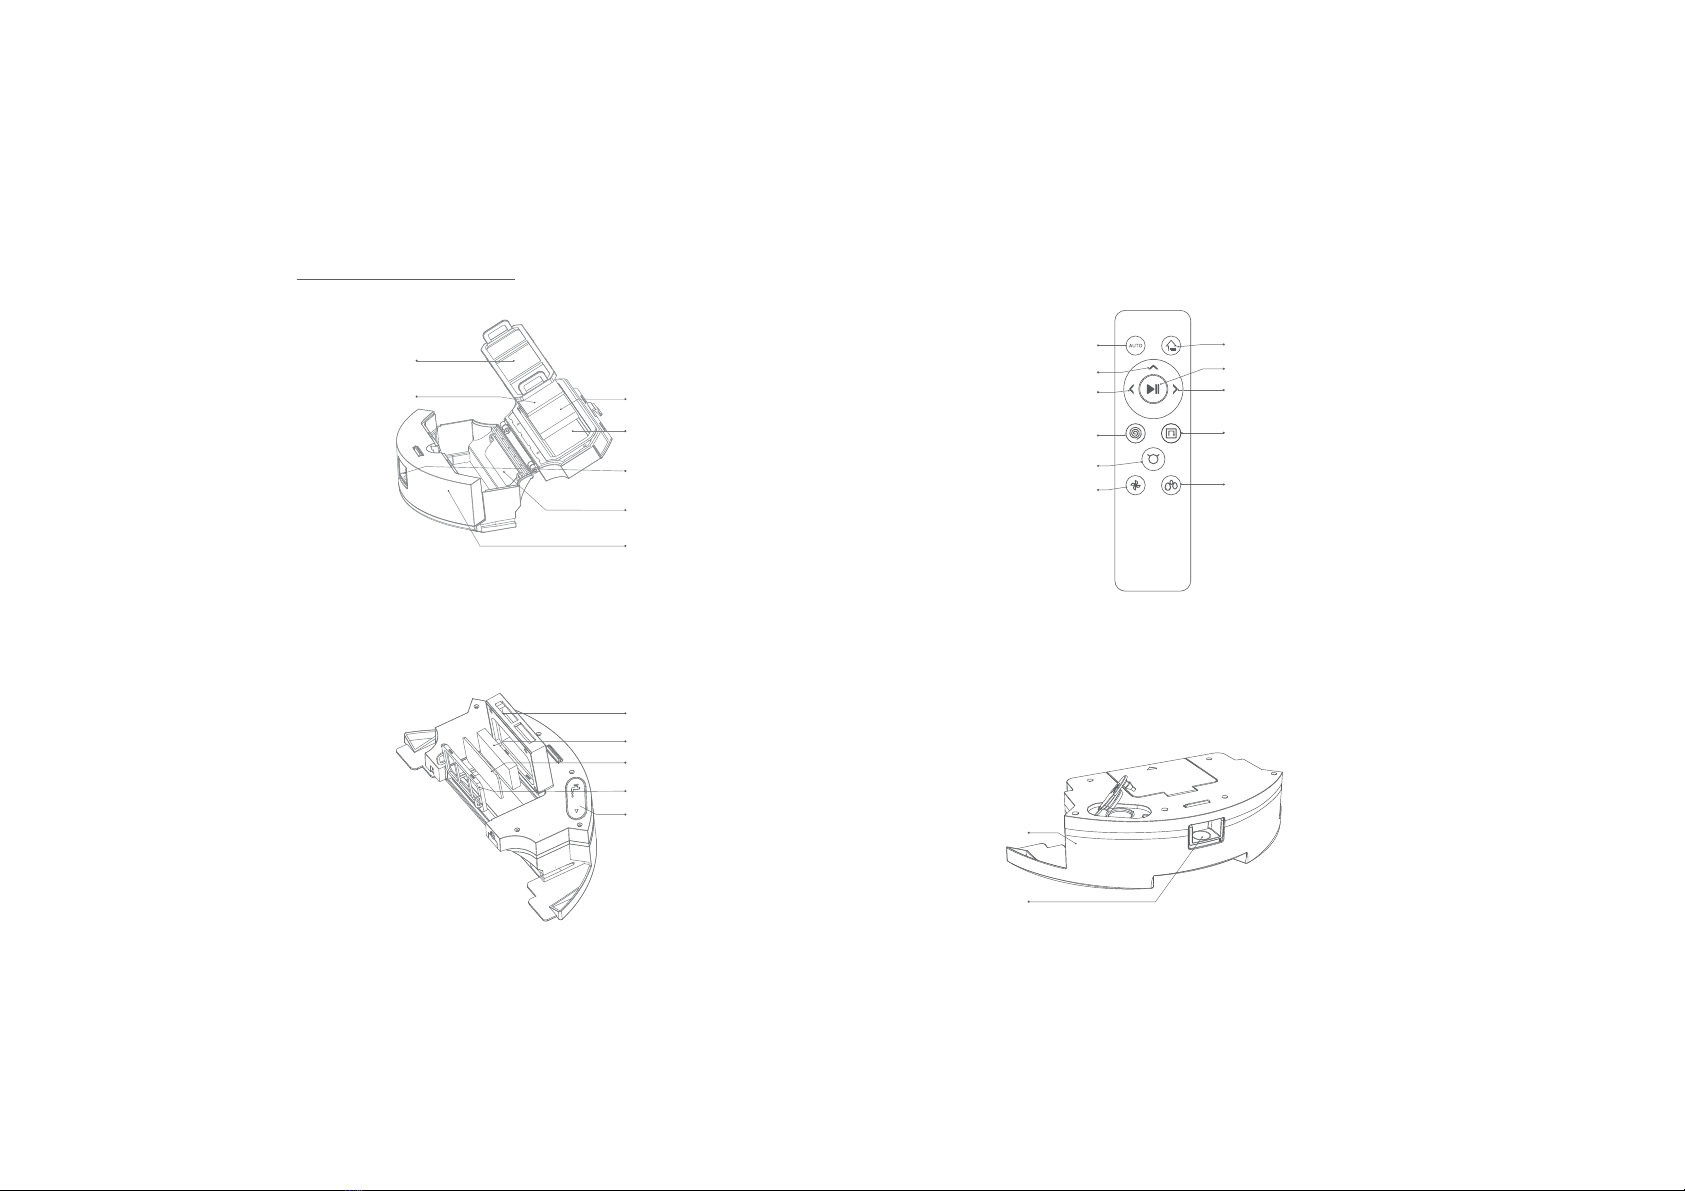
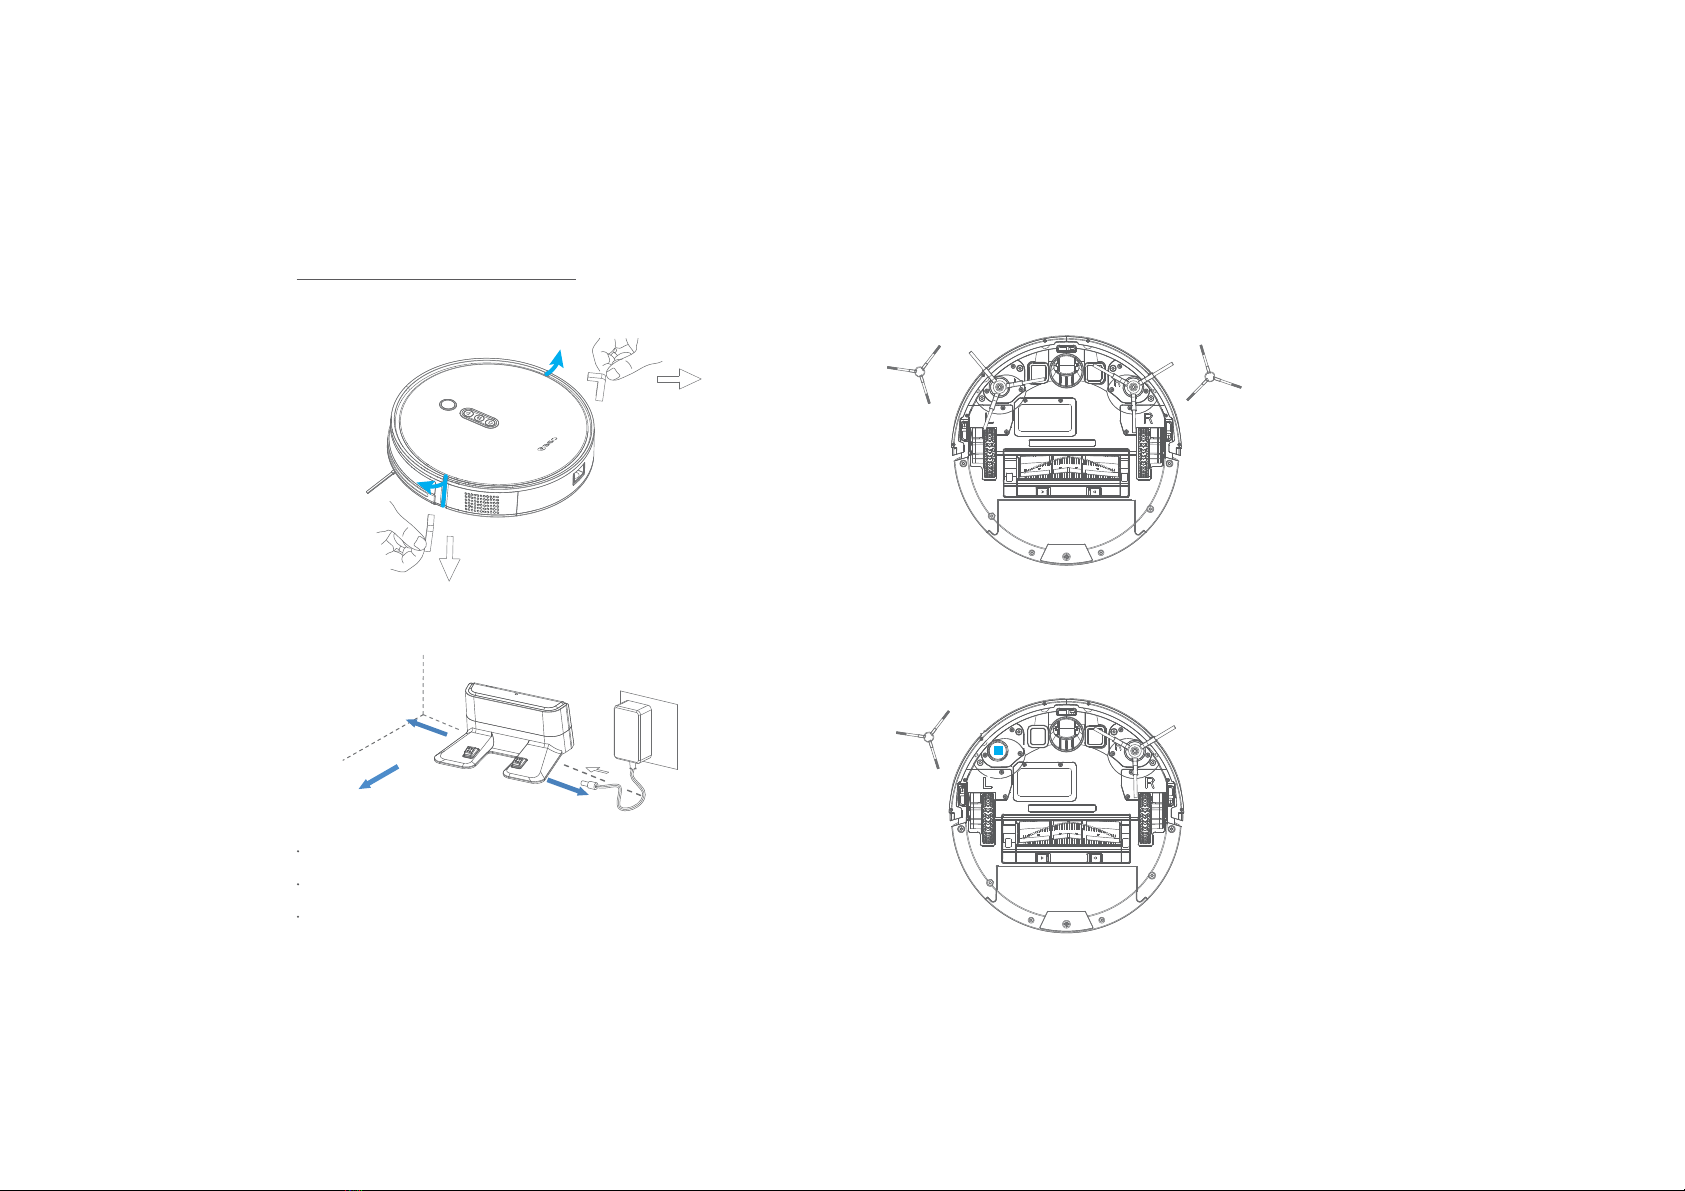
Robot vacuum cleaner