NAGA User Manual
©2021 FOXTECH All Rights Reserved 2
Assembly
Install Landing Gear
Unfold the Arm
Turn on Remote Controller
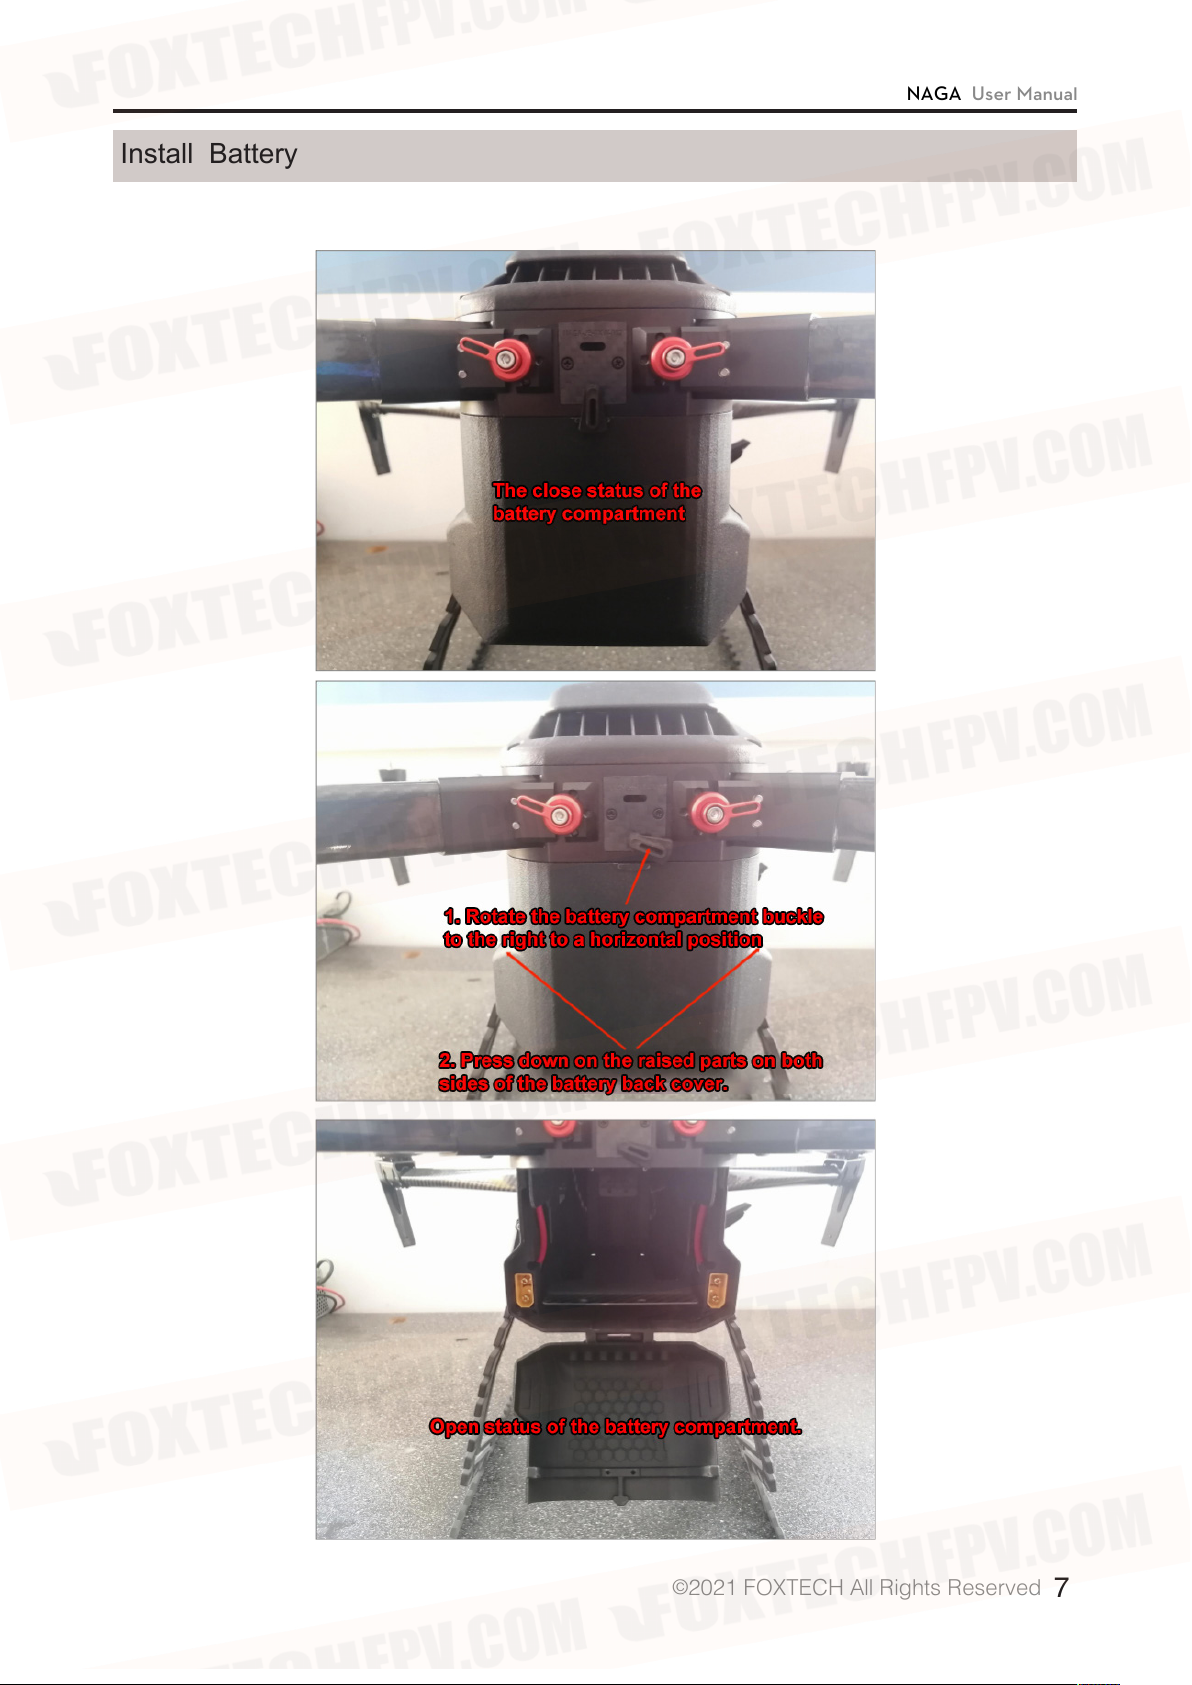
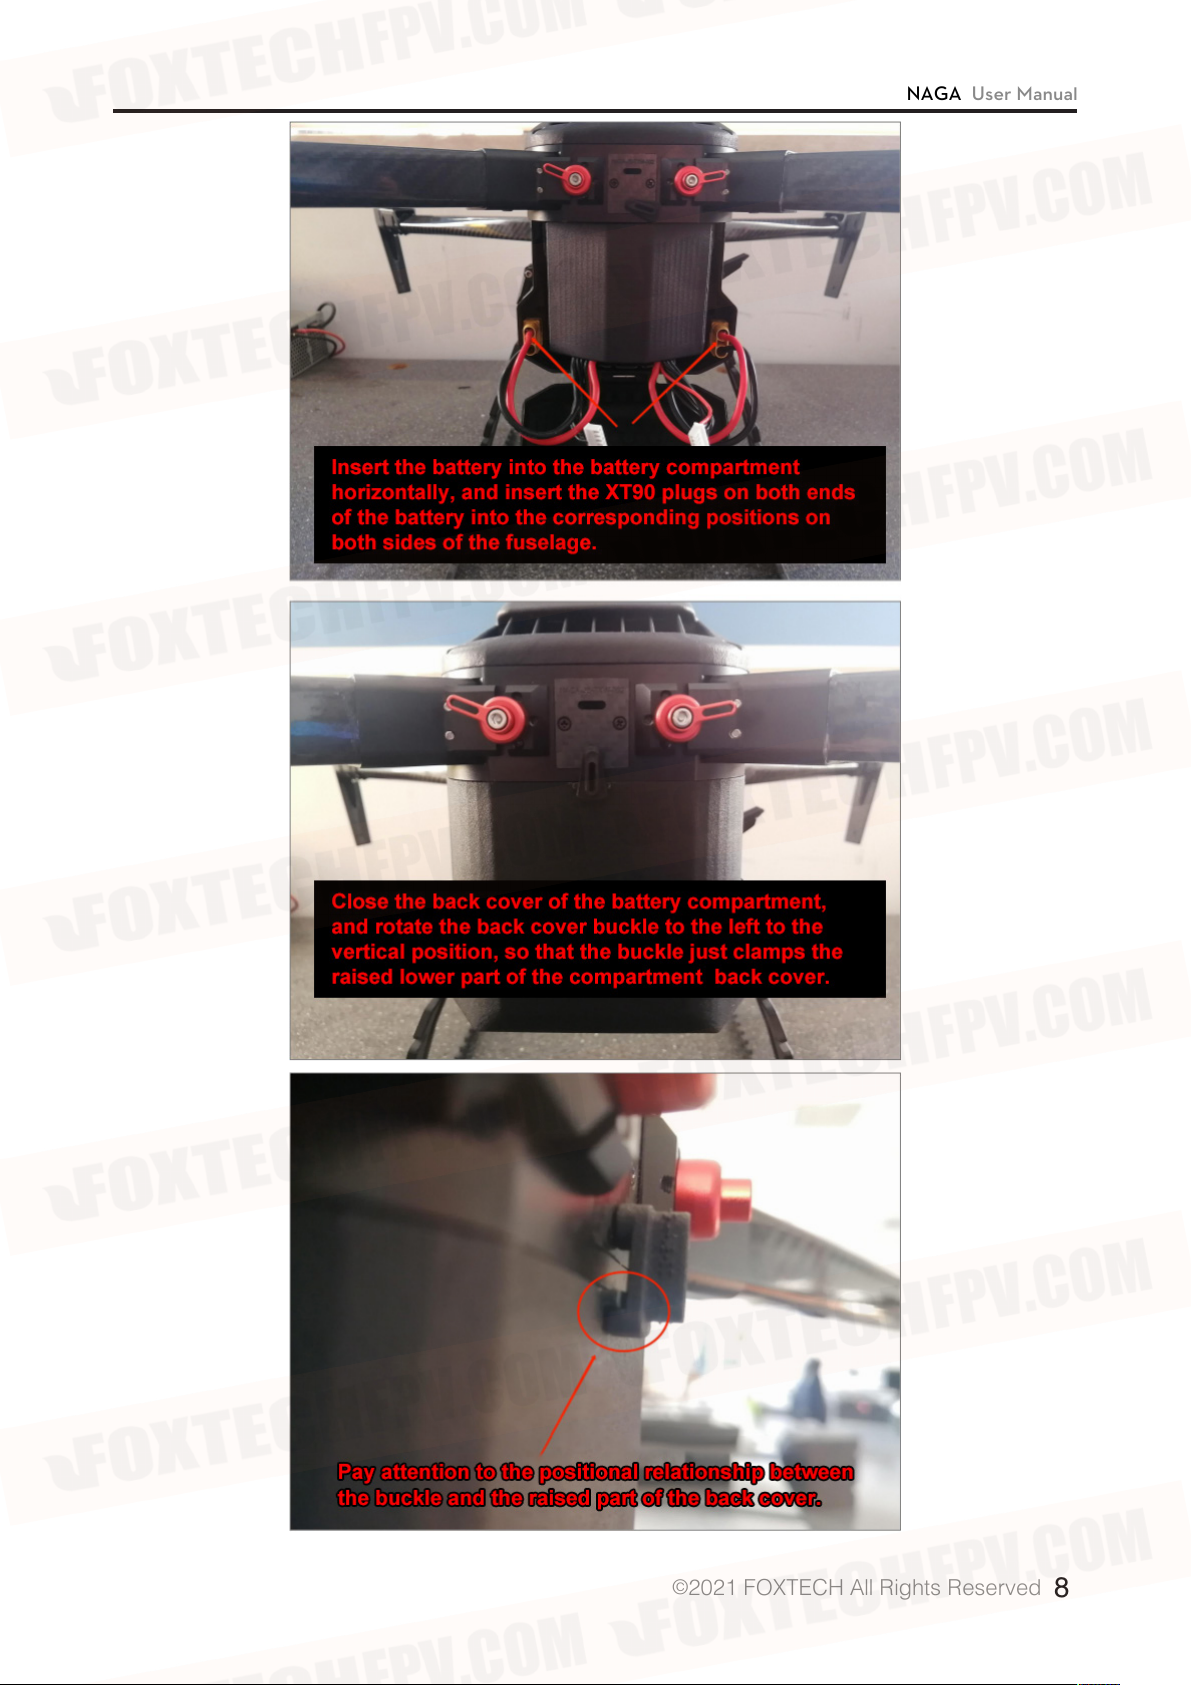
Install Battery
Install Propeller
Herelink Use Part
Hardware Update
Herelink Device Activation
Update Firmware Through WiFi
Pair with the Air Unit
Pair with the Air Unit
Power Mode Setting
Video Sharing
Connect with Mission Planner Ground Station
Watch a Live Herelink Video in Mission Planner
Mission Planner Basic Operation
Download and Install Mission Planner
Connect with The Cube
Connect with The Cube
Basic Hardware Calibration and Parameter Setting
Mission Planner RTK Setting
Basic Settings
How to Use Base Station
First Take-o
Self-checking
Meaning of LED Indicator Light
First Flight
Take-o Precautions
Automatic Mission Planning
How to Use Oblique Camera
Camera Function Buttons
Camera and Aircraft Connection
Photo Taking Test
FAQ
Troubleshooting Guide
How to Use QGC
3
3
5
6
7
9
10
10
10
12
14
16
22
22
28
29
30
30
30
31
32
42
42
45
46
46
46
47
49
50
52
52
52
53
56
60
61
Contents