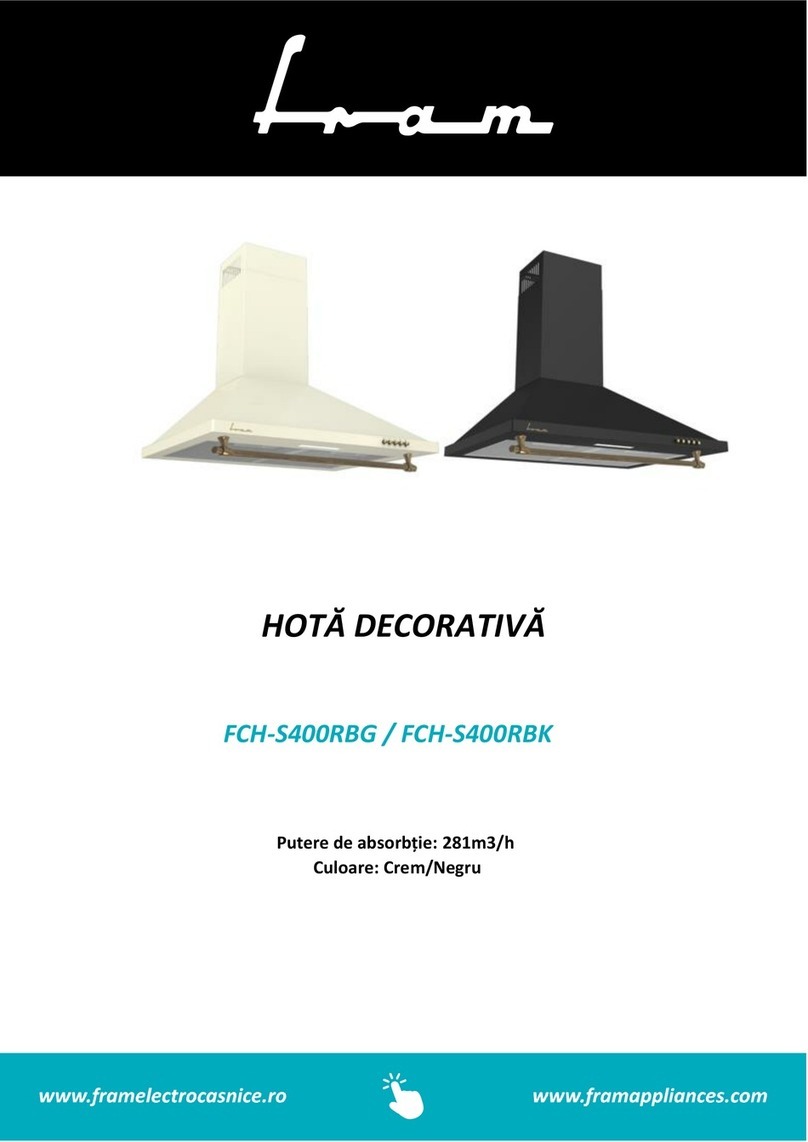
FRAM FDH-660RBG User manual

FDH-660RBG
DECORATIVE COOKER HOOD
Suction power: 589 m³/h
Color: Beige

1
Before using the appliance, please read carefully this instruction manual and keep it for future reference.
This instruction manual is designed to provide you with all required instructions related to the installation,
use and maintenance of the appliance.
In order to operate the unit correctly and safety, please read this instruction manual carefully before
installation and usage.
➔Decorative cooker hood
➔User manual
➔Warranty card
This manual explains the proper installation and use of your cooker hood, please read it carefully before using
even if you are familiar with the product. The manual should be kept in a safe place for future reference.
Never to do:
•Do not try to use the cooker hood without the grease filters or if the filters are excessively greasy!
•Do not install above a cooker with a high level grill.
•Do not leave frying pans unattended during use because overheated fats or oils might catch fire.
•Never leave naked flames under the cooker hood.
•If the cooker hood is damaged, do not attempt to use.
•Do not flambé under the cooker hood.
•CAUTION: Accessible parts may become hot when used with cooking appliances.
3. SAFETY PRECAUTIONS
Thank you for choosing this Fram product!
1. INTRODUCTION
2. YOUR PACKAGE CONTAINS

2
•The minimum distance between the supporting surface for the cooking vessels on the hob and the lowest
part of the cooker hood. (When the cooker hood is located above a gas appliance, this distance shall be
at least 65 cm).
•The air must not be discharged into a flue that is used for exhausting fumes from appliances burning gas
or other fuels.
Always to do:
•Important! Always switch off the electricity supply at the mains during installation and maintenance
such as light bulb replacement.
•The cooker hood must be installed in accordance with the installation instructions and all
measurements followed.
•All installation work must be carried out by a competent person or qualified electrician.
•Please dispose of the packing material carefully. Children are vulnerable to it.
•Pay attention to the sharp edges inside the cooker hood especially during installation and cleaning.
•Make sure the ducting has no bends sharper than 90 degrees as this will reduce the efficiency of the
cooker hood.
•Warning: Failure to install the screws or fixing device in accordance with these instructions may result
in electrical hazards.
•Warning: Before obtaining access to terminals, all supply circuits must be disconnected.
•Always put lids on pots and pans when cooking on a gas cooker.
•When in extraction mode, air in the room is being removed by the cooker hood. Please make sure that
proper ventilation measures are being observed. The cooker hood removes odors from room but not
steam.
•There shall be adequate ventilation of the room when the cooker hood is used at the same time as
appliances burning gas or other fuels.
•Cooker hood is for domestic use only.
•If the supply cord is damaged, it must be replaced by the manufacturer, its service agent or similarly
qualified persons to avoid a hazard.
•This appliance can be used by children aged from 8 years and above and persons with reduced physical,
sensory or mental capabilities or lack of experience and knowledge if they have been given supervision
or instruction concerning use of the appliance in a safe way and understand the hazards involved.
Children shall not play with the appliance. Cleaning and user maintenance shall not be made by
children without supervision.
•Caution: The appliance and its accessible parts can become hot during operation. Be careful to avoid
touching the heating elements. Children younger than 8 years old should stay away unless they are
under permanent supervision.
•There is a fire risk if cleaning is not carried out in accordance with the instructions.
•Regulations concerning the discharge of air must be fulfilled.
•Clean your appliance periodically by following the method given in the chapter Maintenance.
•For safety reason, please use only the same size of fixing or mounting screw which are recommended in
this instruction manual.
•Regarding the details about the method and frequency of cleaning, please refer to maintenance and
cleaning section in the instruction manual.
•Cleaning and user maintenance shall not be made by children without supervision.

3
•When the cooker hood and appliances supplied with energy other than electricity are simultaneously in
operation, the negative pressure in the room must not exceed 4 Pa (4 x 10⁻⁵ bar).
•Warning: Danger of fire. Do not store items on the cooking surfaces.
•A steam cleaner is not to be used.
•Never try to extinguish a fire with water, but switch off the appliance and then cover flame e.g. with a
lid or a fire blanket.
Mounting of the V-Flap
If the cooker hood does not have an assembled V-flap 1, you should mount the half-parts to its body. The
images only show an example of how to mount the V-flap, because the outlet may vary according to
different models and configurations.
To mount the V-flap 1 you should:
•Mount two half-parts 2 into the body 6.
•The pin 3 should be top oriented.
•The axis 4 should be inserted into the holes 5 on the body.
•Repeat all the operations for the 2nd half-part.
Installation
If you have an outlet to the outside, your cooker hood can be connected as below picture by means of an
extraction duct (enamel, aluminum, flexible pipe or non-flammable material with an interior diameter of
150 mm).
1. Before installation, turn the unit off and unplug it from the outlet.
4. INSTALATION

4
2. The cooker hoods should be placed at a distance of 65-75cm from the cooking surface for best effect.
3. Install the hook on a suitable place once the installation height is fixed, and keep it in line. The fixed
position of the inside chimney bracket is the place of chimney. See pic 2.
4. Install the expansion pipe and fixed with a cable tie. Then put the cooker hood on the hook. See pic 3.
5. Fix the outside chimney bracket on the outside chimney and be sure that the inside chimney can be
adjusted the height in it freely. Afterwards, install the chimney on the cooker hood and lift up
expansion pipe till it out of the wall through the hole on the wall. See Pic 4.
6. Adjust the height of the inside chimney to the position of the inside chimney bracket and fix on it with
screws, meanwhile, fix the outside chimney on the cooker hood body by screws. After adjusting the
position, fix the body with safety screws. Note: The two safety vents are positioned on the back
housing, with a vdiameter of 6mm. See Pic 5.

5
Hints for exhaust duct installation
The following rules must be strictly followed to obtain optimal air extraction:
•Keep expansion pipe short and straight.
•Do not reduce the size or restrict expansion pipe.
•When using expansion pipe always install the pipe pulled taut to minimize pressure loss. Failure to
observe these basic instructions will reduce the performance and increase noise levels of the cooker
hood.
•Any installation work must be carried out by a qualified electrician or competent person.
•Do not connect the ducting system of the hood to any existing ventilation system which is being used
for any other appliance, such as warmer tube, gas tube, hot wind.
•The angle of the bend of the expansion pipe should not be less than 120º; you must direct the pipe
horizontally, or, alternatively, the pipe should go up from the initial point and should be led to an outer
wall.
•After the installation, make sure that the cooker hood is level to avoid grease collection at on end.
•Ensure the expansion pipe selected for installation complies with relevant standards and is fire
retardant.

6
Push button
1. Push the stop button, and the motor will stop.
2. Push the low button, and the motor will run at low speed.
3. Push the middle button, and the motor will run at mid speed.
4. Push the high button, and the motor will run at high speed.
5. Push the light button and the two lights will illuminate. Push it again and the light will turn off.
Fault
Possible Cause
Solution
Light on, but motor does not work
Fan switch turned off
Select a fan switch
position.
Fan switch failed
Contact service center.
Motor failed
Contact service center.
Light does not work, motor does not
work
House fuses blown
Reset/Replace fuses.
Mains power cable is loose or
disconnected
Refit mains power cable
to power outlet. Switch
power outlet on.
Oil leakage
One way valve and the outlet are not
tightly sealed.
Take down the one-way
valve and seal with
sealant.
Leakage from the connection of
chimney and cover
Take chimney down and
seal.
Lights not working
Broken or faulty bulbs
Replace blubs as per
this instruction.
Insufficient suction
The distance between the cooker hood
and the gas top is too far
Refit the cooker hood to
the correct distance.
The Cooker hood inclines
The fixing screw is not tight enough
Tighten the hanging
screw and make it
horizontal.
5. OPERATION
6. TROUBLESHOOTING

7
NOTE:
Any electrical repairs to this appliance must conform to your local, state and federal laws. Please
contact the service center if in any doubt before undertaking any of the above. Always disconnect the
unit from the power source when opening the unit.
Caution:
•Before maintenance or cleaning is carried out, the cooker hood should be disconnected from the mains
power supply. Ensure that the cooker hood is switched off at the wall socket and the plug removed.
•External surfaces are susceptible to scratches and abrasions, so follow the cleaning instructions to
ensure the best possible result is achieved without damage.
GENERAL
•Cleaning and maintenance should be carried out with the appliance cold especially when cleaning.
Avoid leaving alkaline or acid substances (lemon juice, vinegar etc.) on the surfaces.
STAINLESS STEEL
•The stainless steel must be cleaned regularly (e.g., weekly) to ensure a long-life expectancy. Dry with a
clean soft cloth. A specialized stainless steel cleaning fluid may be used.
•Note: Ensure that wiping is done along with the grain of the stainless steel to prevent any unsightly
crisscross scratching patterns from appearing.
CONTROL PANEL SURFACE
•The inlay control panel can be cleaned using warm soapy water. Ensure the cloth is clean and well
wrung before cleaning. Use a dry soft cloth to remove any excess moisture left after cleaning.
•Important: Using neutral detergents and avoid using harsh cleaning chemicals, strong household
detergents or products containing abrasives, as this will affect the appearance of the appliance and
potentially remove any printing of artwork on the control panel and will void manufactures warrantee.
GREASE MESH FILTERS
•The mesh filters can be cleaned by hand. Soak them for about 3 minutes in water with a mild detergent
and then brush it gently with a soft brush. Do not apply too much pressure to avoid any damage to it.
(Leave to dry naturally out of direct sun light) Filters should be washed separately to crockery and
kitchen utensils. It is advisable not to use rinse aid.
7. CLEANING AND MAINTENANCE

8
INSTALLING GREASE MESH FILTERS
To install filters for the following four steps:
•Angle the filter into the slots at the back of the hood.
•Push the button on the handle of the filter.
•Release the handle once the filter fits into a resting position.
•Repeat to install all filters.
CARBON FILTER (not included in the package)
Activated carbon filter can be used to trap odors. Normally the activated carbon filter should be changed
every 3 to 6 months according to your cooking habits. The installation procedure of activated carbon filter
is as below:
1. Before installing or replacing the carbon filters, disconnect the mains power to the unit.
2. Press the filter lock and remove the mesh filter.
3. Turn the carbon filter on both side of the motor anti-clockwise. Replace the carbon filters with the
new carbon filters.
4. Place the mesh filter.
5. Connect the power supply to the wall socket.
Note:
•Make sure the filter is securely locked. Otherwise, it would loosen and cause danger.
•When activated carbon filter attached, the suction power will be lowered.
BULB REPLACEMENT
•The bulb must be replaced by the authorized service or similarly qualified persons.
•Always switch off the electricity supply before carrying out any operations on the appliance. When
handling bulb, make sure it has completely cooled down before any direct contact with hands.
•When handling bulbs hold with a cloth or gloves to ensure perspiration does not come in contact with
the bulb as this can reduce the life of the bulb
Note:
•Before changing the lights, make sure that the appliance is turned off and unplugged.
•Protect against danger when changing lights, such as wearing gloves.
Changing the lights:
1. Remove the grease filter.
2. Use straight screwdriver to prize up the terminal box of the light connecting wire, and then pull out the
terminal plastic base of the light connecting wire. See pic 1. (Note: If some models cannot find the
terminal box, it may need to dismantle the front panel or glass first. )
3. Use a tool or hand to prize up the LED light bottom edge, then slightly pull out the LED light and light
connecting wire. See pic 2.
4. Apply the reverse procedure to install the light back.

9
-LED modules: self- ballasted –round lamp
-Max wattage: 2×2W
-Voltage range: AC 110-240V
-Dimensions:

10
Product fiche according to Commission Delegated Regulation (EU)
No. 65/2014
Trademark
Fram
Model
FDH-660RBG
Annual energy consumption (kWh/year)
61.6
Energy efficiency class
B
Fluid dynamic efficiency
23.5
Fluid dynamic efficiency class
B
Lighting efficiency (lux/W)
44
Lighting efficiency class
A
Grease filtering efficiency (%)
80
Grease filtering efficiency class
C
Airflow at minimum and maximum speed
under normal conditions of use (m³/h)
355.1
589.1
Airborne acoustical A-weighted sound
power emissions at minimum and
maximum speed under normal conditions
of use (dB(A))
60/70
Power consumption in standby mode (W)
-
Power consumption in off mode (W)
-
8. PRODUCT FICHE

11
CUSTOMER CARE AND SERVICE
Always use original spare parts.
When contacting our Authorized Service Centre, ensure that you have the following data available: Model
and Serial Number.
The information can be found on the rating plate. Subject to change without notice.
TECHNICAL DATA
The technical information is situated in the rating plate on the internal side of the appliance and on the
energy label.
The QR code on the energy label supplied with the appliance provides a web link to the information related
to the performance of the appliance in the EU EPREL database.
Keep the energy label for reference together with the user manual and all other documents provided with
this appliance.
It is also possible to find the same information in EPREL using the link https:// eprel.ec.europa.eu and the
model name and product number that you find on the rating plate of the appliance.
Thank you for purchasing this product. If you need support with your product, visit our website using the
links below.
Get User manuals: www.framelectrocasnice.ro
Get Service information: www.framelectrocasnice.ro
Environment friendly disposal
You can help protect the environment!
Please remember to respect the local regulations: hand in the non-working electrical equipment’s to an
appropriate waste disposal center.

12
FRAM is a registered trademark of Network One Distribution SRL. Other brands and product names
are trademarks or registered trademarks of their respective holders.
No part of the specifications may be reproduced in any form or by any means or used to make any
derivative such as translation, transformation, or adaptation without permission from NETWORK
ONE DISTRIBUTION.
Copyright © 2013 Network One Distribution. All rights reserved.
www.framelectrocasnice.ro; www.framappliances.com; www.nod.ro
This product is in conformity with norms and standards of European Community.
Importer: Network One Distribution
Marcel Iancu, 3-5, Bucharest, Romania
Tel: +40 21 211 18 56, www.framelectrocasnice.ro, www.nod.ro
www.framelectrocasnice.ro

13
FDH-660RBG
HOTĂ DECORATIVĂ
Putere de absorbție: 589 m³/h
Culoare: Crem

14
Înainte de a utiliza acest aparat, citiți cu atenție manualul de instrucțiuni și păstrați-l pentru consultări
ulterioare.
Acest manual este conceput pentru a vă oferi toate instrucţiunile necesare referitoare la instalarea, utilizarea
şi întreţinerea aparatului.
Pentru utilizarea corectă şi în siguranţă a aparatului, vă rugam să citiţi cu atenţie acest manual de instrucţiuni,
înainte de instalare şi utilizare.
➔Hotădecorativă
➔Manual de instrucțiuni
➔Certificat de garanție
Acest manual cuprinde explicaţii cu privire la instalarea şi utilizarea corespunzătoare a hotei .Vă rugăm să
citiţi cu atenţie manualul înainte de utilizarea produsului, chiar dacă modul de utilizare vă este cunoscut.
Manualul trebuie păstrat într-un loc sigur, pentru a putea fi consultat ulterior în caz de nevoie.
Avertismente:
•Nu încercaţi să utilizaţi hota fără filtrele de grăsime sau dacă filtrele sunt foarte murdare.
•Nu instalaţi produsul deasupra maşinilor de gătit prevăzute cu grill extern în partea superioară.
•Nu lăsaţi tigăile nesupravegheate în timpul utilizării, deoarece grăsimile şi uleiurile supraîncălzite pot lua
foc.
•Nu lăsaţi niciodată surse de flacără deschisă sub hotă.
•Dacă hota prezintă deteriorări, nu încercaţi să o utilizaţi.
Vă mulţumim pentru achiziţionarea acestui produs F R A M !
1. INTRODUCERE
2. CONȚINUTUL PACHETULUI DUMNEAVOASTRĂ
3. AVERTISMENTE PRIVIND SIGURANȚA

15
•Nu pregătiţi sub hotă preparate flambate.
•ATENȚIE: Componentele expuse ale aparatului pot deveni fierbinţi în timpul utilizării deasupra aparatelor
de gătit.
•Atunci când hota este montată deasupra unei maşini de gătit cu gaze, distanţa minimă dintre suprafaţa
de sprijin pentru vasele de gătit de pe plită şi partea cea mai de jos a hotei trebuie să fie de cel puţin 65
de cm.
•Aerul evacuat nu trebuie eliberat într-un canal de fum pentru evacuarea gazelor arse în urma utilizării
altor aparate
Avertismente:
•Important! În timpul efectuării operaţiilor de instalare sau întreţinere (cum ar fi înlocuirea becului), opriţi
întotdeauna alimentarea cu energie electrică.
•Hota trebuie instalată în conformitate cu instrucţiunile de instalare.
•Toate lucrările de instalare trebuie efectuate de către o persoană calificată dau de către un electrician.
•Vă rugăm să eliminaţi ambalajele cu grijă. Copiii sunt vulnerabili la acestea.
•Acordaţi atenţie muchiilor ascuţite din interiorul hotei, mai ales în timpul efectuării operaţiilor de
instalare şi curăţare.
•Asiguraţi-vă că tubulatura de evacuare nu are coturi la un unghi mai mic de 90 de grade, deoarece acestea
reduc eficienţa hotei.
•Avertisment: Montarea şuruburilor şi a sistemului de prindere fără respectarea prezentelor instrucţiuni
poate duce la pericole de natură electrică. Avertisment: Înainte de a atinge bornele, toate circuitele de
alimentare trebuie să fie deconectate.
•Puneţi întotdeauna capacele oalelor şi tigăilor atunci când gătiţi pe o maşină de gătit cu gaze.
•În timpul funcţionării, hota evacuează aerul din încăpere. Vă rugăm să luaţi măsuri pentru asigurarea unei
aerisiri corespunzătoare a încăperii. Hota elimină mirosurile din cameră, dar nu şi aburul.
•Atunci când hota este utilizată cu aparate care funcţionează cu gaze sau alţi combustibili, trebuie
asigurată o aerisire corespunzătoare a încăperii.
•Hota este destinată numai uzului casnic.
•Pentru evitarea pericolelor, în cazul în care cablul de alimentare este deteriorat, acesta trebuie înlocuit
de către producător, de către agentul său de service sau de persoane cu o calificare similară.
•Aparatul poate fi utilizat de către copii cu vârste începând de la 8 ani şi de către persoane cu capacităţi
fizice, senzoriale sau mentale reduse, cu lipsă de experienţă sau cunoştinţe, numai dacă acestea sunt
supravegheate sau instruite în ceea ce priveşte utilizarea în siguranţă a aparatului şi dacă înţeleg
pericolele pe care le implică utilizarea. Copiii nu au voie să se joace cu aparatul. Curăţarea şi întreţinerea
nu trebuie efectuate de către copii nesupravegheaţi.
•Atenţie: Aparatul şi zonele expuse ale acestuia se pot încinge pe parcursul folosirii. Evitaţi atingerea
componentelor fierbinţi. Copiii cu vârste sub 8 ani nu trebuie să aibă acces la aparat, cu excepţia cazului
în care se află sub supraveghere permanentă.
•Există riscul de producere a incendiilor în cazul în care curăţarea nu se efectuează în conformitate cu
instrucţiunile.
•Trebuie respectate reglementările cu privire la evacuarea aerului.
•Curăţaţi aparatul periodic, urmând metoda prezentată în capitolul „Întreţinere”.
•Din motive de siguranţă, vă rugăm să utilizaţi numai şuruburile de fixare sau de montaj recomandate în
cadrul prezentului manual de instrucţiuni.
•Pentru detalii referitoare la metodele de curăţare şi frecvenţa cu care curăţarea trebuie efectuată,
consultaţi secţiunea referitoare la întreţinere şi curăţare din cadrul prezentului manual de instrucţiuni.
•Curăţarea şi întreţinerea nu trebuie efectuate de către copii nesupravegheaţi.
•În cazul în care hota este utilizată împreună cu aparate alimentate cu altă energie decât cea electrică,
presiunea negativă din încăpere nu trebuie să depăşească 4 Pa (4 x 10⁻⁵ bar).
•Avertisment: Pericol de incendiu. Nu depozitaţi obiecte pe suprafeţele destinate gătitului.

16
•Nu utilizaţi aparate de curăţare cu abur.
•Nu încercaţi niciodată să stingeţi focul cu apă, ci opriţi aparatul din funcţiune, apoi acoperiţi flacăra cu un
capac sau cu o pătură rezistentă la foc.
Montarea clapetei antiretur
În cazul în care clapeta antiretur (1) nu este montată, cele două secţiuni ale acesteia trebuie asamblate.
Imaginile ilustrează doar un exemplu de montare a clapetei antiretur, configuraţia putând fi diferită în funcţie
de modelul achiziţionat.
Pentru asamblarea clapetei antiretur (1), parcurgeţi paşii de mai jos:
1. Montaţi cele două secţiuni (2) în carcasă (6);
2. Bolţul (3) trebuie orientat înspre sus;
3. Axul (4) trebuie introdus în orificiile (5) de pe carcasă;
4. Repetaţi paşii de mai sus pentru a doua secţiune.
Montarea
În cazul în care este disponibil un orificiu de evacuare către exterior, hota poate fi conectată aşa cum este
indicat în imaginea de mai jos, prin intermediul unui tub de evacuare (din aluminiu, ţeavă flexibilă sau
material neinflamabil cu diametrul interior de 150 mm).
1. Înainte de instalare, opriţi aparatul şi deconectaţi-l de la sursa de alimentare cu energie electrică.
4. INSTALARE

17
2. Pentru o funcţionare optimă, hota trebuie instalată la o distanţă de 65-75cm deasupra maşinii de gătit.
3. După stabilirea înălţimii de instalare a hotei, montaţi cârligul. Poziţia fixă a suportului coşului interior
stabileşte poziţia de instalare a coşului. Consultaţi “Picture 2”.
4. Instalaţi conducta de expansiune şi fixaţi-o cu cablu de legătură. Apoi puneţi hota pe carlig.
5. Fixaţi suportul coşului de fum exterior pe coşul de fum exterior şi asiguraţi-vă că coşul interior poate fi
reglat în mod liber. Apoi, instalaţi coşul pe hota şi ridicaţi conducta de expansiune până când se scoate
afara din perete prin orificiu. A se vedea imaginea 4.

18
6. Reglaţi înălţimea coşului interior la poziţia suportului coşului interior şi fixaţi-l cu şuruburi. Intre timp,
fixaţi coşul exterior pe corpul hotei prin şuruburi. După reglarea poziţiei, fixaţi corpul cu şuruburi de
siguranţă. Notă: Cele două orificii de siguranţă sunt poziţionate pe carcasa din spate, avand un diametru
de 6 mm.
Sfaturi pentru instalarea tubului de evacuare Pentru o evacuare eficientă a aerului, urmaţi cu stricteţe regulile
de mai jos:
•Încercaţi să menţineţi scurt şi drept tubul de evacuare.
•Nu reduceţi dimensiunea tubului de evacuare şi nu îl restrângeţi.
•Întindeţi tubul de evacuare pentru a reduce la minimum pierderile de presiune.
•Nerespectarea acestor instrucţiuni de bază va reduce performanţele şi va creşte nivelul de zgomot al
hotei.
•Toate lucrările de instalare trebuie efectuate de către o persoană calificată dau de către un electrician.
•Nu conectaţi sistemul de evacuare al hotei la un sistem de ventilaţie care este utilizat pentru un alt aparat.
•Unghiul de îndoire a tubului de evacuare nu trebuie să fie mai mic de 120 °; tubul trebuie dispus orizontal
sau, alternativ, tubul trebuie să urce de la nivelul iniţial şi trebuie condus către un perete exterior.
•După instalare, asiguraţi-vă că hota este dreaptă, pentru a evita acumularea grăsimii la una dintre
extremităţile acesteia.
•Asiguraţi-vă că tubul de evacuare ales în vederea instalării corespunde standardelor în vigoare şi este
ignifug.
Avertisment:
•Din motive de siguranţă, vă rugăm să utilizaţi numai şuruburile de fixare sau de montaj recomandate în
cadrul prezentului manual de instrucţiuni.
•Montarea şuruburilor şi a sistemului de prindere fără respectarea prezentelor instrucţiuni poate duce la
pericole de natură electrică

19
Butoane de acționare
1. Apăsaţi pe butonul pentru oprire, iar motorul se va opri.
2. Apăsaţi pe butonul pentru viteză redusă, iar motorul va funcţiona la viteză redusă.
3. Apăsaţi pe butonul pentru viteză medie, iar motorul va funcţiona la viteză medie.
4. Apăsaţi pe butonul pentru viteză ridicată, iar motorul va funcţiona la viteză ridicată.
5. Apăsaţi butonul pentru lampă, iar cele două lumini se vor aprinde. Apăsaţi din nou pe acel buton, iar
lumina se va stinge.
Problemă
Cauză posibilă
Soluție
Lumina se aprinde, dar motorul nu
funcţionează.
Comutatorul ventilatorului este în poziţia
„oprit”.
Selectaţi o poziţie de
funcţionare.
Comutatorul ventilatorului este defect.
Contactaţi centrul de reparaţii.
Motorul este defect.
Contactaţi centrul de reparaţii.
Lumina nu se aprinde, iar motorul
nu funcţionează.
Siguranţele din locuinţă sunt sărite sau arse.
Resetaţi sau înlocuiţi siguranţele.
Cablul de alimentare nu este conectat
corespunzător sau este deconectat.
Reintroduceţi cablul de
alimentare în priză.
Porniţi sursa de alimentare.
Scurgeri de ulei.
Supapa de reţinere şi orificiul de evacuare nu
sunt etanşate corespunzător.
Demontaţi supapa de reţinere şi
utilizaţi material de etanşare.
Scurgeri la nivelul racordului dintre tubul de
evacuare şi carcasă.
Scoateţi tubul de evacuare şi
etanşaţi.
Luminile nu funcţionează.
Becurile sunt defecte sau arse.
Înlocuiţi becurile conform
instrucţiunilor.
Absorbţie insuficientă.
Distanţa dintre hotă şi plita maşinii de gătit
este prea mare.
Montaţi hota la o distanţă
corespunzătoare.
Hota se înclină.
Șuruburile de fixare nu sunt strânse
corespunzător.
Strângeţi şuruburile pentru
fixarea hotei în poziţie
orizontală.
Notă: Reparaţiile componentelor electrice ale acestui aparat trebuie să respecte reglementările locale, de
stat şi federale. Vă rugăm să contactaţi centrul de reparaţii dacă aveţi orice îndoială cu privire la efectuarea
oricăreia dintre operaţiile de mai sus. Deconectaţi aparatul de la sursa de alimentare înainte de deschiderea
acestuia.
5. UTILIZAREA HOTEI
6. DEPANARE
Table of contents
Languages:
Other FRAM Ventilation Hood manuals
Popular Ventilation Hood manuals by other brands

KitchenAid
KitchenAid KVWC908JSS Installation Instructions and Use & Care Guide

ELICA
ELICA ASTI EAS428S2 Use, care and installation guide

Faber
Faber PELLICANO installation instructions

Broan
Broan 893004 series installation instructions

Whirlpool
Whirlpool UXD8630DYS Installation Instructions and Use & Care Guide

ELICA
ELICA ETR836WT Use, care and installation guide