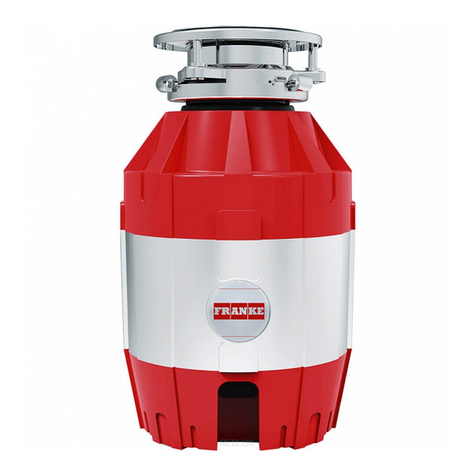
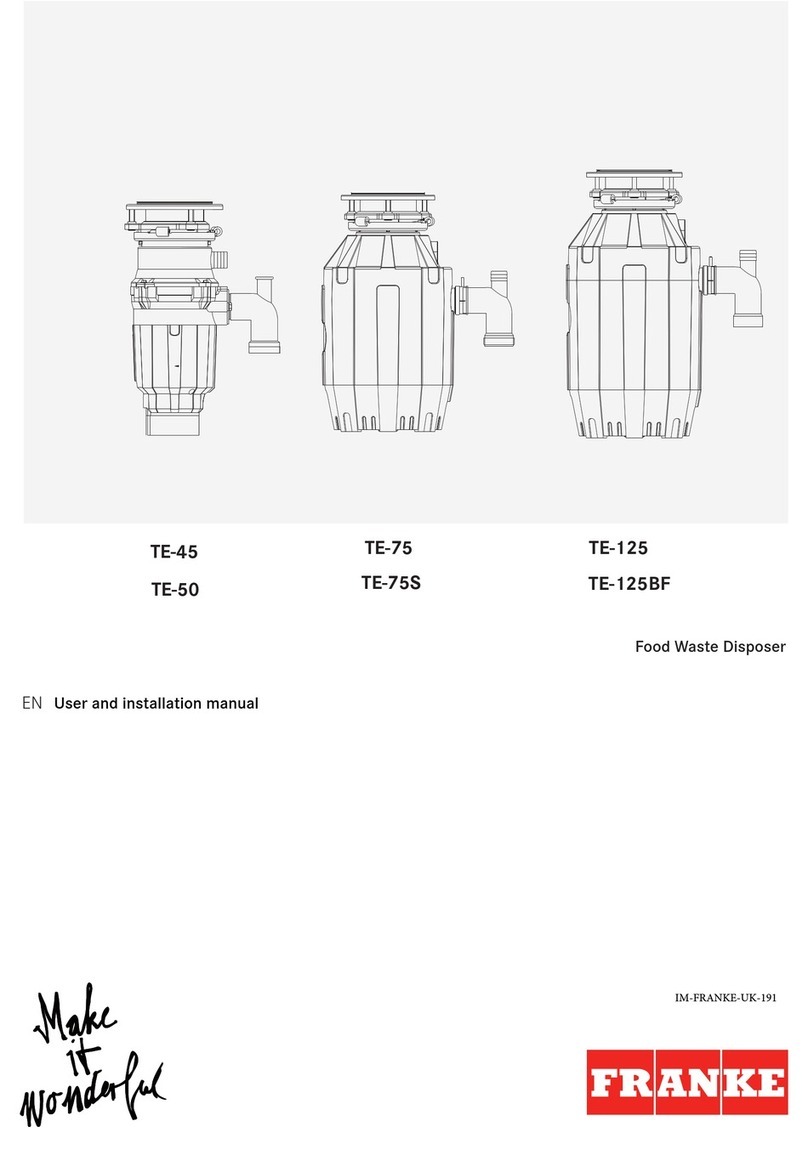
Franke TF LO User manual

1
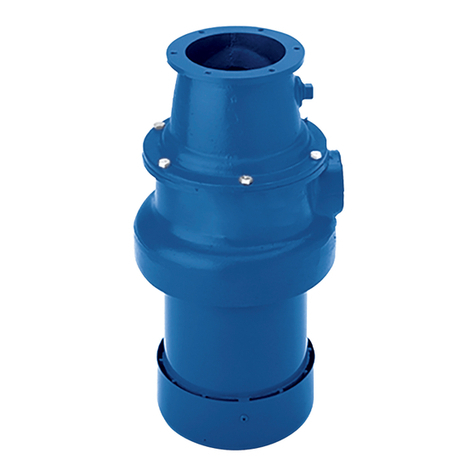
FOOD WASTES DISPOSER TF LO , DS LO, DS MD ,TF MD, TF UP,DS UP
upadated may 2007
INSTALLATION INSTRUCTIONS page 2
OPERATING INSTRUCTIONS page 5
SAFETY INSTRUCTIONS page 6
FOOD WASTE DISPOSER F.A.Q. pag 7
SPARE PARTS -EXPLODED VIEW PAG 13
PNEUMATIC KIT FOR DISPOSER pag 16
RADIO CONTROL for DISPOSER pag 17
ADAPTER - EXSTENSION FOR DRAIN FOOD WASTE DISPOSER page 19
PREVIOUS DOCUMENT
START

2
Food wastes disposer installation and warranty Manual
FOOD WASTE DISPOSER
INSTALLATION INSTRUCTIONS
For specialized installers use only.
The following instructions are for qualified installers to be able to do all the
operations in the most correct way according to the electrical and plumbing
rules.
Assembly parts
1) sink stopper
2) sink flange
3) flange gasket
4) flange washer
5) mount ring
6) hinged clump
7) discharge tube
8) tube flange & screw
9) tube rubber gasket
10)screws
PREVIOUS DOCUMENT
START

3
Sink mount flange installation
Loosen the hinged clump to take the garbage disposer flange away. Unscrew the mount ring and take the flange washer away. Put the
flange gasket in the discharge sinkhole.
Put the washer gasket in the lower part and fasten the sink flange to the sink through the mount ring and related screws.
Join the garbage disposer to the flange and put the hinged clump in position paying attention to the installation side.
To make the join between the garbage disposer and the flange easier you could put some cooking oil on the border of the guard-splash.
________________________________________________________________________________________________
Plumbing Connection
Attach the disposer discharge tube with the tube flange using the given screw.
Connect the garbage disposer discharge tube and tighten it to the drain trap (see fig.1).
To avoid problems, before connecting the plumbs, control the tubes cleaning them if needed.
PREVIOUS DOCUMENT
START

4
Dishwasher Connection
It is possible to connect the dishwasher discharge tube with the food waste disposer.
With the help of a screwdriver and a rubber hammer remove the plastic stopper positioned in the inner site of the dishwasher connection.
Fasten the dishwasher discharge tube to the garbage disposer.
Electrical Connection
All the models are made to function with 220-240V/50Hz
Pay attention that the tension is included in these values.
Grounding instructions for cable connected unit
It is better to put between the unit and the electrical plant a bipolar switch with minimum nominal flow of 10A according to the required rules.
The yellow/green cable does not have to be interrupted by the switch.
Before doing the connection, please check:
- that the electrical feeding plant has a good ground connection according to the rules required by the law.
- that the plug and the bipolar switch used in the connection are easily reachable with the installed unit and out of children’s reach.
- In the electrical plant there has to be a differential switch with nominal value 10A/0,03A for the protection against indirect contacts (life
saver)
WE DECLINE EVERY KIND OF RESPONSABILTY WHEN ACCIDENT-PREVENTION RULES ARE NOT RESPECTED.
PREVIOUS DOCUMENT
START

5
waste disposer dimensions (in mm)
Legend:
A- Distance from sink bottom to disposer bottom
B- Disposer base width
C- Distance from disposer center to drain pipe
center
D- Length from the sink bottom to the drain opening
center
E- Length from the drain opening center to the
drain pipe
OPERATING INSTRUCTIONS
1. Remove the sink drain stopper.
2. Turn cold water on to a medium-high flow and turn the waste disposer on.
3. Put all food waste into the diaposer while the disposer is operating and water running.
4. Let the disposer continue to run for about half a minute after the grinding is over.
5. Turn the disposer off and leave the water running for half a minute.
CAUTION:
PREVIOUS DOCUMENT
START

6
Make sure that the authorities permit the installation of the waste disposer
Use the garbage disposer only for food waste.
Do not use the food waste disposer with hard materials like glass or metal.
Turn the machine off or unplug it while trying to unblock a blocked grinding wheel with a tool.
Use only cold water.
DO NOT put inside:
- Metal, glass, china.
- Lye and drain cleaning chemicals.
- Plastic materials.
SAFETY INSTRUCTIONS
The waste disposer has an overload protection.
If an object falls into the housing or if there is overload the waste disposer stops automatically. You should operate as follows:
1) Put the switch of the plant in the OFF position or unplug it.
2) Insert the hex wrench into the opening at the bottom of the motor shaft and rotate the tool and the counter clockwise to unblock the food
waste disposer(see fig. 2).
3) Remove the object or the overload.
4) Wait for 5/10 minutes.
5) Push the red reset disposer bottom (see fig. 3) and restart the machine.
DISPOSER MAINTENANCE
PREVIOUS DOCUMENT
START

7
With normal usage your disposer should not require any special care.
The motor is permanently lubricated and will not require oiling under normal usage conditions. If used according to the operating
instructions above, your disposer should not require cleaning. However should it start to smell grinding a tray of ice cubes in the disposer
will clean the grinding components. Grinding a lemon cut into quarters will also give your disposer a fresh, clean smell.
Electrical data
TF LO TF MD TF UP
220-240V/50Hz 220-240V/50Hz 220-240V/50Hz
660VA 900VA 1200VA
IP 21 IP 21 IP21
FOOD WASTE DISPOSER
(Checking on-line to identify operating faults and card for solution of problems)
We would like to invite the technician to consider the following cards a simple support or a track in order to obtain
information about a probable intervention (causes, effects, urgency, spare parts and tools to be used).
ASK THE KIND OF FAULT
A. NOT WORKING (NOT RUNNING)
B. OBSRUCTED
C. NOISY
A. TO THE ANSWER “NOT WORKING (NOT RUNNING)”
PREVIOUS DOCUMENT
START

8
-Verify the thermal protection (Reset)
-Verify the presence of the tension on the line
-Verify the switch
-Verify the cable, the plug and the socket
B. TO THE ANSWER “OBSTRUCTED”
-Verify use modality by the client
-Remove the anti-flow bulkhead
-Use more water (avoid the dry use)
-Avoid the grinding of particularly fibrous foods and in
big quantity (artichoke, celery)
-Cleaning of piping
C. TO THE ANWER “NOISY”
-Verify the accidental insertion and/or falling of foreign
matters
-Verify the lubricarion
SECTION A
1. VERIFY THERMAL PROTECTION (RESET)
Check that the thermal protection has not tripped.
PREVIOUS DOCUMENT
START

9
This switch of red colour has located on the bottom of the machine and it is suitable to the interrupt the current in case
that the motor has come to a very high temperature (in case the machine has been left accidentally switched-on)
Wait for few minutes to keep the motor cooler, then push the button in the higher position in order to start-up the
disposer.
2. VERIFY THE PRESENCE OF THE TENSION ON THE LINE
Check that to the shunt socket the presence of 220V current. Will be enough to insert in the socket another house
appliance having the same voltage and verify the running.
3. VERIFY THE SWITCH
Check that the switch or the eventual remote control has not been damaged.
Verify the level of the battery of the remote control, and eventually replace it.
4. VERIFY CABLE –PLUG – SOCKET
Check that the connection phase-neutral, switch, machine has been done correctly .
Warning: Turn off the power before to enter in such part.
5. VERIFY PROBABLE GRIPPING
Check that foreign matters (example: spoon) or a big quantity of material has not gripped the grinding mechanism.
Position the switch located on the system in OFF position or removes the plug from the socket.
Insert the hexagonal key, supplied as outfit, inside the relevant position located centrally on the bottom of the device
(Fig. 1) and turn clockwise and counter clockwise in order to release the disposer.
Remove the exceeding material of the foreign matters using a proper tool (example: long beak pliers).
Wait few minutes in order to keep cooler the motor and push the Reset button (Fig. 2) in high position to start the
disposer.
PREVIOUS DOCUMENT
START

10
Fig. 1
Fig. 2
SECTION B
1. USE MODALITY BY THE CLIENT
Verify with the client the exact operating procedure:
Open the water (max bolt) switch on the machine, push the organic material inside the grinding chamber. At the end of
the grinding, flush the water with switched on machine for few seconds, switch off the disposer and close the water.
2. REMOVE ANTI-FLOW BULKHEAD
On different types of 2/3 ways drain traps, there is an inside anti-flow bulkhead to the level of the central coupler.
Disassemble the draining-trap with the help of a proper tool, remove this membrane that reducing the useful diameter
section might cause obstruction in this point (fig.3)
Fig. 3 BULKHEAD TO BE REMOVED
3. USE MORE WATER (AVOID THE DRY USE)
It is very important to do not load the grinding chamber before the water opening and the start up of the disposer.
In this case, or in case of using small quantity of water, it will become a mixture of a difficult scavenging or a possible
obstruction.
PREVIOUS DOCUMENT
START

11
For the disposer, the water is the carrier of the waste; bigger will be the quantity of used water, better will be the result.
4. AVOID THE GRINDING OF PARTICULARLY FRIBROUS FOOD AND IN BIG QUANTITIES (ARTICHOKE AND
CELERY)
The disposer has not blades, but is working like a grater. This peculiarity keep the machine reliable on service, but at the
same time the missing of blades, keep problematic the discharge of very fibrous food (artichoke, celery, leek etc. in
considerable quantity).
In case of the disposer waste pipe obstruction due to the accidental insertion of the above material by the user, check
the drain-trap and remove manually the existing fibrous obstruction.
5. CLEANING OF PIPING
Could happen that in not recent houses, the drain pipes of the kitchen are in lead and/or with reduced diameter. In this
case, before the installation of the disposer, we suggest to make a preventive cleaning of the first section of the above
pipes, using common plumbers’ tool in order to remove eventual deposit due to sediment cleaner emulsions and
calcareous deposit, which further reduces the useful diameter.
SECTION C
VERIFY THE ACCIDENTAL INSERTION AND/OR FALLING OF FOREIGN
MATTERS.
Check the absence of foreign matters to the inside of the grinding chamber (example: screws, can’s tongue etc.) . If after
a first visual exam, nothing will be visible, remove the disposer from the sink (take out the plug, release the fixing clamp
and unloose the drain-trap), now verify carefully the presence of foreign matters.
Grinding particular hard subject, as fruit’s stone (peach and apricot) could happen that some small residual will remain
restrained on the grinding ring, causing a noisily running, to solve such problem, remove the above residual with the help
of a tool, than re-install the disposer.
VERIFY THE LUBRICATION
It happens that a sole grinding of a particular dry waste or of a sole vegetal origin, will not grant the necessary lubrication
to the rotating parts inside the grinding chamber, originating in this case a noisily running of the disposer.
To avoid such inconvenient, we suggest, during the running of the machine, to drop inside the grinding chamber a small
quantity of alimentary oil.
PREVIOUS DOCUMENT
START

12
VARIOUS
The following notes , concerning the disposer, has been originated by our own experience acquired on “the battle
ground”:
•Absolutely do not use any acid or solvent (example caustic soda) for the sink where a disposer has been installed,
as the above substances could cause the corrosion of the seals with the high risk of serious damages.
•For sinks not in steel, we suggest to use as sealing, between the drain pipe and the sink as well, normal stopper for
sanitary wares.
•For a periodical cleaning of the disposer, we suggest to grind ice with some lemon clove.
•In case You would decide to connect the dishwater exhaust pipe on the foreseen connection on the disposer, must
be removed the plug normally closed, verifying that the above or part of the same, will not remain to the inside of
the grinding chamber, causing during the start up a noisily functioning.
•Best grinding results, will be obtained by the mixing of the different waste material (vegetable, bread, fruit’s stone,
paste and different peels)
PREVIOUS DOCUMENT
START

13
Spare parts FOOD WASTES DISPOSER UPDATED MAY2007
SERVICE CODE DESCRISPTION POSITION
1940023 RUBBER SEAL FOR STAINLESS STEEL STOPPER SINK 1
1940019 RUBBER SEAL FOR BLACK STOPPER SINK 1
1940022 STAINLESS STEEL STOPPER SINK 2
1940001 BLACK STOPPER SINK 2
1940024 STAINLESS STEEL SINK FLANGE 3
1940002 BLACK SINK FALNGE 3
1940004 FLANGE WASHER 4
1940003 FLANGE GASKET 5
1940005 BLACK MOUNT RING ( NYLON+ FIBER GLASS) 6
1940025 MOUNT RING (ZINC ALLOY) 6
1940006 HING CLAMP 7
1940007 GUARD CLAMP 8
1940027 REMOVABLE GUARD SPLASH 8
1940011 RING GASKET TFLO DFLO 14
1940012 RING GASKET TFMD DF MD 14
1940013 EVAPORATOR FIXTURE DF UP TFUP 14
1940008 TUBE RUBBER GASKET AND TUBE SD280 DS MD 16+17
1940026 TUBE RUBBER GASKET AND TUBE SD300 DSUP 16+17
1940009 DISCHARGE TUBE 18
1940010 KEY 19
PREVIOUS DOCUMENT
START

14
1
2 STAINLESS STEEL
3 STAINLESS STEEL
4-5 FLANGE WASHER –
GASKET
6 ( ZINC ALLOY)
7
8 REMOVABLE GUARD SPLASH
PREVIOUS DOCUMENT
START

15
16+17 1940026 TUBE RUBBER GASKET+ TUBE FOR
FOOD WASTE DISPOSER SD300
18
19
0390758 SET PNEUMATIC PUSH BUTTON FOR FOOD WASTE DISPOSER
POSITION 11 1940014 PRESSURE SWITCH
POSITION 10 1940015 NUT FIXING PNEUMATIC SET
POSITION 9 1940016 RUBBER PUSH BUTTON
16+17 1940026 TUBE RUBBER GASKET+ TUBE FOR
FOOD WASTE DISPOSER SD300 DS UP
16+17 1940008 TUBE RUBBER GASKET+TUBE FOR
FOOD WASTE DISPOSER DS MD
PREVIOUS DOCUMENT
START

16
INSTALLATION:
1. WALL SWITCH
INSERTING THE BATTERY:
Remove the front casing. Fit the 23A 12V battery (not included)
into the compartment with battery leads ‘+’ to ‘+’ and ‘-‘ to ‘-‘
(fig. 1).
By pressing the Wall Switch, the LED will illuminate, implying that the battery
has been inserted properly.
INSTALLATION:
To affix the Wall Switch to an existing wall box, simply secure the bottom casing
to the wall box using the 2 screw provided. Alternatively, you may use the
double-side tape provided to affix it anywhere you desire. After installing,
replace the front casing.
2. ON/OFF RECEIVER
Place the receiver into a wall plug (far from water-splash)
Put the disposer’s socket into the receiver (fig. 2)
3. WORKING CODES:
It is possible to change the working code using a screwdriver. Remove the front
casing of the transmitter to have access to the codes screws. Regulate the
codes
The receiver and the transmitter must have the same double-code (Fig. 3)
4. USE
To turn on the disposer push the upper part of the wall switch (transmitter) and
the LED inside it will flash a green light
To turn off the disposer push the lower part of the wall switch (transmitter) and
the LED inside it will flash a red light
PREVIOUS DOCUMENT
START

17
Voltaggio / Voltage 230V/50Hz
Carico massimo / Max loading 16A (3500W)
Portata / Range ca 30 mt. (without impediments)
Frequenza / Frequency 433 MHz
Batteria / Battery Type 1 x 23A 12V
PNEUMATIC KIT FOR DISPOSER
INSTRUCTION FOR USE AND INSTALLATION
THE KIT IS COMPOSED AS FOLLOWS:
•A PNEUMATIC SWITCH
•A RUBBER SMALL TUBE
•A BOX CONTAINING A PRESSURE SWITCH
TO START THE DISPOSER PUSH THE PRESSURE SWITCH; AFTER THE USE
PUSH AGAIN THE SAME TO STOP THE MACHINE.
WE RECOMMEND TO OPEN THE WATER TAP FEW SECONDS BEFORE THE
START OF THE MACHINE AND KEEP THE ABOVE OPEN FEW SECOND AFTER
THE STOP.
BEFORE THE USE OF YOUR PRESSURE SWITCH PLEASE BE SURE THAT:
THE PRESSURE SWITCH HAS ACTING ON THE PHASE OF THE ELECTRIC CURRENT.
CONTRARILY PROVIDE TO INVERT THE POLES OF THE PIN.
INSTALLATION
1. FIX THE SWITCH INSIDE THE HOLE OBTAINED BY DRILLING OF
THE KITCHEN TOP OF ON THE SINK (Diameter 35mm)
PREVIOUS DOCUMENT
START

18
Tipo “A”
Tipo “B”
PREVIOUS DOCUMENT
START

1940018 RIDUTTORE DA 3” A 2” POLLICI LAVELLO
CERAMICA 40 MM
ADAPTER DRAIN FROM 3” TO 2” CERAMIC SINK 40 MM
PREVIOUS DOCUMENT
START

1940030 PILETTA 3” ALLUNGATA LAVELLO
MARMO 350 MM
DRAIN 3” EXSTENSION 350 MM
PREVIOUS DOCUMENT
START
This manual suits for next models
5
Table of contents
Other Franke Garbage Disposal manuals

Franke
Franke STRX611 User manual

Franke
Franke EXOS611X User manual

Franke
Franke TURBO PLUS User manual

Franke
Franke STRX611E User manual

Franke
Franke CE-50 Operating manual

Franke
Franke STRX605 User manual

Franke
Franke RODX604E User manual

Franke
Franke STRATOS STRX605E User manual

Franke
Franke RODX602E User manual
Franke
Franke RODX605E User manual