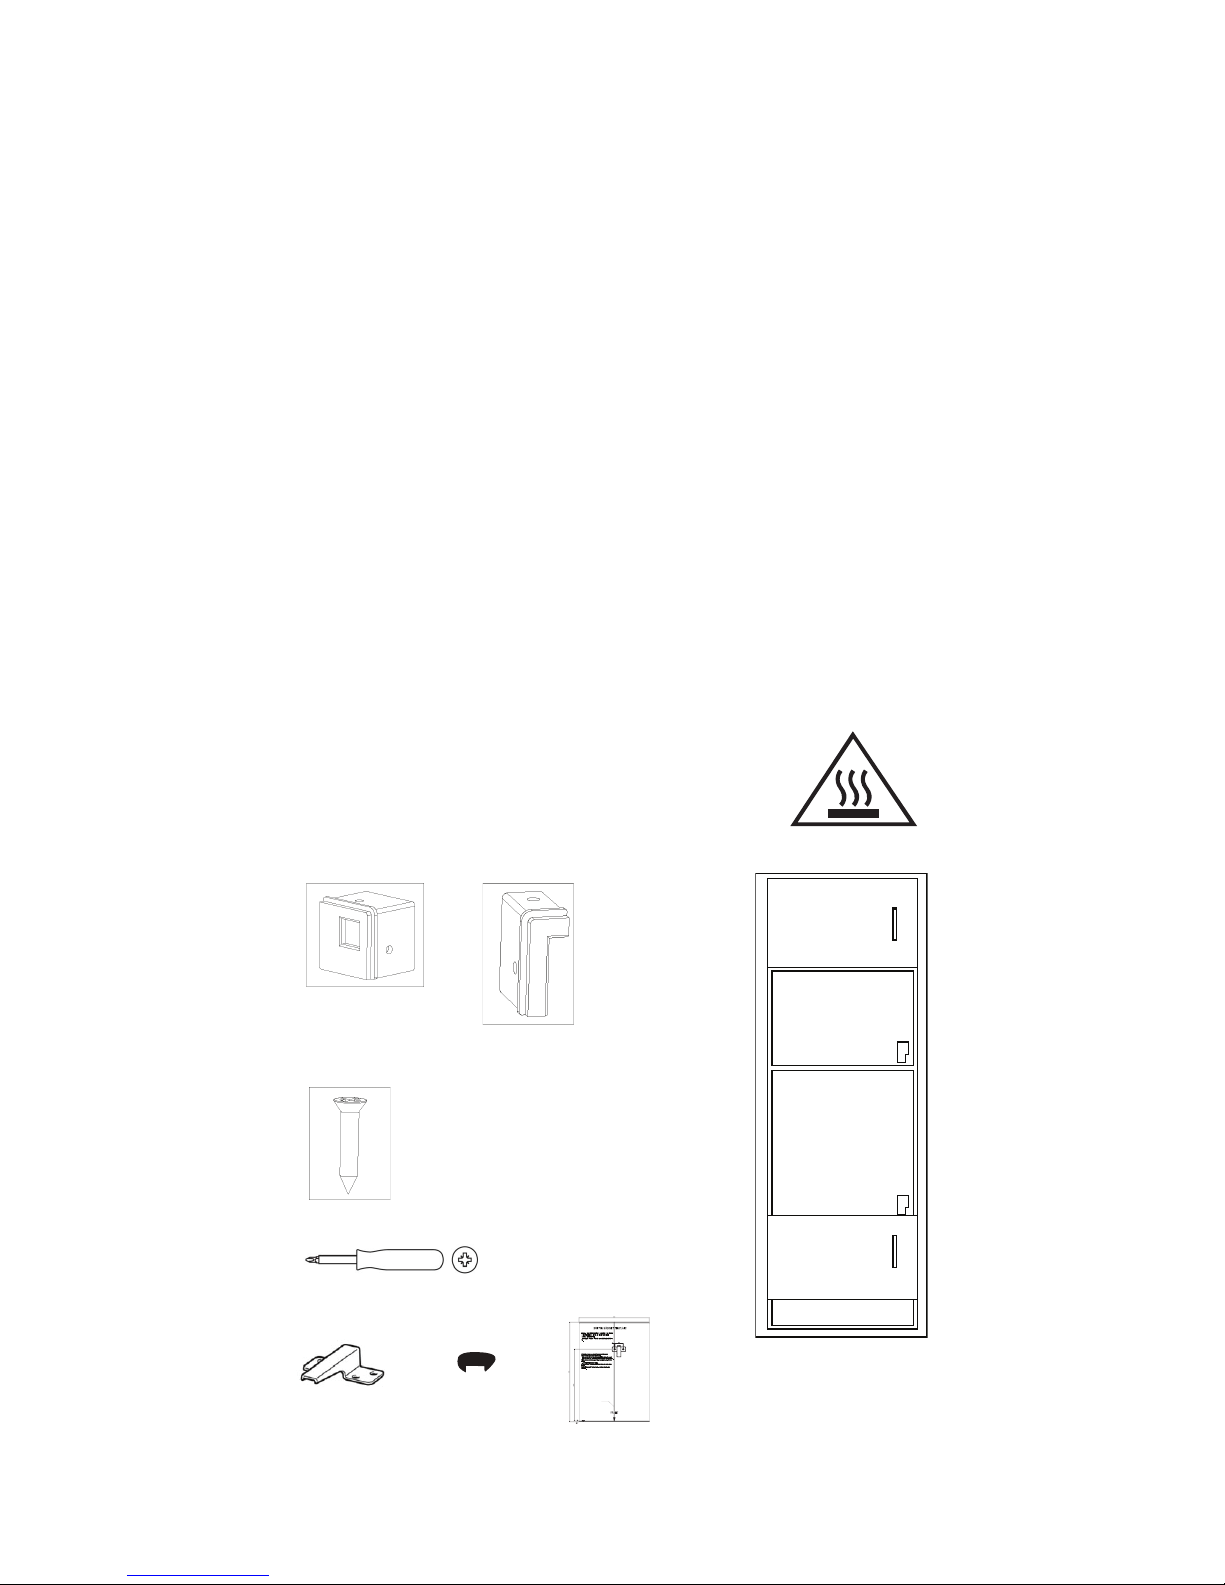
Franke TG925BVY User manual

You’re about to begin a very happy and delicious
relationship. Let’s get started.
This is no ordinary microwave.
Welcome to your new
Franke microwave
TG925BVY - MICROWAVE

2
AN IMPORTANT NOTE
Please read this document and the safety information carefully before you first use
your microwave.
SUPPORT
Speak to our customer service representatives.
New Zealand: 09 964 0400 | info@prks.co.nz
WARRANTY
Your Franke product is protected by a 2-year warranty. Should you ever need to make a
warranty enquiry, simply contact our service department.
GET SOCIAL
Keep up to date on all things Franke by following us on Facebook and Instagram.
@FrankeAUS
#makeitwonderful
“Let’s let everyone else be ordinary,
while we make it wonderful”

Contents 3
Chapter 1: Ready, set up, go
5 Introducing your new Franke microwave
6 What’s in the box?
6 First time use
6 Warnings and safety
7 Installation instructions
11 Disposal
Chapter 2: Life with your Franke Microwave
13 Setting the time
13 Child safety lock function
13 Microwave cooking
14 Grill or combi cooking
14 Quick start
15 Defrost function
15 Automatic menu
16 Multi-phase cooking
Chapter 3: Getting the most out of your Franke Microwave
18 Cleaning and care
18 Interior lighting
Chapter 4: Problem, meet solution
20 Trouble shooting
Chapter 5: Last, but not least
22 Warnings, hazards, risks and legal
22 Technical specifications
Looking for something?
24 Glossary and index
CONTENTS

Chapter 1 Ready, set up, go
4
READY, SET UP, GO
CHAPTER 1
Your Franke microwave is designed to be set up
quickly and easily - so you can start creating delicious
masterpieces even sooner.

5Introducing: Your new Franke Microwave
INTRODUCING: YOUR NEW FRANKE MICROWAVE
Up Arrow
Start / +30s / Confirm
Stop / Clear
DefrostMicrowave Power
Clock / Timer
Down Arrow
Open Door Latch
Turntable
ACCESSORIES

Chapter 1 Ready, set up, go
6
WHAT’S IN THE BOX?
1 x Franke Microwave
1 x Turntable
1 x Electrical cable for connection to power
FIRST TIME USE
When the microwave is first switched on, it may give off an unpleasant smell. This is due to the
bonding agent used for the insulation panels within the microwave. Run the microwave using 900W
power at 9 minutes.
Important note: Never switch the microwave on while empty. During the start up process, place a
microwave proof container or bowl with water.
WARNINGS & SAFETY
• The appliance will become hot during use and directly after use, care should be taken to avoid
touching heating elements.
• This appliance is not intended for use by persons (including children) with reduced physical,
sensory or mental capabilities, or lack of experience and knowledge, unless they have been given
supervision or instruction concerning use of the appliance by a person responsible for their safety.
• Children should be supervised to ensure that they do not play with the appliance.
• CAUTION: Accessible parts may become hot when used with cooking appliances.
• If any parts become damaged, they must be replaced by the manufacturer only.
• Do not use abrasive cleaners or sharp metal scrapers during cleaning.
• Only use utensils which are suitable for use in the microwave.
• When heating food in plastic or paper containers, check the oven frequently to minimise the risk
of ignition.
• If smoke is emitted, switch off or unplug the appliance and keep the door closed in order to stifle
any flames.
• Before placing containers/recipients/paper or plastic bags in the oven, make sure you have
removed any crockery with decorations or metal handles.
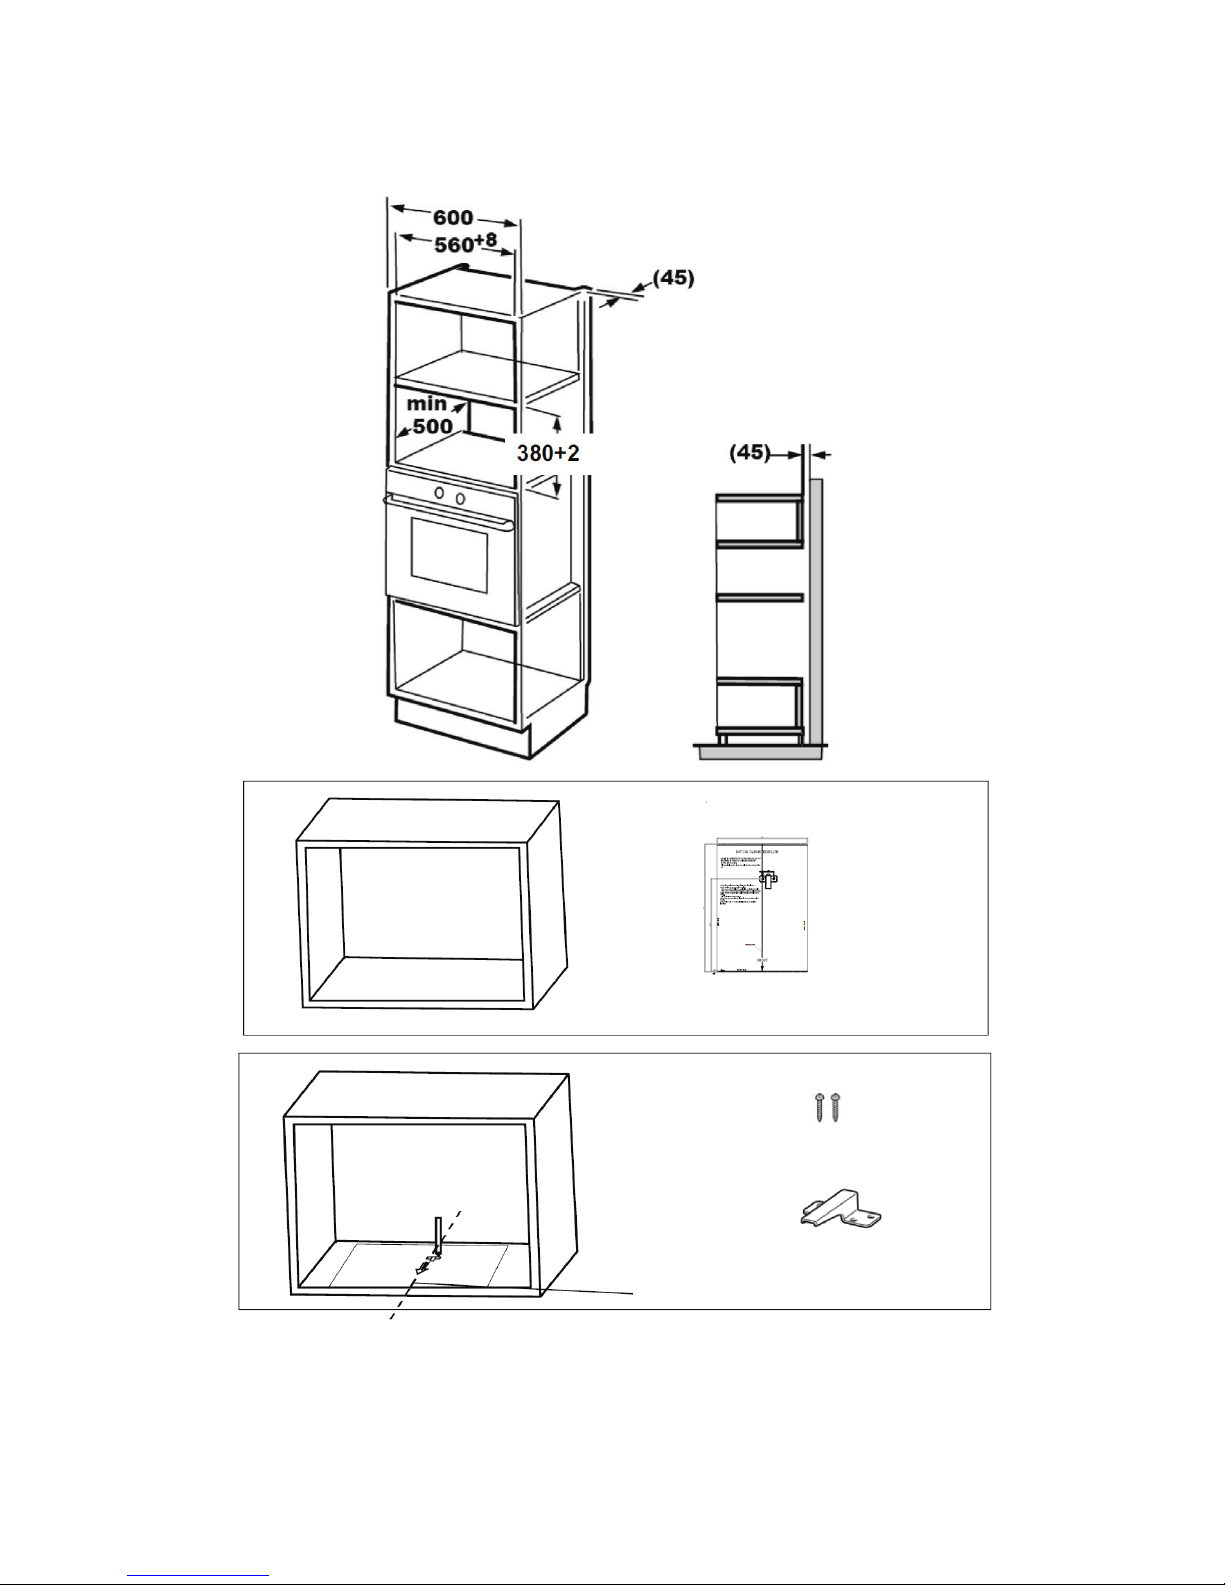
• Install or position the oven in strict compliance with the installation instructions supplied.
• Eggs in their shells and whole boiled eggs should not be heated in the microwave oven as they
may explode, even after the set heating time has elapsed.
• If the power cord is damaged, contact an authorised Franke support centre in order to prevent
potentially hazardous situations from developing.
• Do not keep or use the appliance outdoors.
• Do not use this oven near water, in damp basements or next to swimming pools.

Chapter 1 Ready, set up, go
7
INSTALLATION INSTRUCTIONS
Check the appliance for damage after unpacking it, and don’t connect the appliance if it has been
damaged in transport.
Ensure there is adequate air flow around the rear of the microwave and there is a gap between the
microwave and kitchen unit.
INSTALLATION AND CONNECTION
1. This appliance has been designed exclusively for domestic use.
2. The oven in question has been designed as an integrated appliance.
3. Observe the special installation instructions.
4. The appliance can be installed in a wall-mounted cupboard in heat-resistant material, with a width
of 60 cm (at least 55 cm deep and at least 85 cm from the floor).
5. The appliance is fitted with a plug and simply needs to be connected to a suitably installed socket,
which in turn must be earthed.
6. The mains voltage must correspond to the voltage specified on the appliance rating plate.
7. Socket installation and power cord replacement procedures must be carried out exclusively
by a specialised electrician. If, after installation, the plug is no longer accessible, fit an
omnipolar disconnect switch with a contact opening gap of at least 3 mm in accordance with
the wiring rules.
8. Use of adapters, multi-socket power strips and extension cables is prohibited. Any current
overloads could, in fact, cause a fire.
aa
CENTER LINE
FRONT EDGE
LEFT EDGE
T EDGE RIGH
A x 2 B x 2
a
ab
b
C x 10
Acccessible surfaces can
become very hot during use.

Chapter 1 Ready, set up, go
8

Chapter 1 Ready, set up, go
9

Chapter 1 Ready, set up, go
10

Chapter 1 Ready, set up, go
11
DIMENSIONS DIAGRAM
A 595mm
B 388mm
C 400mm
D 560mm
E 380mm
F Min 500mm
G 10mm
H 10mm
I 20mm
J 45mm
DISPOSAL
Dispose of all packaging in an environmentally friendly manner. Franke practises environmentally
conscious behaviour, and this appliance is labelled in accordance with the used electrical and
electronic appliances waste guidelines.
If you have any questions on disposals, please call the Franke customer service
team on 03 9700 9100.

12Chapter 2 Life with your Franke Oven
life with your franke oven
CHAPTER 2
We designed this microwave with one thing in mind.
How do we create a wonderfully simple user experience
for you, our customer?

13Chapter 2 Life with your Franke Oven
SETTING THE TIME
When the microwave oven is connected to the power supply, “0:00” appears on the LED display and
the acoustic signal sounds.
1. Press “Kitchen Timer/Clock” twice to select the clock setting function; the hour digits on the
clock will start to flash.
2. Press one of the 2 buttons to adjust the hour digits, ensuring the numbers selected are
between 0-23.
3. Press “Kitchen Timer/Clock” once; the minute digits on the clock will start to flash.
4. Press one of the 2 buttons to adjust the minute digits, ensuring the numbers selected are
between 0-59.
5. Press “Kitchen Timer/Clock” once to finish setting the clock. “:” will start to flash, and the time
will light up.
Note:
1. If the clock is not set, the time will not be displayed.
2. During the clock setting procedure, if “Stop/Clear” is pressed, the oven automatically
CHILD SAFETY LOCK FUNCTION
Safety lock: In standby mode, press “Stop/Clear” for 3 seconds and a long beep sounds to indicate
that the child safety lock is enabled; at this point the current time is also displayed, as
long as the time has been set, otherwise the LED display shows " "
Cancelling the safety lock: When the safety lock is enabled, press “Stop/Clear” for 3 seconds; a long
“beep” will sound to signal that the lock has been disabled.
MICROWAVE COOKING
1. Press “Microwave”; “P100” will appear on the LED display.
2. Press button 1 once or choose one of the 2 buttons to select the desired power: with each touch
of the button, the display changes, showing “P100”, “P80”, “P50”, “P30” and “P10” in sequence.
3. Next, press “Start+30Sec./Confirm” 3 to confirm, and use one of the 2 buttons to set a cooking
time of between 0:05 and 95:00.
4. Press “Start/+30 Sec./Confirm” 3 to start cooking.
Example: To use the microwave at 80% of its power and cook the food in question for 20
minutes, operate the oven as indicated below.
1. Press “Microwave” once; “P100” will appear on the display.
2. Press the Microwave button once again to select 80% microwave power.
3. Press “Start+30Sec./Confirm” to confirm; “P 80” will appear on the display.
4. Press one of the 2 buttons to adjust the cooking time until “20:00” appears on the display.
5. Press “Start+30Sec./Confirm” to start cooking.
"Microwave" BUTTON PERCENTAGE VALUES
Display Microwave power
P100 100% - 900 W
P80 80% - 720 W
P50 50% - 450 W
P30 30% - 270 W
P10 10% - 90 W

14Chapter 2 Life with your Franke Oven
GRILL OR COMBI COOKING
Press the Micro/Grill/Combi” button 1 repeatedly and the LED display will show “G”, then “C-1” and
then “C-2”. To select G (grill) or C-1 and C-2 (combi) you can also press one of the 2 buttons.
After selecting the type of cooking press “Start+30Sec./Confirm” 3 to confirm your choice, to set the
cooking time press one of the 2 buttons Time selectable from 0:05 to 95:00.
Press “Start+30Sec./Confirm” 3 again to start cooking.
Example: To use the microwave at 55% power and the grill (C-1) at 45% power, cooking the
food in question for 10 minutes, operate
1. Press button 1 (Micro/Grill/Combi) seven times: the display will show “C-1”.
2. Press “Start+30Sec./Confirm” to confirm: the display will show “C-1”.
3. Press one of the 2 buttons Time selectable from 0:05 to 95:00. To increase cooking time rapidly,
long-press the button.
4. Press “Start+30Sec./Confirm” to start cooking.
Grill/Combi keypad instructions
Note: When the oven reaches the halfway point of the set grill cooking time, the acoustic signal
sounds twice. To achieve optimal cooking results with this type of cooking, turn the food half
way through cooking, close the door again and press “START/ +30SEC./Confirm” again to
continue cooking. Alternatively, the oven will continue cooking until the set time has elapsed.
QUICK START
Press “Start+30Sec./Confirm” 1 to start cooking at 100% power; press the button repeatedly to
increase the cooking time by 30-second intervals, up to a maximum of 95 minutes.
Timer with acoustic signal (does not stop cooking)
1. Press "Kitchen Timer/Clock" once 0:00 appears on the LED display, and the timer
indicator lights up.
2. Press one of the " " buttons to enter the correct time (maximum cooking time
is 95 minutes).
3. Press "Start+30Sec./Confirm" 1to confirm the setting and the timer indicator lights up and
flashes.
4. When the previously set time has elapsed, the timer indicator switches off. The acoustic
signal sounds 5 times. If the clock has been set (24 hour system), the LED display shows the
current time.
Note: The timer does not display the time in the 24-hour time format, as it is an actual timer.
Stopping the cooking cycle
Cooking can be stopped at any time by pressing the STOP/CLEAR button once or opening the oven
door. In both cases:
The emission of microwaves will be stopped immediately.
To restart cooking, close the door again and press the START button.
To cancel the cooking process, press the STOP/CLEAR button again.
Display Microwave power Grill power
G 0% 100%
C-1 55% 45%
C-2 36% 64%

15Chapter 2 Life with your Franke Oven
DEFROSTING ON THE BASIS
1. Press “Weight /Time Defrost” 1 once; the LED display will show “dEF1”.
2. Press one of the “ ” 2 buttons to select the weight of the food in question, selecting a
weight of between 100 and 2000 g.
3. Press “Start+30Sec./Confirm” 3 to start defrosting.
DEFROSTING ON THE BASIS OF TIME
1. Press “Weight/Time Defrost” 1 twice; the LED display will show “dEF2”.
2. Press one of the “ “ 2 buttons to select the defrosting time. The MAX time is 95 minutes.
3. Press “Start+30Sec./Confirm” 3 to start defrosting.
AUTOMATIC MENU
1. Press the button 1 to select the menu: with each touch the display will progress in sequence from
“A-1” to “A-8”, indicating pizza, meat, vegetables, pasta, potatoes, fish, beverages and popcorn.
2. Press “Start+30Sec./Confirm” 2 to confirm.
3. Press one of the 3 buttons to select the default weight in accordance with the menu table.
4. Press “Start+30Sec./Confirm” 2 to start cooking.
Example: If you want to use the "Auto Menu" option to cook 350g of fish, proceed as follows.
1. Press the 1 button six times until the display shows “A-6”.
2. Press “Start+30Sec./Confirm” 2 to confirm.
3. Press the 3 button to select the weight of the fish you wish to cook, so that the display shows
“350”.
4. Press “Start+30Sec./Confirm” 2 to start cooking.
AUTOMATIC MENU table of foods:
Menu Weight Display
A-1
Pizza-Desserts
200g 200
400g 400
A-2
Meat
250g 250
350g 350
450g 450
A-3
Vegetables
200g 200
300g 300
400g 400
A-4
Pasta
50g (with 450ml cold water) 50
100g (with 800l cold water) 100
A-5
Potatoes
200g 200
400g 400
600g 600
A-6
Fish
250g 250
350g 350
450g 450
A-7
Hot beverages
1 cup (120ml) 1
2 cups (240ml) 2
3 cups (360ml) 3
A-8
Popcorn
50g 50
100g 100

16Chapter 2 Life with your Franke Oven
MULTI-PHASE COOKING
Setting a combination of two different types of cooking
At least 2 cooking phases can be set. When cooking in several phases, if one is defrosting, this
process will be carried out as the first phase.
The available programmes are:
MICROWAVE + GRILL/COMBI
GRILL/COMBI+ MICROWAVE
WEIGHT/DEFROST+MICROWAVE
TIME/DEFROST+MICROWAVE
TIME/DEFROST+GRILL/COMBI
AUTO-MENU cannot be selected in multi-stage cooking.
Example: If you want to defrost food for 5 minutes, then cook at 80% microwave power for 7 minutes,
proceed as follows:
1. Press "Weight/Time Defrost" 1 twice and the LED display will show "dEF2"
2. Press one of the 2 buttons to select the defrost time so that the LED display shows "5:00".
3. Press "Microwave" 3 once and the display will show "P100"
4. Press "Microwave" 3 again or use the 2 buttons to select 80% microwave power.
5. Press "Start+30Sec./Confirm" 4 to confirm and the LED display will show "P 80".
6. Press one of the 2 buttons to adjust the cooking time until the LED display shows "7:00".
7. Press "Start+30Sec./Confirm" 4 to start cooking: the acoustic signal will sound once to signal
the start of the first phase and the defrost time will start counting down; the acoustic signal will
sound a second time as soon as the second cooking phase begins. When cooking is complete the
acoustic signal will sound five times.

17
getting the most out of
your franke microwave
CHAPTER 3
Getting the most out of your Franke microwave.
Your Franke microwave turns work into play,
and inspires creativity every single day.
Chapter 3 Getting the most out of your Franke microwave

18Chapter 3 Getting the most out of your Franke microwave
CLEANING AND CARE
We want your Franke Appliance to be looking this good for a long time to come. To ensure that the
various surfaces are not damaged through cleaning, please observe the following:
Glass: Glass cleaner and with a microfiber cloth.
Plastic: Hot soapy water with a soft cloth.
Control panel: Clean with a dish cloth and then dry with a soft cloth.
Interior enamelled surfaces: A mix of hot soapy water, vinegar and lemon juice. Wash with a dish
cloth, and then allow the cooking compartment to dry.
Accessories: Hot soapy water and if there are stubborn food deposits, use a stainless steel
scouring pad.
Rails: Hot soapy water and a dish cloth.
Stainless steel handle: Hot soapy water and a mild stainless steel cleaning product with a soft cloth.
INTERIOR LIGHTING
If the interior lighting bulb or cover is defective for any reason or the light no longer operates, please
call our service team for support.

19Chapter 4 Problem, meet solution
problem, meet solution
CHAPTER 4
We don’t expect your experience with your new Franke
microwave to be anything but wonderful, but here’s
some trouble shooting remedies just in case.

20Chapter 4 Problem, meet solution
TROUBLE SHOOTING
You shouldn’t have any issues with your Franke appliance, however there are some problems which
can easily be fixed by trouble shooting the table below. If you can’t find your problem, or the remedy
has not fixed the issue, then give our friendly customer service team a call on 03 9700 9100, email
Problem Cause and Remedy
Microwave oven interferes
with television reception
Optimal radio and television reception may be affected
while the microwave oven is in use. This interference
is similar to that caused by small domestic electric
appliances, such as blenders, vacuum cleaners and fans.
This is an entirely normal occurrence.
Dim oven light During microwave cooking at low power, the oven light may
become dim. This is an entirely normal occurrence.
Build-up of steam on the
door, hot air escaping from
the air vents
During cooking, food may release steam. In particular, hot
air may escape from the ventilation openings. Some steam
may also build up on the oven door. This is an entirely
normal occurrence.
Accidental oven activation
with no food inside.
The oven must not be operated without food inside. This is
actually very dangerous.
The oven will not start Power plug not inserted properly. Make sure the oven
power supply is enabled.
The oven does not heat up
Door not closed properly.
Make sure there is no foreign material trapped between the
door and the front of the cavity.
The glass tray makes a
noise when the microwave
oven is running
Build-up of dirt in the roller seat and on the bottom
of the oven.
Sparks and popping noises
in the oven (Electric arcs)
Plates used have metallic decorations. A metal fork or
cooking utensil has been forgotten inside the oven. Too
much aluminium foil is being used. A metal bag clip is being
used.
Table of contents
Other Franke Microwave Oven manuals

Franke
Franke FMW 250 CR G Installation and operation manual

Franke
Franke Crystal User manual

Franke
Franke FCMWS25B1 User manual

Franke
Franke TF944E1S User manual

Franke
Franke FSM 25 MW XS User manual

Franke
Franke FMWO 32 NH I User manual

Franke
Franke FSM 25 MW XS User manual

Franke
Franke FMW 380 User manual

Franke
Franke TECH 17 G User manual

Franke
Franke FMW 20 SMP G XS User manual