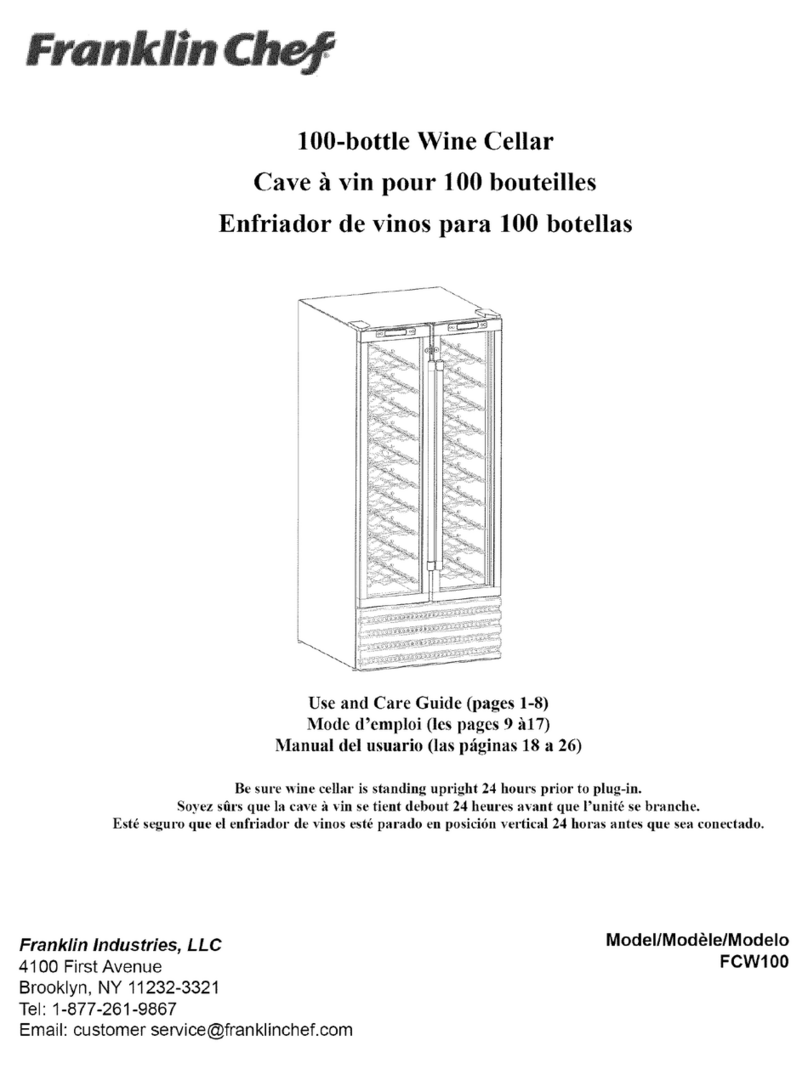
Franklin Chef FCW100 User manual

100-bottle Wine Cellar
Cave à vin pour 100 bouteilles
Enfriador de vinos para 100 botellas
Use and Care Guide (pages 1-8)
Mode d’emploi (les pages 9 à17)
Manual del usuario (las páginas 18 a 26)
Be sure wine cellar is standing upright 24 hours prior to plug-in.
Soyez sûrs que la cave à vin se tient debout 24 heures avant que l’unité se branche.
Esté seguro que el enfriador de vinos esté parado en posición vertical 24 horas antes que sea conectado.
Franklin Industries, LLC
4100 First Avenue
Brooklyn, NY 11232-3321
Tel: 1-877-261-9867
Model/Modèle/Modelo
FCW100

IMPORTANT SAFEGUARDS
Read all instructions before using this appliance. When using this appliance, always
exercise basic safety precautions, including the following:
1. Use this appliance only for its intended purpose as described in this instruction
manual.
2. This Wine Cellar must be properly grounded in accordance with the installation
instructions before it is used. See grounding instructions in the Installation section.
3. This model can either be built-in or free-standing. Built-in units vent at the bottom
front, and airflow at the front of this vent must be unimpeded. The unit must have
a minimum of 3” of space around both sides and the back of the appliance.
4. If the unit is placed on a countertop or stand, the front surface of the door must be
3” or more back from the edge of the countertop or stand in order to avoid
accidental tipping of the appliance during normal usage.
5. Never unplug the unit by pulling on the power cord. Always grip the plug firmly and
pull straight out from the outlet. Repair or replace any cord that is frayed. Do not
use a cord that shows cracks or abrasions along its length.
SAVE THESE INSTRUCTIONS!
DANGER!
Avoid the risk of child entrapment. If the product is not in use, remove the
doors so that small children cannot get trapped inside.
1

Table of Contents
Safety Instructions
Technical Specifications
Location of Parts
Installation
Operating Your Wine Cellar
Care and Cleaning
Troubleshooting
Limited Warranty
French Version of this manual
Spanish Version of this manual
Technical Specifications
Model: FWC100
Capacity: 100 standard wine bottles
Electrical Input: 115VAC~60HZ
Current Rating: 1.6A
Unit dimensions: Width: 26.0” (660 mm)
Depth: 30.5” (775 mm)
Height: 59.8” (1520 mm)
Weight: 220 lbs. (100 kg)
1
2
3
4
5 - 6
7
7
8
9 - 17
18 - 26
2

Location of Parts
Control Panel
Control panels
Locks
Fans
(at rear of each
compartment)
Double-pane
glass doors
Wine storage
compartments
Wine racks
Leveling legs
Ventilation louvers
ON/OFF Button/
Light Switch SET Button LCD Display UP/DOWN
Buttons
Alarm
Indicator Compressor
Run Indicator Temperature
Display

Installation
The FWC100 Wine Cellar is designed to be either free-standing or built-in. It has a fan at
the bottom of the unit to direct compressor-generated heat away from the compressor and
through the front of the unit. There must be a minimum of 3” of space around both sides
and the back of the appliance and the airflow from the vents at the front of the system must
be unimpeded.
Once the unit is positioned, the leveling leg should be turned to level the Wine Cellar.
Electrical Connection
Important! For your personal safety, this appliance must be properly grounded. In the event
of an electrical short circuit, grounding reduces the risk of shock by providing an escape
wire for the electric current. This appliance is equipped with a cord having a grounding wire
with a grounding plug. The plug must be inserted into an outlet that is properly grounded
and installed. Consult a qualified electrician if you do not completely understand the
grounding instructions.
DO NOT UNDER ANY CIRCUMSTANCES CUT OR REMOVE THE THIRD (GROUND)
PRONG FROM THE POWER CORD.
Use of Extension Cords
Avoid the use of an extension cord because of potential safety hazards under certain condi-
tions. If it is necessary to use an extension cord, be sure to use only a 3-wire extension
cord that has a 3-blade grounding plug. Use a 3-slot outlet that will accept the plug. The
marked rating of the extension cord must be equal or greater than the electrical rating of
the appliance.
4

Operating Your Wine Cellar
IMPORTANT: Do not plug in the wine cellar for at least 24 hours after unit is set in place.
Failure to do so may result in the unit working improperly.
Two-Compartment Design
The FWC100 has two separate compartments, each having a capacity of 50 bottles. Each
compartment has its own door and separate control panels. This design feature enables you
to operate one or both compartments and also enables you to set a different temperature for
each compartment. Each control panel also displays the current temperature and allows you
to turn the interior lights on and off independently of each other. The operating instructions
below apply to both compartments and must be implemented separately.
OPERATING INSTRUCTIONS
Turning on the Unit
Choose one of the compartments and press the ON/OFF button, located on the left hand side
of the control panel.
If you want to use the Automatic Temperature (default) setting, do nothing further. The unit will
automatically set the temperature in the compartment at 55 degrees Fahrenheit (13 degrees
Celsius). If you want to set another temperature, see below.
Temperature Setting
Wine Storage Temperatures: While wines store best at temperatures around 56-58 degrees
Fahrenheit, your unit also allows you to store wine at drinking temperatures. Generally RED
WINE should be kept at 60-62 degrees Fahrenheit and WHITE WINE, which is usually served
chilled, should be kept at 54-55 degrees Fahrenheit.
To adjust the temperature, press the SET button, then use the UP/ DOWN keys to navigate to
the preferred temperature. For example, if you are storing red wine, you may want to set a
temperature of 61 degrees Fahrenheit.
When the correct temperature appears in the DISPLAY Window of the Control Panel, press
SET to confirm. Remember that each compartment has separate controls so you will need to
set the temperature in both compartments separately.
Please note: Cold air falls and warmer air rises, and there will be some temperature variation
from the bottom to the top of the unit. The temperature gauge is located near the the top of
the unit and records the temperature on the top of the unit. The temperature at the bottom of
the unit will always be slightly colder.
5
Operating the Internal Lights
Each compartment has an internal light to make is easier for you to see the wines that you have
stored. To turn these lights on or off, simply use the ON/OFF button located on the left side of the
control panel.
Compressor Run Indicator
When your unit is running, the control panel will display a moving icon representing a running fan.
If the compressor stops running, the icon will stop running as well.
If There’s a Power Loss
If the unit suffers a power outage or any other power cutoff, the temperature setting will revert to
the default value (55 degrees Fahrenheit) after power is returned.
About the Liquid Crystal Display (LCD)
When you press any key, a backlight will appear in the Display Panel. If no other key is pressed,
the backlight will automatically go out after 2 minutes.
In the event that there is a fault in the unit, an ALARM indication will appear at the left side of the
screen.
ALARM MODE
In ALARM mode, the unit will make a beeping sound and display an alarm message.
If the Liquid Crystal Display (LCD) on the control panel displays any of the following symbols: E,
Lor H, consult the Wine Cellar Troubleshooting section of this manual.
Shelving
The shelves in your unit are chrome-plated so they will not rust. These shelves pull out only 1/3
of the way. This is a safety features so that neither the unit nor the shelves will tip over.
6

Care and Cleaning of Your Wine Cellar
Cleaning the Outside
Clean the outside of your unit with mild soapy water. Dry thoroughly with a soft cloth. To
clean the door gasket, use only mild soapy water. Never use harsh detergents or scouring
pads to clean any part of your Wine Cellar.
Cleaning the Inside
Unplug your Wine Cellar and remove all bottles. Rinse the inside surface with plain water and
dry the chrome shelves.
Wine Cellar Troubleshooting
Wine cellar does not turn on
Not plugged in.
Fuse blown or circuit breaker tripped
Noise or vibration
Check that unit is level. If not, use leveling leg.
Wine cellar is too warm
Check that door is properly sealed.
To change the temperature, follow the steps in the the Operating Your Wine Cellar section of
this manual.
LCD displays “E” (Error) symbol
This symbol indicates that the thermostatic sensor has malfunctioned and needs to be
replaced. Contact your authorized service facility immediately.
LCD displays “L” (Low) or “H” (High) symbols
These messages indicates that the actual temperature in the Wine Cellar is either much cold-
er or warmer than your set temperature and that the magnet valve is not functioning properly.
Contact your authorized service facility immediately.
7

Limited Warranty
Franklin Industries, L.L.C., warrants this product to be free from defects in materials and workmanship for a
period of one year from the date of original purchase or delivery. Any parts that are determined to be defec-
tive will be replace or repaired by Franklin at no charge as long as the unit was operated in accordance with
the instructions furnished with the product. If the unit proves to be defective, your first course of action
should be to
follow the retailer’s return policy.
This warranty covers units only in the continental United States and does not cover the
following:
•Damage from improper voltage or installation
•Damage in shipping
•Defects other than manufacturing defects
• Glass, trim or light bulbs
• Any damage or loss to cellar contents as a result of the failure of the unit to
perform as expected.
•Labor or repairs after the first 12 months
• Damage from abuse, misuse, accident, alteration or lack of proper care or routine
maintenance
•Improper or incorrectly performed maintenance or repairs
• Damage due to acts of God
Commercial warranty is limited to 90 days parts and labor.
This limited warranty is given in lieu of all other warranties expressed or implied. This warranty does not
cover incidental or consequential damages. Some states do not allow the exclusion or limitation of incidental
or consequential damages, so the above limitation may not apply to you.
This warranty provides you with specific legal rights and you have other rights that vary from state to state.
Consult the written materials accompanying your product for safe and proper operation.
This warranty may not be assigned.
For warranty service, contact:
Franklin Industries, LLC
4100 First Avenue
Brooklyn, NY 11232-3321
Tel: 1-877-261-9867
Website: www.franklinchef.com
When service is required, have on hand the Model and Serial Numbers found on the rating label on the back
of the unit, as well as proof of purchase such as sales or gift receipt.
8


SAUVEGUARDES IMPORTANTES
Lire toutes les instructions avant l’utilisation de cet appareil. En utilisant cet appareil, tou-
jours exercer les précautions de sûreté fondamentales, y compris les suivantes:
1. Utiliser cet appareil seulement pour son but projeté comme décrit dans ce manual
d’instruction.
2. Cette cave à vin doit être convenablement installée conformément aux
instructions d’installation avant qu’elle soit utilisée. Voir des instructions au sujet
du mettre à la terre dans la section d’Installation.
3. Ce modèle peut soit incorporé, soit “free-standing” (debout seul). L’unité
doit avoir au moins 3 pouces (8 cm) d’espace vers les côtés et l’arrière
de l’appareil. Les unités incorporées donnent vent à l’avant inférieur et l’écoule
ment d’air au devant de ce conduit doit être libre d’entraves.
4. Si l’unité est placée sur un comptoir, la surface de devant de la porte doit être 3
pouces (8 cm) ou plus en retrait du bord du comptoir afin d’éviter le renversement
accidentel de l’appareil pendant l’usage normal.
5. Ne jamais débrancher l’unité en tirant sur le cordon d’alimentation. Toujours saisir
le bouchon fermement et tirer directement hors de la sortie. Réparer ou remplacer
n’importe quelle corde qui est éraillée. Ne pas utiliser une corde qui montre des
fissures ou des frottements le long de sa longeur.
EPARGNER CES INSTRUCTIONS!
DANGER!
Eviter le risque de l’attrapement des enfants. Si le produit n’est pas dans l’usage, enlever
les portes pour que les petits enfants ne puissent pas devenir attrapés â l’intérieur.
9

Table des matières
Sauveguardes importantes
Informations techniques
Positions des composants
Installation
Fontionnement de la cave à vin
Soin et nettoyage
Dépannage de la cave à vin
Garantie limitée
Informations Techniques
Modèle: FWC100
Capacité: 100 bouteilles
Alimentation électrique: 115VCA ~ 60 Hz ~1.6A
Dimensions de la unité: Largeur: 660 mm (26.0”)
Profondeur: 775 mm (30.5”)
Hauteur: 1520 mm (59.8”)
Poids: 100 kg (220 livres)
9
10
11
11
13 - 15
16
16
17
10

Positions des Composants
Tableau de Contrôle
Tableaux de contrôle
Serrures
Ventilateurs
(derrière des compartiments)
Portes avec verre
à double-panneau
Compartiments pour le
stockage de vin
Étagères
Fentes de ventilation
Pieds à
nivellement
11
Marche/Arrêt et
l’éclairage interne Régler Ecran à cristaux
liquides (LCD) Haut/bas
Mode
d’Alarme Fonctionnement
du compresseur Température

Installation
Ce modèle est conçu pour être soit incorporé, soit “free-standing” (debout seul). Il utilise un
moteur de ventilateur au fond de l’unité pour diriger la chaleur engendrée par le com-
presseur au loin du compresseur et par le devant de l’unité. L’unité doit avoir au moins 3
pouces (8 cm) d’espace vers les côtés et l’arrière de l’appareil. Les unités incorporées
donnent vent à l’avant inférieur et l’écoulement d’air au devant de ce conduit doit être libre
d’entraves.
Une fois que l’unité est située, les pieds à nivelllement devraient être tournés pour niveler
l’appareil.
Connexion Electrique
Importante! Pour votre sûreté personnelle, cet appareil doit convenablement être mis
à la terre. En cas d’un court-circuit électrique, le mettre à la terre réduit le risque de choc
en fournissant un fil d’échappement pour le courant électrique. Cet appareil est équipé
avec une corde qui a un fil au mettre à la terre avec un bouchon au mettre à la terre. Le
bouchon doit être inséré dans une sortie qui est mis à la terre et est installé convenable-
ment. Consulter un électricien qualifié si vous ne comprenez pas completément ces instruc-
tions au mettre à la terre.
NE FAIRE PAS EN AUCUN CAS COUPER OU ENLEVER LA TROSIEME BROCHE (LE
METTRE A LA TERRE) DU CORDON D’ALIMENTATION.
L’usage de Rallonges
Eviter l’usage d’une rallonge à cause des dangers de sûreté potentiels sous certaines con-
ditions. S’il est nécesaire d’utiliser une rallonge, être sûr d’utiliser seulement une rallonge à
3 fils qui a un bouchon de 3 lames. Utiliser une sortie de 3 entailles qui acceptera le bou-
chon. Les conditions normales de fonctionnement marquées de la rallonge doit être égales
à ou plus grandes que l’evaluation électrique de l’appareil.
12

Fonctionnement de la cave à vin
IMPORTANT : Ne branchez pas la cave à vin pendant au moins 24 heures après avoir installé
l’unité. Dans le cas contraire, l’unité risquerait de ne pas fonctionner correctement.
Conception à deux compartiments
Le FWC100 est pourvu de deux compartiments distincts ayant chacun une capacité de 50
bouteilles. Chaque compartiment dispose de sa propre porte et d’un panneau de commande
distinct. Cette caractéristique de conception vous permet de faire fonctionner un seul compar-
timent ou les deux ainsi que de régler chaque compartiment sur une température différente.
Chaque panneau de commande affiche également la température actuelle et vous permet
d’allumer et d’éteindre les systèmes d’éclairage indépendamment l’un de l’autre. Les instruc-
tions sur le fonctionnement ci-dessous s’appliquent aux deux compartiments et doivent être
mises en pratique séparément.
INSTRUCTIONS SUR LE FONCTIONNEMENT
Mise sous tension de l’unité
Choisissez une des compartiments et appuyez sur le bouton ON/OFF (marche/arrêt) situé à
gauche du tableau de commande.
Si vous désirez utiliser le réglage de température automatique, ne faites rien de plus. La unité
règle automatiquement la température du compartiment sur 55 degrés Fahrenheit (12,78
degrés Celsius). Reportez-vous aux instructions ci-dessous si vous désirez sélectionner une
autre température.
Réglage de la température
Températures de stockage du vin : Bien que le vin se conserve le mieux à une température
située aux alentours de 56 à 58 degrés Fahrenheit (13,33 à 14,44 degrés Celsius), votre unité
vous permet également de ranger vos vins à la température à laquelle ils doivent être bus. En
général, il est préférable de conserver le VIN ROUGE à une température comprise entre 60 et
62 degrés Fahrenheit (15,56 et 16,67 degrés Celsius) et le VIN BLANC à une température
comprise entre 54 et 55 degrés Fahrenheit (12,22 et 12,78 degrés Celsius).
Pour régler la température, appuyez la touche SET, puis utilisez les touches UP/ DOWN (vers
le haut/vers le bas) pour régler votre température préférée. Exemple : si vous désirez con-
server du vin rouge, vous préférerez peut-être régler la température sur 61 degrés Fahrenheit
(16,11 degrés Celsius).
Appuyez sur SET (régler) pour confirmer la température appropriée lorsque celle-ci apparaît
dans la fenêtre DISPLAY (afficher) du tableau de commande. Chaque compartiment étant
pourvu de ses propres commandes, n’oubliez pas que vous devrez régler séparément la
température des deux compartiments.
13

NOTER S’IL VOUS PLAIT: L’air froid descend et l’air plus chaud monte, et il y aura une variation
de température du fond au sommet de de l’appareil. La jauge de température est localisée près
du sommet de l’unité et enregistre la température sur le sommet de l’unité. La température au
fond de l’unité toujours sera légèrement plus froide.
Fonctionnement de l’éclairage interne
Chaque compartiment est équipé d’un système d’éclairage interne qui vous permet de voir plus
facilement les vins que vous conservez. Utilisez simplement le bouton ON/OFF (marche/arrêt)
situé à gauche du tableau de commande pour allumer et éteindre ces lampes.
Indicateur de fonctionnement du compresseur
Lorsque l’unité fonctionne, une icône représentant les pales en mouvement d’un ventilateur est
affichée sur le panneau de commande. Les pales de l’icône s’arrêtent de tourner dès que le com-
presseur s’arrête de fonctionner.
En cas de panne de courant
En cas de panne de courant ou d’autre interruption de l’alimentation, la unité se remettra automa-
tiquement au réglage de 55 degrés Fahrenheit (12,78 degrés Celsius).
14

À propos de l’écran à cristaux liquides (LCD)
Le panneau d’affichage devient rétroéclairé dès que vous appuyez sur une touche quelconque.
Si aucune autre touche n’est actionnée, le rétroéclairage s’éteint automatiquement après 2 min-
utes environ.
Si l’écran à cristaux liquides détecte une défaillance de l’unité, une indication de ALARM (alarme)
s’ajoute au côté gauche de l’écran.
MODE D’ALARME
En mode d’alarme, l’unité émet un bip et affiche un message d’alarme.
Si l’écran à cristaux liquides (LCD) du tableau de commande affiche l’un des symboles suivants:
E(erreur), L(température faible) ou H(température élevée), consultez la section Dépannage de
la cave à vin de ce manuel.
Les étagères
Les étagères dans votre unité sont plaquées de chrome pour qu’elles ne rouillent pas. Ces
étagères retirent seulement 1/3 du chemin. Ceci est une mesure de sécrité pour que ni l’appareil
ni l’ étagère se renverse.
15

Soin et nettoyage
Le nettoyage de l’extérieur
Nettoyer l’hors de votre appareil avec de l’eau douce et savonneuse. Sécher à fond avec un
tissu mou. Pour nettoyer le joint de la porte, utiliser seulement de l’eau douce et savonneuse.
Ne jamais utiliser d’abrasifs, de tampons récurants ou de produits chimiques forts pour net-
toyer l’appareil.
Le nettoyage de l’intérieur
Débrancher votre cave à vin et enlever toutes les bouteilles. Rincer la surface d’intérieur
avec de l’eau ordinaire et sécher les étagères chromées.
Dépannage de la cave à vin
Le rafraîchisseur ne démarre pas
Ce n’est pas branché.
Le plomb est sauté ou le disjoncteur s’est déclenché.
Bruit ou vibration
Vérifier que l’appareil est de niveau. Si non, ajuster les pieds à nivellement.
Le rafraîchisseur est trop chaud
Vérifier que la porte est convenablement scellée.
L’écran à cristaux liquide affiche le symbole « E » (erreur)
Ce symbole indique que la sonde thermostatique ne fonctionne pas correctement et doit être
remplacée. Contactez immédiatement votre centre de service après-vente agréé.
L’écran à cristaux liquides affiche le symbole « L » (température faible) ou
« H » (température élevée)
Ces symboles indiquent que la véritable température de la cave à vin est trop faible ou trop
élevée par rapport à la température que vous avez réglée et que l’électrovalve ne fonctionne
pas correctement. Contactez immédiatement votre centre de service après-vente agréé.
16

Garantie limitée de Franklin Chef®
Franklin Industries, L.L.C., garantit que ce produit est libre de défectuosités des matériels
et de fabrication pour une période d’une année de la date d’achat original ou de la livrai-
son. N’importe quelles parties qui sont déterminées être défectueses seront ou rem-
placées ou réparées par Franklin sans frais aussi longtemps que l’appareil a été opéré en
conformité avec les instructions fournies aved le produit.
Cette garantie couvre le unités seulement dans les Etats-Unis continentaux et ne couvre
pas le suivants:
•Dommage de la tension impropre ou de l’installation
•Dommage dans l’expédition
•Défauts autrement que les défaits de fabrication
• Le verre, l’ornementation ou les lampes
• N’importe quels dommages ou n’importe quelle perte aux contenus de la cave
comme le résulat d’echec de l’unité à s’acquitter comme prévu
• La main-d’oeuvre ou les réparations après les premiers 12 mois
• Dommage de l’abus, l’usage impropre, l’accident, la modification ou le manque de
soin propre ou d’entretien ordinaire.
• Entretien ou réparations impropres ou exécutés inexactement
• Dégâts grâce aux actes de Dieu.
Cette garantie limitée est donnée au lieu de toutes autres garanties exprimées ou sug-
gérées. Cette garantie ne couvre pas les dommages accidentels ou résultants. Cette
garantie ne couvre pas des pertes des détérioration ou des dommages aux contenus du
rafraîchisseur à vin de Franklin Chef®.
Cette garantie vous fournit avec les droits légaux spécifiques et vous pouvez avoir
d’autres droits qui varient de l’état à l’état.
Cette garantie ne peut pas être assignée.
Pour service à la garantie, prendre contact avec:
Franklin Industries, LLC
4100 First Avenue
Brooklyn, NY 11232-3321
Tel: 1-877-261-9867
Website: www.franklinchef.com
Lors de la requête de services, avoir sous la main les chiffres qui indiquent le modèle et le
numéro de série de l’appareil, gravés sur la plaque d’identification à l’arrière de l’appareil,
ainsi que la preuve d’achat tel qu’un reçu de vente ou de cadeau.
17

SALVAGUARDIAS IMPORTANTES
Lea todas las instrucciones antes de usar este aparato. Cuando se usa este aparato,
siempre ejercita las precauciones básicas de la seguridad, inclusive de lo siguiente:
1. Use esta aparato sólo para su propósito destinado como descrito en este manual
de la instrucción.
2. Este Enfriador de Vinos se debe instalar apropiadamente de acuerdo con las
instrucciones de instalación antes de que se se. Vea las instrucciones para la
toma de tierra en la sección de instalación.
3. Este modelo se puede o empotrado o free-standing (libre), y debe tener un míni
mo de 3 pulgadas del espacio alrededor de ambos lados y el envés del aparato.
Las unidades empotradas descargan el calor al fondo de la frente y la corriente
de aire en la frente de esta abertura se debe sin obstrucciones.
4. Si la unidad se coloca en un mostrador o una mesa, la superficie anterior de la
puerta debe ser 3 pulgadas o más hacia atrás de la orilla del mostrador para
evitar derribar sin querer el aparato durante el uso normal.
5. Nunca desenchufe la unidad estirando en el cordón de potencia. Siempre agarre
el enchufe firmemente y estire directamente fuera de la salida. Repare o reem
place cualquier cordón que se está deshilachado. No use un cordón que muestra
las grietas o las abrasiones por su longitud.
¡SALVA ESTA INSTRUCCIONES!
¡PELIGRO!
Evite el riesgo de niños atrapados. Si el producto no está un uso, quita las puertas para
que los niños pequeños no se puedan atrapar adentro.
18
Other manuals for FCW100
1
Table of contents
Languages:
Other Franklin Chef Wine Cooler manuals

Franklin Chef
Franklin Chef FWC36 User manual

Franklin Chef
Franklin Chef FWC36 User manual

Franklin Chef
Franklin Chef FCW100 User manual

Franklin Chef
Franklin Chef FWC20T User manual

Franklin Chef
Franklin Chef FWC35 User manual

Franklin Chef
Franklin Chef FWC120 User manual

Franklin Chef
Franklin Chef FWC120 User manual

Franklin Chef
Franklin Chef FCW120 User manual

Franklin Chef
Franklin Chef FWC24 User manual

Franklin Chef
Franklin Chef FWC36 User manual