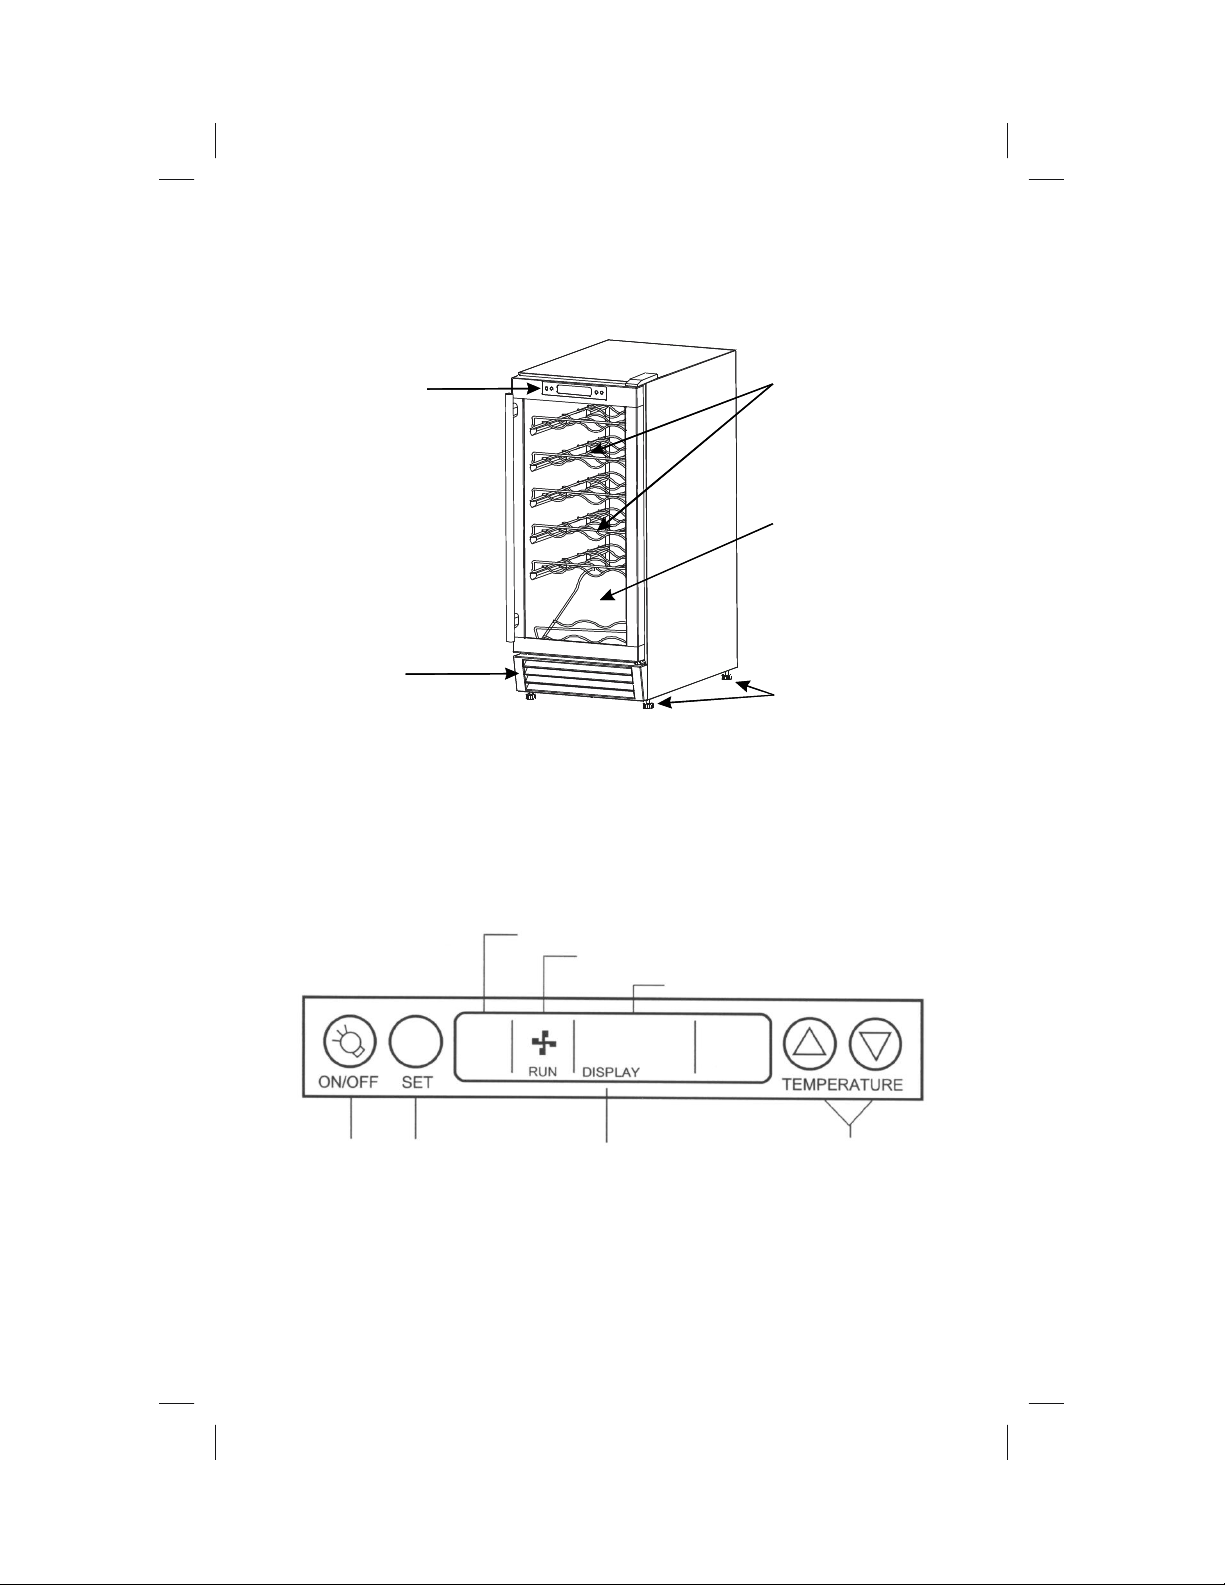
Operating Your Wine Cellar
IMPORTANT: Do not plug in the wine cellar for 24 hours after
unit is set in place. Failure to do so may result in the unit
working improperly.
Plug inthe wine cellar to turn it on automatically. (After the unit
has been on for about 6 hours, the compressor will shut down
for thirty minutes to allow for automatic defrosting.)
If you wantto use theAutomatic Temperature (default)setting,
do nothing further. The unit will automatically set the
temperaturein thecompartmentat55° F(13°C). Ifyouwantto
set another temperature, see below.
Temperature Setting
Wine Storage Temperatures: While wines store best at
temperatures around 56-58° F, your unit also allows you to
store wine at drinking temperatures. Generally, RED WINE
should be kept at 55-65° F and WHITE WINE, which is usually
served chilled, should be kept at 45-55° F. Sparkling wines like
Asti Spumante do well at about 46° F.
To adjust the temperature, press the SET button, then use the
_ _/___keys to navigate to the preferred temperature. The
range of set temperatures is from 46 to 64° F. For example, if
youare storingred wine,youmay wantto seta temperature of
61° F. When the correct temperature appears in the display
window of the control panel, press SET again to confirm. The
actual temperature inside the unit will now appear in the
window. This temperature will vary depending on the number
of bottles stored and how frequently the door is opened.
If the temperature of the room is over 80° F, set the unit
temperature between 50° and 55° F to avoid overheating the
compressor. If room temperature is between 64° and 80° F,
set the unit temperature in the range of 46° to 60° F.
5