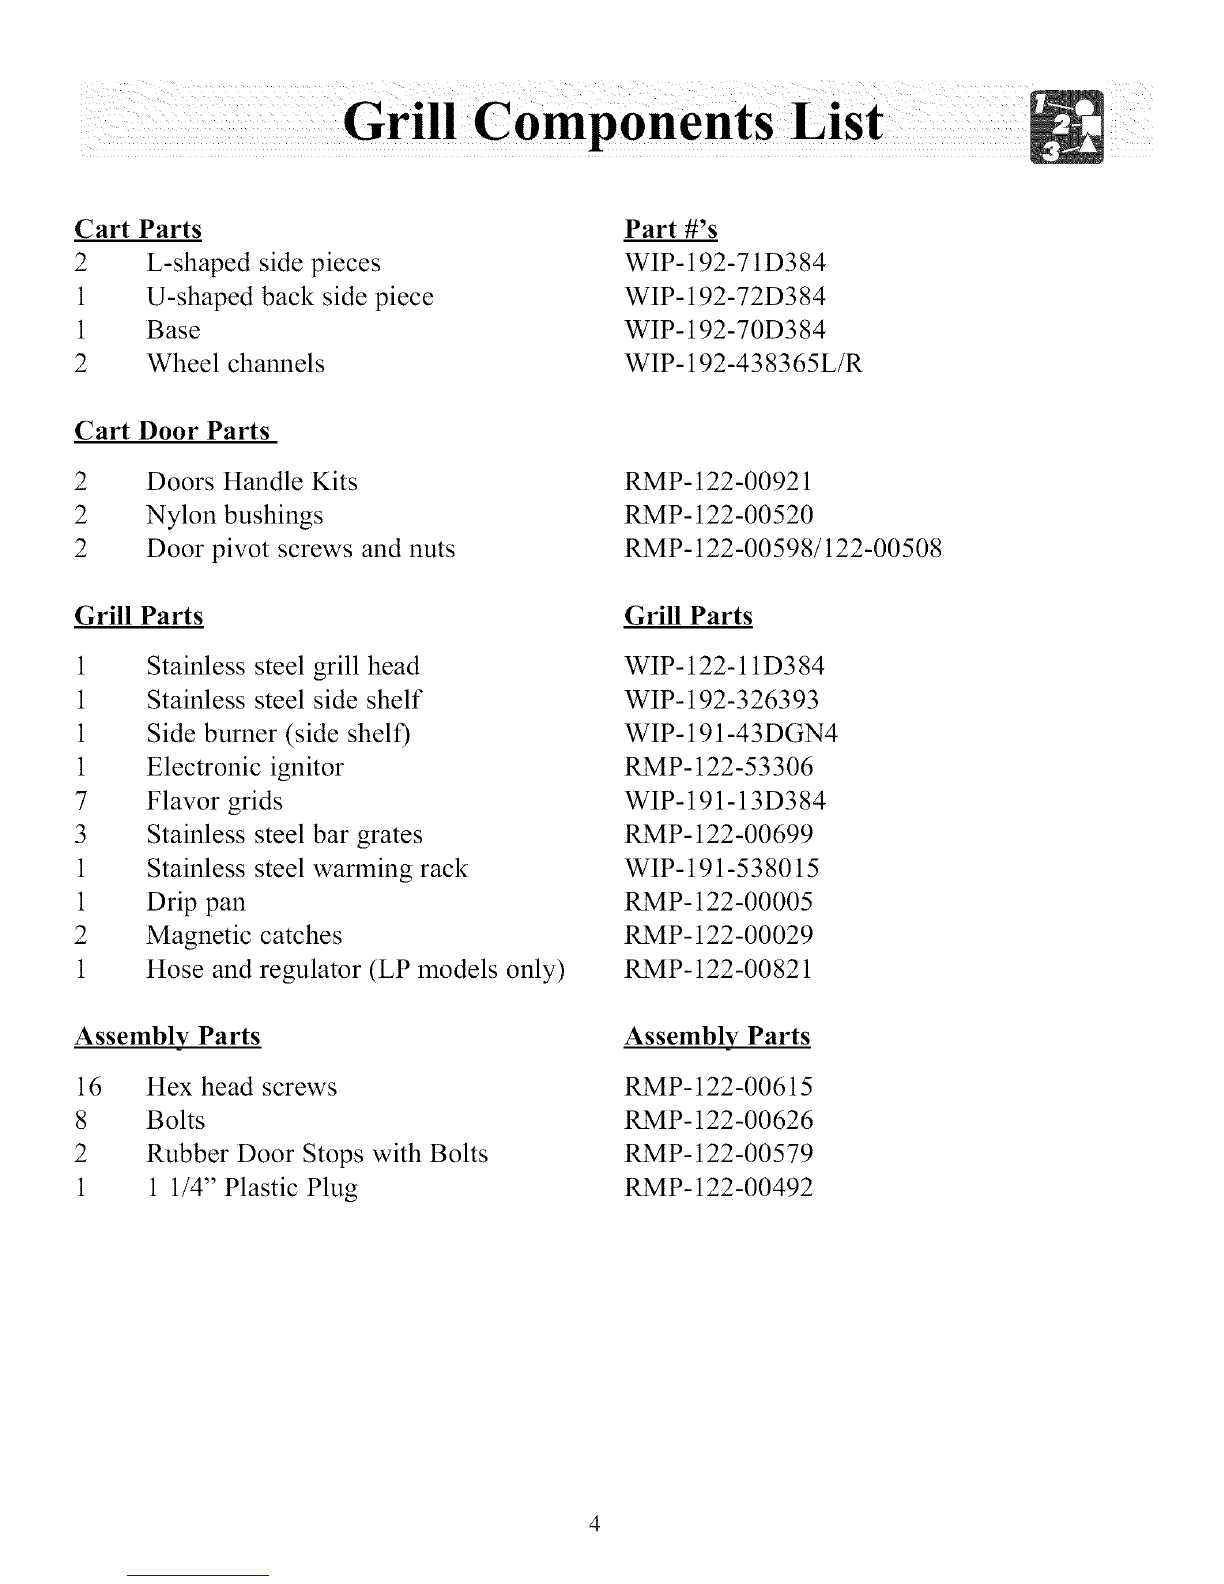
Frigidaire FD38NGDC User manual
Other Frigidaire Grill manuals

Frigidaire
Frigidaire FD26NGDC User manual

Frigidaire
Frigidaire FDR30NGDC User manual

Frigidaire
Frigidaire FN31LPDC User manual

Frigidaire
Frigidaire GL38CAEC User manual

Frigidaire
Frigidaire 26" Stainless Steel Outdoor Grill User manual

Frigidaire
Frigidaire GL57NK60DSS User manual

Frigidaire
Frigidaire ECG426 Owner's manual

Frigidaire
Frigidaire FKOF38MDIS User manual

Frigidaire
Frigidaire Grill User manual

Frigidaire
Frigidaire NECO FN30LP User manual

Frigidaire
Frigidaire Designer Series User manual

Frigidaire
Frigidaire Outdoor Kitchen Grill User manual

Frigidaire
Frigidaire Designer Series User manual

Frigidaire
Frigidaire FD26NGDC User manual

Frigidaire
Frigidaire FD26LKEC User manual

Frigidaire
Frigidaire GL38CAE User manual

Frigidaire
Frigidaire Electric Patio Grill User manual

Frigidaire
Frigidaire Panini Grill/Griddle Owner's manual

Frigidaire
Frigidaire FDR30LPDC User manual

Frigidaire
Frigidaire FDR38HOLPD User manual


Popular Grill manuals by other brands


Kenmore
Kenmore 415.16123800 Use and care guide

Camp Chef
Camp Chef PG24CLAU Warning & instruction booklet

Tucker Barbecues
Tucker Barbecues GTR Series Assembly, installation and operating instructions

Monogram
Monogram ZGG540NCP1SS owner's manual

Equipex
Equipex Sodir Savoy Operation manual

Gaggenau
Gaggenau VR 414 610 use and care manual