Dynamic 2100 Battery Strapping Tool Operation Manual | FPA001 | Apr 2018 | Page 6
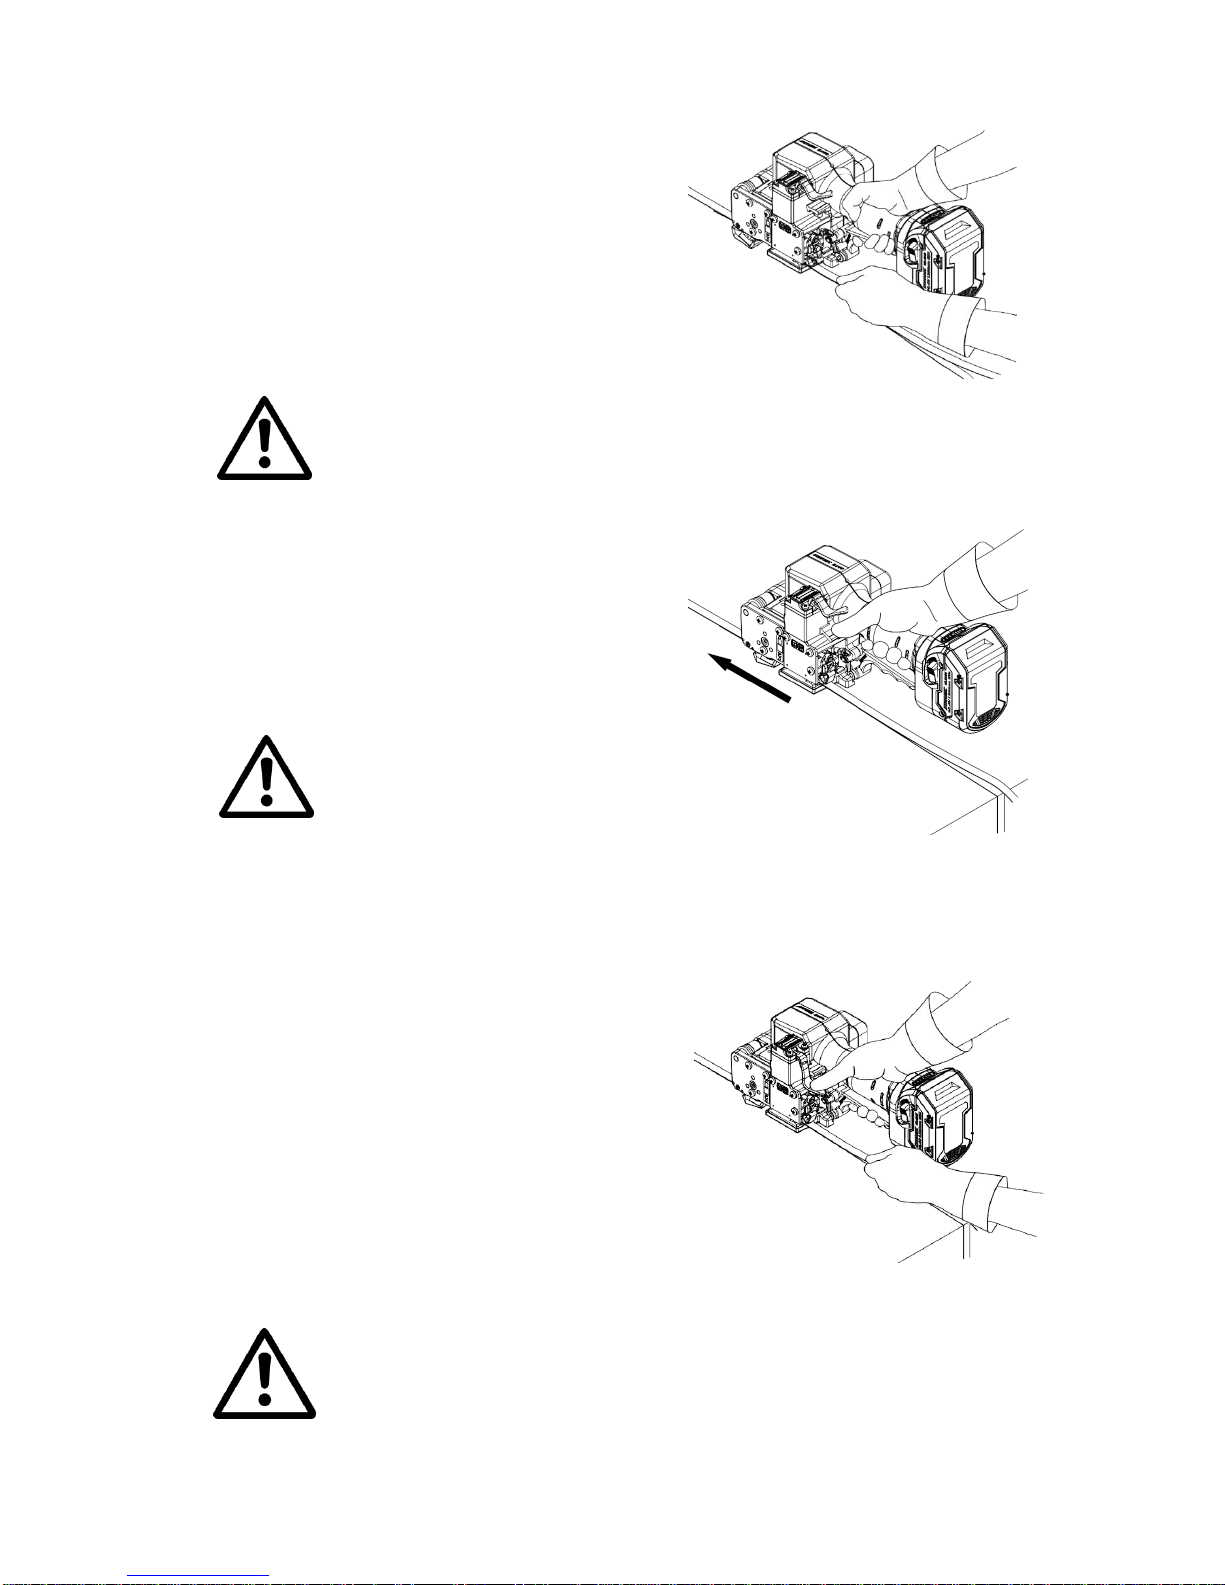
3.4 Inserting the Strap
Pull up the handle lever firmly with your
right hand.
Insert the two straps well aligned on each
other into the strap guide using your left
hand. The lower strap end must slightly
protrude the end of the base plate.
Release the handle lever.
After welding of the strapping it is neither permitted to tension again nor to weld
again. After welding and cooling the tool has to be removed from the strapping
before a new strapping cycle is started. Disregard of this instruction can cause
severe malfunction and damage to the tool.
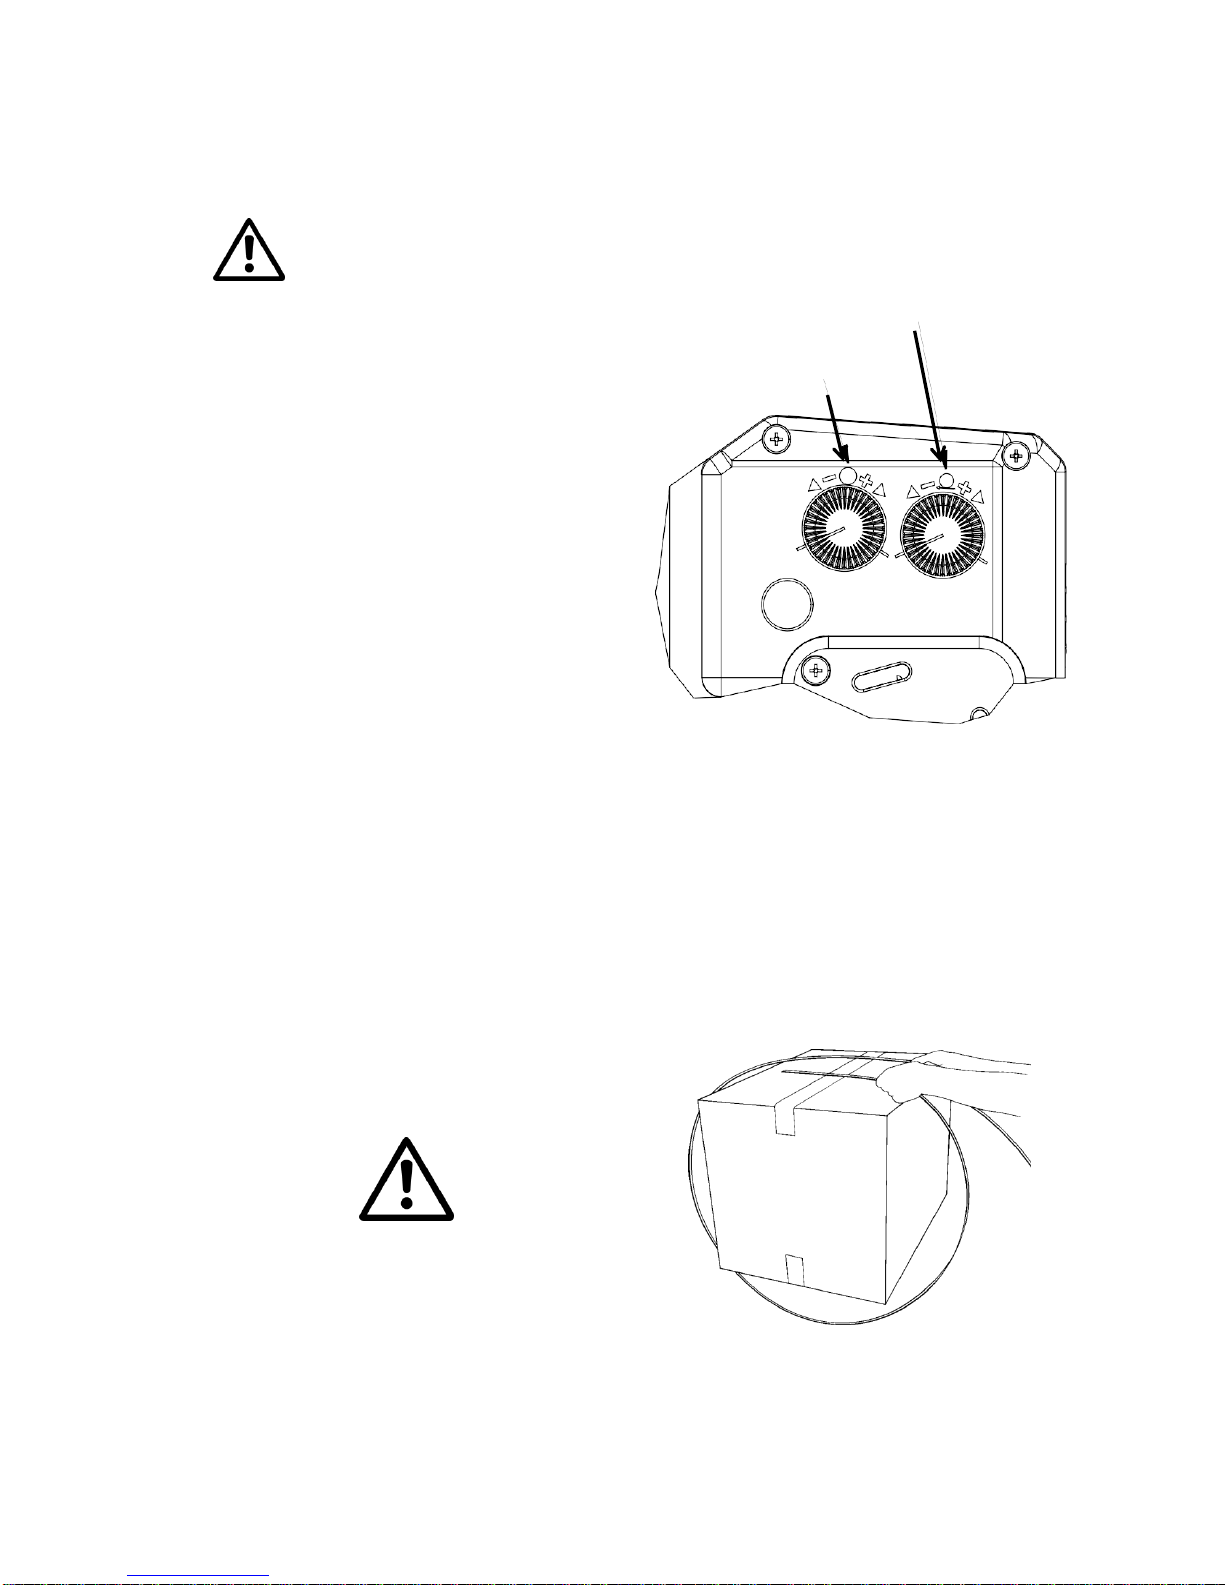
3.5 Tensioning the Strap
Press down the tension button and then
release it again after the desired strap
tension has been reached.
The tensioning operation can be interrupted
and restarted at any time.
During tensioning the LED lights green.
Do not press the switch rocker after
reaching the preselected tensioning.
Danger of strap breakage.
The tool must carry out a balance movement while
tensioning.
Therefore:
- Don’t hinder the tools movement in the signed direction.
Disregard:
- The feed wheel slips on the strap without tensioning it.
3.6 Sealing of the Joint
Press the sealing lever down and let it go
immediately.
The plastic strap is welded and cut off from the
rest of the strap. During the welding the LED
lights green.
After elapsing of the adjusted welding time (see
3.2.2) the cooling time begins (LED lights
yellow). During that time the tool must not be
removed from the strap. If the LED lights green again,
the sealing cycle is finished.
The tool must not be removed from the strap as long as the cooling time is not
finished. Disregard of this regulation is causing insufficient seal efficiencies,
which can cause severe injuries.