manuals.online logo
Brands
  1. Home
  2. •
  3. Brands
  4. •
  5. FujiFilm
  6. •
  7. Transducer
  8. •
  9. FujiFilm Sonosite TEE Series User manual

FujiFilm Sonosite TEE Series User manual

1
TEE Transducer Care
WARNINGS Be sure to use the appropriate Personal Protective Equipment (PPE) whenever necessary.
DO NOT skip any steps or abbreviate the cleaning process in any way.
Cautions DO NOT allow bodily fluids to dry on the transducer. Always clean the transducer immediately after use.
DO NOT bend the endoscopic shaft smaller than a 20 cm (8 inch) curve.
DO NOT use unapproved cleaning agents such as alcohol or bleach (for example: Sani-Cloth) as these can damage the
transducer and void the warranty. For more information about approved cleaners and disinfectants, see www.sonosite.com/
support/cleaners-disinfectants.
DO NOT spray or immerse the controls, the cord, or the connector with any fluid. Be careful to prevent moisture from getting
on the connector.
DO NOT soak the transducer longer than recommended by the chemical manufacturer. Follow the manufacturer’s
recommendations for concentration, temperature, and duration.
STEP 1 ALWAYS use a bite guard.
Remove any dentures before placing the
bite guard in the patient’s mouth.
STEP 2 DO NOT
allow bodily fluids to
dry on the transducer.
Remove all visible
biological material by
wiping the entire
transducer, except the connector, with a
cloth or wipe moistened with water.
Connector
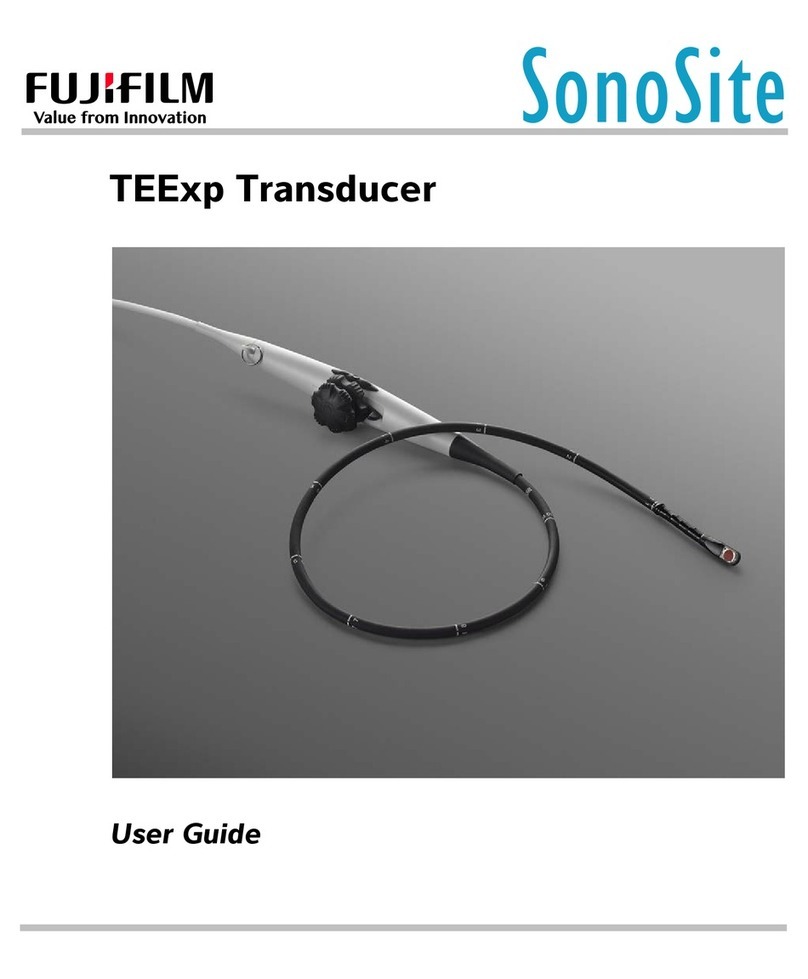
Cable Controller Endoscopic shaft Scan head
Can be submerged
Cannot be submerged
90 cm
Refer to the following diagram when caring for your transducer
STEP 3 Place up to
90 cm of the
endoscopic shaft in an
approved cleaner.
Make sure the
controller cannot fall
into the solution. CHECK the expiration date
of the cleaner, and follow ALL chemical
manufacturer’s instructions for soak time and
temperature.
STEP 4 During the
soak:
A Scrub the shaft for at
least 3 min using a soft
brush or single-use
endoscopic sponge
moistened with cleaner.
B Wipe the controller
and cable with a clean,
non-linting cloth or
single-use endoscopic
sponge moistened with
cleaner. Remove
cleaner by wiping again
with a fresh cloth or sponge moistened with
clean water.
STEP 5 Rinse the
shaft for at least 3 min
in a large volume of
clean, lukewarm water
(for example, 8 L).
Inspect the transducer
for any remaining biological material.
STEP 6 Dry the
transducer with a
clean, non-linting
towel. Examine the
transducer and cable
for any cracks. DO
NOT use the transducer if any damage is
found.
Cleaning
Preventing damage
For a list of approved cleaners and disinfectants, refer to the cleaners and disinfection
tool available at www.sonosite.com/support/cleaners-disinfectants.
2
STEP 10 Rinse the shaft for at least 1
minute in a large volume of sterile,
deionized water (for example, 8 L). Repeat
3 separate times. Discard the rinse water
after each rinse.
STEP 11 Dry the transducer with a
sterile, non-linting towel or medical-grade
air. Examine the transducer and cable for
any cracks. DO NOT use the transducer if
any damage is found.
Disinfecting
STEP 9
APlace up to 90 cm of the shaft in an approved
disinfectant. Make sure the controller cannot
fall into the solution. CHECK the expiration
date of the disinfectant, and follow ALL
chemical manufacturer’s instructions for soak
time and temperature.
B Wipe the controller and cable with a sterile,
non-linting cloth or single-use endoscopic
sponge moistened with disinfectant.
Remove cleaner by wiping again with a
fresh sterile cloth or sponge moistened with
sterile water.
STEP 7 Set up the
equipment.
AInsert the transducer into the
transducer adapter.
BInsert the fork adapter
securely in between the
control wheels on the
controller and do not allow it
to swivel.
CConnect the splitter to the
transducer adapter, the fork adapter, and the leakage tester.
DConnect the conductivity probe to the leakage tester and insert
into 0.9% saline solution or Cidezyme/Enzol.
A
B
C
D
Testing for electrical leakage
STEP 8
Make sure the tester displays
Ready for Testing, press FULL
TEST. Repeat the test two more
times.
If any of the results are Fail, do not
use the transducer and contact
FUJIFILM SonoSite for repair.
STEP 12 Transport and store the
transducer in accordance with your
organization’s policies.
Transporting and storing
For complete instructions on cleaning, disinfecting,
transporting, and storing the TEE transducer, refer to
the TEE Transducer User Guide.
For complete instructions on using the leakage tester,
refer to the ULT2000 Series User Manual.
SonoSite is a registered trademark of FUJIFILM Sonosite, Inc. in various jurisdictions. FUJIFILM is a registered trademark of FUJIFILM Corporation. Value From Innovation is a
trademark of FUJIFILM Holdings America Corporation. All other trademarks are the property of their respective owners.
Copyright © 2019 FUJIFILM SonoSite, Inc. All rights reserved.
P05497-09
*P05497-09*
EC Authorized
Representative
FUJIFILM SonoSite B.V.
Joop Geesinkweg 140
1114 AB Amsterdam,
The Netherlands
Manufacturer:
FUJIFILM SonoSite, Inc.
21919 30th Drive SE
Bothell, WA 9802, USA
T: 1-888-482-9449 or
1-425-951-1200
F: 1-425-951-1201
Australia Sponsor
FUJIFILM SonoSite
Australasia Pty Ltd
114 Old Pittwater Road
Brookvale, NSW, 2100
Australia

Other FujiFilm Transducer manuals

FujiFilm SonoSite TEExp User manual

FujiFilm

FujiFilm SonoSite TEExp User manual

FujiFilm SonoSite TEEx User manual

FujiFilm

FujiFilm SonoSite TEEx User manual

Popular Transducer manuals by other brands

turck EZ-track Q21 Series LDT manual

turck

turck EZ-track Q21 Series LDT manual

Kobold NRF-2 instruction manual

Kobold

Kobold NRF-2 instruction manual

Balluff BTL5-P user guide

Balluff

Balluff BTL5-P user guide

Signaltec TPS II installation manual

Signaltec

Signaltec TPS II installation manual

Lumel P18-0 user manual

Lumel

Lumel P18-0 user manual

Mianyang Weibo Electronic WBV344U01 user manual

Mianyang Weibo Electronic

Mianyang Weibo Electronic WBV344U01 user manual

turck IM33-FSD-Ex/L manual

turck

turck IM33-FSD-Ex/L manual

Balluff BTL7-V50T-M-P-C003 Series user guide

Balluff

Balluff BTL7-V50T-M-P-C003 Series user guide

Setra Systems 540 Series installation guide

Setra Systems

Setra Systems 540 Series installation guide

EarthQuake Q10B user manual

EarthQuake

EarthQuake Q10B user manual

Hontzsch UVA operating instructions

Hontzsch

Hontzsch UVA operating instructions

Mianyang Weibo Electronic WB Series user manual

Mianyang Weibo Electronic

Mianyang Weibo Electronic WB Series user manual

Balluff BTL6-A301-M-A1-S115 Series user guide

Balluff

Balluff BTL6-A301-M-A1-S115 Series user guide

Setra Systems 269 installation guide

Setra Systems

Setra Systems 269 installation guide

Milltronics XPS-10 instruction manual

Milltronics

Milltronics XPS-10 instruction manual

S+S Regeltechnik Thermasgard RTM Operating Instructions, Mounting & Installation

S+S Regeltechnik

S+S Regeltechnik Thermasgard RTM Operating Instructions, Mounting & Installation

Axiometrix Solutions imc WFT-Cx manual

Axiometrix Solutions

Axiometrix Solutions imc WFT-Cx manual

Simrad 200-7F -  REV C datasheet

Simrad

Simrad 200-7F - REV C datasheet

manuals.online logo
manuals.online logoBrands
  • About & Mission
  • Contact us
  • Privacy Policy
  • Terms and Conditions

Copyright 2025 Manuals.Online. All Rights Reserved.