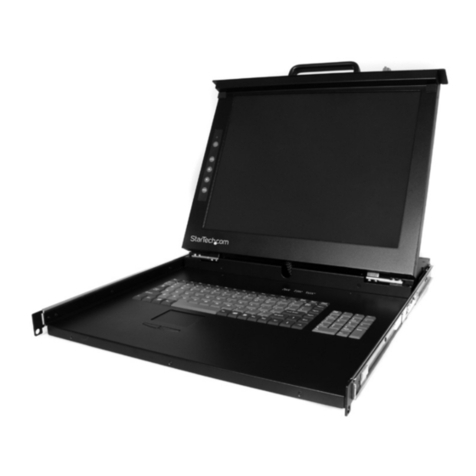
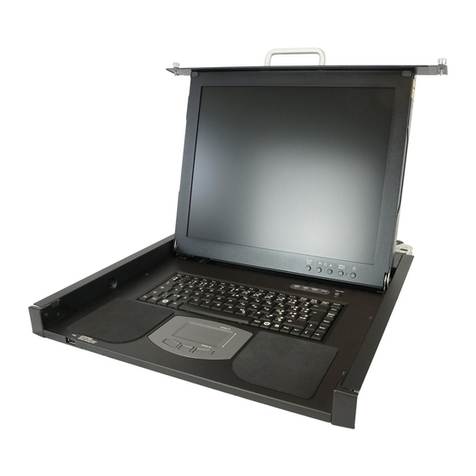
Fujitsu FD-1000AT User manual

Console Drawer (FD-1000AT)
(for PC SERVER)
User’s Manual

Linux is a registered trademark or trademark of Linus Trovalds in the United States of
America and other countries.
The name and logo TurboLinux are trademarks or registered trademarks of
TurboLinux, Inc.
Caldera System and OpenLinux are trademarks or registered trademarks of Caldera
Systems Inc.
Red Hat and any trademarks or logos based on Red Hat are the trademark or
registered trademarks of Red Hat, Inc. in the United States of America and other
countries.
Other names such as product names are the registered trademarks or trademarks of
their respective companies.
All Rights Reserved, Copyright© FUJITSU COMPONENT LIMITED 2003
Declaration of Conformity Model Number : FD-1000AT series
Trade Name : CONSOLE Drawer
Responsible party : FUJITSU COMPONENT AMERICA, INC.
A
ddress : 250 East Caribbean Drive, Sunnyvale,CA94089
Telephone number : (408) 745-4900
This device complies with Part 15 of the FCC Rules. Operation Is subject to the
following two conditions : (1) this device may not cause harmful Interference,
and (2) this device must accept any Interference received, Including
Interference that ma
y
cause undesired o
p
eration.
This Product is designed, developed and manufactured as contemplated for
general use, including without limitation, general office use, personal use,
household use, and ordinary industrial use, but is not designed, developed and
manufactured as contemplated for use accompanying fatal risks or dangers
that, unless extremely high safety is secured, could lead directly to death,
personal injury, severe physical damage or other loss (hereinafter "High Safety
Required Use"), including without limitation, reaction core control in nuclear
power facilities, aircraft autopilot flight control, air traffic control, operation
control in mass transport control systems, medical instruments for life support
systems, missile launching control in weapon systems. You shall not use this
Product without securing the sufficient safety required for the High Safety
Required Use. If you wish to use this Product for High Safety Required Use,
please consult with our sales person representatives in charge before such
use.

i
Contents
PREFACE .....................................................................................................................1
Conventions .............................................................................................................1
Packing List ..............................................................................................................1
IMPORTANT NOTICES ................................................................................................3
Safety .......................................................................................................................3
Precautions..........................................................................................................3
Disposal...............................................................................................................4
Moving Console Drawer ...........................................................................................4
INSTALLATION ............................................................................................................5
Installing Guide Rails................................................................................................5
Installing Console Drawer ........................................................................................7
Installing the 4-port KVM Switch (CRT/KB Switcher) ...............................................8
CONNECTING AND REMOVING CABLES ...............................................................12
Connecting Cables .................................................................................................12
Removing Cables ...................................................................................................12
Connecting to Ports................................................................................................13
OPERATION ...............................................................................................................14
Operating the Console Drawer...............................................................................14
Adjusting the Monitor..............................................................................................17
Basic Adjustment Procedure .............................................................................18
Menu Screen Display Example .........................................................................18
Menu Description...............................................................................................19
Resolution and Refresh Rate ............................................................................20
Using a Linux Operating System............................................................................21
Keyboard Operation ...............................................................................................22
Pointing Device Operation......................................................................................22
The Hot-key and Reset Buttons .............................................................................23
Using CRT/KB Switcher .........................................................................................23
Storing Console Drawer .........................................................................................24
Cleaning Console Drawer ......................................................................................26
TECHNICAL SPECIFICATIONS ................................................................................27

ii

1
Preface
Congratulations on your purchase of the server rack mountable Console Drawer.
Using this product will greatly improve the efficiency and functionality of the
workspace around your racks. Space that was used in previous layouts can now be
used more freely due to our compact sliding module design.
The 15-inch TFT monitor has a resolution of 1024 to 768 dots with 16,770,000 colors.
Also, it is equipped with a keyboard and 2-button pointing device.
Conventions
Symbols and terminology that are used in this manual are described below.
This symbol indicates the possibility of physical damage (such as
damage to the Console Drawer) or physical injury, which may
result if by ignoring this symbol the Console Drawer is operated
incorrectly.
This logo indicates supplemental information, comments or hints.
●Text that is preceded by a number (such as 1.) indicates that the operation must
be done in the order indicated.
●Reference to important chapter titles and terminology are in brackets [ ].
Packing List
Make sure that the items in the following list were included in the shipping package.
●Console Drawer 1 ea.
●Power Cable (2 m) 1 ea.
(Not included in European configuration [FD-1000AT/E])
●Operation Manual (this manual) 1 ea.
●Warranty 1 ea.
(Make sure that the warranty includes all the required information.)
We recommend keeping the box and packing material in which the Console Drawer
was purchased. They may be required when moving it to another location.
If something is missing from the package, contact your place of purchase or a Fujitsu
maintenance person.
CAUTION

2
Please note the safety information in [Important Notices].
1. Check the package delivered and whether the Console Drawer has been damaged
when unpacking.
2. Remove the rubber stabilizer from the front left side of the Console Drawer.
The rubber stabilizer is inserted to prevent the Console Drawer
from sliding when installing or moving it. Be sure to keep it after
finishing the installation for when it needs to be used again.
Rubber stabilizer removal diagram
CAUTION

3
Important Notices
This chapter contains cautions that must be taken when operating the Console
Drawer and information related to safety. Carefully read this chapter to use the
Console Drawer correctly.
Safety
Precautions
This device adheres to the safety regulations related to information processing
equipment such as electronic office machines that are used in an office environment.
If you have any questions please contact your place of purchase or a Fujitsu
maintenance person.
●To prevent extreme bumping or shaking when moving the Console Drawer use
the original shipping container or a box similar to it.
●During installation and before using the Console Drawer, carefully read
[Installation] and the section about environmental conditions in [Technical
Specifications] to use the Console Drawer correctly.
●Moving the Console Drawer from a cold environment to the installation location
may cause condensation to occur. Before using the Console Drawer allow it to
dry out completely and to reach the ambient temperature of the installation
location.
●Make sure that the local power supply voltage is within the acceptable range of
the Console Drawer. Make sure that the rated voltage meets the specifications of
this device (Refer to [Technical Specifications] and the model plate on this
device).
●The power cable for the Console Drawer is specially certified. Do not connect it
to anyplace other than a grounded wall outlet.
●Arrange the immediate area around the Console Drawer's power socket and the
rack's power outlet so that the plug can be quickly pulled.
●Lay all the cables so that they will not be damaged. Refer to the relevant
sections in [Installation] when connecting and removing cables.
●Do not connect or remove the data transmission cables during thunderstorms.
●Do not allow foreign substances (such as necklaces or paperclips) or liquids
inside the Console Drawer.
●In an emergency (such as: damage to the housing, parts or cables; or liquid or a
foreign object has fallen into the Console Drawer) remove the power cable as
soon as possible and contact your place of purchase or a Fujitsu maintenance
person.
●Only licensed engineers can repair the Console Drawer. An unlicensed user that
opens the Console Drawer and makes incorrect repairs may cause electric
shock or fire.
●Avoid using the keyboard when in poor health or for extended periods of time.
●Always hold the connector portion and do not jerk the cables when removing
them.
●Avoid operating the Console Drawer with wet hands.
CAUTION

4
●Do not unplug connectors with wet hands.
●Do not place such unnecessary items as cups on the top of the Console Drawer.
●Do not modify or repair the Console Drawer.
●Only licensed personal can uncouple, remove or switch parts (such as
electromagnetic wave devices) which bear a warning mark (such as a lightening
bolt).
●Only the resolution and refresh rate specified in the monitor explanation in
[Technical Specifications] can be set. Doing settings other than those noted may
damage the monitor. Contact your place of purchase or a Fujitsu maintenance
person if you have any questions.
●To prevent interference it is necessary to adequately isolate the data cables
connected to peripheral equipment.
●Unplug the power plug from the grounded power outlet if there is a power
outage.
●Follow the instructions in the appropriate section in [Operation] when cleaning
the server.
●Keep this manual with the Console Drawer. If you give the Console Drawer to a
third party give them this manual also.
●Do not use the Console Drawer as a foot rest or lean against it with it drawn out.
Doing so may unbalance the rack, causing it to fall over.
Disposal
This device is manufactured with metal and plastic parts. Dispose of it according the
relevant government regulations.
Moving Console Drawer
When moving the Console Drawer to a different location, use the
box in which it was purchased or a box that protects the product
from bumping and shaking. Do not unpack the Console Drawer
until the move has been completed.
CAUTION

5
Installation
Please note the safety information in [Important Notices].
Maintain the area around the equipment when using the Console
Drawer (See [Technical Specifications] for more information).
Avoid dust, humidity and extreme temperatures. Installation may
require more than two people in some situations. Be careful not to
pinch your fingers or hands between the guide rails and the
Console Drawer.
Installing Guide Rails
Install the guide rails with the guides toward the front so that the
Console Drawer can be mounted on them. (Rear Spacers will be
at the back)
See the installing the guide rail diagram on page 6.
1. Insert the rear spacer studs of the guide rails into the holes in the rear rack pillars.
Fasten each guide rail with two screws inserted from the outside of the pillar, one
into each of the top and bottom holes of the rear spacer.
2. Extend the guide rails to reach the inside of the front rack pillar.
Fasten each guide rail in place with two screws, one into each of the top and bottom
holes of the front spacer. (Attach the guide rails inside the front/rear rack pillar so
that the guides face inwards.)
3. Install the left and right guide rails at the same height.
Refer to the enclosed manual for details on how to install additional guide rails.
CAUTION

6
Installing the Guide Rails diagram

7
Installing Console Drawer
Be careful that the latch lever (see page 15) does not come loose.
If the latch lever comes loose the Console Drawer may slip. If the
Console Drawer does not slide easily into the guide rail or is
heavy, lift and insert it with two or more people.
1. After installing the guide rails, insert the Console Drawer into the front end of the
guide rails.
2. Push the Console Drawer in until it stops, then fasten with two screws, one on each
side of the front of the Console Drawer.
Installing the Console Drawer diagram

8
Installing the 4-port KVM Switch (CRT/KB Switcher)
Three methods are used for installing the 4-port KVM switch (Installation Methods 1 - 3).
After removing the rubber feet from this device 4-port KVM switch, use the appropriate
installation method for this device configuration.
Refer to [Connecting to Ports] on page 13 for details on connecting the 4-port KVM
switch.
The 4-port KVM switch will not fit inside of this device unless the
rubber feet have been removed.
To avoid electric shocks and/or short circuits, make certain that
the power cable of this device is not plugged in.
Since this device can cause injury if it falls or tips over, be certain
to only work on a stable surface.
This device contains the components that store and release high
voltage electric charges. Only work on this device after checking
that it has been electrically discharged.
Some metal edges may be sharp. Be careful to not cut yourself.
To avoid damaging this device, do not place foreign objects
(including metal objects, water, and/or liquids) inside it. Also, do
not touch except as necessary.
To avoid damage, only licensed engineers should install the
4-port KVM switch.
Philips screwdrivers (large, small) are required to install the
Console Drawer. Have these ready before proceeding.
The screws for installation method 2 are not included with the
4-port KVM switch. These four 3 x 6 mm flathead screws must be
separately obtained.
Installation Method 1
No extra screws are needed.
It is not necessary to remove the Console Drawer from the guide
rails if there is sufficient workspace above the unit after it has
been attached to the rack.
If the Console Drawer needs to be removed, reverse the
[Installing Console Drawer] operation on page 7.
CAUTION

9
1. Remove the four screws that secure the KVM holder in place.
2. Insert the 4-port switch into the open space in the rear top panel, making sure that
the 4-port KVM switch's connectors face out from the rear of the Console Drawer.
3. Reattach the KVM holder to the rear top panel with the four screws removed in step
1.
Installation Method 1: 4-port KVM switch Assembly Diagram
(viewed from the left rear)

10
Installation Method 2
An extra four 3 x 6 mm flathead screws (not provided) are
required to fasten the 4-port KVM switch in place.
It is not necessary to remove the Console Drawer from the guide
rails if there is sufficient workspace above and below the unit after
it has been attached to the rack. If the Console Drawer needs to
be removed, reverse the [Installing Console Drawer] operation on
page 7.
1. Remove the four screws that secure the KVM holder in place.
2 Insert the 4-port switch into the open space in the rear top panel, making sure that
the 4-port KVM switch's connectors face out from the rear of the Console Drawer.
3. Fasten the 4-port KVM switch in place with the four new screws inserted from
underneath the rear panel.
4. Reattach the KVM holder to the rear top panel with the four screws removed in step
1.
Installation Method 2: 4-port KVM switch Assembly Diagram
(viewed from the left rear)

11
Installation Method 3
Rear top panel must be removed, but no extra screws are
needed.
Remove the Console Drawer from the rack guide rails by
reversing the [Installing Console Drawer] operation on page 7.
1. Remove the ten screws that secure the rear top panel in place.
2. Remove the four screws from the left and right sides of the 4-port KVM switch.
Insert the 4-port KVM switch under the KVM holder between the two bent down flaps
of the rear top panel, making sure that the 4-port KVM switch's will face out from the
rear of the Console Drawer. Fasten it in place with the four screws removed in step 2.
3. Reattach the rear top panel with 4-port KVM switch attached to the rear plate Comp
using the ten screws removed in step 1.
Installation Method 3: 4-port KVM switch Assembly Diagram
(viewed from the left rear)

12
Connecting and Removing Cables
Read the Console Drawer manual before connecting the cables.
Do not connect or remove the cables during a thunderstorm.
When unplugging cables hold them by the plug, not the cable.
Connect and remove cables in the following order.
Connecting Cables
1. Unplug the power cords, from the power outlets, of all the equipment that is
effected.
2. Connect the keyboard cable, mouse cable and the monitor cable to their respective
pieces of equipment.
3. Plug the power cable into the Console Drawer.
4. Plug the power cable into a grounded power outlet.
Connecting cables to Console Drawer diagram
Removing Cables
Unplug the power cords, from the power outlets, of all the equipment that are effected,
then remove each cable.
CAUTION

13
Connecting to Ports
(When CRT/KB Switcher is attached to the back of the Console Drawer.)
Adhere to the cautions in [Connecting and Removing Cables]
when connecting and disconnecting ports. Also, cut the power of
the effected equipment while you are working.
You can connect as many servers as there are ports.
1. Connect the keyboard cable to the KB port, the mouse cable to the Mouse port and
the monitor cable to the COMMON DISP port.
2. Use the dedicated cable to connect the server keyboard port (PS/2) and the mouse
port (PS/2) to the KB/Mouse port (6-pin mini DIN).
3. Connect the terminal monitor cable to the 1 DISP port (15-pin mini D-SUB).
Connecting ports diagram
If you are using a separate CRT/KB switcher, rather than the back
of the Console Drawer, refer to the operation manual for the
CRT/KB switcher.
CAUTION

14
Operation
Pull the Console Drawer toward slowly until the slide rails lock.
If they do not lock, the weight of the Console Drawer may cause it
to move.
Be careful not to pinch your hand when doing such activities as
pulling or pushing the slide module and opening and closing the
LCD.
Operating the Console Drawer
1. If the rubber stabilizer has not been removed yet, remove it now.
2. Push down on the latch lever on the front left side of the Console Drawer. Pull out
the Console Drawer until it clicks.
Before pulling it out, make sure that the two screws on the front of
the Console Drawer are tightly fixed to the rack.
CAUTION

15
Pulling out the slide module diagram
3. Push up on the LCD lock on the left side of the handle, and then grasp the handle
and open the top of the monitor.
4. Turn on the power by pushing the POWER button.
Open the monitor completely.

16
Opening the LCD diagram
Table of contents
Other Fujitsu LCD Drawer manuals
Popular LCD Drawer manuals by other brands

Essentials For Living
Essentials For Living WRENN 1 DRAWER NIGHTSTAND 6139.NG/WHT-BSTL Assembly instructions

Austin Hughes
Austin Hughes CYBER VIEW HF117 user manual

Austin Hughes Electronics
Austin Hughes Electronics RK-1 Series user manual

Austin Hughes Electronics
Austin Hughes Electronics Cyberview LS-120 Specifications

NetView
NetView NVP1615 user manual

I-Tech
I-Tech NVP2417 user manual