manuals.online logo
Brands
  1. Home
  2. •
  3. Brands
  4. •
  5. Fujitsu
  6. •
  7. Rack & Stand
  8. •
  9. Fujitsu CMA-1U User manual

Fujitsu CMA-1U User manual

クロスバーの“UP“側をクロスバー
►
コネクタに向けます。①
クロスバーをレールと並行に向け
►
て、クロスバーコネクタの取付穴に
合わせて差し込みます。②
クロスバーを約90°回転させ抜け
►
防止リベットで組み付けます。③
CMAストッパを反対側レールの固
►
定用ガイドに差し込みカチッと音が
するまでスライドさせて組み付けま
す。④
Halten Sie die Querschiene
► so,
dass die Beschriftung „UP“ zum
Querschienenverbinder zeigt a.
Positionieren Sie die Querschiene
►
parallel zur Schiene und setzen
Sie die Niete in die Schlüsselloch-
Aufnahme b.
Drehen Sie die Querschiene um
►
ungefähr 90°, um die Niete zu
arretieren c.
Schieben Sie den CMA-Stopper in
►
die Aussparungen der Schiene auf
der gegenüber liegenden Seite bis
sie hörbar einrastet d.
Hold the cross bar such that the
►
“UP“ sign shows toward the cross
bar connector a.
Position the cross bar parallel to
►
the rail and insert the rivet into the
keyhole b.
Rotate the cross bar through
►
approximately 90° to arrest the
rivet c.
Slide the CMA stopper into the
►
notches of the rail on the opposite
side until it clicks audibly into
place d.
a
b
c
d
c
Mounting the cross bar / Querschiene anbringen / クロスバーの取り付け
left / links / クククククククククク左
(backside view / Ansicht von hinten / ククククククククククラック背面)
right / rechts / クククククククククク右
クロスバーの”DOWN”側①をCMAス
►
トッパに向けます。
クロスバーを②のように裏返し,クロス
►
バーをCMAストッパと並行にして、
クロスバーコネクタの取付穴に
合わせて差し込みます。
CMAストッパを約90°回転させ抜け
►
防止リベットで組み付けます。③
Halten Sie die Querschiene
► so,
dass die Beschriftung „DOWN“ a
zum CMA-Stopper zeigt.
Drehen Sie die Querschiene,
►
positionieren Sie sie parallel zum
CMA-Stopper und setzen Sie
die Niete in die Schlüsselloch-
Aufnahme b.
Drehen Sie den CMA-Stopper um
►
ungefähr 90°, um die Niete zu
arretieren c.
Hold the cross bar such that the
►
“DOWN“ sign a shows toward
the CMA stopper.
Turn the cross bar, position it
►
parallel to the CMA stopper and
insert the rivet into the keyhole
b.
Rotate the CMA stopper through
►
approximately 90° to arrest the
rivet c.
Connecting the CMA stopper / CMA-Stopper anbringen / CMAストッパの取り付け
クロスバーコネクタを装着の際
►
ロックバネを手前(矢印①)に引
きながらインナーレールに装着
します。②
装着の際、クロスバーコネクタ端面
►
とレール端面を合わせます。③
クロスバーコネクタをカチっと音が
►
する位置まで押し下げます。
上部④に隙間の無いことを確認し
てください。
►Ziehen Sie die Feder a während
Sie den Querschienenverbinder auf
der Lasche der inneren Schiene
plazieren b.
Stellen Sie sicher, dass der Quer-
►
schienenverbinder mit dem Ende
der Lasche abschließt c.
Drücken Sie den Querschienver-
►
binder herunter bis er einrastet.
Stellen Sie sicher, dass an der
Oberkante kein Spalt entsteht d.
Pull the spring
►a while placing the
cross bar connector on the lever of
the inner rail b.
Make sure that the cross bar
►
connector is positioned flush to the
end of the lever c.
Pull the cross bar connector down
►
until it clicks into place. Make sure
that there is no gap at the top
edge d.
a
b
a
b
cc
c
Mounting the cross bar connector / Querschienenverbinder anbringen / クロスバーコネクタの取り付け
CMA (Cable Management Arm)a
CMA stopper with protection capb
CMA connector outer railc
CMA connector inner raild
Cross bar connectore
Cross barf
Cable ties, 10 cmg
Cable ties, 30 cmh
CMA (ケーブルマネジメントアーム)a
CMAストッパb
アウター用CMAコネクタc
インナー用CMAコネクタd
クロスバーコネクタe
クロスバーf
ケーブルタイ, 10cmg
ケーブルタイ, 30cmh
CMA (Kabel Management Arm)a
CMA-Stopper mit Schutzkappeb
CMA-Verbinder äußere Schienec
CMA-Verbinder innere Schiened
Querschienenverbindere
Querschienef
Kabelbinder, 10 cmg
Kabelbinder, 30 cmh
a
b c d e
f
g
h
d
Delivery Contents / Verpackungsinhalt / CMAマウントキット梱包物
CMA Installation / CMA の取り付け手順
CMA-1U Mounting Kit / CMA マウントキット
For RMK-F1/F2 DROP-IN_CMA
English / Deutsch / 日本語 *A26361-F2735-Z300-1-8N19*
A26361-F2735-Z300-1-8N19
Schieben Sie den Verbinder A des
►
CMA-Arms in die Aussparungen
des CMA-Verbinders an der inne-
ren Schiene a.
Schieben Sie den Verbinder B des
►
CMA-Arms in die Aussparungen
des CMA-Verbinders an der
äußeren Schiene b bis er ein-
rastet.
Slide the connector A of the CMA
►
arm into the notches of the CMA
connector at the inner rail until it
clicks into place a.
Slide the connector B of the CMA
►
arm into the notches of the CMA
connector at the outer rail until it
clicks into place b.
CMAアームのA部をインナー用
►
CMAコネクタの固定用ガイドに差
し込み、①の方向へカチっと音が
する位置までスライドさせ固定さ
せます。
CMAアームのB部をアウター用
►
CMAコネクタの固定用ガイドに差
し込み、②の方向へカチっと音が
する位置までスライドさせ固定さ
せます。
Ziehen Sie die Kabel vom Server ab.
►
Öffnen Sie den CMA-Stopper, um
►
den CMA-Arm zu bewegen a, b.
Lassen Sie den CMA-Arm nicht los
während Sie ihn bewegen, da das
Kabelgewicht den CMA verbiegen
kann.
Entfernen Sie den CMA-Arm indem
►
Sie die Knöpfe c ziehen.
Wenn erforderlich, entfernen Sie die
►
den CMA-Stopper durch Drücken
der Feder d während Sie ihn aus
den Aussparungen ziehen e.
Disconnect the cables from the
►
server.
Open the CMA stopper to move the
►
CMA arm a, b. Do not unhand
the CMA arm while moving it as the
cable weight can distort the CMA.
Remove the CMA arm by pulling
►
knobs c.
If appropriate, remove the CMA
►
stopper by pressing the spring d
while sliding it out of the notches e.
ケーブルをサーバから取り外し
►
ます。
ラッチ①を解除し、CMAストッパ
►
レバーを②の方へ開きます。
その際、ケーブルの重さでCMA
が飛び出し、CMAアームを変形さ
せないようCMAアームから手を放
さないで下さい。
ノブ③(2個所)を引いてCMAアー
►
ムを取り外します。
必要に応じロックバネ④を押して
►
CMAストッパを取り外して下さい。
⑤
C
AC
B
a
b
a
b
de
c
c
C
A
C
B
Connecting the CMA arm / CMA-Arm anschließen / CMAアームの取り付け
Disconnecting the CMA / CMA entfernen / CMAの取り外し
Verbinden Sie die Stromkabel und
►
fixieren Sie sie mit Kabelbindern
a. Formen Sie eine Kabelschlaufe,
wenn es für den PSU-Typ sinnvoll
ist.
Verbinden Sie die anderen Kabel mit
►
dem Server.
Legen Sie die Kabel in den Kabel-
►
arm. Fixieren Sie die Kabel mit
einem Kabelbinder an Punkt b, so
dass sie annähernd in einer Linie mit
der blauen Linie sind.
Schieben Sie den Server so weit wie
►
möglich aus dem Rack. Justieren Sie
die Kabellänge so, dass der Server
bequem in das Rack und aus dem
Rack geschoben werden kann.
Fixieren Sie alle Kabel außer
►
Glasfaserkabel mit Kabelbindern wie
durch die Kreise c gekenn-
zeichnet.
Fixieren Sie VGA-Adapter wie durch
►
die Kreise d gekennzeichnet.
Beachten Sie den Biegeradius für
►
Glasfaserkabel und verwenden Sie
die Kabelbinder wie in e gezeigt.
Für asymmetrische Racks können
►
die Kabel an Punkt f fixiert werden.
Connect the power cables and fix
►
them with cable ties a. Form a
cable loop if useful for the PSU type.
Connect the other cables to the
►
server.
Place the cables in the cable arm.
►
Fix the cables with a cable tie at
point b such that they are nearly in
line with the blue line.
Slide the server out of the rack to
►
extend the CMA arm as far as pos-
sible. Adjust the cable length so that
the server can easily slide in and out
of the rack.
Fix all cables except fibre cables with
►
cable ties as indicated by the circles
c.
Fix VGA adapters with short cable
►
ties as indicated by the circles d.
Observe the bend radius for fibre
►
cables and use the cable ties as
indicated by e.
For asymmetric racks, the cables can
►
be fixed at point f.
電源ケーブルを接続しケーブル
►
タイで固定します。PSUによりケ
ーブルをループさせてフォーミン
グします。
他のケーブルをサーバに接続し
►
ます。
ケーブルを青色ラインに添うよう
►
に這わせ、CMAアームにフォー
ミングし、ケーブルタイで仮固定
します②
サーバをラックから引き出しCMA
►
アームを開きます。その際、コネク
タ、ケーブルに負荷がかからない
ようケーブルフォーミング状態・長
さを調整します。
ファイバーケーブルを除いた他の
►
ケーブルをケーブルタイで丸印の
そばで固定します③
VGAアダプタを短いケーブルタイ
►
で丸印の辺りで図のように固定し
ます。④
ファイバーケーブルの曲げ半径を
►
守り、図⑤のようにケーブルタイで
フォーミングします。
非対称ラックへの取り付けの場合、
►
⑥の個所でのケーブル固定が適し
ています。
a
b
c
d
f
b
c
c
f
dd
d
e
Connecting the cables / Kabel anschließen / ケーブルの取り付け
Slide the CMA connector for the
►
outer rail into the notches at the
end of the rail until it clicks into
place a.
Place the CMA connector for the
►
inner rail in the notches b.
Pull the spring
►c while sliding the
CMA connector in direction of the
arrow d until it clicks into place.
Schieben Sie den CMA-Verbinder
►
für die äußere Schiene in die
Aussparungen am Ende der
Schiene bis er einrastet a.
Platzieren Sie den CMA-Verbinder
►
für die innere Schiene in den Aus-
sparungen b.
Ziehen Sie die Feder
►c während
Sie den CMA-Verbinder in
Pfeilrichtung d schieben bis sie
einrastet.
アウター用CMAコネクタをレール
►
の後端から固定用ガイドに差し
込みカチッと音がするまでスライ
ドさせ組み付けます。①
インナー用CMAコネクタを固定用
►
ガイドに合わせます。②
バネを引き上げながら③、インナー
►
用CMAコネクタを④の方向へカチっ
と音がする位置までスライドさせま
す。
a
b
c
d
b
Mounting the CMA connectors / CMA-Verbinder anbringen / CMAコネクタの取り付け
Online documentation for reverse installation (cable exit at the left rear side support upride) can be found on / Online-Dokumentation für den spiegelbildlichen Einbau
(Kabelauslass am hinteren linken Montageholm) finden Sie unter /
ラックの取り付けに関するオンラインドキュメントは下記のページにあります。
http://manuals.ts.fujitsu.com/index.php?id=5406-5605-5606
http://primeserver.fujitsu.com/primergy/manual/peri_rack.html
For special installation details or service instructions see the server-specific user manuals or service supplements. / Für spezielle Installationsdetails und Serviceanleitungen
siehe Server-spezifisches Benutzerhandbuch oder Service Handbuch / その他、装置固有の手順などについてはJ各装置のユーザガイドな どを参照下さい

Other Fujitsu Rack & Stand manuals

Fujitsu RMK-F1 DROP-IN QRL User manual

Fujitsu

Fujitsu RMK-F1 DROP-IN QRL User manual

Fujitsu RMK-F1 DROP-IN QRL User manual

Fujitsu

Fujitsu RMK-F1 DROP-IN QRL User manual

Fujitsu PRIMERGY PG-R1CK1 User manual

Fujitsu

Fujitsu PRIMERGY PG-R1CK1 User manual

Fujitsu PRIMECENTER M1 User manual

Fujitsu

Fujitsu PRIMECENTER M1 User manual

Fujitsu RC24 User manual

Fujitsu

Fujitsu RC24 User manual

Fujitsu PRIMECENTER M1 19-inch Rack User manual

Fujitsu

Fujitsu PRIMECENTER M1 19-inch Rack User manual

Fujitsu PRIMERGY 19 User manual

Fujitsu

Fujitsu PRIMERGY 19 User manual

Fujitsu PRIMERGY PG-R1CK2 User manual

Fujitsu

Fujitsu PRIMERGY PG-R1CK2 User manual

Fujitsu 1740 User manual

Fujitsu

Fujitsu 1740 User manual

Fujitsu PRIMERGY PG-R1CK7 User manual

Fujitsu

Fujitsu PRIMERGY PG-R1CK7 User manual

Fujitsu PRIMERGY PG-R6RC1 User manual

Fujitsu

Fujitsu PRIMERGY PG-R6RC1 User manual

Fujitsu ETERNUS DX60 S2 Mounting instructions

Fujitsu

Fujitsu ETERNUS DX60 S2 Mounting instructions

Fujitsu PRIMERGY PG-R1CK20 User manual

Fujitsu

Fujitsu PRIMERGY PG-R1CK20 User manual

Fujitsu PenCentra 130 User manual

Fujitsu

Fujitsu PenCentra 130 User manual

Fujitsu PRIMERGY PG-R1CK6 User manual

Fujitsu

Fujitsu PRIMERGY PG-R1CK6 User manual

Fujitsu CMA User manual

Fujitsu

Fujitsu CMA User manual

Fujitsu CMA Series User manual

Fujitsu

Fujitsu CMA Series User manual

Fujitsu PCR M2 User manual

Fujitsu

Fujitsu PCR M2 User manual

Fujitsu PRIMERGY PG-R1CK21 User manual

Fujitsu

Fujitsu PRIMERGY PG-R1CK21 User manual

Fujitsu Stylistic 3400 Quick setup guide

Fujitsu

Fujitsu Stylistic 3400 Quick setup guide

Fujitsu PenCentra 130 User manual

Fujitsu

Fujitsu PenCentra 130 User manual

Popular Rack & Stand manuals by other brands

Betzold 11741 Assembly guide

Betzold

Betzold 11741 Assembly guide

Garmin GPSMAP 500 Series installation instructions

Garmin

Garmin GPSMAP 500 Series installation instructions

MINOURA P-500AL-6S instruction manual

MINOURA

MINOURA P-500AL-6S instruction manual

Enclume DR 25 installation instructions

Enclume

Enclume DR 25 installation instructions

Display Mount Pro LCD512-S Installation instruction

Display Mount Pro

Display Mount Pro LCD512-S Installation instruction

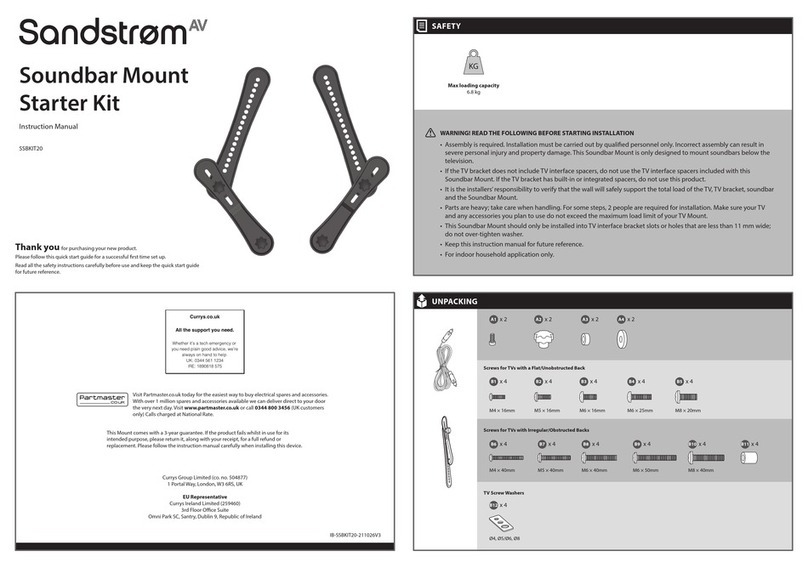
Sandstrom SSBKIT20 instruction manual

Sandstrom

Sandstrom SSBKIT20 instruction manual

Crown CM-SB datasheet

Crown

Crown CM-SB datasheet

Vivo MOUNT-PS5C instruction manual

Vivo

Vivo MOUNT-PS5C instruction manual

WilTec L07 installation guide

WilTec

WilTec L07 installation guide

Landmann Lumberjack 82815 Assembly and use instructions

Landmann

Landmann Lumberjack 82815 Assembly and use instructions

Goobay 58524 user manual

Goobay

Goobay 58524 user manual

ErgotronHome Workspace Lift35 user guide

ErgotronHome

ErgotronHome Workspace Lift35 user guide

Artiss TV-MOUN-S02-BK quick start guide

Artiss

Artiss TV-MOUN-S02-BK quick start guide

Triarch 75200 installation instructions

Triarch

Triarch 75200 installation instructions

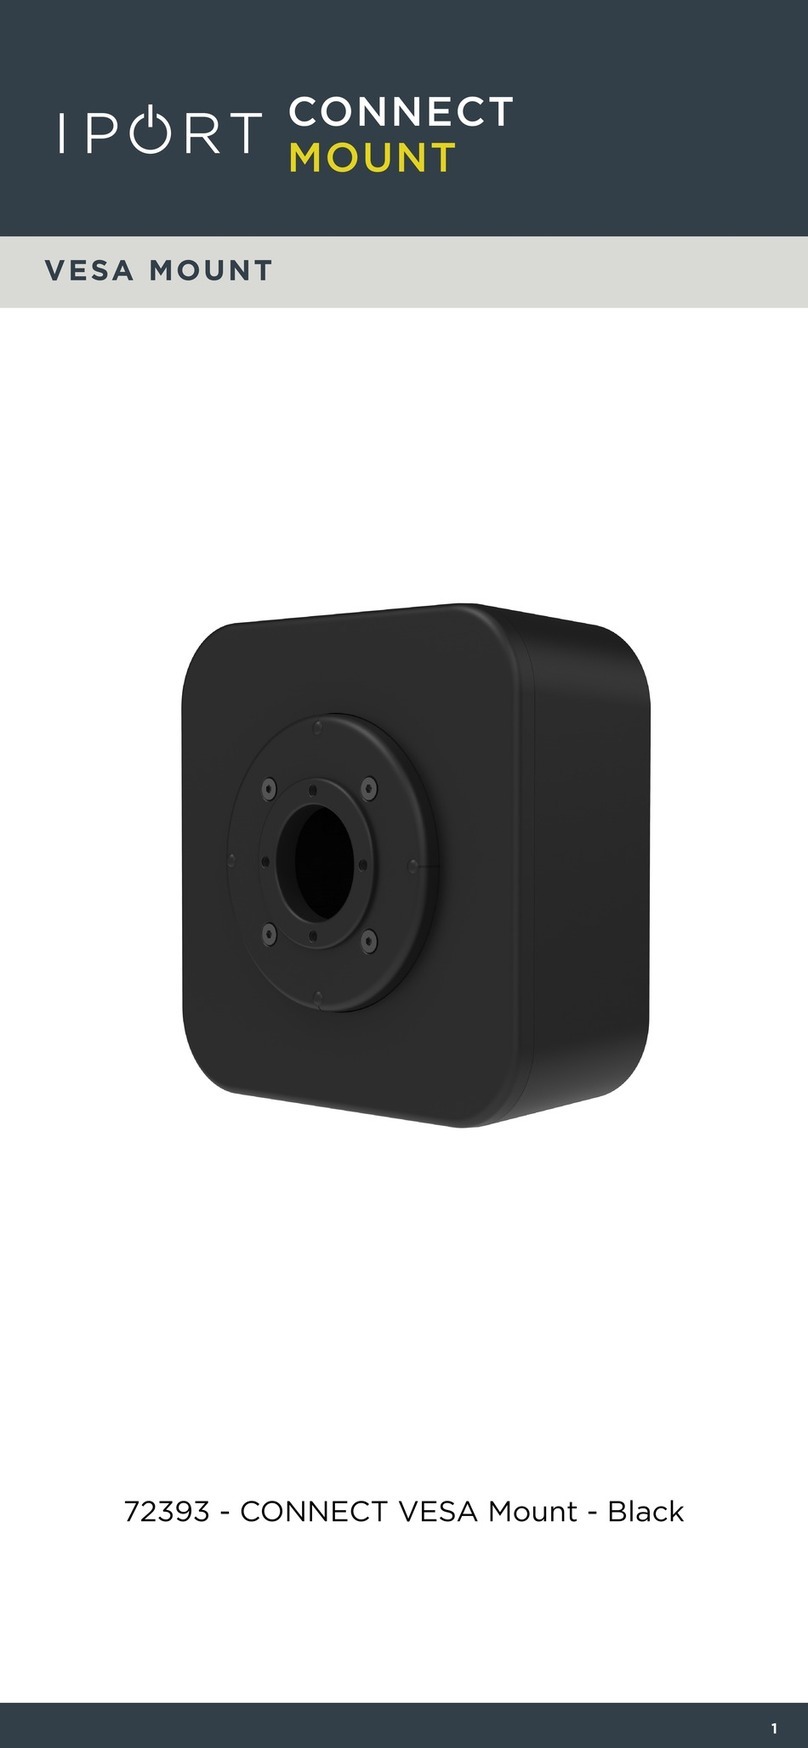
iPort 72393 manual

iPort

iPort 72393 manual

Renkforce 1077816 operating instructions

Renkforce

Renkforce 1077816 operating instructions

peerless-AV SUA740P installation instructions

peerless-AV

peerless-AV SUA740P installation instructions

Griffin Technology APST01 user manual

Griffin Technology

Griffin Technology APST01 user manual

manuals.online logo
manuals.online logoBrands
  • About & Mission
  • Contact us
  • Privacy Policy
  • Terms and Conditions

Copyright 2025 Manuals.Online. All Rights Reserved.