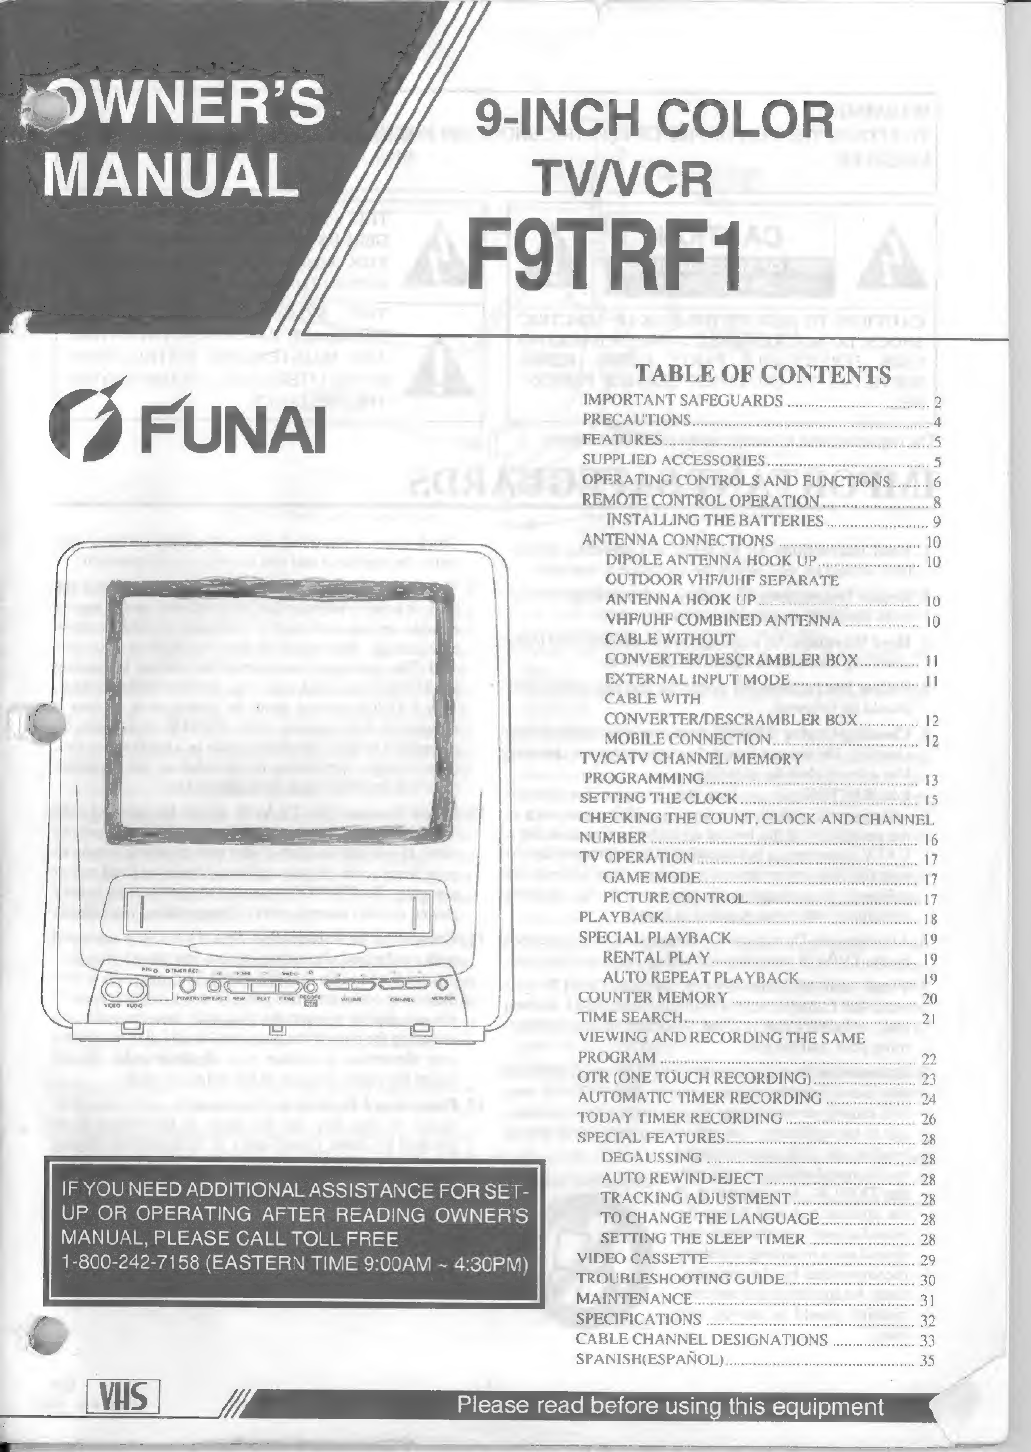
FUNAI F9TRF1 User manual

*)WNER’S
9-INCH
COLOR
MANUAL
TV/VCR
IF
YOU
NEED
ADDITIONAL
ASSISTANCE
FOR
SET-
UP
OR
OPERATING
AFTER
READING
OWNER'S
MANUAL,
PLEASE
CALL
TOLL
FREE
1-800-242-7158
(EASTERN
TIME
9:00AM
~
4:30PM)
FOTRF1
TABLE
OF
CONTENTS
IMPORTANT
SAFEGUARDS
.........
b
PRECAUTIONS...
FEATURES
i
SUPPLIED
ACCESSORIE:
OPERATING
CONTROLS
AND
FUNCTIONS
.......6
REMOTE
CONTROL
OPERATION..
INSTALLING
THE
BATTERIES
ANTENNA
CONNECTIONS
DIPOLE
ANTENNA
HOOK
UP.
OUTDOOR
VHF/UHF
SEPARATE
'TENNA
HOOK
UP.
10
VHF/UHF
COMBINED
ANTENNA
10
CABLE
WITHOUT.
CONVERTER/DESCRAMBLER
BOX
.....
n
EXTERNAL
INPUT
MODI
CABLE
WITH
CONVERTER/DESCRAMBLER
BOX..............
12
MOBILE
CONNECTION
merda
TV/CATV
CHANNEL
MEMORY
PROGRAMMING.........
13
SETTING
THE
CLOCK........
15
CHECKING
THE
COUNT,
CLOCK
AND
CHANNEL
NUMBER
16
TV
OPERATION
GAME
MODE.
t
17
PICTURE
CONTROL...
17
PLAYBACK
18
5!
L
PLAYBACK
санал.
AD
RENTAL
PLAY
.......
ha
19
AUTO
REPEAT
PLAYBACK...
19
COUNTER
MEMORY
20
TIME
SEARCH..
21
VIEWING
AND
RECORDING
ТН!
PROGRAM
Ac
r
2
OTR
(ONE
TOUCH
RECORDING).
23
AUTOMATIC
TIMER
RECORDING
......
24
TODAY
TIMER
RECORDING
26
SPECIAL
FEATURES
28
DEGAUSSING
28
AUTO
REWIND-EJECT
...
28
TRACKING
ADJUSTMENT.
г
28
TO
CHANGE
THE
LANGUAGE...
28
SETTING
THE
SLEEP
TIMER
...
28
VIDEO
CASSETTE
29
TROUBLESHOOTING
GUIDE...
30
MAINTENANCE
31
SPECIFICATIONS
32
CABLE
CHANNEL
DESIGNATIONS
33
SPANISH(ESPANOL)
-35

WARNING:
TO
REDUCE
THE
RISK
OF
FIRE
OR
ELECTRIC
SHOCK,
DO
NOT
EXPOSE
THIS
APPLIANCE
TO
RAIN
OR
MOISTURE.
CAUTION
RISK
OF
ELECTRIC
SHOCK
DO
NOT
OPEN
А
А
A
THIS
SYMBOL
INDICATES
THAT
DAN-
GEROUS
VOLTAGE
CONSTITUTING
А
RISK
OF
ELECTRIC
SHOCK
IS
PRESENT
WITHIN
THIS
UNIT.
CAUTION:
TO
REDUCE
THE
RISK
OF
ELECTRIC
SHOCK,
DO
NOT
REMOVE
COVER
(OR
BACK)
NO
USER
SERVICEABLE
PARTS
INSIDE.
REFER
SERVICING
TO
QUALIFIED
SERVICE PERSON-
NEL.
А
THIS
SYMBOL
INDICATES
THAT
THERE
ARE
IMPORTANT
OPERATING
AND
MAINTENANCE
INSTRUCTIONS
IN
THELITERATURE
ACCOMPANYING
THE
APPLIANCE.
The
important
note
is
located
on
the
rear
of
the
cabinet.
IMPORTANT
SAFEGUARDS
1.
Read
instructions-All
the
safety
and
operating
instruc-
tions
should
be
read
before
the
appliance
is
operated
2.
Retain
Instructions-The
safety
and
operating
instruc-
tions
should
be
retained
for
future
reference.
3.
Heed
Warnings-All
warnings
on
the
appliance
and
in
the
operating
instructions
should
be
adhered
to.
4.
Follow
Instructions-All
operating
and
use
instructions
should
be
followed.
5.
Cleaning-Unplug
TV/VCR
from
the
wall
outlet
before
cleaning.
Do
not
use
liquid
cleaners
or
aerosol
cleaners.
Use
a
damp
cloth
for
cleaning.
EXCEPTION
:
A
product
that
is
meant
for
uninter-
rupted
service
and,
that
for
some
specific
reason,
such
as
the
possibility
of
the
loss
of
an
authorization
code
for
а
САТУ
converter,
is
not
intended
to
be
unplugged
by
the
user
for
cleaning
or
any
other
purpose,
may
exclude
the
reference
to
unplugging
the
appliance
in
the
cleaning
description
otherwise
required
in
item
5.
Attachments-Do
not
use
attachments
not
recommended
by
the
TV/VCR
manufacturer
as
they
may
cause
hazards.
.
Water
and
Moisture-Do
not
use
this
TV/VCR
near
water-for
example,
near
a
bath
tub,
wash
bowl,
kitchen
sink,
or
laundry
tub,
in
a
wet
basement,
or
near
a
swim-
ming
pool,
and
the
like.
Accessories-Do
not
place
this
TV/VCR
on
an
unstable
cart,
stand,
tripod,
bracket,
or
table.
The
TV/VCR
may
fall,
causing
serious
injury
to
someone,
and
serious
dam-
age
to
the
appliance.
Use
only
with
a
cart,
stand,
tripod,
bracket,
or
table
recommended
by
the
manufacturer,
or
sold
with
the
TV/VCR.
Any
mounting
of
the
appliance
should
follow
the
manufacturer's
instructions
and
should
use
a
mounting
accessory.
recommended
by
the
manufac-
turer.
An
appliance
and
cart
com-
bination
should
be
moved
with
care.
е
EJ
ре
PORTABLE
CART
WARNING
е
Quick
stops,
excessive
force,
and
uneven
surfaces
тау
cause
the
appliance
and
cart
combination
to
overtum.
Ventilation-Slots
and
openings
in
the
cabinet
and
the
back
or
bottom
are
provided
for
ventilation
and
to
ensure
reliable
operation
of
the
TV/VCR
and
to
protect
it
from
overheating,
these
openings
must
not
be
blocked
or
cov-
ered.
The
openings
should
never
be
blocked
by
placing
the
TV/VCR
on
a
bed,
sofa,
rug,
or
other
similar
surface.
This
TV/VCR
should
never
be
placed
near
or
over
radiator
or
heat
register.
This
TV/VCR
should
not
9
placed
in
a
built-in
installation
such
as
a
bookcase
or
rack
unless
proper
ventilation
is
provided
or
the
manufac-
turer's
instructions
have
been
adhered
to
.
Power
Sources-This
TV/VCR
should
be
operated
only
from
the
type
of
power
source
indicated
on
the
marking
label.
If
you
are
not
sure
of
the
type
of
power
supply
to
your
home,
consult
your
appliance
dealer
or
local
power
company.
For
TV/VCRs
intended
to
operate
from
battery
power,
or
other
sources,
refer
to
the
operating
instructions.
.
Grounding
or
Polarization-This
TV/VCR
is
equipped
with
a
polarized
alternating-current
line
plug(a
plug
hav-
ing
one
blade
wider
than
the
other).
This
plug
will
fit
into
the
power
outlet
only
one
way.
This
is
a
safety
feature.
If
you
are
unable
to
insert
the
plug
fully
into
the
outlet,
try
reversing
the
plug.
Ifthe
plug
should
still
fail
to
fit,
contact
your
electrician
to
replace
your
obsolete
outlet.
Do
not
defeat
the
safety
purpose
of
the
polarized
plug.
.
Power-Cord
Protection-Power-supply
cords
should
be
routed
so
that
they
are
not
likely
to
be
walked
on
or
—
9
pinched
by
items
placed
upon
or
against
them,
paying
particular
attention
to
cords
at
plugs,
convenience
recep-
tacles,
and
the
point
where
they
exit
from
the
appliance.
Ф
EN
ж
5B13

©
FIGURE
A
EXAMPLE
OF
ANTENNA
GROUNDING
AS
PER
NATIONAL
ELECTRICAL
CODE
ANTENNA
LEAD
IN
WIRE
ANTENNA
|
DISCHARGE
UNIT
(NEC
SECTION
810-20)
ELECTRIC
SERVICE
EQUIPMENT.
==
GROUNDING
CONDUCTORS
(NEC
SECTION
810-21)
GROUND
CLAMPS,
NEC
-
NATIONAL
ELECTRICAL
CODE
POWER
SERVICE
GROUNDING
-
ELECTRODE
SYSTEM
$2898A
(NEC
ART
250,
PART
Н)
|
13.
Outdoor
Antenna
grounding-lf
an
outside
antenna
or
19.
Damage
Requiring
Service-Unplug
this
TV/VCR
from
cable
system
is
connected
to
the
TV/VCR,
be
sure
the the
wall
outlet
and
refer
servicing
to
qualified
service
antenna
or
cable
system
is
grounded
so
as
to
provide
some
personnel
under
the
following
conditions:
protection
against
voltage
surges
and
built-up
static
a.
When
the
power-supply
cord
or
plug
is
damaged
or
charges.
Article
810
of
the
National
Electrical
Code,
frayed,
ANSI/NFPA
No.
70,
provides
information
with
respectto
b. If
liquid
has
been
spilled,
or
objects
have
fallen
into
the
proper
grounding
of
the
mast
and
supporting
structure,
TV/VCR.
grounding
of
the
lead-in
wire
to
an
antenna
discharge
unit,
c.
If
the
TV/VCR
has
been
exposed
to
rain
or
water.
size
of
grounding
conductors,
location
of
antenna-dis-
|
d.
If
the
TV/VCR
does
not
‘operate
normally
by
following
charge
unit,
connection
to
grounding
electrodes,
and
re-
the
operating
instructions.
Adjust
only
those
controls
that
quirements
for
the
grounding
electrode.
(Fig.
A)
are
covered
by
the
operating
instructions,
as
improper
14.
Lightning-For
added
protection
for
this
TV/VCR
re-
adjustment
of
other
controls
may
result
in
damage
and
will
ceiver
during
a
lightning
storm,
or
when
it
is
left
unat-
often
require
extensive
work
by
a
qualified
technician
to
tended
and
unused
for
long
periods
of
time,
unplug
it
from
restore
the
TV/VCR
to
its
normal
operation.
the
wall
outlet
and
disconnect
the
antenna
or
cable
system.
е.
If
the
TV/VCR
has
been
dropped
or
damaged
in
any
way.
This
will
prevent
damage
to
the
TV/VCR
due
to
lightning
f.
When
the
TV/VCR
exhibits
a
distinct
change
in
perform-
and
power-line
surges.
ance-this
indicates
a
need
for
service.
15.
Power
Lines-An
outside
antenna
system
should
not
be
20.
Replacement
Parts-When
replacement
parts
are
re-
located
in
the
vicinity
of
overhead
power
lines
or
other
quired,
be
sure
the
service
technician
has
used
replace-
electric
light
or
power
circuits,
or
where
it
can
fall
into
ment
parts
specified
by
the
manufacturer
that
have
the
such
power
lines
or
circuits.
When
installing
an
outside
same
characteristics
as
the
original
part.
Unauthorized
antenna
system,
extreme
care
should
be
taken
to
keep
substitutions
may
result
in
fire,
electric
shock,
injury
to
from
touching
such
power
lines
or
circuits
as
contact
with
persons
or
other
hazards.
them
might
be
fatal.
21.
Safety
Check-Upon
completion
of
any
service
or
repairs
16.
Overloading-Do
not
overload
wall
outlets
and
extension
to
this
TV/VCR,
ask
the
service
technician
to
perform
cords
as
this
can
result
in
a
risk
of
fire
or
electric
shock.
routine
safety
checks
to
determine
that
the
TV/VCR
is
in
17.
Object
and
Liquid
Entry-Never
push
objects
of
any
kind
proper
operating
condition.
into
this
TV/VCR
through
openings
as
they
may
touch
22.
Heat-This
TV/VCR
product
should
be
situated
away
from
dangerous
voltage
points
or
short
out
parts
that
could
heat
sources
such
as
radiators,
heat
registers,
stoves,
or
result
in
a
fire
or
electric
shock.
Never
spill
liquid
of
any
other
products
(including
amplifiers)
that
produce
heat.
kind
on
the
TV/VCR.
18.
Servicing-Do
not
attempt
to
service
this
TV/VCR
your-
$
self
as
opening
or
removing
covers
may
expose
you
to
dangerous
voltage
or
other
hazards.
Refer
all
servicing
to
qualified
service
personnel.
-3è
EN
жж»
5C22

LOCATIO
For
safe
operation
and
satisfactory
performance
of
your
unit,
keep
the
following
in
mind
when
selecting
a
place
for
its
installation:
*
Shield
it
from
direct
sunlight
and
keep
it
away
from
sources
of
intense
heat.
*
Avoid
dusty
or
humid
places.
*
Avoid
places
with
insufficient
ventilation
for
proper
heat
dissipation.
Do
not
block
the
ventilation
holes
at
the
top
and
bottom
of
the
unit.
Do
not
place
the
unit
on
a
carpet
because
this will
block
the
ventila-
tion
holes.
*
Install
unit
in
a
horizontal
position.
*
Avoid
locations
subject
to
strong
vibration.
*
Do
not
place
the
unit
near
strong
magnetic
fields.
*
Do
not
move
the
unit
from
a
cold
to
a
hot
place
or
vice
versa.
*
Do
not
handle
the
power
cord
with
wet
hands.
*
Do
not
pull
on
the
power
cord
when
disconnecting
it
from
an
AC
wall
outlet.
Grasp
it
by
the
plug.
*
If,
by
accident,
water
is
spilled
on
your
unit,
unplug
the
power
cord
immediately
and
take
the
unit
to
an
authorized
Funai
service
center
for
servicing.
*
Do
not
put
your
fingers
or
objects
into
the
TV/VCR
cassette
holder.
*
Do
not
place
anything
directly
on
top
of
the
unit.
WARNING
Moisture
condensation
may
occur
inside
the
unit
when
it
is
moved
from
a
cold
place
to
a
warm
place,
or
after
heating
a
cold
room
or
under
conditions
of
high
humid-
ity.
If
a
tape
is
played
in
a
TV/VCR
which
has
moisture,
it
may
damage
the
tape
and
TV/VCR.
Therefore
when
the
condensation
occurs
inside
the
unit
turn
the
POWER
button
on
and
allow
at
least
2
hours
for
the
unit
to
dry
out.
FCC
WARNING-
This
equipment
may
generate
or
use
radio
frequency
energy.
Changes
or
modifications
to
this
equipment
may
cause
harmful
interference
unless
the
modifications
are
expressly
approved
in
the
instruction
manual.
The
user
could
lose
the
authority
to
operate
this
equipment
if
an
unauthorized
change
or
modification
is
made.
IMPORTANT
COPYRIGHT
INFORMATION
Unauthorized
recording
or
use
of
broadcast
television
programming,
video
tape,
film
or
other
copyrighted
material
may
violate
applicable
copyright
laws.
We
assume
no
responsibility
for
the
unauthorized
duplication,
use
or
other
acts
which
infringe
upon
the
rights
of
copyright
owners.
The
serial
number
of
this
product
may
be
found
on
the
back
of
the
unit.
No
others
have
the
same
serial
number
as
yours.
You
should
record
the
number
and
other
vital
information
here
and
retain
this
book
as
a
permanent
record
of
your
purchase
to
aid
identification
in
case
of
theft.
Date
of
Purchase
Dealer
Purchased
from
Dealer
Address
Dealer
Phone
No.
Model
No.
Serial
No.
Ф
-4-
EN
жж»
5004

QQEATURES
*
Auto
Power
On
and
Off
system-
Automatically
turns
the
TV/VCR
on
as
you
insert
the
cassette,
turns
off
and
ejects
after
auto-rewind
when
the
beginning
of
the
tape
is
reached.
*
Three
Different
Record/Playback
Speed—
Select
SP
mode
(Standard
play),
LP
mode
(Long
play)
and
SLP
mode
(Super
long
play)
for
up
to
eight
hours
of
recording/playback
with
a
T-160
tape.
*
On
Screen
Programming-
All
majoroperating
and
programming
functions
appear
on
your
TV/R
screen
for
operating
convenience.
Bilingual
on
screen
menu
display
selectable
in
English
or
Spanish
*
Automatic
Playback
Speed
Selection-
Automatically
selects
the
proper
playback
speed
even
if
you
select
a
different
speed.
*
1
Year,
8
Events
Timer
(including
Today,
Daily
and
Weekly
Timer
Recording)-
The
built-in
timer
allows
you
to
record
up
to
7
programs
at
different
times
on
different
channels
up
to
1
year
in
advance.
The
Today
Timer
Recording
feature
uses
program
number
8.
The
daily
timer
will
allow
recordings
to
be
made
of
daily
broadcasts
and
the
weekly
timer
will
allow
recording
to
be
made
once
а
week
up
to
the
end
of
the
tape.
*
Today
Timer
Recording-
Allows
you
to
easily
record
one
program
within
24
hours.
*
Visual
Search-
Allows
you
to
view
a
video
tape
at
a
high
speed
in
either
a
forward
or
reverse
direc-
tion.
*
STILL-
"Freeze"
the
picture
at
any
time,
for
close
viewing
of
a
particular
scene.
181
Channel
Capability
PLL
Frequency
Syn-
thesizer
Tuner
with
Direct
station
Call-
(А
CATV
Box
may
be
necessary
to
view
scrambled
CATV
channels.)
Infrared
Remote
control
unit-
Allows
you
to
use
most
of
the
controls
from
a
remote
location.
Game
Mode-
Allows
TV/VCR
display
to
be
suit-
able
for
use
with
a
TV
game.
Rental
Play
Mode-
Improves
playback
picture
quality
of
worn
tapes,
especially
rental
tapes.
Auto
Repeat
Playback-
Allows
you
to
repeat
a
tape
indefinitely
without
using
the
PLAY
button.
You
can
select
all
feature
(that
repeat
playback
from
the
beginning
to
the
end
of
the
tape)
or
blank
feature
(that
repeat
only
recorded
part,
not
blank
part).
OTR
(One
Touch
Recording)-
Automatic
timed
recording
from
30
to
480
minutes
is
possible
at
the
push
of
OTR
button.
(Timer
adjustments
for
recording
are
not
required.)
Time
Search-
Allows
you
to
set
the
TV/VCR
to
advance
the
tape
by
entering
the
desired
playback
time
you
want
to
skip.
Sleep
Timer-
Allows
you
to
turn
off
the
TV/VCR
without
using
the
POWER
button
after
a
desired
time
period.
Two-
Way
Power-
Allows
you
to
power
the
TV/VCR
with
standard
household
AC
or
your
vehi-
cle’s
battery,
using
the
supplied
car-battery
cord.
SUPPLIED
ACCESSORIES
(1813641/1780103)
(WPZ0202GA004)
*
If
you
need
to
replace
these
accessories,
please
refer
to
the
PART
NO.
under
the
illustrations
and
contact
the
FUN.
AI
parts
department
for
ordering.
SFI9

OPERATING
CONTROLS
AND
FUNCTIONS
(;
—
FRONT
VIEW
—
1
EARPHONE
jack-
Connect
to
earphone
(not
supplied)
for
personal
listening.
The
size
of
jack
is
1/8"
monaural
(3.5mm).
2
VIDEO
IN
jack-
Connect
to
video
output
jack
of
your
video
camera
or
another
VCR.
3
AUDIO
IN
jack-
Connect
to
audio
output
jack
of
your
audio
equipment
or
another
VCR.
4
Remote
Sensor-
Receives
the
infrared
control
signals
from
the
handheld
remote
control
unit.
5
POWER
button-
Press
to
tum
TV/VCR
on
and
off.
Press
to
activate
the
automatic
timer
recording.
6
STOP/EJECT
button-
Press
to
stop
tape
mo-
tion.
Press
to
remove
tape
from
TV/VCR.
7
REW
button-
Press
to
rewind
tape,
or
to
view
video
in
reverse
during
the
Play
mode
ata
faster
than
normal
speed.
Press
PLAY
button
to
return
TV/VCR
to
normal
playback
speed.
8
PLAY
button-
Press
to
begin
playback
of
a
tape.
9
F.FWD
button-
Press
to
advance
tape,
or
to
view
video
in
forward
during
Play
mode
at
a
faster
than
normal
speed.
Press
PLAY
button
to
return
TV/VCR
to
normal
playback
speed.
10
RECORD/OTR
button-
Press
to
begin
manual
recording.
Press
to
activate
One
Touch
Recording.
11
VOLUME
"7"
button-
Press
to
decrease
t
volume
level.
CLEAR
function-
Press
to
cancel
Today
Timer
Recording.
12
VOLUME
"^"
button-
Press
to
increase
the
vol-
ume
level.
SELECT
function-
Press
to
select
the
next
step
when
setting
Today
Timer
Recording.
13
CHANNEL
":"/"."
buttons-
Press
to
select
the
channel
for
viewing
or
recording.
TRACKING
+/-
function-
Press
to
minimize
video
'noise'
(lines
or
dots
on
screen)
during
the
Play
mode.
SET
function
—
Press
to
adjust
time
using
7
or
^
button
in
the
Today
Timer
Recording.
14
MONITOR
button-
Press
to
turn
the
TV
screen
on
and
off
when
in
the
Recording
mode.
TODAY
TIMER
RECORDING
function-
Press
to
set
Today
Timer
Recording.
15
CASSETTE
COMPARTMENT
16
TIMER
REC
indicator-
Lights
up
in
the
Timer
Recording
mode.
17
REC
indicator-
Lights
up
in
the
Recording
mode.
e
EN
ж»
5004

T
DC
12V
jack-
Connect
to
the
Car
Battery Cord.
9
AC120V
jack-
Connect
to
the
AC
cord.
20
AUDIO
IN
jack-
Connect
to
audio
output
jack
of
your
audio
equipment
or
another
VCR.
21
VIDEO
IN
jack-
Connect
to
video
output
jack
of
your
video
camera
or
another
VCR.
22
VIDEO
OUT
jack-
Connect
to
the
video
in
jack
of
video
processor
or
another
VCR.
23
AUDIO
OUT
jack-
Connect
to
the
audio
in
jack
|
of
your
audio
equipment
or
another
УСК.
24
ANT.
terminal-
Connect
to
an
antenna
ог
CATV.
5D04

OTE
CONTROL
OPERATION
е
You
can
operate
most
of
functions
from
the
Remote
Control
(included).
The
buttons
on
the
Remote
Control
have
the
same
functions
as
the
corresponding
buttons
on
the
unit.
HOW
TOL
‘TROL
1
POWER
button-
Press
to
turn
TV/VCR
on
and
2
NUMBER
buttons-
Press
to
select
desired
chan-
off.
Press
to
activate
the
automatic
timer
recording.
nels
and
select
item
in
the
Menu
mode.
They
cannot
be
used
to
set
desired
channel
during
Timer
Record-
ing.
To
select
channels
1
to
9,
first
press
the
O
button
.
and
then
1
to
9.
*100
button-
Press
to
select
cable
channels
which
are
equal
or
greater
than
number
100.
3
MONITOR
button-
Press
to
turn
the
TV/VCR
—
|
screen
on
and
off
in
the
Recording
mode.
4
VOL
buttons-
Press
to
adjust
desired
volume
level
by
using
either
A
or
V
button.
5
SPEED
button-
Press
to
set
desired
recording
speed.
(SP/LP/SLP)
6
REWIND
button-
Press
to
rewind
the
tape,
or
to
view
the
picture
rapidly
in
reverse
during
the
Play
mode.
(Rewind
Search)
7
RECORD
button-
Press
to
begin
manual
record-
ing.
8
STOP
button-
Press
to
stop
the
tape
motion.
U
9
PAUSE/STILL
button-
Press
to
temporarily
stop
the
tape
during
the
Recording
mode
or
to
view
à
still
picture
during
the
Play
mode.
10
PLAY
button-
Press
to
playback
the
tape.
11
F.FWD
button-
Press
torapidly
advance
the
tape,
or
to
view
the
picture
rapidly
in
forward
during
the
Play
mode.
(Forward
Search)
12
CHANNEL
RETURN
BUTTON-
Press
to
go
back
to
the
previously
viewed
channel.
For
example,
pressing
this
button
once
will
change
channel
dis-
STORE.
тиб.
play
from
3
(present
channel)
to
10
(previously
viewed
channel),
and
pressing
it
a
second
time
will
return
from
10
to
3.
13
CH
buttons-
Press
to
select
desired
channel
by
using
either
A
or
W
button.
They
may
also
be
used
to
adjust
the
picture
control.
(See
page
17.)
TRACKING
function-
Press
A
or
W
button
to
minimize
video
‘noise’
(lines
or
dots
on
screen)
dur-
ing
the
Play
mode.
(See
page
28.)
14
SLEEP
button-
Press
to
activate
the
sleep
timer
function.
(See
page
28.)
15
C.MEMORY
button-
Press
to
use
the
Counter
Memory
mode.
(See
page
20.)
-8-
EN
жох
5004

16
ADD/DELETE
button-
Press
to
add
or
delete
channel
numbers.
Press
to
cancel
a
timer
program.
(This
function
is
operative
only
in
the
Menu
mode.)
(See
pages
14
and
25.)
C.RESET
button-
Press
to
reset
counter
to
0:00:00.
17
SELECT
button-
Press
to
select
setting
modes
(clock,
counter,
tape
speed,
timer
programming,
channel
preset,
etc.).
DISPLAY
function-
Press
to
display
the
counter
or
the
current
channel
number
and
current
time
on
the
TV/VCR
screen.
(See
"CHECKING
THE
COUNT,
CLOCK
AND
CHANNEL
NUMBER")
18
MENU
button-
Press
todisplay
main
menu
on
the
TV/VCR
screen.
19
MUTE
button-
Press
to
mute
sound.
Press
it
again
to
resume
sound.
20
EJECT
button-
Press
to
remove
tape
from
the
TV/VCR.
Slide
the
battery
compartment
cover
by
pressing
the
Cover
on
the
remote
unit
in
the
direction
of
the
arrow.
ZEE
»
dum
LL
[2]
Insert
2
"AA"
batteries
into
the
battery
compartment
in
the
direction
as
indicated
by
the
polarity
(+/-)
markings.
Ө
Ф|
e
Ө|
Replace
the
cover.

ENNA
CONNECTIONS
6
DIPOLE
ANTENNA
HOOK
UP
1.
Push
the
stem
of
the
Dipole
Antenna
(accessory)
into
the
hole
for
antenna
at
the
back
of
TV/VCR.
2.
Connect
the
flat
twin-lead
cable
from
the
Dipole
An-
tenna
to
the
300/75
ohm
Matching
Adapter
(acces-
sory).
3.
Plug
the
Matching
Adapter
to
ANT
terminal
of
TV/VCR
as
shown
in
drawing.
For
the
best
reception,
extend
the
Dipole
Antenna
and
adjust
its
length
and
position.
(Avoid
handling
the
top
section
when
making
adjustments).
Dipole
Antenna
(accessory)
/
Flat
twin-lead
Cable
аа
Matching
Adapter
(accessory)
„бё
оО
NOTES:
1)
If
it
is
difficult
to
get
good
reception
with
the
in-
door
antenna,
the
use
of
an
outdoor
antenna
is
rec-
ommended.
Before
an
outdoor
antenna
is
connected
to
the
set,
the
indoor
antenna
should
be
discon-
nected.
Note
to
CATV
system
installer
OUTDOOR
VHF/UHF
SEPARATE
ANTENNA
HOOK
UP
1.
Connect
the
300-ohm
flat
twin-lead
cable
from
an
outdoor
UHF
antenna
to
the
VHF/UHF
Combiner
(not
supplied).
2.
Connect
a
round
type
75
ohm
coaxial
cable
from
an
outdoor
VHF
antenna
to
the
VHF/UHF
Combiner
(not
supplied).
3.
Plug
the
VHF/UHF
combiner
to
ANT
terminal
of
TV/VCR
as
shown
in
drawing.
VHF
Antenna
UHF
Antenna
Round
type
|
75-ohm
Coaxial
Cable
VHF/UHF
Flattwin-lead
—
|
Combiner
^
Cable
{л
(Not
supplied)
4
VHF/UHF
COMBIN
)
ANTENNA
A
VHF
UHF
75
ohm
combination
antenna
can
be
con-
nected
to
ANT
terminal.
VHF/UHF
Combination
Antenna
This
reminder
is
provided
to
call
the
CATV
system
installer's
attention
to
Article
820-40
of
the
NEC
that
provides
guidelines
for
proper
grounding
and,
in
particular,
specifies
that
the
cable
ground
shall
be
connected
to
the
grounding
system
of
the
building
as
close
to
the
point
of
cable
entry
as
practical.

Use
this
connection
if
your
cable
system
connects
di-
rectly
to
your
TV/VCR
without
a
converter
box.
With
this
connection
you,
1)
can
use
your
TV/VCR
Re-
mote
Control
to
select
channels,
2)
program
one
or
more
unscrambled
channels
for
automatic
timer
recording.
From
Cable
System
75-ohm
When
using
an
external
input
signal(another
VCR
or
video
camera),
connect
the
player's
audio/video
output
cables
to
the
AUDIO
IN,
VIDEO
IN
jacks
of
your
TV/VCR.
Then
press
CH.
"А"
or
"v"
button
or
enter
"00"
with
number
button
so
that
AUX
appears
on
the
screen.
AUX
TO
COPY
A
VIDEO
CASSETTE
(Requires
another
VCR)
Connect
your
TV/VCR
and
a
Source
(Playing)
VCR
using
the
following
diagram:
1.
Insert
a
pre-recorded
video
cassette
into
the
Source
(Playing)
VCR.
2.
Insert
a
blank video
cassette,
or
one
you
want
to
re-
cord
over,
into
the
TV/VCR’s
cassette
compart-
ment.
3.
Press
SPEED
button
on
the
remote
control
to
select
the
desired
recording
speed
(SP,
LP
or
SLP).
4.
Press
CHANNEL
A
or
V
button
repeatedly
so
that
"AUX"
appears
on
the
screen.
5.
Begin
playback
of
the
tape
in
the
Source
(Playing)
VCR.
6.
Press
RECORD
button
on
the
TV/VCR.
NOTE:
For
best
results
during
dubbing,
use
the
TV/VCR's
front
panel
controls
whenever
possible.
The
remote
control
might
affect
the
Source
(Playing)
VCR's
playback
operation.
Audio/Video
adapter
cord(not
supplied)
„ы
ЕМ
ooo
5004

If
your
cable
service
supplies
you
with
a
converter
box
you
can
use
the
basic
connection
shown
here.
With
this
connection
you
can
record
and
view
any
chan-
nel,
including
scrambled
channels.
However
channel
selection
must
be
made
with
the
converter
box.
This
means
that
channels
cannot
be
changed
using
the
TV/VCR
Remote
Control.
Unattended
recording
is
limited
to
one
channel
at
a
time.
TO
RECORD
AND
VIEW
A
SCRAMBLED/UN-
SCRAMBLED
CHANNEL
1.
Set
the
TV/VCR
channel
to
the
output
channel
of
the
Cable
Converter
Box.
(Ex.
CH3)
2.
Select
the
channel
to
be
recorded
or
viewed
on
the
Cable
Converter
Box.
From
Cable
System
CATV
Box
(Not
supplied)
NOTE:
When
using
a
cable
converter
box
you
can
not
record
one
channel
and
view.
WARNING:
never
watch
the
TV/VCR
while
driving.
CAUTION
If
you
use
the
TV/VCR
with
the
vehicle's
engine
off,
recharge
the
vehicle's
battery
after
about every
4
hours
оѓ
use
to
prevent
it
from
running
down.
After
you
finish
using
the
TV/VCR
be
sure
you
unplug
the
car-battery
cord
from.
the
cigarrette-lighter
socket.
ANTENNA
CONNECTION
The
supplied
indoor
antenna
is
adequate
when
your
ve-
hicle
is
stationary.
For
best
reception
on
the
road,
use
a
high-quality
VHF/UHF
mobile
TV
antenna.
VHF/UHF
Combination
Mobile
Antenna
(Not
Supplied)
Z
ott
С>
9o:
oo:
CAR
BATTERY
CORD
CONNECTION
Attach
the
car
battery
cord
to
the
DC12V
connector
on
the
back
of
the
TV/VCR.
Then,
connect
the
other
end
to
your
vehicle's
cigarette-lighter
socket.
Car
battery
cord
(accessory)
|
=]
Zu...
То
the
vehicle's
cigarrete-lighter
socket
Notes:
*
Be
sure
your
vehicle
has
a
12-volt,
negative-ground
electrical
system.
*
Be
sure
you
use
only
the
supplied
car
battery
cord.
Using
another
cord
could
damage
the
TV/VCR.
*
Be
sure
the
socket
is
free
of
ashes
and
other
debris.
*
Be
sure
to
push
the
car
battery
cord's
plug
com-
pletely
into
the
cigarette-lighter
socket.
*
Always
unplug
the
car
battery
from
the
cigarette-
lighter
socket before
you
unplug
it
from
the
TV/VCR.
*
You
must
disconnect
the
car
battery
cord
from
the
TV/VCR
before
you
can
use
AC
power.
*
Be
sure
to
replace
fuse
with
only
same
type,
5A,
250V.
&
|
EN
жж»)
5004

QI
V/CATV
CHANNEL
MEMORY
ROGRAMMING
You
can
program
the
tuner
to
scan
only
the
channels
you
receive
in
your
area.
NOTE:
Channel
memory
programming
is
not
needed
when
using
a
converter/descrambler
box.
You
must
use
the
remote
control
unit
for the
following
steps:
E
Attach
the
smaller
end
оғће
supplied
AC
cord
to
the
AC
Frat
M
of
the
TV/VCR.
Then,
plug
the
other
end
into
a
standard
TV/VCR.
Note:
You
must
disconnect
the car
battery
cord
from
the
120V
connector
on
the
back
AC
outlet.
Press
POWER
button
to
turn
on
the
TV/VCR
before
you
can
use
AC
power.
~UaNouaae
SELECT
-
тюш
он
arse
L
Select
item
1
(ENGLISH)
or
2
(ESPANOL-SPANISH)
9"
number
|
or
2
button.
CH
01
Press
SELECT
button
on
the
remote
control
unit.
The
tuner
scans
and
memorizes
all
the
active
channels
in
your
area.
*
The
TV/VCR
distinguishes
between
standard
TV
channels
and
CATV
automatically.
[4]
After
scanning,
the
tuner
stops
on
the
lowest
memo-
rized
channel.
(TV
mode:
from
CH
02/
CATV
mode:
from
CH
01)
If
you
want
to
recall
the
selected
channels,
you
can
select
the
desired
channel
directly
with
the
remote
con-
trol
number
button
or
CH
A
or
Y
button
on
the
remote
control
unit.
TO
RETURN
TO
TV
MODE
WHEN
SCANNING
Press
MENU
button
in
scanning
mode.
Press
MENU
button.
Select
item
4
(CHANNEL
SET
UP)
using
number
4
button.
Press
number
1
button
re-
peatedly
to
select
[TV]
or
CATV].
CH
02
Select
item
2
(AUTO
PRE-
SET)
using
number
2
button.
The
tuner
scans
and
memo-
rizes
all
the
active
channels
in
your
area.
After
scanning,
the
tuner
stops
on
the
lowest
memo-
rized
channel.
(TV
mode:
from
СНО2
/
САТУ
mode:
from
CH01)
If
you
want
to
recall
the
selected
channels,
you
can
select
the
desired
channel
directly
by
number
button
or
CH
A
or
Y
button
on
the
remote
control
unit.
TO
RETURN
TO
TV
MODE
WHEN
SCANNING
Press
MENU
button
in
scanning
mode.
-13-
EN
ж»
5004

Press
MENU
button.
Select
item
4
(CHANNEL
SET
UP)
using
number
4
button.
Select
item
3
(ADD/DE-
LETE
CH)
using
number
3
button.
Enter
the
desired
channel
number
using
the
number
button
or
the
CH
A
or
V
but-
ton.
Herc
cc
з
Serna
EC
Ho
cuc
Н
$
uaes
serue
crane.
зєтүө-
эмеш
wi
2
млоряевет
з
AOODELETE
CH
sj-
EN
[4]
DELETING
PRESET
CHANNEL
AODORLETE
CH
Press
ADD/DELETE
but-
ton.
The
channel
number
2
m
changes
to
light
red.
The
channel
is
deleted
from
memory.
*
To
delete
another
channel,
repeat
steps
[3]
and
[4].
*
If
you
press
the
ADD/DELETE
button
again,
the
channel
is
memorized
again.
ADDING
PRESET
CHANNEL
Press
ADD/DELETE
but-
int
the
c
ton.
The
channel
number
m
changes
to
light
blue.
The
channel
is
added
to
memory.
QUI
*
To
add
another
channel,
repeat
steps
[3]
and
[4].
* If
you
press
the
ADD/DELETE
button
again,
the
channel
is
deleted
again.
Added
channel
is
in
light
blue.
Deleted
channel
is
in
light
red.
Press
MENU
button.
The
TV/VCR
screen
returns
to
TV
mode.
NOTE:
To
confirm
that
channel(s)
has
been
deleted
or
added,
press
CH
A
or
V
button.
t.
coe
5D04.

@ETTING
THE
CLOCK
Set
the
clock
accurately
for
proper
automatic
timer
recording.
©
You
must
use
the
remote
control
unit
for
the
following
steps:
*
Power
must
be
turned
on.
In
the
example
below,
the
clock
is
to
be
set
to:
DATE
March
Ist,
1995
SETTING
TIME
5:40PM
1
SETTING
CLOCK
-
Press
MENU
button.
<=
Enter
the
desired
minute
us-
мотом
vtm
Select
item
3
(SETTING
|
en
eroonsa
ing
number
button.
wmm
CLOCK)
using
number
3
Hs
(Ex.
5:40pm
-
enter
40)
eam
к
setter
жт
ч
button.
dro
2
——
M
Enter
the
desired
month
using
number
button.
C
-wmwéaex-
|
(Ex.
March
-
enter
03)
кз
Enter
|
toselect"
AM"
oren-
комн
vean
Кере
Ул
ter
2
to
select
"PM"
using
йрй
number
button.
gon
ursa
vonum
жем
a
nter
the
desired
day
using
CEESHüpatcienter2)
imber
button.
CERES
(Ex.
March
Ist
-
enter
01)
nS
d
rom
Press
MENU
or
SELECT
button
to
start
the
clock.
sen)
[3]
Although
seconds
are
not
|
displayed,
they
begin
count-
i
;
ara
ing
from
00
when
you
press
Ee
|
„
м
MENU
or
SELECT
button.
Use
this
feature
to
synchro-
(Ex.
1995
-
enter
1995)
ako
de
nize
the
clock
with
the
correct
time.
*
This
unit
has
a
built
in
calendar
up
to
the
year
2008.
[5]
e
Enter
the
desired
hour
using
pio
number
button,
pene
TO
CHANGE
CLOCK
SETTING
(Ex.
5:40pm
-
enter
05)
If
you
want
to
change
the
clock,
1)
Follow
step
[1].
2)
Select
desired
digit
using
SELECT
button
or
ADD/DELETE
button.
3)
Enter
correct
numbers
using
number
button.
4)
Press
MENU
button
to
return
to
TV
mode.
-18-
ЕМ
жж»
5004
жий

CHECKING
THE
COUNT,
CLOCK
AND
6)
CHANNEL
NUMBER
To
check
the
Count,
Clock
and
Channel
number
on
the
TV/VCR
screen,
press
SELECT
button
on
the
remote
control.
Each
time
you
press
SELECT
button
on
the
remote
control,
the
TV/VCR
screen
will
change
as
follows:
OFF
mode
COUNT
mode
CLOCK
mode
UM

@V
OPERATION
Press
POWER
button
to
turn
on
the
TV/VCR.
“
Ы
Select
the
desired
channel
using
number
button
or
CH
А
or
Y
button.
L3]
Adjust
the
VOLUME
to
de-
sired
listening
level
using
the
VOLUME
Aor
V
but-
ton.
GAME
MODE
This
function
enables
you
to
adjust
the
TV/VCR
dis-
play
making
it
suitable
for
use
with
a
TV
GAME.
*
You
must
use
the
remote
control
unit
for the
fol-
€
lowing
steps:
Press
MENU
button.
Select
item
7
(USER'S
SET
UP)
using
number
7
button.
[2]
Press
number
|
button
to
se-
lect
(GAME
MODE
[ON]).
[3]
Press
MENU
button
to
re-
turn
to
TV
mode.
TO
CANCEL
THE
GAME
MODE
*
Repeat
steps
[1]
and
[2].
Then,
follow
step
[3]
to
select
[OFF].
Press
MENU
button
to
return
to
TV
mode.
OR
*
Set
the
PICTURE
CONTROL.
The
GAME
MODE
will
then
automatically
be
turned
[OFF].
PICTUR
DEOR
Adjust
picture
controls
for
a
natural
looking
image.
*
You
must
use
the
remote
control
unit
for
the
fol-
lowing
steps:
[1]
Press
MENU
button.
Select
item
2
(PICTURE
CONTROL)
using
number
2
button.
Press
SELECT
button
repeatedly
until
desired
control
is
displayed.
Each
time
you
press
SELECT
button,
CON-
TRAST,
BRIGHT,
COLOR,
TINT
and
SHARP-
NESS
will
appear
on
the
screen
in
sequence.
Adjust
the
picture
control
using
CH
A
or
V
button.
*
Your
TV/VCR's
picture
controls
—
CONTRAST,
BRIGHT,
COLOR,
TINT
and
SHARPNESS
—
are
preset
to
the
factory
specification.
This
is
usually
best,
but
if
you
need
to
make
any
further
adjust-
ments,
use
the
following
chart
as
a
guide.
CHY
CHA
CONTRAST
to
increase
contrast.
to
decrease
contrast
BRIGHT
to
increase
brightness
to
decrease
brightness
COLOR
TINT
SHARPNESS
to
pale
to
brilliant
to
purple
to
soft
to
green
to
clear
NOTE:
When
setting
the
PICTURE
CONTROL,
the
GAME
MODE
will
be
automatically
set
to
[OFF].
-M-
EN
жук
5004
m———
Áo
À———À

PLAYBACK
Power
must
be
turned
on.
Insert
a
cassette
into
the
cas-
sette
compartment.
NOTE:
If
the
erase-protec-
tion
tab
has
been
removed,
the
TV/VCR
will
start
play-
back
automatically.
‘stor
If
playback
does
not
begin
automatically,
press
PLAY
button.
me
Press
STOP
button
when
playback
is
completed.
М
-——ÀÀ—
VISUAL
SEARCH
(SP/LP/SLP
MODE)
You
may
view
a
video
tape
at
a
high
speed
in
either
a
forward
or
reverse
direction.
This
feature
is
useful
in
finding
or
skipping
over
a
particular
scene
on
a
tape.
Forward
Direction:
When
in
the
Play
mode,
press
F.FWD
button
to
view
the
tape
at
a
fast
speed
in
the
forward
direction.
The
sound
will
be
muted.
Reverse
Direction:
To
view
the
tape
at
a
fast
speed
in
the
reverse
direc-
tion,
press
REW
button.
The
sound
will
be
muted.
Press
PLAY
button
to
return
to
normal
playback.
NOTE:
The
picture
will
not
be
as
good
as
in
normal
playback
during
Visual
Search.
SUPER
HIGH
SPEED
SEARCH
(LP/SLP
MODE)
For
Visual
Search
in
super
high
speed:
1)
Press
either
F.FWD
or
REW
button
while
the
unit
is
in
the
Play
mode.
2)
Release
button.
3)
Depress
it
again.
The
unit
will
now
search
in
super
high
speed.
Press
PLAY
button
to
return
to
normal
playback.
NOTE:
Tapes
recorded
in
the
SP
or
LP
mode
will dis-
play
a
noise
bar
on
the
TV/VCR
screen
and
the
picture
may
revert
to
Black
and
White.
This
is
normal.
STILL
PICTURE
DURING
PLAYBACK
If
you
press
PAUSE/STILL
button
during
the
Play
mode,
the
picture
will
"freeze"
on
the
TV/VCR
screen.
You may
use
this
feature
to
study
a
particular
scene.
(Only
tapes
recorded
in
the
SLP
mode
will
show
the
least
amount
of
lines.)
Press
PLAY
button
to
continue
playback.
NOTE:
The
TV/VCR
will
automatically
switch
to
the
Stop
mode,
if
it
is
left
in
the
Pause/Still
mode
for
more
than
five
minutes.
NOISE
CANCELLING
If
you
use the
PAUSE/STILL
button
to
freeze
the
pic-
ture
during
playback
with
tapes
recorded
in
the
SLP
mode,
usually
there
will
be
video
"noise
bars"
on
the
TV/VCR
screen.
This
is
normal,
however,
this
TV/VCR
has
a
special
feature
that
allows
you
to
reposition
or
reduce
the
lines.
Each
time
you
press
PAUSE/STILL
button
the
lines
will
change
position
on
the
TV/VCR
screen.
This
en-
ables
you
to
see
the
picture
in
its
entirety
without
dis-
tracting
noise
lines.
If
the
tape
was
originally
recorded
in
the
SP
or
LP
mode,
the
still
picture
may,
in
addition
to
the
"noise
bars",
revert
to
black
and
white.
This
is
normal.

@PECIAL
PLAYBACK
RE
L
PLAY
This
function
enables
you
to
improve
the
picture
qual-
ity
when
playing
back
worn
cassettes
such
as
those
rented
from
a
video
shop.
*
Before
playback,
follow
steps
below.
*
You
must
use
the
remote
control
unit
for
the
follow-
ing
steps:
*
Power
must
be
turned
on.
*
Make
sure
that
a
cassette
tape
is
in
the
TV/VCR.
[1]
а
Press
MENU
button.
Heer
Select
item
7
(USER'S
SET
UP)
using
number
7
button.
Press
number
2
button
to
select
(RENTAL
[ON]).
*
Once
you
select
the
Rent-
-serue
al
Play
mode,
it
stays
in
pe
a
кт
effect
even
after
you
turn
ас
И
ац
off
the
TV/VCR.
First
press
MENU
button,
then
press
PLAY
button
to
start
the
Rental
play.
TO
EXIT
THE
RENTAL
PLAY
MODE
Repeat
steps
[1].
Then,
follow
step
[2]
but
select
[OFF].
Press
MENU
button
to
return
to
TV
mode.
The
TV/VCR
has
an
auto
repeat
function
that
allows
you
to
repeat
a
tape
indefinitely
without
using
the
PLAY
button.
There
are
two
selections
for
Auto
Repeat
Playback;
ALL
REPEAT:
repeat
playback
from
the
beginning
to
the
end
of
the
tape.
BLANK
REPEAT:
repeat
playback
from
the
begin-
ning
to
the
blank
part,
which
is
not
recorded
anything
for
more
than
10
seconds.
*
Before
playback,
follow
steps
below.
*
You
must
use
the
remote
control
unit
for the
fol-
lowing
steps:
*
Power
must
be
turned
on.
*
Make
sure
that
a
cassette
tape
is
in
the
TV/VCR.
L1]
Press
MENU
button.
Select
item
7
(USER'S
SET
UP)
using
number
7
button.
[1]
Press
number
3
button
repeatedly
to
select
[ALL]
or
[BLANK].
[ALL]
or
[BLANK]
appears
besides
the
"REPEAT
PLAY".
*
Once
you
select
the
Re-
нечен
кп
peat
Play
mode,
it
stays
in
омма
en
effect
even
after
you
turn
nnn
i
off
the
TV/VCR.
First
press
MENU
button,
then
press
PLAY
button
to
start
the
Repeat
Play."REPEAT
PLAY
We"
is
displayed
on
the
screen.
©
If
the
rental
play
function
is
set
ON,
the
"RENTAL
PLAY
We"
display
has
priority.
NOTES:
1)
All
buttons
except
POWER
and
STOP
buttons
do
not
work
during
Auto
Repeat
Playback.
Always
set
the
Auto
Repeat
Playback
function
to
[OFF]
when
not
in
use.
2)
If
the
Counter
Memory
(See
page
20)
is
activated,
the
tape
will
automatically
stop
when
the
count
re-
turns
to
approx.
0:00:00
during
Auto
Rewind.
TO
EXIT
THE
REPEAT
PLAY
MODE
Press
STOP
button
to
stop
playback.
And
repeat
steps
[1],
then
follow
step
[2]
but
select
[OFF].
Press
MENU
button
to
return
to
TV
mode.
«dis
EN
жау
5004
mm
MÀ
M———
MÀ

COUNTER
MEMORY
The
Counter
Memory
can
be
used
during
rewind
or
fast
forward
to
automatically
stop
the
tape
when
the
count
reaches
a
preset
memory
position
of
approx.
0:00:00
reading.
For
example,
this
feature
can
be
used
to
return
the
tape
to
a
pre-selected
position
immediately
after
recording,
or
to
repeatedly
playback
a
certain
portion
of
a
tape.
*
You
must
use
the
remote
control
unit
for
the
following
steps:
*
Power
must
be
turned
on.
*
Make
sure
that
a
cassette
tape
is
in
the
TV/VCR.
:
Tape
Start
Fast
Forwards
Auto-Stop
^
Rewinds
Таре
End
0:00:00
Counter
Point
EN
If
the
count
is
displayed
on
the
TV/VCR
screen,
skip
Press
REWIND
button.
step
[1].
(
чу
The
tape
will
automatically
If
the
count
is
not
displayed,
stop
when
the
count
returns
press
C.
MEMORY
button
to
approx.
0:00:00.
so
that
the
counter
appears
on
the
TV/VCR
screen.
сотен
You
may
confirm
the
counter
by
pressing
SELECT
buj
j
ton.
Press
COUNTER
RESET
button.
The
count
resets
to
TO
CANCEL
THE
COUNTER
MEMORY
Press
COUNTER
MEM-
(mmm
ORY
button.
"MEMORY"
appears
on
the
screen.
Press
C.MEMORY
button
so
that
the
counter
appears.
Press
C.
MEMORY
button
[4]
axis
NL
so
that
"COUNT"
appears
on
the
TV/VCR
screen.
Press
RECORD
or
PLAY
button.
Press
STOP
button
when
re-
cording
or
playback
is
com-
pleted.
Other manuals for F9TRF1
2
Table of contents
Other FUNAI TV manuals

FUNAI
FUNAI F4813U User manual

FUNAI
FUNAI 40FDB7714 User manual

FUNAI
FUNAI RFT909A User manual

FUNAI
FUNAI RFT909 User manual

FUNAI
FUNAI LH7-M22BB User manual

FUNAI
FUNAI T-27M User manual

FUNAI
FUNAI F4819UV User manual

FUNAI
FUNAI NLC-3216 User manual

FUNAI
FUNAI F4819T User manual

FUNAI
FUNAI 40FDB7555 User manual

FUNAI
FUNAI LED32-H9000M User manual

FUNAI
FUNAI FT1321 User manual

FUNAI
FUNAI NLC-3216 User manual

FUNAI
FUNAI LCD-A1504 User manual

FUNAI
FUNAI 40FDI7514 User manual

FUNAI
FUNAI F413TB, F419TB User manual

FUNAI
FUNAI CTV270S User manual

FUNAI
FUNAI LCD-A2726 User manual

FUNAI
FUNAI LCD-A3206 User manual

FUNAI
FUNAI 32FDV5714 User manual