8
Operation
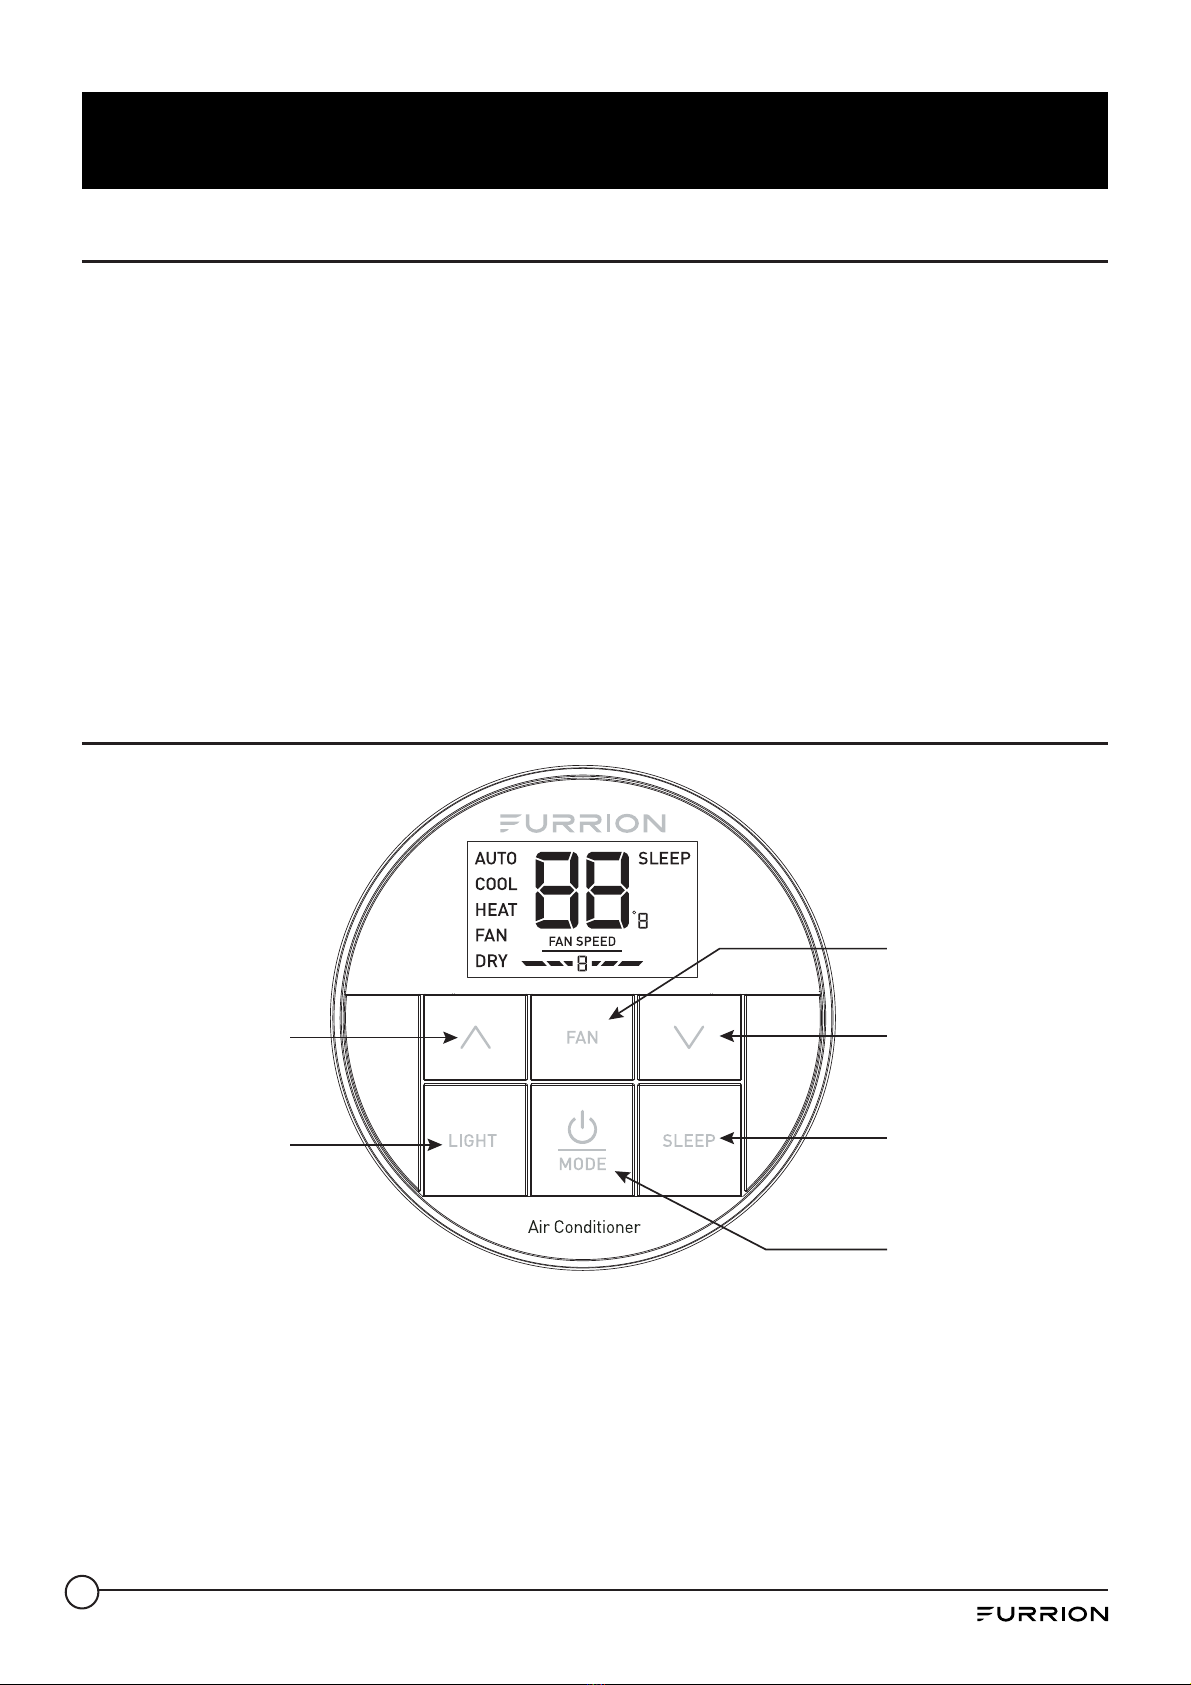
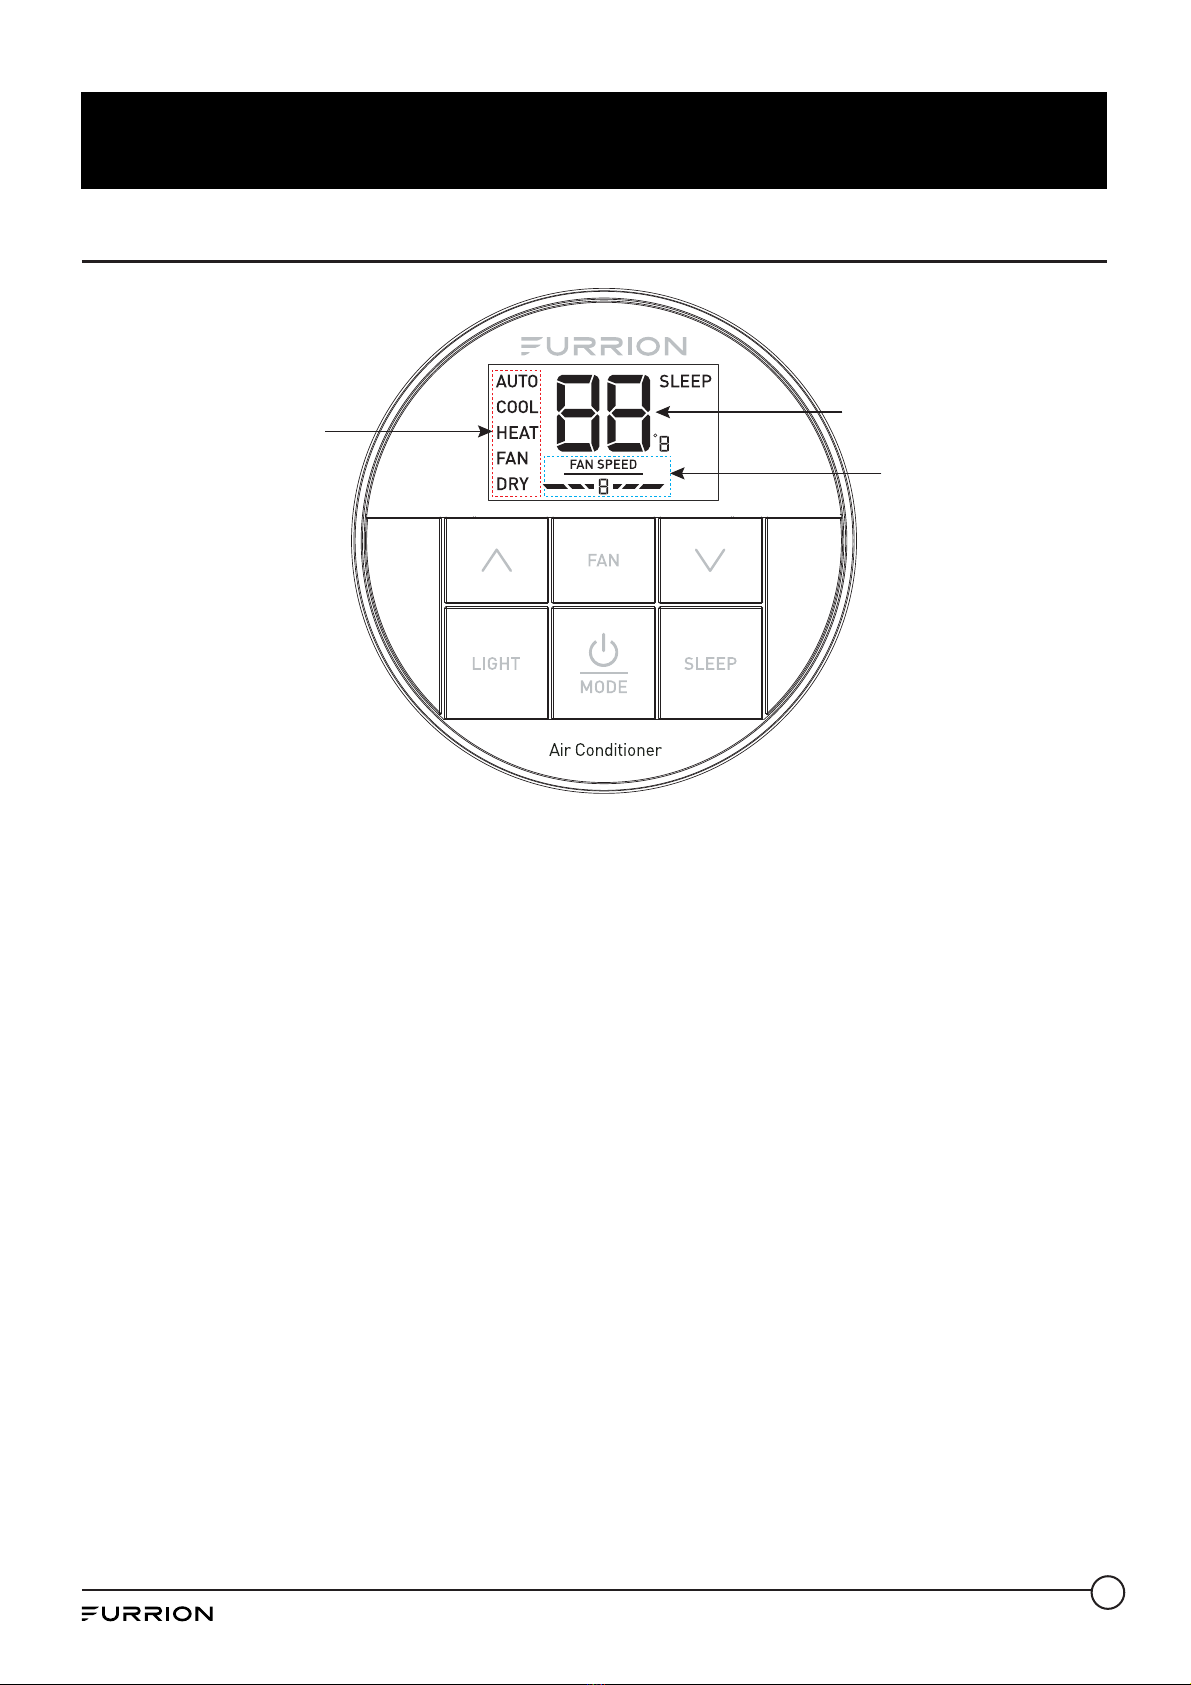
are 5 available modes (AUTO, COOL,
HEAT, FAN and DRY) for you to select.
See the following tables for detailed
information of each mode.
NOTE: The HEAT mode is only available
after the furnace is enabled.
AUTO MODE
●The system will changeover
between COOL and HEAT mode
according to the room temperature.
For example, when the room
temperature is below 68ºF (20ºC),
the system will operate in HEAT
mode. In contrast, when the room
temperature is above 77ºF (25ºC),
the system will operate in COOL
mode. It operates the Dry Mode in
comfort temperature between 68ºF
(20ºC) to 77ºF (25ºC).
●The AUTO icon and the current
temperature set-point displays on
the LCD.
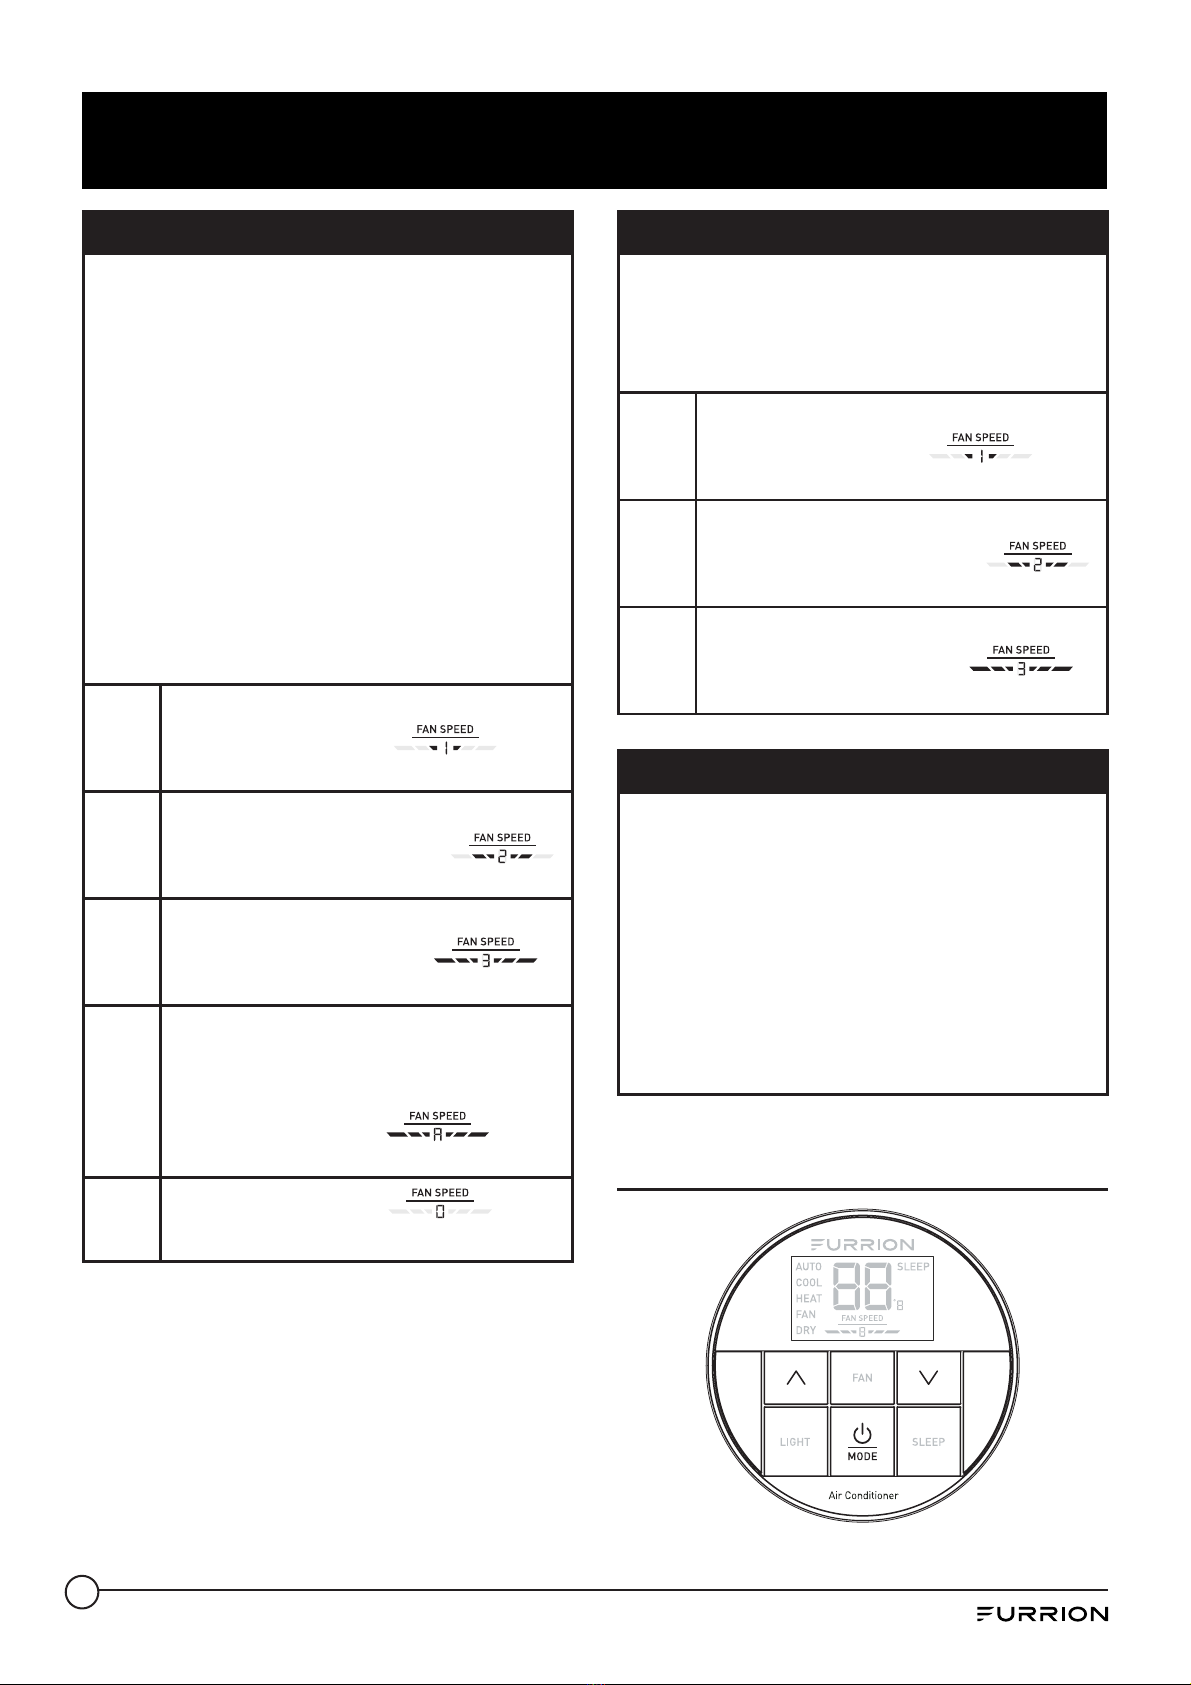
COOL MODE
●The system will cycle the
compressor on and off based on
the room temperature and the
temperature set-point.
●The fan will be turned on after the
compressor is running.
●There are 4 fan speed selections in
this mode.
Low
The fan operates continuously at
low speed and the icon
displays on the LCD.
Med
The fan operates continuously at
medium speed and the
icon displays on the LCD.
High
The fan operates continuously
at high speed and the
icon displays on the LCD.
Auto
The fan speed varies depending
on the difference between the
temperature set-point and room
temperature. The icon
displays on the LCD.